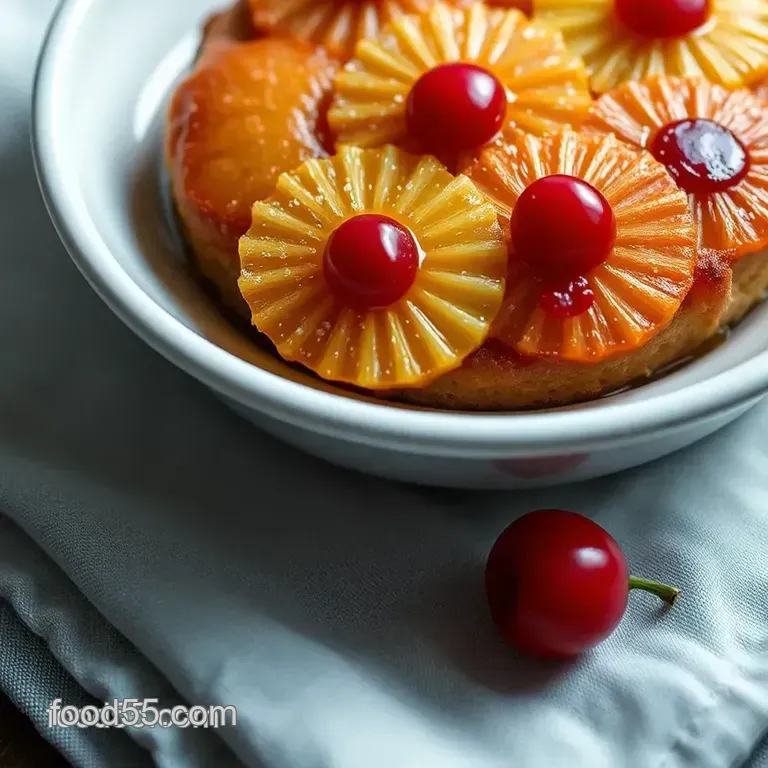
Mini Pineapple Upside Down Cakes

look into into the Sweet World of Mini Pineapple Upside Down Cake
A Sweet Little Memory
Oh my gosh, i remember the first time i tried a mini pineapple upside down cake . it was at my grandma's house, and she insisted i help her make it.
I was like, “what in the world is this upside down magic?” but then, after one bite, i knew i was hooked! that perfect balance of buttery cake with sweet, caramelized pineapple and cherries was something i’d never forget.
It’s funny how food can weave itself into our memories like that, right? so, whether you’re reminiscing about your grandma’s kitchen or just curious about this classic dessert, trust me, these treats are a game changer!
A Slice of History
Now, did you know that pineapple upside down cakes first made their debut in america during the roaring 1920s? yep! they gained wild popularity thanks to the rise of canned pineapple (seriously, thank you, canning technology!).
Today, these cakes hold a dear spot in our hearts and in dessert tables across the nation. and guess what? with this mini pineapple upside down cake recipe, you can whip up individual servings perfect for parties or just for your own sweet cravings without the hassle of slicing.
What You Need to Know
Let’s talk time and difficulty. don’t freak out, but you can make these little beauties in under an hour about 45- 50 minutes total ! i swear they're as easy as pie err, cake! you don’t need to be a baking whiz to impress your friends.
Seriously, if you can melt butter and stir stuff together, you’re golden. plus, it won’t break the bank! you’ll probably spend around $10 or less for about 6 mini cakes , which is pretty awesome for a dessert that looks, feels, and tastes bougie.
Why You’ll Love These Mini Treats
Now, hold up, because here’s why you need to make these mini pineapple upside down cakes asap. first off, they’re incredibly delicious that sweet tropical vibe is like a little hawaiian vacation on your plate!
plus, they’re downright adorable and perfect for special occasions imagine serving these at a bbq or your next girls' night.
But let’s get real for a sec. these mini delights also pack a punch in the health department thanks to the pineapple, which is not only super tasty but also loaded with vitamin c.
I mean, who doesn’t want a tasty dessert with a bit of a health kick, right? they have a leg up on traditional cakes since they’re portioned out perfectly.
No more fighting over that last slice everyone gets their own!
Bouncing into the Ingredient Fun
Feeling intrigued? let’s jump into what’s needed to get this party started. you’ll want to gather a few items from your kitchen for that glorious caramel topping and the fluffy cake batter.
Trust me, you’ll be in love with these cake mini wonders before you even start mixing!
But before we get there, let’s take a closer look at our cast of ingredients. each one plays a role like a team in a sitcom.
From the unsalted butter to the maraschino cherries , everything comes together to create this unforgettable treat. so stick around because you won't want to miss how to whip up these desserts for a crowd .
Next up, i'll share how to combine those star ingredients into something magical!
Essential Ingredients Guide
When it comes to baking, you want every ingredient to shine. Think of your recipe as a blockbuster movie. Every actor or ingredient plays a crucial role! So let’s break down the premium core components that will take your mini pineapple upside down cakes from "meh" to "wow"!
Premium Core Components
Measurements matter: for your mini pineapple upside down cakes, you’ll need precise measurements. use 1 cup all-purpose flour (120g) and 1/2 cup brown sugar (100g) , and yes, in baking, it’s always a good idea to have a scale on hand if you’re weighing things out.
Treat those numbers like gold!
Quality indicators: always look for fresh ingredients. opt for unsalted butter that’s at room temperature and make sure those pineapple rings look bright and juicy.
Nobody wants flat flavors in their desserts for a crowd!
Storage guidelines: if you’re not using your ingredients right away, make sure they’re stored properly. keep that butter in the fridge but let it soften before you mix it in.
Brown sugar? store it in an airtight container to prevent it from turning into a brick!
Freshness tips: always sniff your spices before using them. you’d be surprised how many of us hold onto ancient jars that pack zero punch.
If your baking powder doesn’t bubble when you mix it with water, toss it! freshness equals flavor!
Signature Seasoning Blend
Let’s talk spices. for that signature flavor in your mini pineapple upside down cakes, you don’t need to go wild.
Just a sprinkle of salt (maybe 1/2 teaspoon ) helps balance the sweetness. and if you’re feeling adventurous? toss in a hint of cinnamon for a regional twist.
Pair your vanilla extract (a must have ) with lemon zest for that citrus kick. and for those craving something different, using nutmeg could also rock your world! each twist tells a delicious story.
Smart Substitutions
Sometimes life happens, and we need a little wiggle room. if you’re out of buttermilk, just add a splash of lemon juice or vinegar to some regular milk.
Give it 10 minutes to thicken up and voilà!
Don’t fret if you can’t find cherries! In a pinch, blueberries or raspberries work just as wonderfully just think about the color contrast too!
Kitchen Equipment Essentials
Now, let’s chat about the tools of the trade. you'll want a reliable 6-cup muffin tin or even individual mini cake pans if you're feeling fancy.
Honestly, whoever made muffin tin recipes a thing deserves a medal it makes portion control a breeze!
Come prepared with mixing bowls that won’t slide off your counter as you whip up that batter! a good whisk and a rubber spatula will become your best friends.
And for the love of all things sweet, invest in a cooling rack. no one wants soggy bottoms!
Prepare to Bake!
Once you’ve gathered all your essentials, you’re ready to dive into making your mini pineapple upside down cakes . it’s honestly a simple process, but i’ve got loads of tips coming up in the next section to make sure you nail it.
Stay tuned!
Because, really, who doesn't want a bite of that buttery goodness topped with sweet, caramelized pineapple and cherries? It’s like having a mini vacation, right on your plate!
So, grab those ingredients and let’s make some magic happen in the kitchen!
Slicing Through the Basics: Professional Cooking Method for Mini Pineapple Upside Down Cakes
When you dive into the world of professional cooking, what you get is an explosion of creativity wrapped in some serious organizational finesse.
Seriously! to whip up delightful mini pineapple upside down cakes , you’ll want to grab hold of some professional cooking methods to ensure your dessert game is on point.
Let's get into it, shall we?
Essential Preparation Steps
First off, let's talk mise en place . sounds fancy, right? but all it means is having everything in its place before you start cooking.
Don't be that person hunting for ingredients while your butter turns to a puddle! pre-measure your ingredients: 4 tablespoons of unsalted butter , 1/2 cup of brown sugar , and so on.
Next up, time management . set a timer when you're baking those mini cakes, especially since they cook pretty fast. think 20- 25 minutes in a preheated oven at 350° f ( 175° c).
That's not a lot of time to get up, do a dance, and inevitably almost burn your cakes all at once!
Then comes organization strategies . a little tip? use a muffin tin for effortless baking. no one wants to wash a million pans am i right? lastly, let’s not forget about safety .
Always keep those potholders handy, because hot pans and butter fingers don't mix well!
step-by-step Process
So, let’s break this down step-by-step:
Prepare that heavenly caramel topping :
- Melt 4 tablespoons of unsalted butter over medium heat. Stir in 1/2 cup of brown sugar until it’s all gooey goodness.
Assemble the magic :
- Pour your caramel in each muffin cup, then add 6 pineapple rings and, for a cherry on top, plop in 6 maraschino cherries (or fresh if you're feeling fancy).
Whip up the cake batter :
- Combine 1 cup of all-purpose flour , 1 teaspoon of baking powder , and 1/2 teaspoon of salt in one bowl. In another, cream up 1/4 cup of granulated sugar with 1/4 cup of softened butter until fluffy. Toss in an egg and 1/2 teaspoon of vanilla extract . Gradually alternate adding flour and 1/2 cup of buttermilk until it's mixed but don't get too crazy. Overmixing is a buzzkill for fluffiness!
Fill those pans and bake. Make sure each cup gets a good layer of batter.
Bake for 20- 25 minutes . How do you know they’re done? Stick a toothpick in the center and it should come out clean.
Cool and flip : Give them about 10 minutes in the pans, then invert them onto a platter. Watch that delicious caramel and pineapple cascade down like it’s a 90s music video!
Expert Techniques
A few pro tips never hurt, right?
Critical Steps : When you pour the caramel, do it slowly. You want it to coat and not just sink to the bottom.
Quality Checkpoints : Make sure your oven temp is accurate. Ovens can be sneaky, so maybe invest in an oven thermometer for peace of mind!
Troubleshooting : If they rise too high and don’t flip well, you may have overmixed the batter or your oven was too hot. But hey, kitchen disasters make for great stories!
Success Strategies
We've all had a cooking fail or two. Here are some ways to ensure you nail it this time:
Common Mistakes : Don’t bake these bad boys too long. They’ll dry out faster than a TikTok trend! Checking a few minutes early keeps them moist and perfect.
Quality Assurance : Honestly, doing a quick taste test before serving is a must. I mean, who doesn’t love licking the spatula, right?
make-ahead Options : These mini cakes can be made a day in advance. Just store them covered at room temperature. They stay great!
Wrapping It Up
So there you have it a journey through the professional cooking methods that make your mini pineapple upside down cakes the star of the show.
From prep to presentation, using these techniques will not only elevate your baking game but also give you those impressive results that wow everyone.
Feeling inspired? hold on tight because there’s always more to learn. so let's transition into some additional information about pineapples, upside down cakes, and how to make these lovely treats even more delightful.
Get ready to turn your kitchen into a tropical paradise!
Additional Recipe Information
When it comes to making a mini pineapple upside down cake , let’s get real, folks: you want the best bite.
These small treats have a way of bringing back memories it’s like a warm hug from your grandma on a summer day.
With a little guidance here, you’re set to whip up these mini cakes that’ll not only taste amazing but look that way too.
Pro Tips & Secrets
Oh my gosh, can i just say? the magic is in the details. first off, use room temperature ingredients . seriously, it makes a world of difference! your butter, egg, and buttermilk should all be cozy at room temp for that fluffy texture we’re going for.
Also, don’t overmix your batter. just stir until combined; we’re not making bread here! keep it light and airy. and watch your bake time closely every oven is a little different.
Check for doneness a few minutes before time’s up.
Caramelization is an art too! stir that sugar and butter gently to avoid any hard lumps. lastly, when you flip them out of the tin, get ready to act fast like you’re in a cooking show.
The moment's fleeting, and you want that perfect release.
Perfect Presentation
Let’s face it, we eat with our eyes first, right? for presentation , try plating these mini cakes on vibrant colored plates.
It really makes those golden cakes pop! garnish with a sprig of mint for a little freshness, or sprinkle a bit of toasted coconut on top.
Color combinations can say a lot too. consider contrasting colors like that golden brown cake next to a bright red cherry.
It just invites anyone to dig in! when you’re setting this out for your next gathering, think about visual appeal this could easily be one of those desserts for a crowd that has everyone coming back for seconds.
Storage & make-ahead
Got leftovers? here’s how to keep those beauties fresh! store any mini cakes in an airtight container at room temperature for up to three days .
If you want to stretch their life, pop them in the fridge. they’ll last about a week that way, but let’s be real they probably won’t last that long! if you make them ahead, just reheat in the microwave for about 10-15 seconds to bring back that fresh baked goodness.
Creative Variations
Feeling adventurous? modify the classic! try a mango upside down cake instead of pineapple for a fun twist. or how about adding some shredded coconut to the batter for an island vibe? you could even play around with seasonal fruits like peaches or apricots.
The sky's the limit with these cake mini delights!
For those who need something special, make it gluten-free using a good flour blend. Dietary needs? No problem, just swap out the buttermilk for a dairy-free milk alternative, and you’re good to go!
Complete Nutrition Guide
Now, ever wonder what you’re actually eating? let’s break it down! each mini pineapple upside down cake is around 210 calories .
That’s pretty moderate for a dessert, right? you get a nice blend of sugars and fats, but don’t forget the fruit gives you a little boost in vitamins too.
If you're portioning these out for a party, keep in mind that one mini cake is probably enough for most folks with a sweet tooth.
Encouraging Conclusion
So there you have it, friends! your complete guide to mastering those mini pineapple upside down cakes . i want you to feel confident when you take on this recipe.
Whether you’re baking for a potluck, a special occasion, or just because it’s tuesday, these mini cakes are sure to impress.
Honestly, you might just find yourself making them again and again because they’re that good! now, roll up your sleeves, have a little fun, and happy baking!
Frequently Asked Questions
What makes mini pineapple upside down cake different from the regular version?
The mini pineapple upside down cake is simply a smaller, individual sized version of the classic dessert, making it perfect for portion control and easy serving. Plus, the individual cakes have their own cute presentation ideal for parties or just a special treat for yourself!
Can I use fresh pineapple for my mini pineapple upside down cake?
Absolutely! Fresh pineapple can add a brighter flavor to your cakes. Just make sure to slice it into rings about 1/4 inch thick, similar to canned pineapple. You may need to adjust your caramel cooking time slightly, as fresh pineapple can release more juice.
What are some good variations for mini pineapple upside down cake?
Feel free to get creative! You can substitute mango slices for a tropical twist or add shredded coconut to the batter for a delightful coconut flavor. For a berry version, swap out the cherries for blueberries or raspberries yum!
How should I store leftover mini pineapple upside down cakes?
To store leftover cakes, simply wrap them in cling film or place them in an airtight container at room temperature for up to 2 days. If you need to keep them longer, they can be frozen for up to a month. Just let them thaw at room temperature before enjoying!
Are mini pineapple upside down cakes suitable for a gluten-free diet?
Yes, you can easily make these mini cakes gluten-free! Just swap out the all-purpose flour for a gluten-free flour blend. Be sure to check the other ingredients for gluten content to ensure your treat stays gluten-free!
What are some tips for achieving the best results with my mini pineapple upside down cake?
For the best results, use room temperature ingredients this helps your batter come together more smoothly. Remember not to overmix to keep the cakes light and fluffy. Also, keep an eye on the bake time, as ovens can vary your cakes are ready when they’re golden brown and a toothpick comes out clean!
Mini Pineapple Upside Down Cakes
Ingredients:
Instructions:
Nutrition Facts:
| Calories | 210 |
|---|---|
| Fat | 8g |
| Fiber | 0g |
