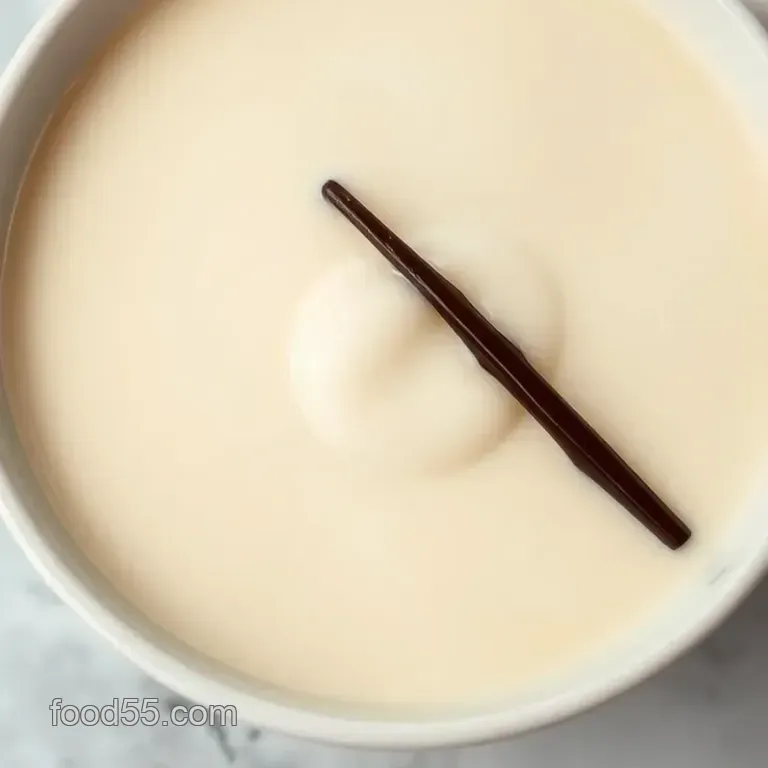
Smooth and Creamy Homemade Vanilla Coffee Creamer

- A Little Coffee Love
- A Sip of History
- Why You'll Love It
- Get to the Good Stuff
- Wrap Up to Flavor Town
- Your Go-To Guide for Essential Ingredients
- Mastering Professional Cooking: Essential Tips & Tricks
- Extra Recipe Information: Secrets, Tips, and Creative Twists
- Wrap Up
- Frequently Asked Questions
- 📝 Recipe Card
A Little Coffee Love
Oh my gosh! let me take you back to a cozy morning not too long ago. picture this: i woke up, the sun was peeking through the curtains, and i could almost hear my coffee pot whispering sweet nothings.
You know how it is when you crave that perfect cup of coffee ? something simple yet absolutely dreamy? that’s when i decided to dive into making my own homemade vanilla coffee creamer .
Believe me, once you taste this magic in a jar, you'll never look back!
So, what’s the deal with homemade vanilla coffee creamer ? well, think comfort in a cup. this delight takes your morning brew from ordinary to extraordinary with just a few ingredients.
Honestly, it’s super easy just three ingredients, and you’re well on your way to caffeinated bliss!
A Sip of History
The concept of coffee creamer has been around for a while, probably since the first person decided that black coffee just needed a little pizzazz.
Today, homemade coffee creamers have surged in popularity. whether it’s a diy coffee creamer 3 ingredients or a more complex concoction, people are all about that flavor boost.
Nowadays, with folks looking for healthier or more natural options, homemade is where it’s at.
Making your own creamer doesn’t just taste better; it's also a bit of a money saver. why splurge on pricey bottles of store-bought stuff when you can whip up a dreamy batch in about 15 minutes ? yep, you read that right!
whether you’re a busy student or a morning person on the go, this easy coffee creamer recipe is perfect for everyone.
Why You'll Love It
Let’s chat health for a minute. this vanilla coffee concoction offers a fresh alternative to those overly sweetened creamers packed with artificial ingredients.
Using whole milk and heavy cream , you get that rich, satisfying flavor without any weird preservatives. and can we talk about versatility? it’s a creamer substitute for coffee that suits any occasion.
Whether you’re enjoying a lazy sunday brunch or trying to impress guests during a festive gathering, this creamer fits right in.
Plus, you can feel good about serving it! healthier options, homespun flavors, and a guaranteed smile from everyone around the table? what’s not to love?
Get to the Good Stuff
Let’s break it down. Here’s what you’ll need to create this creamy goodness:
- 1 cup (240 ml) whole milk
- 1 cup (240 ml) heavy cream
- ¼ cup (50 g) granulated sugar
- 2 teaspoons pure vanilla extract
- A pinch of salt (because everything needs a dash of salty love)
This recipe yields about 1 ½ cups , perfect for a rocking 12 servings. Trust me, once they get a taste, you’ll find folks coming back for seconds!
Wrap Up to Flavor Town
Now, I can taste that creamy goodness already! I can already think of dairy-free options too, like swapping out the whole milk for almond or coconut milk hello, creamy dream!
With this quick and easy recipe, you can say goodbye to those overpriced coffee shop trips and embrace cozy mornings at home.
Honestly, there’s nothing like pouring a little homemade happiness into your mug.
Ready to gather those ingredients and bring this coffee fantasy to life? Let’s jump right into how you can toss this all together to create that perfect cup of joy!
Your Go-To Guide for Essential Ingredients
When it comes to cooking, having the right ingredients on hand is like finding gold in your kitchen. whether you’re whipping up a quick breakfast or diving into a weekend feast, knowing your staples can make all the difference.
Premium Core Components
Measurements are key here. for those of us in the usa, we're familiar with cups and tablespoons. but if you're traveling or dabbled in international recipes, it’s helpful to know metric conversions too.
One cup of flour is about 120 grams , and trust me, using the right amount makes a world of difference.
Now let’s talk quality indicators . this means knowing what to look for, like shiny, firm basil leaves and deep colored ripe tomatoes.
Fresh is always best! for storage , a good rule of thumb is that most herbs can last in the fridge for about a week .
But raw veggies? they typically hang out for up to two weeks if stored properly. keep an eye out for wilting or discoloration.
That’s your sign it’s time to toss!
Signature Seasoning Blend
Feeling adventurous? let's dive into the world of spices and herbs . think about a classic blend like italian seasoning . this usually includes basil, oregano, and thyme perfect for a homemade pizza that’ll make you feel like you’re dining in a trattoria in italy!
don't forget about regional variations some folks prefer a hint of cumin for a southwestern twist, and others might go for a taco seasoning for some good ol' american flair.
Smart Substitutions
Now, sometimes we find ourselves in a sticky situation. you’re halfway through a recipe and realize you’re out of an ingredient? no worries! there are smart substitutions you can make.
For instance, if you need a creamer substitute for coffee , i’ve got your back. you can swap in half and half or even a diy coffee creamer with 3 basic ingredients : milk, heavy cream, and sugar.
Seriously, how easy is that?
For those looking to modify their diet, like going dairy-free, try using almond milk or oat milk in your recipes. They’ve become super popular, and they work like a charm.
Kitchen Equipment Essentials
Every cook has their must haves, and without the right kitchen equipment , things can get rough. a good whisk, measuring cups, and a sturdy cutting board are non-negotiables.
You could also snag some alternatives, like using a mason jar to shake dressings instead of a fancy shaker. they work just as well!
Storing Solutions
Keeping your kitchen organized can also help you grab what you need, and trust me, it gives a sense of peace amidst the chaos of chopping and stirring.
Invest in some clear containers for easy visibility. plus, labels can help, especially when you’re half asleep and reaching for that vanilla extract for your easy coffee creamer recipe we’ve all been there!
And, speaking of homemade flavors, let’s move on to our star player today: smooth and creamy homemade vanilla coffee creamer .
This recipe elevates your morning brew with rich creaminess and aromatic vanilla. you won't believe the difference it makes compared to store-bought options filled with additives.
With only a few ingredients whole milk, heavy cream, sugar, and pure vanilla extract it’s super simple. you can whip it up in just 15 minutes! plus, it makes about 1 ½ cups , which is good for about 12 servings .
So, ready to get started on this homemade vanilla delight? it’s time for you to shine in the kitchen! just check out the instructions, and let’s make those coffee moments unforgettable.
What are you waiting for? grab those ingredients and let’s get brewing!
Mastering Professional Cooking: Essential Tips & Tricks
Oh my gosh, have you ever tried to whip up some culinary magic in your kitchen only to end up with a total disaster? been there! let’s dive into professional cooking methods that will elevate your skills and kick those mishaps to the curb.
Whether you’re looking to impress at dinner parties or just elevate your cooking game, you’ll benefit from these essential prep steps and expert techniques.
Essential Preparation Steps
Mise en place is more than just a fancy french term. it means "everything in its place." get all your ingredients prepped and lined up before you start cooking.
It saves time and helps avoid the dreaded “oh snap, i forgot the garlic!” moment. i can’t count how many times i’ve been halfway through a recipe and realized i didn’t have something crucial!
Now, let’s talk time management . set a timer for everything. seriously. whether this is for your homemade vanilla coffee creamer or a perfectly seared steak, knowing when to jump to the next step keeps you on track.
If your total cooking time is around 15 minutes , then be sure to not waste those precious seconds!
Organization strategies are key. keep your workspace tidy. a clean kitchen is a happy kitchen. use bowls for loose ingredients and a trash bowl for wrappers and scraps.
Trust me, it makes a world of difference.
And safety? don’t neglect that. a sharp knife can save your fingers, but only if you're using it safely. remember, consistency in temperature control and keeping your surfaces clean is a must.
You don’t want cross contamination to mess up your homemade goodies!
step-by-step Process
Okay, now let’s get into the nitty gritty with some clear steps. For our flavored coffee creamer, follow these easy, numbered instructions:
Combine ingredients : in a medium saucepan, whisk together 1 cup whole milk , 1 cup heavy cream , and ¼ cup sugar .
Make sure that sugar is dissolved to avoid graininess in your creamer.
Heat the mixture : place it on medium heat . you want to bring it just to the point of steaming but don’t let it hit a full boil.
We’re looking at about 5 minutes of gentle heating just enough to infuse those flavors without wrecking the creaminess.
Add flavors : remove it from the heat and stir in 2 teaspoons vanilla extract and a pinch of salt.
If you’re feeling extra, add 1 teaspoon of vanilla bean paste for that gourmet touch.
Cool and store : let it cool at room temperature for a bit. once cooled down, store it in a sealed container.
This creamer will keep in the fridge for about a week!
Gently Shake : Before you pour it over your coffee, give it a little shake to mix everything back together. No one likes a separated creamer!
Expert Techniques
Now, let's get into some solid professional techniques . A common mistake? Not tasting as you go! Always sample your mixtures. If that vanilla flavor isn't popping, add a bit more.
For quality checkpoints, think about using a thermometer very useful for making sure your creamer’s temperature stays in the sweet spot.
Ideally, you'll want to maintain a range of 150- 160° f during heating.
And if you run into troubles, like your mixture curdling, don’t panic! Simply whisk it vigorously. But for the future, keep your heat low and always, always respect your ingredients!
Success Strategies
Let’s wrap this up with some success strategies. common mistakes include overcooking your cream or adding too much sugar. remember, this is a 3-ingredient coffee creamer recipe simple is key! use your taste buds to guide you.
Quality assurance starts with your ingredients. use fresh, high-quality vanilla extract and cream. it makes all the difference. want even more flavor? consider infusing with a cinnamon stick or nutmeg for a twist.
If you’d like to prep ahead, this homemade vanilla coffee creamer can live in your fridge for about a week. Honestly, it’s a game changer for morning coffee rituals!
So there you have it! with this guide, you’re ready to elevate your kitchen skills and craft that perfect cup of coffee with your homemade vanilla coffee creamer .
Now that you’ve got the basics down, let’s explore some additional information on fantastic flavor variations and tips to keep your creativity flowing in the kitchen!
Extra Recipe Information: Secrets, Tips, and Creative Twists
Let’s dive into the world of homemade vanilla coffee creamer ! you know, it’s not just about pouring something creamy into your cup; it’s about enhancing that whole coffee experience.
We're talking velvety richness, sweet vanilla goodness, and all the happiness that comes with your morning brew. so, i’m here to share some pro tips & secrets that’ll make your creamer even better, plus some creative variations to keep things exciting.
Pro Tips & Secrets
First things first, let’s chat about the magic behind making a great creamer. experiment with sweetness ; if you like it a bit less sweet, start with just a tablespoon of sugar and adjust to your taste.
I mean, who are they to say how sweet your coffee should be, right? and seriously, if you want to bump up that flavor, consider adding a split vanilla bean while you warm up your milk.
Time saving techniques are key too. you can whip this up in just 15 minutes, which is faster than any drive thru queue.
If you're in a real time crunch, just make a double batch on the weekend and keep it in the fridge.
It will last you about a week if you store it properly. don't forget to give it a quick shake before using; those ingredients like to separate a bit.
For my fellow flavor ensoiasts, try adding a teaspoon of cinnamon or a scoop of cocoa powder for a fun twist.
You only need 3 ingredients to make a fab creamer, so why not play around a little?
Perfect Presentation
Okay, so now you’ve got this amazing homemade creamer let’s make sure it looks as awesome as it tastes. for plating, think about using a clear jar or bottle .
It shows off that creamy goodness and the luxurious color. a sprinkle of cacao powder or a cinnamon stick as a garnish on top always looks inviting when you pour it over your coffee.
Speaking of colors, you want that contrast. picture a dark cup of coffee with the warm vanilla hue of your creamer swirling in.
Maybe even top it with some whipped cream if you’re feeling fancy! your cup can look like something straight outta a café.
Storage & make-ahead
Trust me, knowing how to store this stuff right is crucial. you can keep your homemade vanilla creamer in an airtight container in the fridge for up to a week.
Keep an eye out for any separation; it's perfectly normal! just give it a shake before diving back into your morning routine.
Need some make-ahead tips? make a big batch, pour it into smaller bottles, and you can easily gift some to friends! everyone loves a diy creamer.
On those crazy mornings, you won’t regret having a bottle ready to go.
Creative Variations
Let’s mix it up! if you’re looking for a creamer substitute for coffee , why not think outside the box? for a dairy-free option , throw almond or oat milk in there instead of whole milk.
If you're feeling adventurous, why not add a splash of hazelnut or caramel syrup ?
With the seasons changing, you can easily adapt your recipe. during fall, think about adding pumpkin spice. in the summer, you could add fresh mint or coconut extract for a tropical vibe.
Go wild with seasonal twists!
Complete Nutrition Guide
Now, getting into nutrition , let’s keep it real. this homemade vanilla coffee creamer is rich and creamy, yes, but it can fit into a balanced diet when enjoyed in moderation.
A serving has about 50 calories and a nice balance of fat and carbs, so keep a portion in mind 2 tablespoons is perfect for a single cup.
And the health benefits? Well, the natural ingredients may just give you that cozy feeling, but it's always good to remember that balance is key. Feel good about your coffee experience!
Wrap Up
So there you have it! with this homemade vanilla coffee creamer, you're not just making your coffee better; you’re embracing the joy of crafting something delicious right in your kitchen.
Whether you're scaling it down or exploring 3 ingredient coffee creamer ideas, this is your canvas let your creativity flow.
Take the plunge and try out all the fun variations. i promise you’ll be wowed, not just by the taste but also by how easy it is to create something so special! so pour yourself a cup, stir in that creamy magic, and enjoy each sip.
Cheers to a cozy coffee experience, my friends!
Frequently Asked Questions
What is homemade vanilla coffee creamer made of?
Homemade vanilla coffee creamer is typically made with a blend of whole milk, heavy cream, granulated sugar, and pure vanilla extract. You can also enhance its flavor with vanilla bean paste or a pinch of salt, creating a rich, creamy addition to your coffee without any artificial ingredients.
How long does homemade vanilla coffee creamer last?
Your homemade vanilla coffee creamer can last up to a week in the fridge. If you notice any separation, just give it a quick shake before pouring it into your cup. It's best to enjoy it fresh for the most delightful flavor!
Can I customize the sweetness of my homemade vanilla coffee creamer?
Absolutely! You can adjust the sugar level in your homemade vanilla coffee creamer to suit your taste. Start with the recommended amount and feel free to add more or even substitute it with maple syrup or honey for a different sweetness profile.
What are some variations I can try with this recipe?
The beauty of homemade vanilla coffee creamer is its versatility! Try adding cocoa powder for a mocha flavor, or cinnamon for a warm spice kick. If you're looking for a dairy-free option, almond or coconut milk can be fantastic substitutes!
Do I have to heat the ingredients when making homemade vanilla coffee creamer?
Yes, heating the mixture gently allows the sugar to dissolve completely and helps the flavors to meld beautifully. Just remember to avoid boiling it; a steaming mixture is all you need for that smooth, creamy texture.
What’s the best way to store my homemade vanilla coffee creamer?
Store your creamer in an airtight container in the fridge. It’s recommended to use a glass jar for easy refrigeration and to monitor freshness. Shake it well before each use, especially if it separates after sitting!
Smooth And Creamy Homemade Vanilla Coffee Creame
Ingredients:
Instructions:
Nutrition Facts:
| Calories | 50 |
|---|---|
| Fat | 4 g |
| Fiber | 0 g |
