Chocolate Chip Cookies: Bakery Standard, Made at Home
- Introducing the 'Perfect Brew' Chocolate Chip Cookies: Why Texture Matters
- The Science of Chew: Achieving the Ideal Cookie Structure
- Sourcing Your Success: Essential Ingredients for Superior Results
- Substitutions and Adjustments for Dietary Needs
- Crafting the Dough: Step-by-Step Method for the Best Chocolate Chip Cookies
- Troubleshooting Your Batch: Pro Tips for Cookie Perfection
- Mastering Storage: Keeping Your Homemade Cookies Fresh
- The Ultimate Pairing: How to Serve Your Chewy Delights
- Recipe FAQs
- 📝 Recipe Card
Introducing the 'Perfect Brew' Chocolate Chip Cookies: Why Texture Matters
Can we talk honestly about the smell of pure, caramelised joy? Walking into a kitchen where a fresh tray of homemade Chocolate Chip Cookies is cooling is instantly grounding, right? You get that immediate hit of dark sugar, vanilla, and nutty butter mixed with warm, melting chocolate.
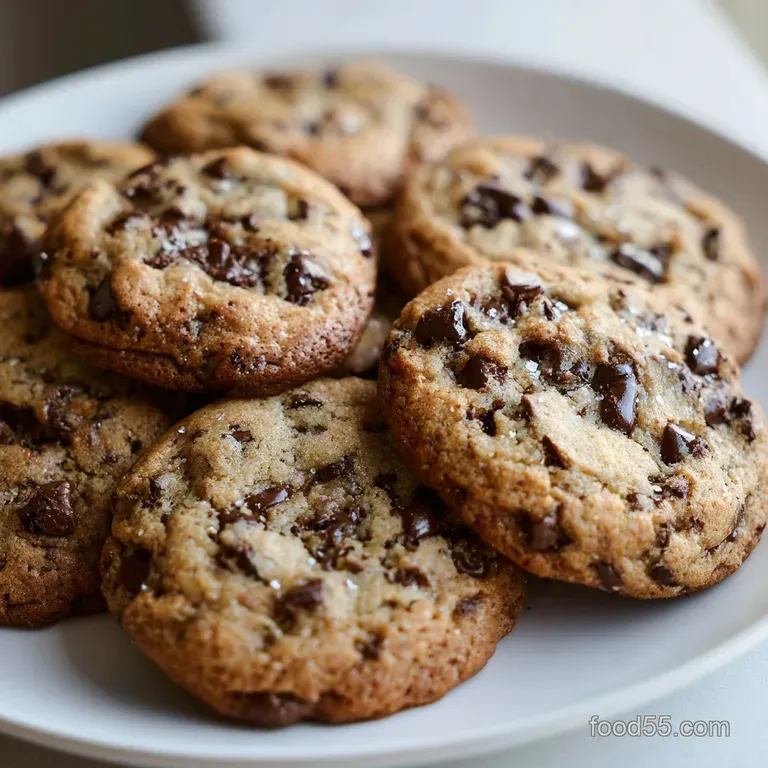
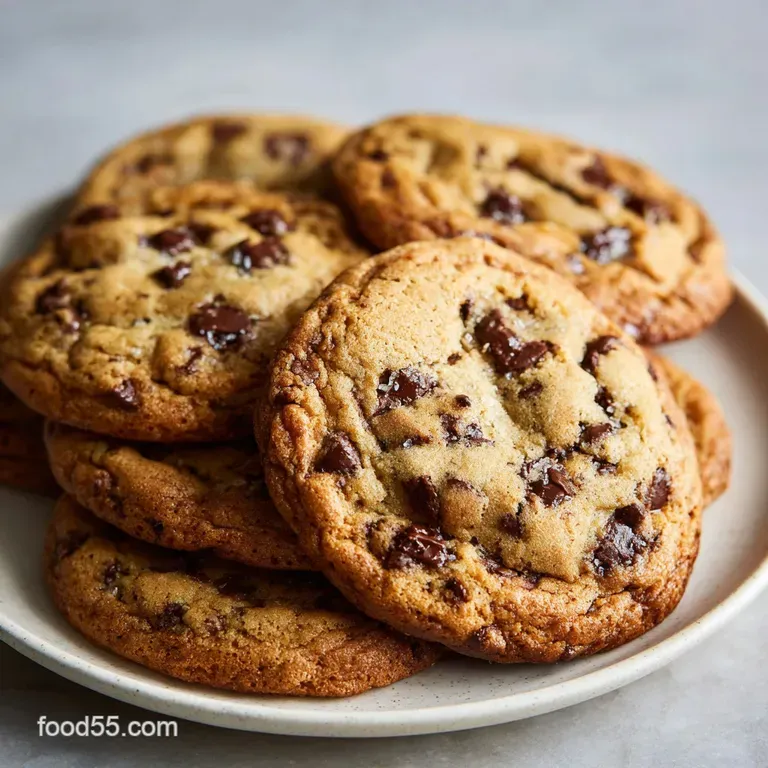
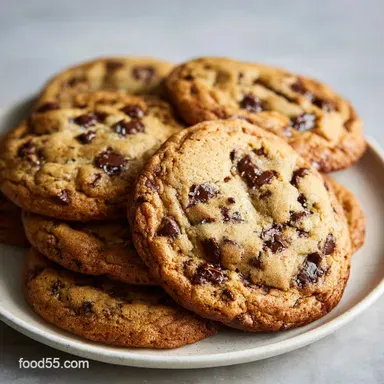
Forget those flat, dry supermarket imposters. We are aiming for chewy edges, shatteringly crisp crusts, and those soft, gooey centres that only the best bakery style cookies deliver.
This recipe is genuinely revolutionary for home bakers. While it demands a little patience, the active work is surprisingly fast, maybe 15 minutes max. It takes common, cheap pantry ingredients flour, sugar, butter and uses a simple technique adjustment to achieve truly spectacular results.
If you’ve ever had a batch of cookies come out too cakey, too greasy, or too pale, this method is your lifelong answer.
We're not just throwing ingredients together; we're using kitchen science to leverage flavour depth and perfect texture. This method guarantees that every single batch of these chewy Chocolate Chip Cookies turns out exactly how you dreamed they would.
Let's crack on and figure out the secrets to cookie dominance.
The Science of Chew: Achieving the Ideal Cookie Structure
Most people rush the process, but the secret to creating truly phenomenal baked goods often lies in what you don't do. We are deliberately breaking standard cookie rules here, and the results speak for themselves.
This method maximizes chewiness and complex flavour by focusing on hydration and controlled spread.
Why the 24 Hour Chill is Non-Negotiable
If you only take one piece of advice from this entire blog post, let it be this: chill your dough, and chill it properly. We mandate a minimum of three hours, but ideally, you want that dough resting in the fridge for 24 to 72 hours. This isn't just a suggestion, it's chemistry.
During the rest, the flour fully hydrates, preventing a cakey texture. More importantly, chilling the dough also helps concentrate the sugars, leading to a far richer, more caramelised flavour when they finally hit the oven. You get a deeper, more profound sweetness that just screams "bakery quality."
Decoding the Maillard Reaction Flavour Profile
What is the Maillard reaction? Simply put, it’s what gives bread crusts their intense flavour, and it’s what makes these Chocolate Chip Cookies taste so incredibly good.
When the sugars and proteins react under heat and particularly after a long chill they create hundreds of new, complex flavour compounds. This gives the cookies a gorgeous malty, toffee like complexity you simply don't get in a quick mix and bake. The subtle difference is shocking.
What Defines a Bakery Standard Cookie?
A bakery cookie has balance. It’s not just sweet; it's also salty, nutty, and slightly bitter from the dark chocolate. It definitely has irregular edges and a soft, underbaked middle. We achieve this by meticulously measuring ingredients and using the flaky sea salt finish.
This isn't just baking; it's engineering the perfect textural experience.
The Role of Melted Butter vs. Creamed Butter
Many traditional recipes call for softened, creamed butter, which incorporates air and leads to a puffier, softer, more cake like cookie. We want chewiness. By melting the butter, we reduce the air incorporated and ensure the sugar dissolves more efficiently.
This leads to a flatter, denser dough that spreads beautifully while baking, guaranteeing those desirable crinkled edges and the signature chewiness we crave.
Balancing Brown and Granulated Sugars
The ratio of sugars is absolutely key to texture. Granulated white sugar primarily contributes to spread and crispness. Light brown sugar, because it contains molasses, adds moisture and that deep, caramel flavour, keeping the interior soft and chewy.
We use significantly more brown sugar than white sugar in these homemade Chocolate Chip Cookies to nail the moisture content.
Ensuring Those Gooey, Slightly Underbaked Centres
Achieving a truly gooey centre relies on two factors: the high brown sugar content and the specific baking time. When you pull the cookies out, the centre must look underdone . Trust the process.
The residual heat from the baking sheet continues to cook the middle slightly as they rest, yielding that perfect molten centre without drying out the edges. This recipe demands a commitment to the underbake.
Sourcing Your Success: Essential Ingredients for Superior Results
Accuracy matters here, especially when making something as iconic as Chocolate Chip Cookies . Pull out your kitchen scale this isn't the time for guesswork.
- Unsalted Butter (Melted and Cooled): The base of our rich flavour. Make sure it's cooled slightly after melting so you don't scramble the eggs!
- Light Brown Sugar: Provides moisture and chewiness.
- Granulated White Sugar: Adds structure and helps with browning.
- Large Eggs (Room Temp): Room temperature eggs emulsify better into the butter sugar mixture.
- Vanilla Extract: Use a proper quality extract; the flavour really comes through.
- All-Purpose Flour: Must be weighed or carefully spooned and levelled.
- Baking Soda and Salt: These create lift and structure.
- Quality Dark Chocolate (60 70%): Do NOT skip the high-quality here. Chop the bar yourself for better melt pools.
- Flaky Sea Salt: Crucial finishing touch for balance.
Substitutions and Adjustments for Dietary Needs
Baking should be inclusive! Here are some smart swaps if you need them.
| Ingredient | Role | Suggested Substitution |
|---|---|---|
| Unsalted Butter | Fat/Moisture | dairy-free Butter: Use an equal weight of plant based block margarine or vegan butter. |
| All-Purpose Flour | Structure | gluten-free Flour: Use a measure for-measure GF blend (250g). Allow dough to rest longer. |
| Brown Sugar | Moisture/Chew | Dark Brown Sugar: Use instead of light brown for an even deeper molasses flavour. |
| Baking Soda | Leavening | Baking Powder: Use 3 tsp (1 Tbsp) of baking powder, though the texture will be slightly loftier. |
Selecting the Best Quality Chocolate Chips
Forget the waxy chips sometimes found in grocery stores. For truly gooey, rich homemade Chocolate Chip Cookies , you need quality. I always buy a bar of 60 70% cocoa dark chocolate and chop it unevenly. The uneven chunks melt into magnificent, gooey pockets rather than staying rigid.
Understanding the Impact of Flour Type and Protein Content
All-purpose flour works beautifully here because its protein content is balanced not too high (like bread flour, which makes tough cookies) and not too low (like pastry flour). The crucial thing is accuracy.
Weighing your flour (250g) prevents accidentally adding too much, which leads directly to dry, dense, cakey results.
Notes on Vanilla and Salt Consistency
Don't skimp on the vanilla. One full tablespoon of good extract in the dough is necessary to cut through the richness of the butter and sugar. As for the salt, you need two types: fine salt in the dough for flavour development, and the flaky sea salt sprinkled on top right before baking.
That flaky salt is the true game changer in this Chocolate Chip Cookies recipe.
Smart Swaps: Making the Recipe dairy-free or Gluten Conscious
If you are using gluten-free flour, I urge you to chill the dough for the full 48 hours. This extra time allows the gums in the GF blend to fully hydrate and bind the dough, preventing crumbling and ensuring a great chew.
When using dairy-free butter blocks, expect a slightly softer spread, but the flavour profile remains excellent.
Crafting the Dough: step-by-step Method for the Best Chocolate Chip Cookies
Patience and precision are your friends when mastering these Chocolate Chip Cookies from scratch.
Preparing the Melted Butter Base
- Melt and Combine Butter and Sugars: Melt the 3/4 cup (170g) of butter until just liquid. Let it sit and cool for about five minutes. Combine the slightly cooled melted butter with the brown and granulated sugars in your mixing bowl. Whisk vigorously for 1- 2 minutes until the mixture looks glossy and smooth.
- Add Wet Ingredients: Beat in the eggs one at a time. The mixture should lighten slightly as you incorporate them. Stir in the generous tablespoon of vanilla extract.
- Combine Dry Ingredients: In a separate medium bowl, whisk together the precisely measured flour (250g), the baking soda, and the fine salt.
- Mix Wet and Dry: Slowly add the dry mixture to the wet mixture. Mix only until the last streaks of flour disappear. Stop immediately! Overmixing develops gluten, which makes tough cookies.
- Fold in Chocolate: Gently fold in all that gorgeous chopped chocolate.
Mixing and Resting: The Crucial Chilling Period
- Chill the Dough (Crucial Step): Transfer the dough to an airtight container or cover the bowl tightly. Refrigerate for a minimum of 3 hours, but aim for 24 to 72 hours. This drying and flavour development is absolutely essential for creating complex, bakery style chocolate chip cookies. Seriously, don’t skip the chill.
Chef's Note: If you want to make other amazing treats while you wait, try my recipe for Peanut Butter Blossom Cookies Recipe: The Softest, Chewy Batch . That one is quick, but this one needs the wait!
Portioning Uniform Cookie Dough Balls for Consistent Baking
- Preheat and Prep: Preheat your oven to 175°C (350°F). Line two heavy baking sheets with parchment paper or silicone mats.
- Scoop the Dough: Use a large cookie scoop (about 1/4 cup) to portion the dough into balls, about 100g each. Uniform size ensures uniform baking critical for getting the best Chocolate Chip Cookies .
- Sprinkle with Salt: Lightly sprinkle the top of each dough ball with flaky sea salt. It’s non-negotiable for flavour balance.
Final Bake Time and Cooling Protocol
- Bake: Bake for 12 to 14 minutes. Look for golden brown, set edges, but a centre that still looks puffy, pale, and undercooked.
- The 'Cookie Bash' Technique (Pro Tip): This is fun! Immediately upon removing the tray, lift it about 6 inches and gently drop (or ‘bash’) it onto the work surface. This releases trapped steam and forces the cookie centre to collapse, creating those beautiful, chewy crinkled edges. Repeat twice if needed.
- Cool: Let the cookies cool on the baking sheet for 5- 10 minutes. This allows the hot centre to set up. Only then should you carefully transfer them to a wire rack to finish cooling completely.
Troubleshooting Your Batch: Pro Tips for Cookie Perfection
When making the best Chocolate Chip Cookies, a few things can go wrong. Here’s how to avoid common pitfalls.
Why Your Cookies Spread Too Much (and How to Fix It)
Spreading is usually caused by too much moisture or fat, or not enough structure. Did you properly measure the flour by weight? If your cookies are spreading into flat pancakes, the most likely culprit is either that you skipped the crucial chilling step, or your melted butter was too warm when you added the eggs and sugar.
Make sure your dough is rock hard before baking. If you must bake immediately, try freezing the portioned dough balls for 30 minutes first.
The Importance of Oven Temperature Consistency
If your oven temperature is too low, the cookies will spread excessively before they set. If it’s too high, the outside will burn while the inside stays raw. Invest in an inexpensive oven thermometer, seriously.
My oven runs 15 degrees cool, which I only learned after ruining my first batch of these specific Chocolate Chip Cookies years ago! Bake at exactly 175°C (350°F).
When to Add Those Extra Chocolate Shards for Presentation
Want that magazine worthy look? When the dough balls are scooped and placed on the tray, gently press 2 3 extra chopped chocolate pieces directly onto the top surface of the dough.
These extra pieces will melt into beautiful, distinct pools on the surface, making your homemade chocolate chip cookies look utterly irresistible.
Mastering Storage: Keeping Your Homemade Cookies Fresh
Don't let your efforts go stale! Proper storage ensures you can enjoy these Chewy Chocolate Chip Cookies for days or weeks.
Safe Refrigeration Guidelines for Unbaked Dough
The unbaked dough is brilliant for make-ahead baking. It can be stored in an airtight container in the refrigerator for up to 5 days, and arguably gets even better up to day 3. Just be sure to let it sit on the counter for 10 minutes before scooping if it's too hard to portion.
Baking Directly From Frozen Dough
Yes, you can freeze portioned dough balls! Scoop them, place them on a tray until solid (about an hour), then transfer them to a heavy duty freezer bag or container. They keep well for up to 3 months.
When ready to bake, place the frozen dough balls on a lined tray, sprinkle with salt, and add 2– 4 minutes to the total baking time.
Optimal Shelf Life of Baked Goods
Once baked and completely cooled, these cookies stay fresh at room temperature in an airtight container for 4 to 5 days. For longer storage, you can freeze the baked cookies by wrapping them tightly in plastic wrap and then foil.
To reheat, simply microwave them for 10 15 seconds, or toast them lightly in a 150°C (300°F) oven for a few minutes until the chocolate melts again.
The Ultimate Pairing: How to Serve Your Chewy Delights
These truly are the best Chocolate Chip Cookies imaginable, so they deserve a stellar pairing.
The simplest approach is always best: serve them warm with an ice-cold glass of milk. Alternatively, if you're hosting a dessert board, they look magnificent alongside something tart, like raspberries or a small bowl of lemon curd.
For a next level, sophisticated dessert, sandwich two cooled cookies around a scoop of the creamiest vanilla ice cream you can find. Speaking of ice cream, if you want to make it truly spectacular, try pairing these with my homemade Chocolate Chip Ice Cream: Rolls Royce French Custard Recipe . The textures are a dream together.
If you’ve enjoyed mastering these homemade Chocolate Chip Cookies, you might also be ready to tackle some other classics, perhaps my incredibly delicious Sugar Cookies: The Best Buttery Cut-Outs Recipe next time you need a project. Happy baking!

Recipe FAQs
Why did my cookies come out flat and greasy instead of thick and chewy?
This is often due to insufficient chilling time or inaccurate butter measurements. Since this recipe utilizes melted butter, the dough needs ample time (ideally 24 hours) for the fat to fully solidify, which prevents excessive spreading during baking.
Additionally, ensure your baking soda is fresh, as old leavening agents won't provide the necessary lift.
Is the 24-hour dough rest mandatory, or can I skip it if I'm in a hurry?
While you can technically bake the cookies after a minimum of 3 hours of chilling, the 24-hour rest is highly recommended for achieving the "Perfect Brew" flavor profile. This extended rest allows the flour to fully hydrate and the chemical compounds in the sugar to break down and complexify, giving the finished cookie a profoundly deeper, maltier flavor often associated with high end bakeries.
Can I substitute the brown sugar with white granulated sugar?
You can, but substituting will drastically alter the intended chewy texture. Brown sugar contains molasses, which is hydroscopic it retains moisture, keeping the center gooey, and increases the cookie's pH, which promotes spread.
Using only white sugar will result in a much crispier, thinner, and less complexly flavored cookie.
How should I store the finished cookies, and can I freeze the dough for later?
Store baked cookies in an airtight container at room temperature for up to five days, though they are always best within 48 hours of baking. For long term storage, scoop the chilled dough balls onto a baking sheet, freeze them until solid, and then transfer them to a heavy duty freezer bag for up to three months.
Bake frozen dough directly, increasing the bake time by 3 to 5 minutes.
The edges of my cookies burned before the centers were set. What caused this?
This is a common issue typically linked to an inaccurate oven temperature or the use of improper bakeware. Ensure your oven is calibrated; if it runs hot, reduce the temperature by 25°F (about 14°C) next time.
Also, using dark colored or non-stick baking sheets can absorb heat rapidly and cause the bottoms and edges to scorch, so switching to light colored aluminum sheets may solve the problem.
I want a crunchier cookie instead of a chewy one. How can I adjust the recipe?
To encourage crispiness, use cold, cubed butter instead of melted butter, and slightly reduce the amount of brown sugar used, increasing the white granulated sugar proportionally. Additionally, baking the cookies for an extra 2-3 minutes past the suggested time will reduce the final moisture content, yielding a drier and snappier result.
Can I use gluten-free flour, or substitute the eggs to make this recipe vegan?
Yes, many high-quality 1:1 gluten-free baking blends work effectively in this recipe, though the chilling period becomes even more crucial to prevent spreading. To make the recipe vegan, substitute the butter with vegan stick butter (not tub margarine) and replace the eggs using a flaxseed egg substitute (1 tablespoon ground flax mixed with 3 tablespoons water per egg), ensuring all chocolate is dairy-free.
Chewy Chocolate Chip Cookies
Ingredients:
Instructions:
Nutrition Facts:
| Calories | 663 kcal |
|---|---|
| Protein | 3.3 g |
| Fat | 36.5 g |
| Carbs | 80.4 g |
