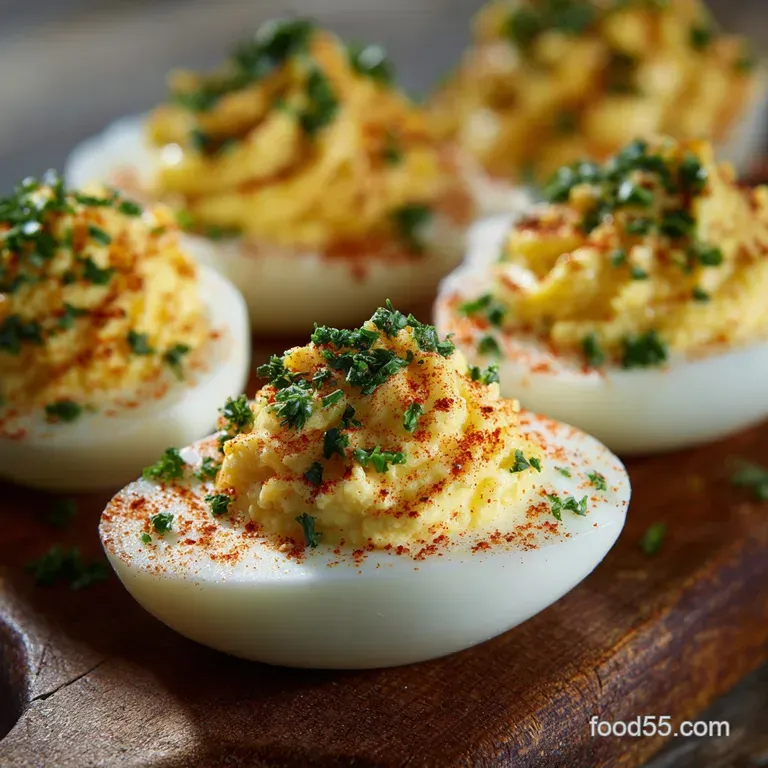
Classic Deviled Eggs: the Timeless, Pitch-Perfect Appetizer
The Undisputed Champion of Finger Foods: Mastering the Classic Deviled Eggs
Okay, let's talk about the unsung hero of every potluck, picnic, and slightly tipsy backyard barbecue: the Deviled Egg. Simple, right? Just mash some yolks and dump in some mayo. WRONG.
I spent years making sad, lumpy, grey and ringed deviled eggs before I finally figured out the two or three non and negotiable secrets to achieving perfection. This isn't just an "Original Deviled Eggs Recipe;" this is the real deal. The one where everyone asks you to bring them again next time.
We’re aiming for creamy, tangy, bright yellow goodness that doesn't taste like you just scooped it out of a jar.
The Ancient History of the 'Deviled' Dish
Honestly, I mostly care about eating them, but the history is kinda cool. Deviled dishes have been around forever like, since ancient Rome, where they boiled eggs and seasoned them up.
But the term "deviled" started popping up in cookbooks in the 1700s, usually meaning a dish that was highly seasoned, tangy, or spicy. Think lots of mustard, vinegar, maybe cayenne. It wasn't satanic (phew). It just meant it had a kick .
When you hear people talking about a good Classic Deviled Eggs Recipe, they are talking about that essential combination: creamy richness punched up by vinegar and mustard.
Defining the Perfect Deviled Egg Ratio
The biggest fail I see is cooks rushing the seasoning. They use too much mayo and not enough tang. If the filling tastes heavy, you screwed up the ratio. The job of the mustard and the acid (we are using white wine vinegar, by the way) is to cut through the incredible creaminess provided by the yolk and the mayonnaise.
It must sparkle. You want the texture to be incredibly smooth, almost like frosting, but the flavour should be sharp and balanced. A good deviled egg is a miniature, perfect ecosystem.
What Makes This Recipe the 'Classic' Standard?
We are stripping away the fuss. No bacon bits (yet). No crazy sauces. This is the Classic Deviled Eggs Recipe Easy version, focusing entirely on texture and balance.
The filling is pure yolk, quality mayo, Dijon for that adult tang, and a small but mighty dose of white wine vinegar to prevent it from tasting flat. We also treat the eggs like gold during the cooking phase, ensuring that perfect yellow colour without the dreaded grey ring of doom.
It's the standard for Appetizers Using Eggs because it never fails to satisfy.
Gathering Your Deviled Egg Arsenal: Essential Ingredients & Tools
The 5 Non and Negotiable Flavour Components
Seriously, don’t skimp here. This is why some three and ingredient deviled eggs are a flop. You need texture, body, tang, salt, and aromatic finish.
- The Yolks: Duh.
- Full and Fat Mayonnaise: Listen, I’m a fan of moderation, but this is not the time for low and fat mayo. You need that fat content to create the silky texture and richness that holds the seasoning. Don't compromise the mission.
- Dijon Mustard: Not the bright yellow stuff (unless you really love that flavour), but proper Dijon. It brings heat and depth without being overly sweet.
- White Wine Vinegar: This is the game changer. It wakes everything up.
- Smoked Paprika: A subtle, earthy finish, dusted on top.
Sourcing the Best Eggs for Easy Peeling
This is the greatest secret to the entire Deviled Eggs process, and I swear people skip it every time. Do not use eggs you bought yesterday. Fresh eggs are a nightmare to peel. Their internal pH causes the membrane to fuse with the egg white like superglue.
"If your egg carton says 'Grade A, Use By Next Month,' you're going to tear up your whites and cry. Use eggs that are 7 to 10 days old. They peel cleanly and beautifully."
If all you have are super fresh eggs, try steaming them instead of boiling. It can sometimes help loosen the shell, but honestly, planning ahead is always better for deviled eggs appetizers.
Mustard Varieties: Which Tang is Right for the Classic Taste?
For a true Classic Deviled Eggs flavour profile, I stick strictly to Dijon. It's sharp but smooth. If you want to lean into the 'deviled' meaning a bit harder, you could use English mustard powder, but only a tiny pinch, mixed into the wet ingredients. It’s got a much sharper, nose and clearing quality.
If you use American yellow mustard, you’re going into picnic basket territory, which is fine, but it tends to be sweeter and less complex.
Essential Kitchen Tools for Rapid Assembly
You don’t need much, but a couple of things make the job exponentially easier.
| Tool | Why You Need It |
|---|---|
| Ice Bath | Stops the cooking immediately; prevents the grey ring. |
| Fine and Mesh Sieve | The secret weapon for professional, lump and free filling. |
| Piping Bag & Tip (Optional) | Makes assembly fast and presentation beautiful. |
Related Recipes Worth Trying
- Jollof Rice Mastering the Ultimate Smoky DeepRed Classic — Jollof Rice is the legendary West African classic Follow this expert jollof rice recipe nigerian to create a deep red smoky flavor profile Learn the secret...
- Coq Au Vin Classic French Stew with Red Wine Braised Chicken — Coq Au Vin is the ultimate French comfort food Learn to make this classic French stew featuring tender red wine braised chicken smoky bacon and a hearty red...
- Chicken leek and ham pasties GoldenCrusted Comfort Food Classic — Chicken leek and ham pasties are the ultimate handheld meal Master the perfect flaky crust and creamy Chicken Pasties Filling with this detailed Homemade...
Executing the Classic Deviled Eggs Technique
The Ice Bath Method for Perfect, Centralized Yolks
We aren't just boiling the eggs; we are steaming and shocking them. Why? Because the rapid temperature change helps pull the white away from the shell, and the steaming method prevents that sad, overcooked, green and grey ring from forming around the yolk.
I used to make those grey and ringed eggs all the time, thinking that was just how hard and boiled eggs looked. Nope. That means they cooked too long!
Right then, the method: Put the eggs in the saucepan, cover with cold water, bring to a full rolling boil. Turn off the heat immediately, cover the pot tightly, and set a timer for 10 minutes. That residual heat is doing the work.
Once the timer shrieks, pull them out and plunge them straight into the ice bath for 15 minutes. This is critical.
Peeling 101: How to Achieve Spotless Halves
Once they are fully cooled, gently crack the egg all over by rolling it on the counter. Start peeling from the widest, bottom end where the air pocket usually forms. I always peel under a slow stream of cool water; the running water helps wash away tiny shell fragments and keeps the membrane wet, making it easier to separate.
Rinse, wipe, admire your perfect whites. Slice them lengthwise with a sharp, thin knife.
Whipping and Seasoning the Silky Yolk Paste
Scoop all those bright yellow yolks into a bowl. Now, here is where we separate the pros from the amateurs. If you want restaurant and smooth filling, push the yolks through the fine and mesh sieve. Seriously. Do it.
It takes two minutes, and it eliminates every single tiny lump, leaving you with airy, fluffy yolk dust ready for mixing.
Once sieved (or thoroughly mashed if you're skipping the sieve, which I forgive, barely ), add your mayonnaise, Dijon mustard, and white wine vinegar. Whip it aggressively with a fork or spatula until it’s incredibly creamy. Then season with the salt and pepper. Taste it. Does it sing?
Or is it a dull thud? If it's dull, add a tiny bit more vinegar and salt until it pops. That’s how you define the "Classic" standard.
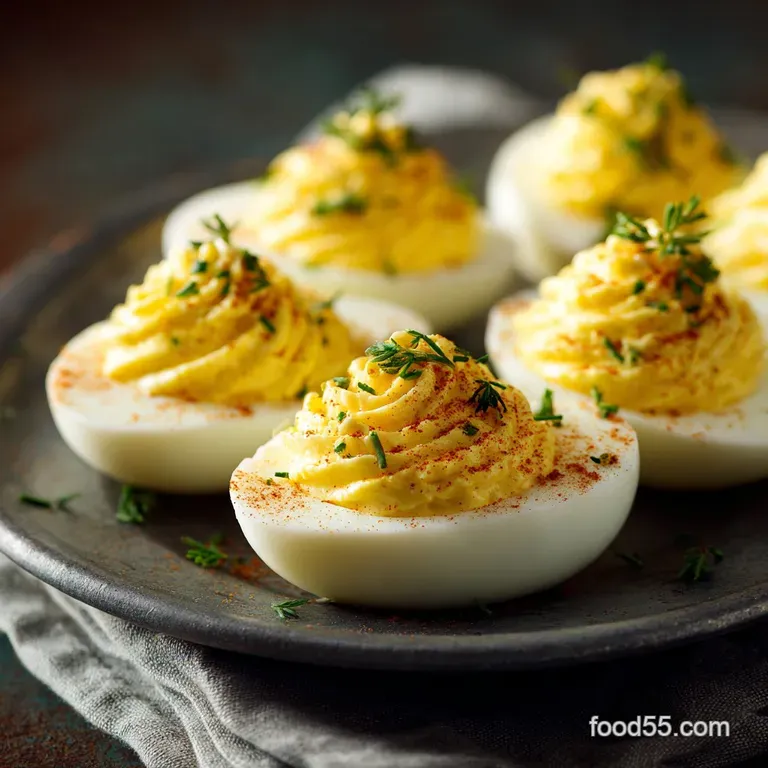
Piping Tips: Elegant Filling for a Professional Look
You can absolutely spoon the filling back into the cavities. No shame in that game. But if you want that elegant, professional look (especially for appetizers using eggs at a party), use a piping bag. Any simple star tip works great.
Just load the filling, twist the bag closed, and pipe a nice little swirl into each egg white half. It makes the serving platter look 100% better, and frankly, it's less messy than spooning.
Troubleshooting and Customizing Your Perfect Classic Deviled Egg
How Far Ahead Can You Make Deviled Eggs?
This is the great timing challenge. You can do the prep work far ahead, but you absolutely cannot assemble them until close to serving time, or the egg whites will dry out and the paprika will get soggy.
- Up to 2 Days Ahead: Hard and boil and peel the eggs. Store the whole eggs in an airtight container in the fridge.
- Up to 1 Day Ahead: Make the yolk filling. Store the filling in an airtight container OR in the piping bag, sealed at the tip, and refrigerate.
- 30 Minutes Before Serving: Assemble the eggs, garnish, and chill briefly to set the filling.
Best Practices for Safe Refrigeration and Transport
Since these Classic Deviled Eggs are rich in mayonnaise, you must treat them like the highly perishable food they are. Keep them cold! If you are transporting them, use a dedicated deviled egg carrier (they really exist, and they are brilliant) or a standard tray set inside a larger container surrounded by frozen gel packs.
Never leave them at room temperature for more than two hours.
Three Simple Toppings That Define the 'Garnish'
If you want to move beyond the traditional dusting of paprika, these three garnishes are always spot and on and fit the Original Deviled Eggs Recipe profile:
- Minced Fresh Chives (brings a subtle oniony bite)
- A Tiny Snippet of Fresh Dill (very summery and bright)
- A Sprinkle of Finely Chopped Sweet Pickle Relish (perfect if you want Classic Deviled Eggs with Pickle Relish flavor without incorporating the relish into the creamy filling)
Adjusting Texture: Fixing a Filling That is Too Dry or Too Wet
This usually happens when you measure mayo with your heart instead of a spoon. It's okay. We can fix it.
| Problem | Diagnosis | The Fix |
|---|---|---|
| Too Dry/Crumbly | Not enough fat/liquid. | Add mayo one teaspoon at a time. If it still tastes thick, add a tiny dash of water or milk to loosen. |
| Too Wet/Soupy | Too much mayo or too much liquid acid. | Push the filling back through the sieve to drain any excess liquid, or (the better fix) quickly cook another hard and boiled yolk, mash it, and stir it in to absorb the moisture. |

Recipe FAQs
Why are my hard boiled eggs a nightmare to peel?
This common headache is often down to using eggs that are too fresh! For smooth Deviled Eggs, aim for eggs that are at least a week old, as the pH changes and allows the shell to detach neatly from the membrane. Also, never skip the immediate, ice-cold shock bath after cooking.
How far in advance can I make these Classic Deviled Eggs?
You can prepare the boiled and peeled egg whites up to two days ahead and store them covered in the fridge. However, to maintain that pitch perfect texture and prevent the filling from becoming watery, it’s best to mix and pipe the yolk mixture no more than 12 hours before you plan to serve them.
My Deviled Egg filling is a bit lumpy; how do I get that silky smooth pub-style texture?
For a truly elegant, grain free filling, the chef's secret is to push the cooked yolks through a fine mesh sieve before you add the mayonnaise and mustard it only takes a minute and makes a huge difference.
Alternatively, ensure you mash the yolks completely smooth with a fork before introducing any wet ingredients.
I want to jazz things up are there any easy ways to tweak the classic flavour profile?
Absolutely! If you’re feeling adventurous, try folding in a teaspoon of mild curry powder for an Anglo Indian twist, or adding a dash of English mustard powder for an extra sharp kick. Finely chopped bacon bits or smoked salmon also make a lovely, decadent addition.
Help! My yolks turned a murky green/grey around the edges. Is that bad?
That grey ring is harmless, but it indicates the egg was slightly overcooked and the iron reacted with the sulfur. To achieve that bright yellow centre consistently, you must halt the cooking process immediately after the 10-minute steam by plunging the eggs into a generous ice bath.
Classic Deviled Eggs Timeless Recipe

Ingredients:
Instructions:
Nutrition Facts:
| Calories | 100 kcal |
|---|---|
| Fat | 9 g |
| Fiber | 0 g |
