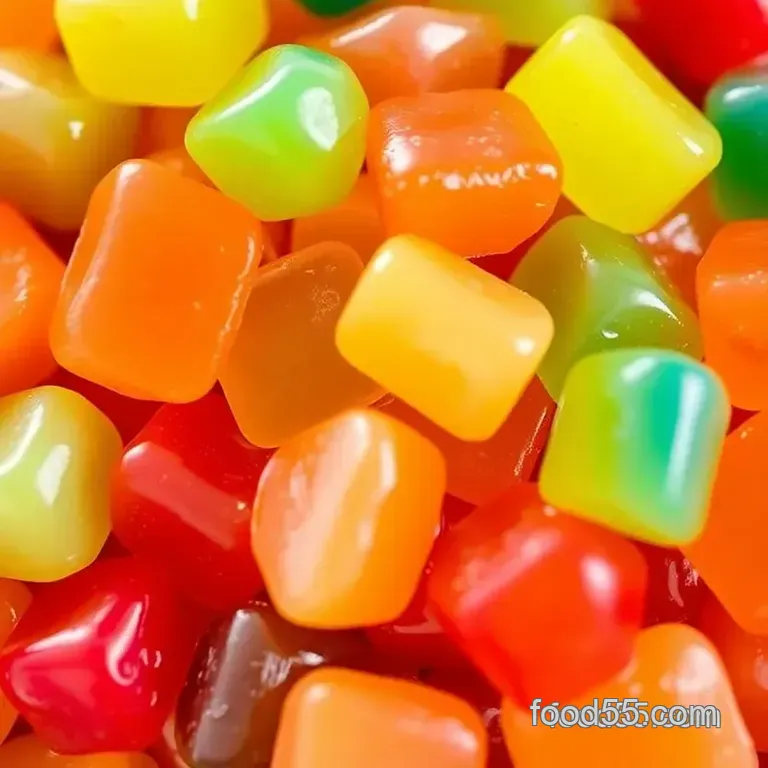
Gushers Gushers: Fruity Gel-Filled Snacks

- Introduction: The Nostalgic Quest for Gushers
- Master the Art of Homemade Gushers
- What Makes This Recipe Special
- Health and Nutrition Highlights
- Recipe at a Glance
- Master Ingredient List for Homemade Gushers
- Homemade Gushers: Fruity Gel-Filled Snacks
- Expert Kitchen Wisdom
- Perfect Presentation
- Storage and Make-Ahead
- Creative Variations
- Complete Nutrition Guide
- Expert FAQ Solutions
- 📝 Recipe Card
Introduction: The Nostalgic Quest for Gushers
Have you ever found yourself craving a snack that brings you right back to your childhood? you know, that sweet moment when you pop a gummy candy in your mouth, and it explodes with a burst of flavor? well, i’m about to take you on that trip down memory lane with my take on a classic: homemade gushers !
this recipe is not just a throwback; it’s a fun-filled adventure that’s perfect for anyone looking to recreate those chewy, fruit filled bites without breaking the bank or heading to the store.
What makes this recipe special? for starters, it’s a delightful blend of simplicity and creativity! you'll be spending about an hour making these candy wonders.
It requires a bit of finesse when it comes to molding, but i promise it’s not rocket science just a medium level culinary challenge that’s oh-so-rewarding!
Master the Art of Homemade Gushers
So, where did this whimsical candy come from? well, gushers were originally unleashed on the world by the good folks over at general mills in the early '90s.
Kids everywhere were fascinated by these sticky, gel-filled treats that seemed to defy the laws of candy. fast forward to today, and these fruity bites have transformed from a store-bought indulgence into a diy kitchen project, and honestly, i think they’re more fun to make!
One of the reasons i adore making homemade gushers is their rich culinary heritage . while most gummy candies have a long standing history, these little gems have captured the hearts (and taste buds) of generations.
The magic lies in their ability to conjure up memories of carefree childhood days spent in playgrounds or movie nights with friends.
Today, they’re not just a nostalgic dessert; they’ve become fun snack alternatives for kids and adults alike.
What Makes This Recipe Special
Now, let's dive into what truly sets this colorful treat apart. for me, it starts with the flavor combinations . you can tailor your gushers to be anything from classic grape to wild berry blast, and the possibilities are endless!
using high-quality fruit juice makes all the difference in achieving those authentic sweet and tangy flavors.
Plus, it’s a great way to sneak in some nutritional fruit treats who knew your childhood cravings could be somewhat healthy?
Worried about technique? don’t be! this recipe is actually pretty foolproof. i’ve tried various methods, and i’m here to share the expert tested techniques to ensure your gushers come out perfectly every time.
My top tip? chill your filling and the outer layer enough; it makes all the difference in the world!
Health and Nutrition Highlights
Oh, and here’s the kicker: when you craft these gushers at home, you can control what goes in them, making them a healthier snack option.
Instead of high fructose corn syrup or artificial colors and flavors, we’re using natural sweeteners and grocery store ingredients you’re probably familiar with.
This gives you the added benefit of creating kid-friendly recipes that parents can feel good about.
Each serving is not just a burst of sweetness; it’s also relatively low in calories, packing in some fruit goodness, which is usually a win in anyone’s book, right?
Recipe at a Glance
Let's break it down for you:
- Total Preparation Time: 1 hour plus some chilling time.
- Skill Level Required: Medium don’t sweat it!
- Serving Size: Yields about 12-15 Gushers, which should be enough to share you know, if you’re nice!
- Cost Efficiency: Honestly, making these at home is a lot cheaper no more splurging on cute packaging at the store!
So, are you ready to unleash your inner candy maker? next up, let's get into the nitty gritty of the ingredients that will make your very own gushers gushers a reality! trust me; you’ll love adding your personal spin to these nostalgic treats.
Grab your apron, and let’s get cooking!
Master Ingredient List for Homemade Gushers
Alright, my friend, let’s dive into the heart of creating those nostalgic homemade gushers . first off, you gotta stock up on the best ingredients for that chewy, gel-filled magic.
Trust me, the quality of what you’ll use makes all the difference. are you ready? let’s go!
Premium Core Ingredients
For the Gel Filling:
- Fruit Juice: 1 cup (240 ml). Think fresh! You can’t beat the flavor of freshly squeezed orange or a sweet mixed berry blend. Ah, the memories!
- Sugar: 2 tablespoons (30 g). You might want to adjust this based on how sweet your juice is; nobody likes a bland gusher, right?
- Cornstarch: 2 tablespoons (15 g). This helps thicken things up nicely.
- Gelatin Powder: Just 1 teaspoon (5 g). It’s the secret behind the chewy texture!
For the Exterior:
- Fruit Flavored Gelatin: 2 cups (240 g). Pick your favorite flavors. Cherry , blue raspberry , whatever your heart desires!
- Water: 1 cup (240 ml).
- Granulated Sugar: 1 cup (200 g). Sweet tooth checklist check!
- Lemon Juice: 1 tablespoon (15 ml). A little tanginess brings it all together, like a good plot twist in your favorite novel.
Signature Seasoning Blend
So, what about seasoning ? Well, we’re in the dessert world here, so no traditional seasonings needed. However, let's not forget our flavor enhancers:
- Try adding some vanilla extract for a warmer undertone.
- If you’re feeling adventurous, throw in some fruit zest like lemon or lime for a zesty explosion. Yup, you heard it right!
Smart Substitutions
Now, hurdles are a thing in cooking! You might not find everything in your kitchen cupboard or grocery store. Here are some smart substitutions :
- Juice : If you’re out of juice but have some fruit puree , that works too! Just adjust the sugar.
- Sugar : Use honey or stevia for a natural sweetener great for healthier snack alternatives!
- Gelatin : If you want a vegan take, look for agar agar instead.
Kitchen Equipment Essentials
Next up, what’s a cook without their trusty tools? Here’s your must have kitchen equipment list:
- Small saucepan : For mixing that gorgeous gel filling.
- Silicone molds : They make life so much easier for popping out those beauties.
- Whisk : Don’t forget this essential for smooth mixes and pure bliss.
- Measuring cups and spoons : Gotta get those portions just right!
- Piping bag : Optional, but it makes for a fancy filling experience.
Pro Ingredient Tips
Alright, here are a few pro tips to finesse your Gushers making game:
- Quality juice is key skip the from concentrate stuff if you can.
- Look for gelatin that’s labeled as non-GMO and grass fed for the fancy touch.
- For storage, keep your Gushers in an airtight container in the fridge. They’ll stay deliciously fresh for about a week. But let's be honest, they probably won't last that long!
- Wanna save a few bucks? Buy your ingredients in bulk especially sugar and gelatin. It’s all about those money saving moves!
Alright, with all that said, it’s time to get our hands a little sticky and make some awesome gushers! i can’t wait to walk you through the fun kitchen activities in the next section!
we’ll transform those ingredients into colorful, sweet snacks that remind us of our childhood, and trust me, they’ll be worth it when you sink your teeth into those chewy fruit candies .
Let’s get cooking, shall we?
Homemade Gushers: Fruity Gel-Filled Snacks
Oh my gosh, let me tell you it’s time for a walk down memory lane with one of those classic childhood treats: homemade gushers ! this recipe is more than just a throwback; it’s a way to bring a little joy into your kitchen as you whip up these chewy, fruity delights.
I mean, who doesn’t love a little burst of flavor in a snack? the best part? you get to customize them just the way you like!
Let’s dive into what I call the expert cooking method , making your feat into those lovely gel-filled candies a walk in the park.
Essential Preparation Steps
First thing’s first, we’re gonna talk mise en place . this french term basically means “everything in its place” and trust me, it’s a lifesaver in the kitchen.
Gather your ingredients like good ole fruit juice (orange, grape, or whatever tickles your fancy), sugar, cornstarch, and gelatin. oh, and don’t forget the fruit flavored gelatin for the outer layer.
Having all your items prepped and measured before you start is crucial for a smooth ride.
Now, let's get organized. you know what can be a drag? running around the kitchen looking for tools. grab a small saucepan, a whisk, measuring cups, and either silicone molds or some candy molds for shaping.
A piping bag is a fun touch too if you wanna get fancy with the filling!
Professional Cooking Method
Alright, ready? Let’s break it down step-by-step.
Prepare the gel filling: in a small saucepan, combine 1 cup of your chosen fruit juice, 2 tablespoons of sugar , 2 tablespoons cornstarch , and 1 teaspoon of gelatin .
Whisk it together over low heat until it thickens about 3-5 minutes . just take it off the heat and let it cool a bit.
Chill that gel: once it’s all blended, pour it into a small container and refrigerate it for at least 20 minutes .
It’s like letting the stuff set so it gets all deliciously jiggly.
Make the outer layer: in a medium saucepan, mix 2 cups of fruit flavored gelatin (whatever makes your heart sing), 1 cup water , 1 cup sugar , and 1 tablespoon lemon juice .
Stir it over low heat until everything is dissolved, about 5-7 minutes . watch that heat low and slow is the way to go!
Mold those gushers: lightly grease your molds and pour a thin layer of that glorious mixture in the bottom. add a dollop of the gel filling, then top it off with more gelatin mixture.
Don’t overfill let them sleep a bit!
Chill Until Firm: These babies need to chill for 30 minutes at least. It could even take an hour, so be patient!
Unmold and Store: Once fully set, carefully pull them out of the molds. Store them in an airtight container in the fridge and enjoy these nostalgic treats at your leisure.
Expert Techniques
Now let’s sprinkle some expertise! when thickening your gel filling, keep stirring to prevent any lumps. if you ever find your gushers not coming out as you hoped, consider the temperature of your filling too hot might ruin the gel quality.
And for success indicators? a nice jiggle when you shake the mold is your golden ticket!
If you want to get creative, throw caution to the wind with flavorful homemade treats . you can swap ingredients to customize these chewy snacks like a kitchen adventure! go ahead and incorporate healthy snack alternatives like honey instead of sugar, or even try out a vegan gushers recipe by using plant based gelatin.
Success Strategies
Now that you’re all set, let’s chat troubleshooting. if your gushers are too sticky, they probably need a longer chill time.
And if they’re crumbling, it could be your outer layer that didn’t set properly yikes! one final tip: if your kids like to help, make this activity a family tradition it’s a fun kitchen activity that’s bound to create laughter and some tasty fruity snacks that would make any picnic a hit!
So, are you ready to dive in and make your own delightful DIY Gushers ? Trust me, this journey of transforming simple grocery store ingredients into exciting bites of nostalgia is well worth the time!
Your friends and family will be amazed, and you’ll have an effortless flow of colorful party treats at your fingertips!
And for those curious minds looking for more delectable bites, stay tuned for even more gelatin recipes . We’re just getting started with fun flavors and creative snack ideas !
Expert Kitchen Wisdom
So, let me start by saying, making homemade snacks like these gushers gushers is seriously one of my favorite activities.
You can totally channel your inner chef while getting a bit nostalgic about those childhood treats you loved. this recipe isn’t just about flavors; it’s a chance to play in the kitchen! now, if you’ve never worked with gelatin before, don’t sweat it!
the secret lies in following a simple technique and an understanding of how the ingredients interact.
When you know how to manipulate temperatures and textures, you're already halfway to success. trust me, if i can do it, you can too!
Perfect Presentation
Picture this: you’ve just pulled a batch of your homemade gushers from the fridge. they’re sitting in their colorful glory, and it’s time to show them off ! plating is key here.
Garnish with some fresh mint leaves, or maybe even a side of colorful fruit slices. a spritz of lemon juice brings out their sweet and tangy flavors beautifully! when it comes to serving, think about small, bite sized portions this is a great picnic snack idea!
use edible gelatin molds to make even more intriguing shapes! who wouldn’t want to eat something that looks like a tiny star or heart?
Storage and make-ahead
Okay, so what about storing these beauties? if you want them to stay fresh, keep those gummies in an airtight container in the fridge.
Honestly, they last about a week, but good luck having them around that long! if you ever find yourself strapped for time, this recipe is also super easy to make-ahead.
I love making a big batch on sunday and enjoying them throughout the week. just make sure to check those storage guidelines to maintain that chewy goodness!
Creative Variations
Here’s the bit that really gets my creative juices flowing: variations! what’s better than sticking to just one flavor? try switching things up with different fruit juice snacks recipes .
You can create tropical flavors by using pineapple or mango juice, or even mix your favorites for a wild fruit explosion! want to make it vegan? absolutely! sub out the gelatin for a vegan gushers recipe using agar agar seriously, tons of options! need a dietary modification ?
try using natural sweeteners like honey or maple syrup instead of granulated sugar.
I promise you’re gonna have a blast experimenting!
Complete Nutrition Guide
Now let’s break it down a bit on the nutrition front. if you’re raising eyebrows worried about caloric intake, let me give you some deets.
Each gusher is about 50 calories, and they’re low in fat! you know what that means a guilt free snack that’s also a dose of fun.
They’re perfect for when you need those nutritional fruit treats without the fussy prep. you can enjoy these while feeling good about what you’re putting into your body, especially when you opt for healthier ingredients.
Expert FAQ Solutions
By now, i’m sure you may have some burning questions! like, “what if my gummy candies don’t gel?” don’t fret! if that happens, it usually means the mixture didn’t reach the required temperature, so just make sure to keep an eye on it next time.
And if you’re wondering how to troubleshoot sticking issues, lightly greasing your molds helps. and hey, you can always ask me for some success tips if you’re feeling unsure!
Wrapping up, i just want to say, making these chewy fruit candies or, as i like to call them, customizable gummy snacks , has elevated my snacking game, tenfold.
It’s not just about the end product but the memories and laughs made while creating them. whether you're sitting down for a quick snack or whipping them up for a gathering, these gushers sure bring everyone together! so grab your ingredients and have fun! enjoy every sweet moment in your kitchen!
Gushers Gushers Fruity Gel Filled Snacks
Ingredients:
Instructions:
Nutrition Facts:
| Calories | 50 |
|---|---|
| Protein | 0.5 g |
| Fat | 0 g |
| Carbs | 12 g |
| Sugar | 8 g |
| Sodium | 5 mg |
