Instant Pot Yogurt: Cracking Good Set-For-Success
- Cracking the Code to Perfect Homemade Yogurt
- The Science of Set: Why the Instant Pot Excels
- Essentials for Silky Smooth Yogurt: Ingredients Breakdown
- Method: How to Make Instant Pot Yogurt (Step-by-Step)
- Troubleshooting Your Batch and Pro Tips
- Maximizing Freshness: Storing Your Homemade Yogurt
- Beyond Breakfast: Creative Ways to Enjoy Your Plain Yogurt
- Recipe FAQs
- 📝 Recipe Card
Cracking the Code to Perfect Homemade Yogurt
Listen up, because I’m about to spill the secret to the thickest, creamiest, most satisfyingly tangy yogurt you’ve ever spooned into a bowl. Forget those watery, expensive tubs from the store.
Learning how to make Instant Pot Yogurt is honestly a kitchen game changer, and it’s so ridiculously easy that you’ll kick yourself for not starting sooner.
This isn't just about saving cash, though we certainly do that. It’s about total control over ingredients and achieving that luxurious, velvety texture that store brands only dream of. The Instant Pot takes the fussy guesswork out of the process, acting like a brilliant, precise culinary nanny.
We’re diving deep into the exact temperatures, the critical timing, and the specific milk you need. Trust me, if you want a perfect batch every single time, this Instant Pot Yogurt guide is your new best friend. Let’s crack on!
The Science of Set: Why the Instant Pot Excels
The core of great yogurt relies on two things: heating the milk just right and keeping the culture perfectly comfortable while it eats lactose. Traditional methods require constant monitoring and juggling pots, but the beauty of the Instant Pot Yogurt function is its stability.
It manages the two required heating phases pasteurization and incubation with robotic accuracy.
Ditching store-bought: The Quality and Cost Difference
When you look at the price of a small jar of decent, full fat yogurt, it’s wild. Making a huge batch of homemade yogurt for the cost of one gallon of milk is the ultimate financial win. But beyond the savings, the quality is unparalleled.
This easy Instant Pot Yogurt recipe lets you use the highest quality ingredients, ensuring no strange fillers or stabilizers sneak into your breakfast.
Recipe Overview: Texture, Tang, and Yield Expectations
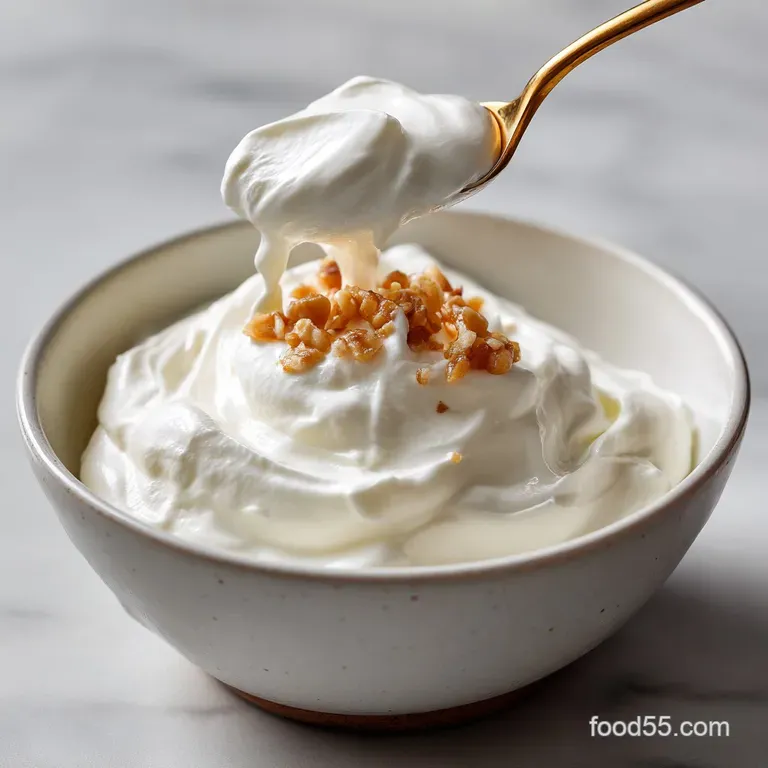
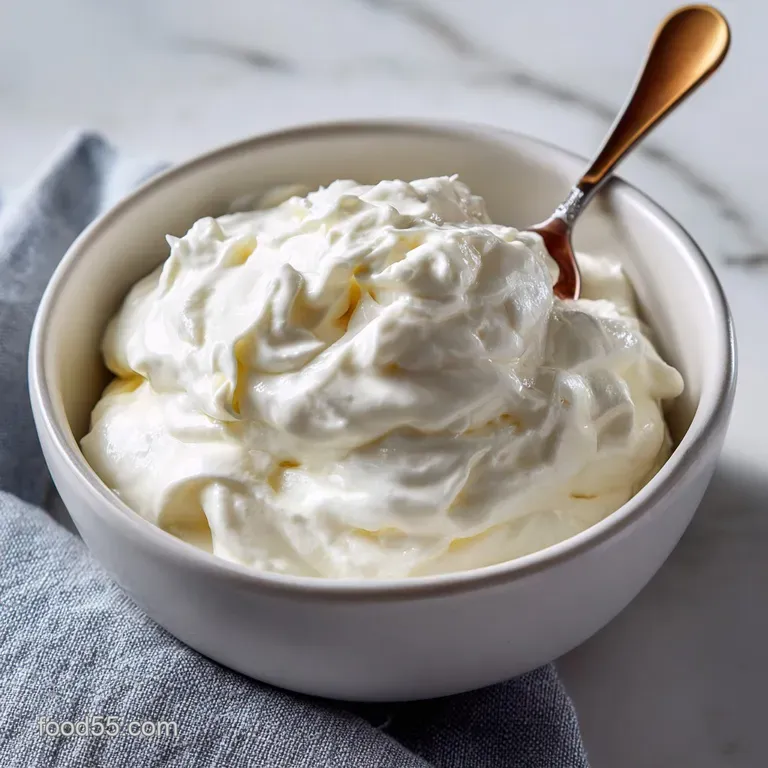
This recipe is designed to yield approximately 7.5 cups of yogurt from one gallon of milk a significant bounty! The texture will be thick and smooth, almost like European style yogurt, especially if you add that little bit of powdered milk (a non-negotiable hack for me).
The tang is entirely adjustable; simply let it incubate longer for a sharper flavor profile.
Defining "Silky Smooth & Set-for-Success"
A successful batch of homemade yogurt Instant Pot style should set up nicely, holding its shape when you gently tilt the pot after incubation. If it looks like a wobbly jelly, you've nailed it. If it’s still liquid like milk, something went sideways (and we'll cover that later!).
The key is avoiding any movement during the crucial culturing period.
Pasteurization Precision: Eliminating Undesirable Bacteria
The heating phase is crucial because you need to reach 180°F (82°C). This scalding process denatures the milk proteins, making them structurally sound so they can bind together later and create a thick product.
It also kills off any potentially competing bacteria that might mess with your delicate starter culture.
Stable Incubation: The Key to Consistent Thickening
Once the culture is added, the temperature must remain stable between 105°F and 115°F (40°C 46°C) for several hours. This is the whole magic trick of the Instant Pot.
Its dedicated "Yogurt" setting maintains this sweet spot perfectly, allowing the bacteria to multiply and convert lactose into lactic acid without interruption. That’s why the texture is always spot-on when you use the appliance.
Achieving Optimal Tanginess (Lactic Acid Development)
Tanginess directly correlates with time. The longer you let the incubation run say, 10 to 12 hours instead of the default 8 the more lactic acid the little cultures will produce. Do you want mildly tart yogurt for serving with fruit?
Stick closer to 8 hours. Are you aiming for a sharply flavored, Greek style base for Tzatziki? Go for the full 12.
Essentials for Silky Smooth Yogurt: Ingredients Breakdown
You really only need two things, but the optional additions make a massive difference in quality.
Choosing the Right Dairy (High vs. low-fat Content)
I’m going to be straight with you: start with whole milk. While you can use 2% milk, the fat content adds richness and prevents the final texture from getting gritty. If you absolutely must use lower fat milk, you must compensate with powdered milk to boost the protein content.
Do not use skim milk for your first attempt —you are setting yourself up for sadness.
Selecting Your Starter Culture (Probiotic Power)
Your starter must, absolutely must, contain live active cultures. Check the label of the store-bought yogurt you use. If it says "heat treated" or doesn't mention live cultures, it’s useless for this purpose. You can also buy powdered freeze dried culture packets, which are incredibly consistent.
The Debate: Can I Use UHT or Powdered Milk?
UHT (Ultra High Temperature) milk is often used successfully in "cold start" Instant Pot Yogurt methods because the proteins are already denatured. However, I prefer the taste and texture of traditionally scalded milk.
If you use UHT milk, you can skip the 'Boil' phase entirely, but the texture might be slightly different. As for powdered milk, I consider it mandatory! A small quarter cup of dry milk powder whisked in guarantees thickness.
| Ingredient | Substitute/Alternative | Notes |
|---|---|---|
| Whole Milk | 2% Milk + Powdered Milk | Will be thinner, may need straining. |
| Live Yogurt Starter | Freeze dried Culture Packet | Requires less base yogurt for seeding. |
| Sweetener | Agave, Stevia, Monkfruit | Add after culturing to avoid impacting bacteria. |
Tips for Making Greek Style Yogurt (The Essential Straining Method)
If you crave that dense, spoon stands-up-straight Greek yogurt, the trick isn't in the Instant Pot, but what happens after . Once your batch is chilled, strain it using a cheesecloth lined sieve. Let the whey drain off in the refrigerator for 2 to 4 hours.
You decide when to stop based on your desired level of thickness.
Method: How to Make Instant Pot Yogurt (step-by-step)
This process has three non-negotiable phases. Follow these exact Instant Pot Yogurt instructions for guaranteed success.
Scalding the Milk (The 'Boil' Phase)
- Clean House: Give your inner pot a quick scrub with hot water to ensure no lingering food residue interferes with your cultures. Pour 8 cups of milk into the pot, whisking in the optional powdered milk now.
- Heat: Place the lid on (no need to seal the vent). Select the Yogurt function, then press Adjust until the display reads Boil .
- Monitor the Temperature: The IP will heat the milk. Once the cycle finishes, check the temperature. It must read 180°F (82°C). I highly recommend using a separate thermometer to double check this critical phase.
The Critical Cooling Phase (Hitting the Sweet Spot)
- Cool Down: Remove the inner pot and let it cool. You can set the pot inside a large basin filled with ice and water to speed this up dramatically I’m impatient, so I always use the ice bath method.
- Hit the Target: Wait until the milk cools to between 105°F and 115°F (40°C 46°C). This is the most critical temperature window. Too hot, and you'll kill the starter. Too cool, and the culture will be sluggish.
Incorporating the Starter Culture (Inoculation)
- Temper the Starter: In a separate small bowl, whisk your 2 tablespoons of live yogurt starter with about 1/2 cup of the warm milk. This "wakes up" the culture gently.
- Combine: Pour the starter mixture back into the large pot of milk. Whisk it in very gently until fully incorporated. If adding optional sweeteners like honey, do it now.
Setting the Incubation Timer and Process
- Incubate: Place the inner pot back into the Instant Pot base. Press the Yogurt function and adjust the time. I usually set mine for 10 hours for a nice balance of mildness and tang.
- Walk Away: Put the lid on (again, sealing the vent doesn't matter, it’s just covering the pot). Do not touch, bump, or even breathe too heavily on the Instant Pot for the entire duration. This undisturbed rest is vital.
Troubleshooting Your Batch and Pro Tips
If your first batch of Instant Pot Yogurt isn't perfect, don’t panic! I once used old yogurt that had been hanging out in the back of the fridge for weeks; the resulting watery mess taught me a painful lesson about fresh starters.
Why Your Yogurt Didn't Set Up (Common Errors)
The failure to set is almost always temperature related. Did you add the culture before the milk cooled below 120°F? If so, you scorched the cultures. Did you add the culture when the milk was below 100°F? The cultures weren't warm enough to activate fully. Always, always check with a thermometer.
Dealing with Gritty or Ropy Texture
If the yogurt feels grainy, it usually means the milk wasn't heated high enough (below 180°F) or wasn't held there long enough to fully denature the proteins. Ropy texture is rare but typically signals a contaminant, often introduced by unclean equipment or an impure starter.
Make sure your pot is sterilized.
The Importance of Clean Equipment (Avoiding Spoilage)
Bacteria is the name of the game, but only the right kind of bacteria. Any residual soap, old food, or airborne contaminants can introduce undesirable cultures that might cause off-flavors or prevent your Instant Pot Yogurt from setting properly.
A quick wash with boiling water before adding the milk is a good safeguard.
Chef's Note: If your yogurt is too thin after chilling, don't throw it out! Strain it for 6– 8 hours and it will be salvageable, albeit yielding a smaller amount.
Maximizing Freshness: Storing Your Homemade Yogurt
Best Practices for Refrigeration
Once incubation is done and you've moved past the initial excitement, get the yogurt into the fridge immediately. Cooling is the final step that halts the culturing process and firms the texture. Transfer the finished yogurt into airtight containers. It will last beautifully for 10 to 14 days.
If it starts to get very tangy or develops visible mold, compost it.
Separating Whey: Is It Safe and How to Use It?
The clear, yellowish liquid that collects on top of your yogurt is whey. It is completely safe and normal. This is actually a highly nutritious byproduct! If you don't strain the yogurt, just stir the whey back in for a slightly thinner consistency. If you strain it to make Greek yogurt, save the liquid it’s fantastic to use instead of water when baking sourdough or making my favorite Korean Sweet Potato Bread: Chewy Goguma Ppang Illusion .
Beyond Breakfast: Creative Ways to Enjoy Your Plain Yogurt
Once you master this Instant Pot Yogurt recipe , you’ll have plenty of plain yogurt on hand. Don't limit it to just granola!
Sweet Enhancements (Honey, Maple, Jam)
These are the simplest additions. You can sweeten individual servings with a swirl of maple syrup, some local honey, or a spoonful of homemade jam. For a hearty start, I sometimes blend a scoop of this yogurt with fruit and mix it into my Breakfast Foil Packets: The Full English Sausage Sweet Potato Meal for a creamy sauce element.
We’re done with store-bought sadness. You now possess the ultimate blueprint for consistently incredible Instant Pot Yogurt . Go forth and culture!

Recipe FAQs
Why didn't my yogurt set properly, and what can I do next time?
Runny yogurt is often caused by the incubation temperature being too low or the starter culture being old/inactive. Ensure you allow the milk to cool precisely between 105°F and 115°F before adding the starter, as higher temperatures kill the bacteria and lower temperatures make them dormant.
Using ultra pasteurized milk can sometimes hinder setting due to altered protein structure, so opt for standard whole milk if possible.
Do I have to use the dedicated "Yogurt" function, or can I use "Sauté" for the incubation?
While you can use the Sauté function to bring the milk to the boil (scalding), the dedicated "Yogurt" function is essential for the long incubation stage. This setting maintains the perfect, stable temperature range (around 110°F) necessary for the bacteria to thrive and multiply.
Using the Sauté function or attempting manual temperature control will likely overheat or underheat the cultures, leading to yogurt failure.
My yogurt is too sour/tangy. How can I adjust the flavor for a milder result?
Tanginess is a direct result of the incubation time; the longer the incubation, the more lactic acid the cultures produce. For a milder flavor, reduce the incubation time to 6 to 8 hours instead of the standard 10 or 12 hours.
Ensure you chill the yogurt immediately after the incubation phase, as the cold temperature halts the bacterial activity and prevents further souring.
Can I use non-dairy milks (like almond or oat) with this recipe?
Yes, you can use non-dairy alternatives, but the process and results vary significantly because they lack the necessary dairy proteins needed for natural thickening. You must typically add a thickening agent, such as agar agar or tapioca starch, and use specialized vegan starter cultures to ensure the mixture properly sets.
Be aware that the texture will be different from traditional dairy yogurt.
How do I transform this regular Instant Pot yogurt into thicker Greek yogurt?
To achieve Greek yogurt consistency, you must strain the finished product through a cheesecloth lined sieve or a specialized strainer after incubation and chilling. This process removes excess liquid whey, which concentrates the solids and results in a much thicker, denser product.
The longer you strain it (typically 4 to 8 hours), the more concentrated and thicker the yogurt will become.
How long will homemade Instant Pot yogurt stay fresh in the refrigerator?
When stored properly in clean, airtight containers, homemade yogurt typically remains fresh and delicious for about 10 to 14 days. The high concentration of live cultures and acidity helps preserve it naturally, extending the shelf life past many commercial brands.
Always ensure containers are sterilized before use to prevent any external contamination.
Can I freeze the yogurt, and will it maintain its texture?
While you can freeze homemade yogurt, the texture will change significantly; freezing causes the liquid (whey) and solids to separate upon thawing, resulting in a somewhat grainy consistency.
For the best results, use thawed yogurt in smoothies, baking, or applications where the texture is less critical, rather than consuming it plain. Do not use previously frozen yogurt as a starter culture for new batches.
Instant Pot Yogurt Recipe Success

Ingredients:
Instructions:
Nutrition Facts:
| Calories | 335 kcal |
|---|---|
| Protein | 19.4 g |
| Fat | 17.2 g |
| Carbs | 27.5 g |
