Low-Carb Sandwich Thins (Gluten-Free)
- Recipe Overview
- Key Benefits
- Essential Ingredients Guide to Low-Carb Sandwich Thins (Gluten-Free)
- Mastering Professional Cooking: Your Go-To Guide
- Pro Tips & Secrets for Perfecting Your Low-Carb Sandwich Thins
- Perfect Presentation: Making Your Sandwich Thins Shine
- Storage & Make-Ahead Tips
- Creative Variations to Try
- Complete Nutrition Guide
- Frequently Asked Questions
- 📝 Recipe Card
Oh my gosh! let me tell you about this one day when i desperately needed a snack but didn’t want to go off my low-carb game.
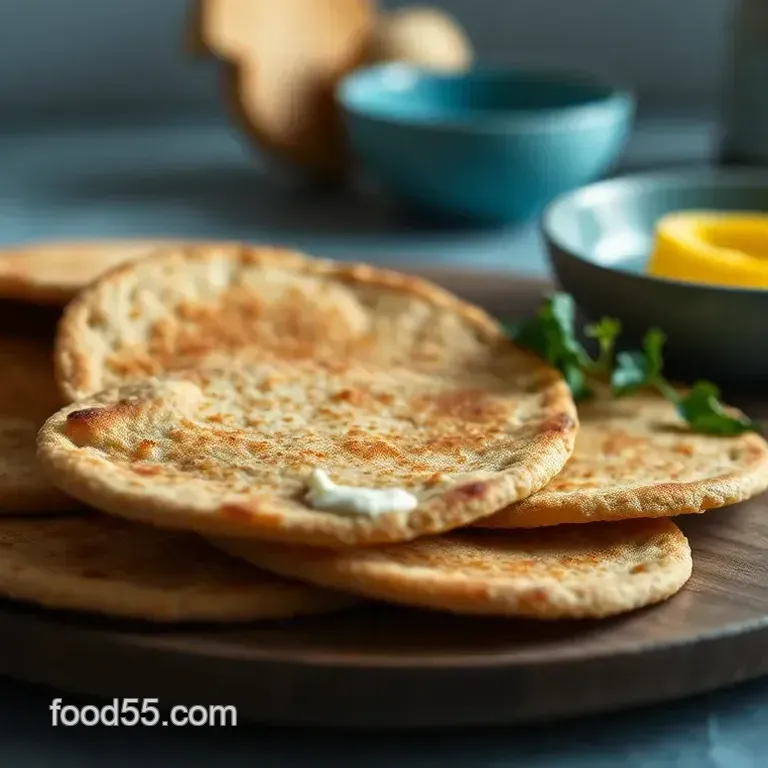
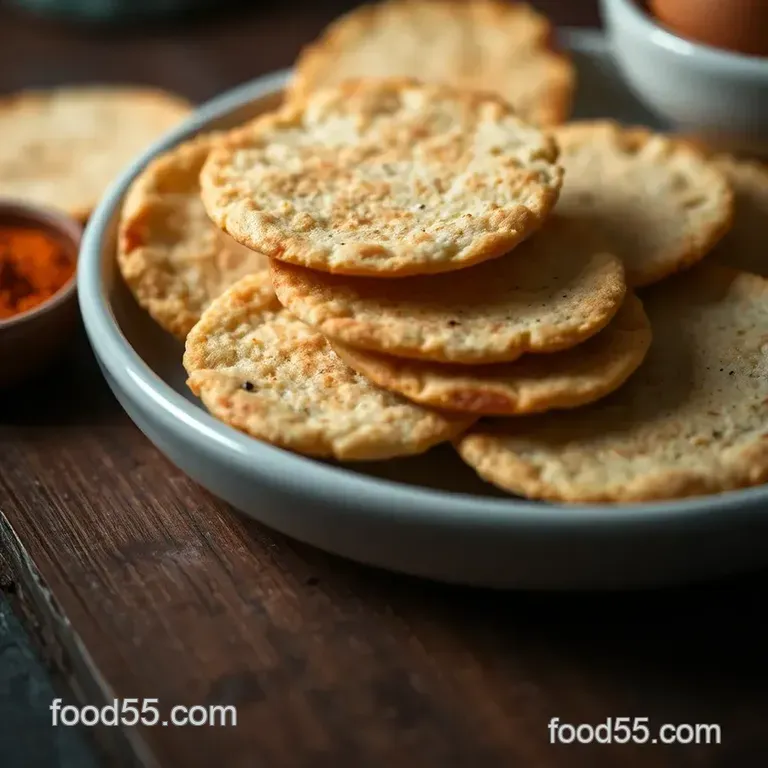
After rummaging through my kitchen, i came up with a miracle recipe: low-carb sandwich thins (gluten-free) ! seriously, if you’re like me, always looking for healthy lunch solutions without sacrificing taste, these sandwich thins are about to be your new best friend.
Picture this: soft, chewy thins that can hold any delicious filling you’ve got on hand. yup, it’s as good as it sounds.
These aren't just your average sandwich thins; they bring some history and relevance to the table. sandwiched between the past and the present, this recipe is rooted in the world of artisan bread, yet it's been tailor made for today's low-carb lovers, especially those dabbling in gluten-free cooking .
Plus, whipping these up takes only about 25 minutes! talk about a quick bread recipe . and the cost? a steal compared to store-bought alternatives!
Recipe Overview
Dating back to when bread was primarily made at home, people have always been searching for ways to make low-carb alternatives.
Fast forward to today, and there’s a whole community dedicated to keto friendly recipes . these low-carb sandwich thins are now a popular solution for anyone trying to maintain a gluten-free diet , giving us that bread like texture we all crave without the carbs.
Now, let’s get real about the time it takes. prep time is just around 10 minutes , with a cook time of about 15 minutes .
That means you can go from zero to sandwich hero in just under half an hour! the level of difficulty? beyond easy.
If you can mix and roll a dough, you’re golden.
While prices can vary, you can easily whip up a batch for around $10, yielding 8 sandwich thins —no more paying crazy prices for low-calorie sandwich options at specialty stores!
Key Benefits
Now, if you’re still on the fence about trying these out, let’s chat about those key advantages ! first off, the health benefits are impressive.
Packed with protein thanks to the cream cheese and eggs, you can cure those mid-day cravings without breaking your diet.
Plus, flaxseed health benefits in the golden flax meal provide fantastic fiber without any guilt.
What’s particularly exciting is that these sandwich thins are not just for sandwiches. oh no, they can double as tasty low-carb snacks or even pizza crusts.
Serve them for brunch, lunch, or whenever you need a weekend meal idea . they work beautifully for entertaining guests too everyone will be asking how you made them!
The uniqueness of these thins sets them apart from traditional bread. with the added almond flour recipes and cheese base, they’re not only gluten-free but also offer an indulgent texture that grain free bread just can’t compete with.
Seriously, who doesn't love a touch of cheesy goodness?
As we get ready to dive into the ingredients, don't let the thought of complicated cooking deter you. just grab your supplies, and let’s go! there’s nothing better than the joy of pulling a fresh batch out of the oven, ready to elevate healthy eating on a budget.
Now let's check out what you need to make these bad boys come to life!
Essential Ingredients Guide to Low-Carb Sandwich Thins (gluten-free)
Hey there, kitchen warriors! if you’re on the lookout for a fantastic bread alternative, let me introduce you to low-carb sandwich thins (gluten-free) .
Trust me, once you whip these up, you’ll forget about that store-bought stuff. they’re quick, easy, and just perfect for your keto friendly recipes .
So, let’s break down what you need!
Premium Core Components
First things first, let’s talk ingredients . For our Low-Carb Sandwich Thins, you’ll need the following:
- 2 cups shredded whole milk mozzarella (approx. 200g)
- 2 ounces cream cheese (approx. 57g)
- 2 large eggs
- 1.5 cups almond flour (approx. 150g)
- ¼ cup golden flax meal (approx. 25g)
- 1 teaspoon baking soda
- ½ teaspoon xanthan gum (optional)
When picking out your mozzarella, look for that full fat, low-moisture type for the best texture. a little tip: if you’ve never worked with xanthan gum before, it’s a game changer for gluten-free baking, giving your bread a lovely chewiness.
Signature Seasoning Blend
Honestly, you don’t need a ton of spices to make these thins sing. the cheese and eggs naturally lend a rich flavor.
But, if you're feeling adventurous, toss in some dried herbs like rosemary or thyme . those are great flavor enhancers that can really kick things up a notch.
If you’re a fan of regional variations, consider mixing in some italian herbs for a twist!
Smart Substitutions
Now, let’s be realistic. sometimes, you gotta make do with what ya have. if you’re out of almond flour, swap it for sunflower seed flour perfect for those nut-free baking options .
Or, you can try coconut flour, but keep in mind, it absorbs more moisture, so adjust your liquids!
And if you're on a dairy-free journey, don’t fret! Try using a vegan cheese alternative instead of mozzarella. The texture may change a bit, but it’ll still be a delight.
Kitchen Equipment Essentials
You don’t need fancy gadgets for this one. Just grab some simple tools. You’ll need:
- A microwave safe bowl
- Rolling pin
- Parchment paper
- Baking sheets
And if you've got one, a bench scraper makes dividing the dough a breeze, but your hands work just as well! honestly, i remember the first time i tried rolling dough out, and it was a bit of a mess.
Learning curve, am i right?
Conclusion
There you have it, folks! with just a handful of ingredients and tools, you can create these scrumptious low-carb sandwich thins.
They’re not just easy to make; they’re versatile enough for healthy lunch solutions or even low-calorie sandwich options .
Before we dive into the step-by-step instructions, just remember: if the dough feels sticky, give it a few minutes to chill.
Trust me; it will be easier to work with later. ready to get baking? let’s do this!
Mastering Professional Cooking: Your Go-To Guide
Oh my gosh, if you’re like me, the kitchen can turn into a battleground sometimes! but honestly, with a solid professional cooking method , it can feel way more like a fun food adventure!
let's walk through essential preparation steps, a clear step-by-step process, expert techniques, and some success strategies that’ll have you cooking like a pro in no time.
Whether you’re whipping up some low-carb sandwich thins (gluten-free) or your grandma's classic lasagna, these tips will elevate your cooking game!
Prep Like a Pro: Essential Steps
First off, let’s dive into mise en place . it sounds fancy, huh? but really, it just means getting everything ready before you start cooking.
I can’t tell you how many times i’ve rummaged through my pantry mid-recipe, and it always ends in chaos! so, gather all your ingredients, tools, and equipment before you even think about turning on the stove.
This saves time and keeps your kitchen looking organized.
Speaking of time time management is key! mark out your prep and cook times. for example, if you’re making those delicious low-carb sandwich thins, give yourself about 10 minutes for prep and 15 minutes for cooking .
Plan your cook times around your tasks; while something’s baking, tidy up or get started on the next step. trust me, it’ll feel less overwhelming!
And let’s not forget safety considerations . of course, you want to keep those fingers intact, right? use sharp knives with care and always keep a dish towel nearby to catch any spills or burns.
A little caution goes a long way in avoiding kitchen drama.
step-by-step Process: Easy Peasy!
Let’s get into the juicy stuff, shall we? Here’s how to approach your cooking process, step-by-step:
- Preheat the Oven : Set it to 400° F ( 200° C) . You want that oven nice and hot for those sandwich thins!
- Melt Cheese : Combine 2 cups of shredded mozzarella and 2 ounces of cream cheese in a microwave safe bowl. Microwave for 20 seconds , stir, and repeat in 10-second intervals until you have a smooth, gooey mix.
- Add in 2 large eggs and stir until combined. No big clumps, okay?
- In a separate bowl, mix 1.5 cups of almond flour , ¼ cup golden flax meal , 1 teaspoon baking soda , and ½ teaspoon xanthan gum if you're using it.
- Blend the two mixtures it's going to be sticky but roll with it!
- Divide dough into 8 equal portions and, using parchment paper, roll each to about 4 inches wide and ¼ inch thick .
- Then, bake those beauties for 15 minutes , until they’re slightly golden.
Expert Techniques: Get It Right!
Now, let’s talk about some expert techniques that can make or break your dish. perfect cooking comes from knowing when something’s done.
Look for visual cues for doneness those edges should be golden, and a toothpick should come out clean. pay attention to temperature control ; that 400° f is crucial for getting a nice rise and firm texture.
Always have quality checkpoints . Is your dough too dry? Add a splash of water. Too sticky? Let it rest for 5 minutes. Don't sweat it; cooking is learning.
Success Strategies: Avoid the Pitfalls
Let’s not ignore the common mistakes. A dry sandwich thin? Yikes. One hit of carelessness can ruin your batch. Here are a couple quick quality assurance tips : Measure precisely! And use full fat, low-moisture mozzarella for the best results in your homemade bread recipes !
Also, consider make-ahead options ; these thin slices can be stored in the fridge or freezer. just pop them in the toaster and you’ve got a quick low-carb snack! your future self will thank you for those easy low-carb meals .
So, ready to cook up some magic? The world of gluten-free baking and keto friendly recipes is just waiting for you!
And hey, don’t miss out next we’ll dive into more additional information to make you a kitchen ninja! Cook jargon, tips, or even some favorite brands for ingredients. Catch you soon!
Pro Tips & Secrets for Perfecting Your Low-Carb Sandwich Thins
Oh my gosh, let me tell you about my experience with these low-carb sandwich thins (gluten-free) ! just the other day, i was prepping for a lunch party, and these little gems became the star of the show.
Honestly, there are a few pro tips and secrets that took my sandwich game up a notch.
Time Saving Techniques
First off, if you wanna save yourself some precious time, prep your ingredients ahead of time. i usually shred my mozzarella on sunday and store it in the fridge.
This way, when monday rolls around, it’s just a matter of tossing everything in a bowl and mixing! plus, using a microwave to melt the cheese? total game changer! just remember to microwave in short bursts so you don’t end up with rubbery disaster.
Flavor Enhancement Tips
Now, flavor is everything, right? one of my favorite tricks is adding herbs to the dough. i mean, who doesn’t love a little kick? dried oregano or garlic powder brings these sandwich thins to life.
Your taste buds will be thanking you, i swear!
Presentation Advice
Presentation matters too, friends! arrange your sandwich thins on a pretty platter and sprinkle some fresh parsley on top. this little detail makes a huge difference.
My guests couldn’t resist snapping pics for their insta stories! you know how it goes if it’s not on instagram, did it even happen?
Perfect Presentation: Making Your Sandwich Thins Shine
Let's talk plating techniques . Keep it simple and clean! Pair these with vibrant sides, like a colorful salad or a bright, zesty dip. A pop of color never hurts.
Garnish Ideas
Here’s a quick idea: Try topping your thins with fresh avocado or a dollop of herbed cream cheese. These garnishes not only look stunning but add a burst of flavor, making your sandwiches even more delicious!
Storage & make-ahead Tips
Now, onto storage! If you’re like me and love meal prepping, you might be wondering how to store these. Just place them in an airtight container in the fridge for about a week, but trust me, they’ll be gone way before then because they're just that good!
Freshness Duration
To maximize freshness, reheat them in the oven for about 5 minutes at 350° f ( 175° c) to bring back that warm, chewy texture.
So, whenever you crave easy low-carb meals , these thins are just a warm-up away!
Creative Variations to Try
Okay, let’s spice things up. one of my go-tos when entertaining is creating seasonal twists . in the fall, for example, i love adding cooked pumpkin and spices to my dough for an autumn inspired treat.
Dietary Modifications
You can easily make these thins vegan by swapping out cream cheese for a dairy-free alternative, and while you’re at it, ditch the eggs.
There are plenty of awesome egg-based recipes out there to help bind without the yolk!
Complete Nutrition Guide
Now that we’ve covered the fun stuff, let’s get real for a second. these low-carb sandwich thins pack a punch when it comes to nutrition.
With just 2g net carbs per thins, they’re perfect for anyone on the gluten-free diet .
Portion Guidance
Consider this: if you're sticking to low-calorie sandwich options , you could pair one or two thins with a healthy scoop of tuna salad for a satisfying lunch without the carb overload.
In summary, whether you opt for classic ham and cheese, or go wild with your favorite spreads, these low-carb sandwich thins are bound to become your new lunch obsession.
They bring together ease, taste, and nutrition seamlessly. so, go ahead, gather your ingredients, and let’s make some homemade bread recipes that’ll surely impress! happy cooking!
Frequently Asked Questions
What are Low-Carb Sandwich Thins (gluten-free) made from?
The Low-Carb Sandwich Thins are primarily made from shredded mozzarella cheese, cream cheese, almond flour, and golden flax meal. These ingredients combine to create a dough that's not only gluten-free but also low in carbohydrates, making it a perfect option for those on a keto diet or anyone looking to reduce their carb intake.
Can I make Low-Carb Sandwich Thins ahead of time?
Absolutely! You can prepare the Low-Carb Sandwich Thins in advance and store them in an airtight container. They can last in the fridge for about a week or be frozen for up to 3 months. Just pop them in the toaster or oven to warm them up when you're ready to enjoy!
How can I customize the flavor of my Low-Carb Sandwich Thins?
You can easily add herbs or spices to the dough for added flavor. Consider incorporating dried herbs like basil or oregano, or even some garlic powder. For a spicy kick, a pinch of chili flakes works wonders perfect if you fancy a bit of heat with your lunch!
What’s the best way to store my Low-Carb Sandwich Thins (gluten-free)?
Store your cooled Low-Carb Sandwich Thins in an airtight container in the fridge for up to a week. For longer term storage, place them in a freezer safe bag, separating layers with parchment paper to avoid them sticking together. Thaw in the fridge overnight before using!
Can I use a different type of flour instead of almond flour?
Yes, if you need a nut-free alternative, sunflower seed flour is a great substitute for almond flour. Keep in mind, however, that it may slightly alter the taste and texture, but it will still yield a delicious sandwich thin!
Are there any good serving suggestions for Low-Carb Sandwich Thins?
These sandwich thins are incredibly versatile! Pair them with a light salad for a refreshing meal, or enjoy them with homemade soup like a classic tomato soup, it's a comforting combo. You could also use them as a base for personal mini pizzas or serve with various dips for a snack.
Low Carb Sandwich Thins gluten-free

Ingredients:
Instructions:
Nutrition Facts:
| Calories | 277 kcal |
|---|---|
| Protein | 14 g |
| Fat | 22 g |
| Carbs | 5 g |
| Fiber | 3 g |
| Sodium | 473 mg |
