3 Ingredient Mug Cake: Speedy Vanilla Treat
- Instant Gratification: Meet the Classic 3 Ingredient Mug Cake
- The Science Behind the Fluff: Achieving Perfect Texture
- Your Essential Shopping List: Just Three Simple Items
- Customisation and Vegan Swaps for the Speedy Treat
- The Quick Method: Preparing Your Vanilla Mug Cake Batter
- Microwave Timing: Cooking the 90 Second Dessert Perfectly
- Troubleshooting and Chef's Essential Tips
- Dressing It Up: Best Serving Suggestions for Instant Cake
- Can You Store a 3 Ingredient Mug Cake?
- Recipe FAQs
- 📝 Recipe Card
Instant Gratification: Meet the Classic 3 Ingredient Mug Cake
That moment when the microwave pings and you get that first, sweet blast of hot vanilla hitting your face? That’s pure bliss, honestly. It smells exactly like proper, freshly baked birthday cake, but you know it took less than two minutes of actual effort.
This specific 3 Ingredient Mug Cake is a total lifesaver, especially when those late night sugar cravings strike and making a full dessert feels way too much hassle.
It’s shockingly fast, uses cheap pantry staples, and somehow, this stripped back version tastes ten times better than the complicated ones I've tried. It's the ultimate quick mug cake recipe.
Trust me, I’ve tried all the versions the ones with eggs, the ones with oil, the complicated layers and they often turn out rubbery or greasy. But this simple three item foundation is where the magic truly lives. Let's crack on and get you baking instantly.
The Science Behind the Fluff: Achieving Perfect Texture
I know, you’re thinking: How can flour, sugar, and milk turn into actual, fluffy cake? The secret to this specific 3 Ingredient Mug Cake is the self raising flour.
That flour is already loaded with leavening agents that's baking powder, essentially which activates immediately when mixed with liquid and super heats in the microwave. The result is rapid, aggressive lift, giving you an easy mug cake recipe that is surprisingly tender.
The History of the Microwave Dessert Craze
Way back when, people tried making full size cakes in the microwave. Spoiler alert: they were often dense and dry because the corners cooked long before the centre. The genius shift to the single serving mug cake format was brilliant because the rapid, contained heat and small volume cook perfectly together, containing all the steam.
It was the birth of true instant dessert gratification.
Why This Stripped Back Version Is Fundamentally Better
Most mug cakes call for eggs and oil, which can easily turn the result chewy or greasy if they are not perfectly measured or if you use too small a mug. By skipping the egg entirely, this 3 Ingredient Mug Cake recipe eliminates the main culprit for that rubbery texture.
We rely purely on the milk for moisture and the flour's rising power, resulting in a cleaner, more satisfying crumb.
Balancing Wet and Dry: The Optimal Batter Ratio Secret
The ratio of 1/3 cup flour to 3 tablespoons of milk is absolutely critical here. If you use too much milk, the batter turns soupy and sinks tragically when you pull it out. Too little milk, and you’ll get a dense, dry brick.
The final batter should look like a very thick pancake mix; slightly sticky, but definitely not pourable.
The Role of the Mug Size and Microwave Power Settings
Mug size is vital. You need a big, high sided mug I always recommend 10 12 oz capacity to give the cake room to rise dramatically without spilling over. If the batter comes more than halfway up the sides before cooking, you risk a disastrous overflow, and no one wants to scrape sticky cake off the bottom of their microwave!
How to Prevent a Chewy or Rubber Mug Cake
It boils down to two things: mixing and timing. Over mixing develops gluten, which makes the cake tough think of the difference between bread and cake. Only stir until the dry streaks disappear. And don’t overcook! The second the top looks dry and set, pull it out.
Five seconds too long will instantly turn your soft vanilla mug cake into a disaster.
Your Essential Shopping List: Just Three Simple Items
This is truly the easiest grocery shop you’ll ever have for a dessert. You need just three common staples to create this perfect 3 Ingredient Mug Cake . Seriously, if you have flour, sugar, and milk, you are minutes away from warm, fluffy goodness.
| Ingredient | Role | Substitution |
|---|---|---|
| Self Raising Flour | Provides Structure and Lift | Plain Flour + 1 tsp Baking Powder |
| Caster Sugar | Sweetness and Fine Texture | Granulated Sugar (whisk into flour well) |
| Whole Milk | Hydration and Tenderness | Oat Milk (preferred) or Almond Milk |
Customisation and Vegan Swaps for the Speedy Treat
Deciphering the Three Core Ingredients
We use self raising flour specifically because it eliminates the need for a fourth ingredient (baking powder) and saves a step. Caster sugar is always preferred because its fine crystals dissolve much faster in such a quick recipe, preventing that unpleasant grainy crunch.
Whole milk delivers the best richness, making the crumb incredibly tender.
Ingredient Quality and the Importance of Vanilla Flavouring
Okay, if you want this quick mug cake to taste professional, you need a secret (optional) fourth ingredient: a tiny splash of vanilla extract. Since we are dealing with such a stripped back profile, the quality of that vanilla truly shines through, enhancing the basic sweetness.
It makes the difference between "okay" and "OMG."
Scaling Up: Adjusting Quantities for Larger Servings
Honestly, don't try to scale this up in a bigger bowl and microwave it longer. Microwave cooking means large volumes cook terribly unevenly. If you need two servings of this 3 Ingredient Mug Cake , make two separate mugs, one right after the other.
That is the only way to guarantee two perfect, fluffy servings.
dairy-free and Alternative Liquid Options
For a vegan or dairy-free option, oat milk works beautifully. It generally has a slightly higher fat content than almond milk, which helps mimic the tenderness whole milk provides. Just keep the measurement ratio the same.
Boosting the Flavour (The Optional Fourth Ingredient)
If you have a minute, toss in a few chocolate chips, or maybe a tiny smear of jam in the centre before cooking. This turns your simple 3 ingredient mug cake into a gooey dream. For a truly decadent finish, a spoonful of peanut butter tucked in the middle creates a molten core when cooked.
The Quick Method: Preparing Your Vanilla Mug Cake Batter
This is where speed matters most. The moment the milk hits the self raising flour, the leavening process starts working. We need to mix it, microwave it, and eat it before it loses its momentum. Making this perfect 3 ingredient vanilla mug cake is literally a race against the clock.
Step 1. Combine the Dry: Place the self raising flour and caster sugar directly into your large, microwave safe mug.
Step 2. Mix and Aerate: Using a small fork, lightly whisk the dry ingredients together for about 10 seconds. This is critical it ensures the leavening agent is evenly distributed and breaks up any lumps in the sugar, guaranteeing a better rise.
Step 3. Add the Milk: Pour the measured whole milk into the center of the dry ingredients. If you’re using vanilla essence, this is the moment to add your dash.
Step 4. Gentle Whisking: Using the same fork, stir the mixture until just combined. Start slowly from the bottom of the mug and work your way up. Stop stirring the moment you no longer see streaks of dry flour.
Over mixing develops gluten and results in a tough, rubbery cake we’re aiming for fluffiness, not a bouncy ball!
Step 5. Clean the Sides (Quickly): Use a spatula or your finger to scrape down any sticky batter clinging to the upper sides of the mug, ensuring a clean, centred rise in your mug.
Microwave Timing: Cooking the 90 Second Dessert Perfectly
Choosing the Right Mug: Depth vs. Width
Go for width over depth every time. A wider surface area allows the heat waves to penetrate the batter more easily, ensuring the center is cooked through at the same rate as the edges. If your mug is tall and narrow, you'll often end up with a cooked outer ring and a liquid core.
Mixing Techniques for a Lump Free Finish
Use a fork! The tines of a fork break up flour clumps better than a spoon does. Remember: we are making a 3 ingredient mug cake no egg , so we don't have the structure of an egg to protect us from overworking the batter. Keep the mixing quick and gentle.
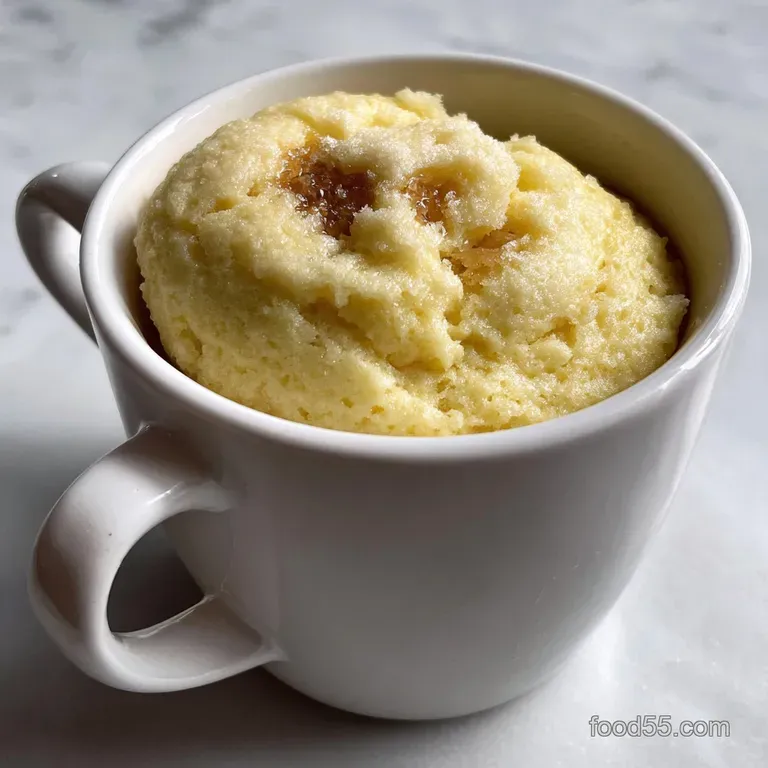
The Visual Cues of a Perfectly Cooked Cake
Place the mug centrally in the microwave. Cook on High power (1000W) for 60 seconds . During cooking, watch for the rise it will puff up dramatically, often peaking above the rim. When it's done, the surface will look mostly matte and set.
If the cake looks shiny or still gooey, especially in the centre, it needs 10 more seconds. When you touch it gently, it should bounce back without leaving a wet dent.
Adjusting Cook Time Based on Microwave Wattage
This is the single most important factor for avoiding a dry result. My recipe timing (60 90 seconds) assumes 1000W. If you have an older, lower power microwave (say 700W), you must add 30 45 seconds. It is always safer to undercook and add 10 seconds than to overcook and end up with sad, dry cake dust.
Troubleshooting and Chef's Essential Tips
The Single Biggest Mistake Mug Cake Bakers Make (Overmixing)
I know I’ve said it twice, but I’m repeating it because I made this mistake so often when I first started making 3 ingredient mug cake variations. Overmixing is fatal! The texture goes from fluffy cake to a chewy, unfortunate sponge.
Embrace a few tiny lumps of batter; they will magically disappear during the rapid cooking process.
Fixing a Dry or Sunken Mug Cake
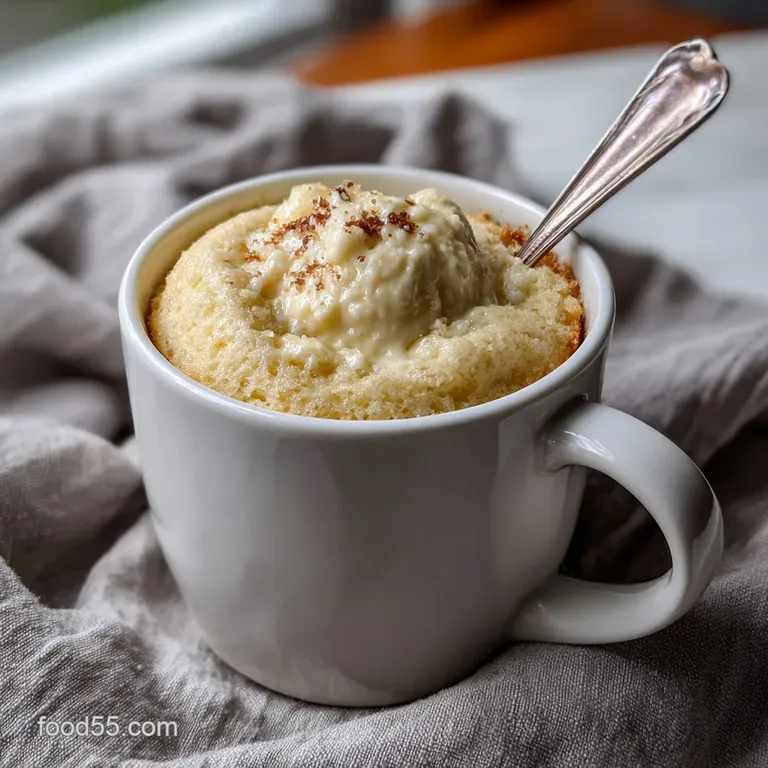
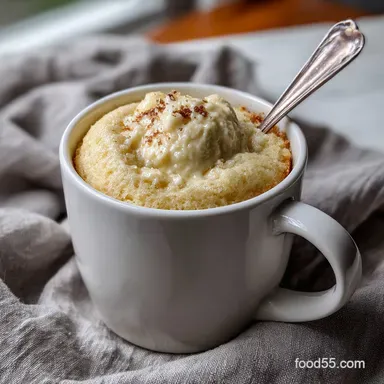
If the final result is dry, you overcooked it. You can't fix the internal texture, but you can save the situation by generously smothering it in melting ice cream or thick cream. If it sank dramatically in the middle, it was likely over mixed, or perhaps undercooked slightly.
Ensure you thoroughly whisk the flour and sugar together before adding the milk.
Ensuring Even Cooking Across All Microwaves
Always put the mug in the center of the turntable. If your microwave is older and lacks a turntable, pause the cooking halfway through (at 30 seconds) and turn the mug 180 degrees yourself. This guarantees more consistent heat distribution, resulting in a better rise.
Dressing It Up: Best Serving Suggestions for Instant Cake
Simple Toppings for Zero Effort
A simple sprinkling of powdered sugar makes everything look instantly fancier, right? Failing that, a teaspoon of jam stirred through the warm cake (raspberry is my favourite) provides a bright, fruity lift. If you’re feeling extra luxurious, pull out some leftover caramel sauce from making Gooey Butter Cookies: Easy St. Louis Cake Mix Recipe and drizzle it over the top.
Warming Pairings (Coffee, Tea, and Milk)
This is the perfect accompaniment to a strong espresso or a rich English Breakfast tea. The warm, slightly moist vanilla flavour begs to be paired with something hot and comforting. Alternatively, pour a splash of cold milk over the warm cake for a simple, nostalgic treat.
Can You Store a 3 Ingredient Mug Cake?
Can you store a 3 ingredient microwave cake ? Yes, technically, but honestly, why would you? This dessert is designed for instant consumption. It takes four minutes to make from start to finish.
If you make it ahead, you lose the crucial warm, steaming texture that makes it so amazing fresh out of the microwave.
Best Practices for Enjoying Leftovers
If you absolutely must save half, cover the mug tightly in plastic wrap and store it in the fridge for up to 24 hours. Reheat it in the microwave for 15 20 seconds maximum. Be warned: it will be significantly denser and slightly drier than the fresh version.
Really, the best practice is to just whip up another quick mug cake when the craving strikes. This 3 Ingredient Mug Cake is best enjoyed immediately!

Recipe FAQs
Does this 3-ingredient mug cake require an egg?
No, the beauty of the 3-ingredient mug cake is that it relies on chemical leavening (such as baking powder, often integrated into self rising flour) rather than an egg for structure.
The lack of egg keeps the texture ultra light and means you don't need to worry about cooking it completely through like a traditional cake.
How can I adapt this vanilla recipe to make it chocolate or use cocoa powder?
To switch to chocolate, substitute 1 tablespoon of the flour with 1 tablespoon of unsweetened cocoa powder (this keeps your ingredients count low). You must also add an extra ½ teaspoon of liquid, as cocoa absorbs moisture and can dry out the cake quickly.
For a decadent finish, stir in a few chocolate chips before microwaving.
Why did my mug cake turn out dry and rubbery?
A dry or rubbery texture almost always means the cake was overcooked in the microwave. Since microwave power varies greatly, always start checking for doneness at the minimum recommended cook time. The cake is done when the top looks set, but the center is still slightly moist; it will firm up as it cools.
Can I make a chocolate peanut butter mug cake using this simple base?
Yes, you can achieve a peanut butter flavor by incorporating 1 tablespoon of creamy peanut butter directly into the batter before microwaving. If you choose to do this, reduce the amount of liquid slightly to account for the oiliness of the peanut butter.
Alternatively, swirl the peanut butter on top of the cooked cake as a glaze.
Can I easily make this recipe vegan or dairy-free?
Absolutely, this recipe is very simple to veganize, provided you use a suitable plant based milk (such as oat or almond milk) as your liquid component. If you are using plain flour (and adding baking powder), you can also stir in ½ teaspoon of apple cider vinegar to the liquid component, which reacts with the baking powder to ensure a superior lift and tender crumb without eggs.
What size mug should I use for optimal results?
We recommend using a standard 10-12 ounce ceramic mug that is microwave safe, as this allows sufficient space for the cake to rise without spilling over. If your mug is too wide, the cake may spread thin and cook too quickly, resulting in a tougher texture.
Be sure to lightly grease the mug if you plan on removing the cake.
How should I store leftover mug cake?
Mug cakes are truly meant to be eaten immediately, as the texture rapidly degrades upon cooling and storing, becoming dense. If you must store leftovers, cover the mug tightly and refrigerate for a maximum of 24 hours.
Reheating is not recommended, but you can try 10 seconds in the microwave to restore some minor warmth.
3 Ingredient Mug Cake Recipe
Ingredients:
Instructions:
Nutrition Facts:
| Calories | 32 kcal |
|---|---|
| Protein | 0.4 g |
| Fat | 0.4 g |
| Carbs | 6.9 g |
