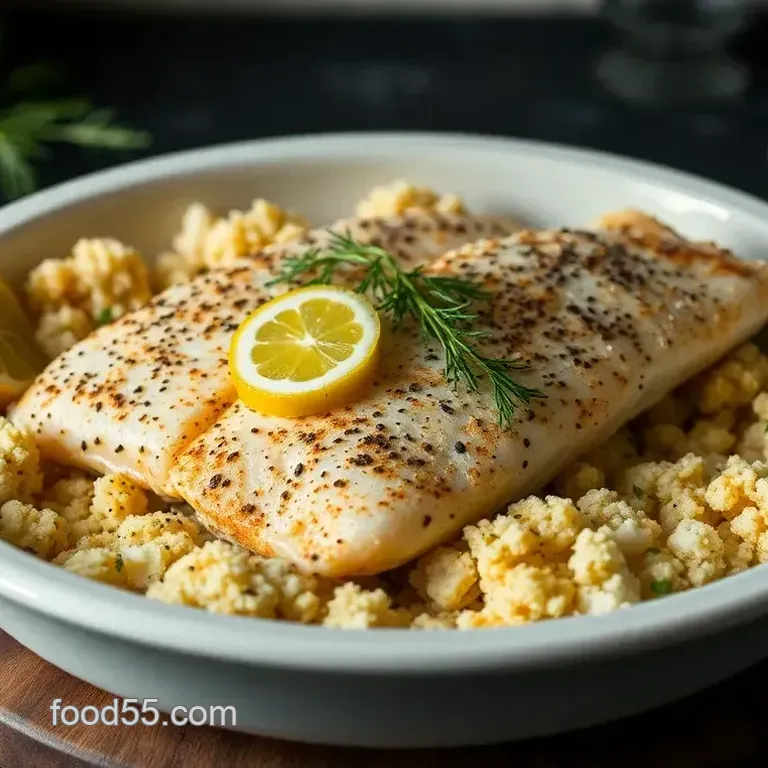
Baked Walleye Fillets with a Zesty Lemon-Dill Crust
- A Taste of Home: Baked Walleye Fillets with a Zesty Lemon-Dill Crust
- look into into History: Where Walleye Comes From
- Why You’ll Love This Dish: Key Benefits
- And Now, Let’s Get Cooking!
- Essential Ingredients Guide for Baked Walleye (and Beyond!)
- Mastering the Art of Cooking: Professional Methods at Home
- Pro Tips & Secrets: Chef’s Daily Dose
- Perfect Presentation: Because We Eat with Our Eyes
- Storage & Make-Ahead: Plan Ahead, Eat Right
- Creative Variations: Spice It Up, Switch It Up
- Complete Nutrition Guide: Eat Well, Feel Well
- In Conclusion: Get Cookin’, Friends!
- Frequently Asked Questions
- 📝 Recipe Card
A Taste of Home: Baked Walleye Fillets with a Zesty Lemon Dill Crust
Oh my gosh, you guys! let me share a quick story. the first time i cooked walleye was a total blunder.
I was like, “how hard can fish be?” spoiler alert: very! but that experience changed everything. since then, i’ve mastered some killer baked walleye recipes .
This isn’t just a dish; it’s a celebration of north american cuisine, right in your kitchen. if you’ve ever craved that melt-in-your mouth fish flavor that makes you feel all warm and fuzzy inside, keep reading!
look into into History: Where Walleye Comes From
Walleye has roots deep in the lakes and rivers across north america. this freshwater gem is a favorite catch for anyone who loves fishing; it's like the mvp of north american fish.
The best part? its mild taste and flaky texture make it super versatile! fast forward to today, and baked walleye is seriously the go-to dish for gatherings, cozy family dinners, or when you just want to impress your friends without breaking a sweat.
Speaking of sweat, this recipe is easy peasy we’re talking about a total time of about 35 minutes from start to finish ( 15 minutes prep and 20 minutes baking).
And the ingredients don’t break the bank either. you can serve four people with just a few fillets, and i guarantee everyone will be licking their plates.
Why You’ll Love This Dish: Key Benefits
Let’s not forget the real reason we’re all here: the food ! this baked walleye recipe isn’t just tasty it’s also a nutritional powerhouse.
Let’s get real, it’s packed with protein (about 30g per serving) and is relatively low in calories. not to mention, it’s a good source of healthy fats.
With the zesty lemon dill crust, you can elevate your plate while keeping it light.
And don’t get me started on versatility! you could whip this dish up for a holiday gathering, a birthday party, or just a regular tuesday or whenever the craving strikes.
Got a friend who’s never cooked fish before? perfect! this recipe is super forgiving; it hardly requires any fancy techniques.
Seriously, if you can set a timer and mix a few ingredients, you’re golden!
When it comes to variations, oh boy, have i got ideas for you! feeling adventurous? try swapping out the lemon for lime and stirring in some sriracha into that dijon mustard for a spicy kick.
Trust me , it's a game changer!
And Now, Let’s Get Cooking!
So, who’s ready to dive into those ingredients? you’ll need four walleye fillets , some olive oil, salt, and pepper the usual gang.
But here’s the twist: we’ll jazz things up with panko breadcrumbs , melted butter, fresh dill, and a little lemon zest for that zing! you can find it all at your local grocery store or farmer's market, so there’s no excuse not to try it out.
Just imagine bursting flavors of lemon, herbs, and a satisfying crunch enveloping your walleye that’s the kind of culinary happiness we’re after, folks.
So go ahead, preheat that oven to 375° f ( 190° c) . grab your baking sheet, take a deep breath, and let's make some delicious memories.
We’re just getting started with this fantastic journey!
Can't wait to walk you through the cooking step-by-step! Let’s jump into the ingredients next.
Essential Ingredients Guide for Baked Walleye (and Beyond!)
Oh my gosh, if you love cooking like i do, then you totally get how essential it is to have the right ingredients at hand.
Whether you’re going for that baked walleye recipe or trying to figure out how to cook grouper in the oven , knowing your ingredients is key.
So, grab a comfy chair and let’s dive into some must know essentials!
Premium Core Components
First things first, let’s talk about measurements . it feels like every recipe has its own vibe, but usually, they’re super forgiving.
Just like in baking, precision counts. for our walleye, you need 4 fillets at about 6 ounces each that’s around 170 grams if you like the metric way.
When shopping for these, make sure they're fresh look for clear eyes and firm flesh. and don’t forget about storage ! fresh fish can chill in the fridge for a day or two, but if you’re looking at something frozen, keep it cold and use it within 3-6 months for the best taste.
Signature Seasoning Blend
Let’s sprinkle some magic on this walleye with a killer seasoning blend! honestly, a good spice mix can elevate any fish.
Classic walleye usually loves a symphony of flavors like lemon, dill, and garlic. for a basic yet amazing baked fish seasoning recipe , think equal parts salt , pepper , and fresh herbs.
Dill is a rockstar here, but don’t shy away from experimenting with other herbs like thyme or parsley .
Regional variations? You bet! If you find yourself dreaming of the South, toss in some cayenne pepper for a kick or if you are feeling sophisticated— Parmesan is killer with fish too!
Smart Substitutions
What do you do if you can't find walleye? no worries! just grab some cod or haddock instead. both are super flaky and will soak up those flavors beautifully.
If you’re feeling fancy and want to try oven baked basa fillets , just follow the same steps as our walleye recipe but keep an eye on cooking times since basa might need a tad less time.
Eating healthy? switch out panko for crushed almonds or cheese for a gluten-free twist. the key is adapting ingredients to your taste or what you have on hand.
You don’t always have to run out to the store.
Kitchen Equipment Essentials
Now to the gadgets. If you’re whipping up these delightful fillets, you need some basic tools. A baking sheet is your best friend, especially if you line it with parchment paper trust me, it makes clean-up life so much easier after your fishy feast!
A mixing bowl and a basting brush are also essentials. you’ll use the brush to spread that glorious topping on your fish just right.
No fancy gadgets needed here just keep it simple. and don’t forget to grab some measuring spoons to get those exact amounts down.
Mind Your Timing
Cooking's all about timing, right? preheat your oven to 375° f ( 190° c) before placing your fish in there.
It’ll take about 20 minutes to nail that golden crust we're after. just remember: you want that fillet to be 145° f ( 63° c) internally.
Grab a kitchen thermometer if you can; it’s a lifesaver!
Closing Thoughts
So there you have it! a solid guide to gather your essentials for making baked walleye that’ll wow your friends and family.
Remember, cooking is all about having fun and finding what works for you. now that you know your ingredients and equipment, you're all set for the next section where we’ll dive into those juicy baked walleye recipes .
Get ready to make your kitchen smell divine!🍋✨
Mastering the Art of Cooking: Professional Methods at Home
Oh my gosh! have you ever been totally intimidated by the idea of cooking like a pro? trust me, i’ve been there! whether it’s for a dinner party or just a cozy meal at home, figuring out the ins and outs of professional cooking methods can be a game changer.
Let’s break it down, step-by-step, in a way that even your aunt edna would find easy. you ready? grab your apron!
Essential Preparation Steps
Alright, first off, let’s talk about mise en place . it sounds fancy, but it's just a way of saying "everything in its place.
" get your ingredients ready and pre-measured before you start cooking. this will save you from a last minute dash looking for lemon zests while your fish is going to town in the oven (we’re looking at you, baked walleye recipes !).
Time management is key! before you turn on that oven, plan out your cooking timeline. for my go-to oven baked basa fillets , i always set a timer.
Might sound silly, but it makes all the difference. setting those little reminders keeps my head clear!
And don’t forget about organization strategies ! keep your workspace tidy. no one wants to deal with a messy kitchen while navigating hot pans and sharp knives.
Plus, it’s a good practice helps prevent accidents, you know? remember: safety first!
step-by-step Process
Now, let’s get down to the nitty gritty! Follow these numbered instructions for success:
- Preheat the oven to 375° F ( 190° C) .
- Get busy on your baking sheet —line it with parchment paper or give it a light grease with olive oil.
- For those beautiful walleye fillets, pat them dry and sprinkle on some salt and pepper. Lay those babies on the baking sheet.
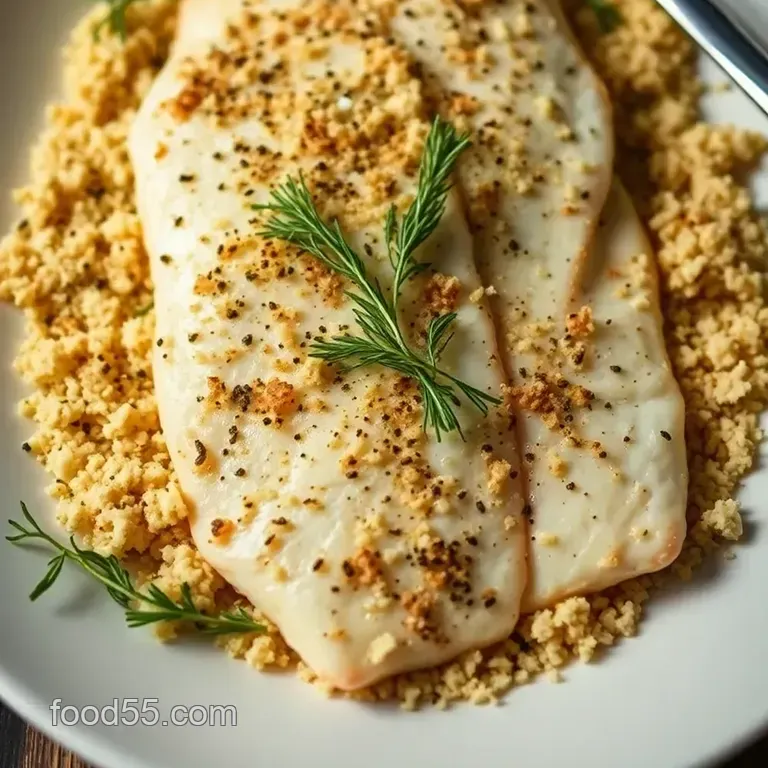
- In a bowl, whip up that Lemon Dill Crust . Combine your panko breadcrumbs , melted butter, zest of one lemon, and fresh dill. Stir it up until it’s all beautifully mixed.
- Smother that crust on the fish, pressing down gently. Get in there and make it stick!
- Pop it in the oven and bake for 20 minutes . The magic temp? Make sure the fish reaches an internal temperature of 145° F ( 63° C) .
- Watch for that golden brown color and fish that flakes easily with a fork.
Expert Techniques
Let’s talk about some critical steps here. Take your time on the quality checkpoints . Overcooking is the ultimate kiss of death for fish! If you’re unsure, use the fork test: it should flake nice and easy!
And hey, if your breadcrumbs aren’t as brown as you like, finish off with a quick broil for the last 2- 3 minutes.
You’ll be amazed at how that little trick elevates your dish!
Got any hiccups? here’s a quick troubleshooting tip : if your fish seems dry, maybe it needed a little more oil or a watchful eye on baking time.
Trust me, we’ve all made that mistake!
Success Strategies
Alright, my friends, let’s talk about common mistakes to dodge. Skipping steps in your prep can lead to chaos, so plan ahead! And always trust your instincts if something smells off, it probably is!
Your guaranteed way to assure quality? taste as you go. add seasoning as you like. and if you’ve got any leftovers, these make-ahead options are a life saver.
Cook a little extra walleye for lunch the next day. winning!
Closing Thoughts
Cooking doesn’t have to be scary; it can be fun and rewarding! whether you’re aiming for how to cook grouper in oven or perfecting that baked fish seasoning recipe , the key is to enjoy the process!
so next time you’re whipping up some healthy perch fish recipes or those tasty oven baked grouper fillets, remember to relax and have a good time.
For more insights and inspiration, stay tuned for the next section— Additional Information . Happy cooking!
Pro Tips & Secrets: Chef’s Daily Dose
Let’s kick things off with some insider tips that’ll elevate your baked walleye recipes to the next level. first off, i’ve learned that using fresh walleye is key.
If it’s frozen, make sure to thaw it overnight in the fridge. and when you’re ready to prep, pat that bad boy dry.
Nobody wants a watery fillet!
Now, here’s a time saver for ya: prepare the crust ahead of time. you can mix those panko crumbs and herbs, then just chill in the fridge until you’re ready to roll.
Trust me, you’ll feel like a culinary rockstar with minimal work during dinner.
Want to pack a flavor punch? toss in a pinch of cayenne pepper to that breadcrumb mix! oh, and if you’re feeling fancy, a quick broil for the last 2- 3 minutes gives you an extra crunch .
It’s all about that fancy crust, my friends!
Perfect Presentation: Because We Eat with Our Eyes
Now, let’s talk about how to make this dish look as good as it tastes. plating isn’t just for instagram it can make a meal feel special.
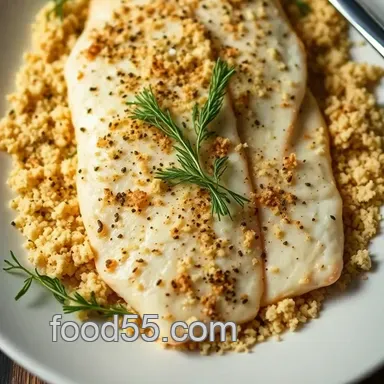
When you arrange the baked walleye , try to angle the fillet slightly. it creates a nice dynamic look.
Garnish with fresh dill and maybe some lemon slices on the side. the pops of green and yellow can truly make the dish sing.
If you're serving this at a dinner party, i promise folks will be snapping pics before they dive in.
You can also think about color combinations. pair your walleye with a side of roasted asparagus or a bright arugula salad.
It’s like a rainbow on your plate and you know what they say, the more colorful the plate, the better it is!
Storage & make-ahead: Plan Ahead, Eat Right
So, you’ve cooked up a storm and have leftovers? no worries. to keep your walleye fresh, store it in an airtight container in the fridge.
It’ll stay good for about 2-3 days . but truth be told, i love eating it fresh, so don’t let it sit too long!
As for reheating, the oven is your best bet. preheat it to 350° f ( 175° c) and pop that fillet back in for about 10 minutes.
Microwaving can dry it out, and no one wants that.
If you’re planning for a big gathering, you can prepare your crust and even season your fillets a day ahead.
Just store everything separately until you’re ready to throw it in the oven. nothing beats the stress of last minute cooking!
Creative Variations: Spice It Up, Switch It Up
Feeling adventurous? Switching up ingredients can make the same recipe feel new. Swap the dill for fresh thyme or parsley if that’s what you have.
Or how about a little Spicy Sriracha Glaze ? Mix some Sriracha with your Dijon mustard for a fiery twist that’s a hit in my home!
For seasonal variations, think about mixing the herbs with seasonal vegetables. in fall, a sprinkle of nutmeg and roasted squash makes for a comforting dish.
In summer, fresh basil and tomatoes can brighten the flavors. you could even try baked basa fillets in the same style if you want to explore other fish it’s just as delicious!
Complete Nutrition Guide: Eat Well, Feel Well
Now let’s talk about the important stuff, right? each serving of this baked walleye packs about 310 calories . you get 30 grams of protein , which is awesome for muscle repair after a workout! plus, it’s relatively low in fat, with around 12 grams , making it a great choice for a heart healthy diet.
Don't forget to mix in whole grains or veggies for added fiber and nutrients. if you’re tracking carbs or calories, it's always a good idea to be mindful of portion sizes.
Aim for balanced meals that leave you satisfied without going overboard.
In Conclusion: Get Cookin’, Friends!
So there you have it all my tips and tricks for making the perfect baked walleye fillets ! this recipe is not just another fish dish; it’s a culinary experience waiting to happen.
Grab your walleye, pull out that trusty baking sheet, and let the aromas fill your kitchen.
Honestly, whether you’re enjoying it solo or with friends, remember that food is all about sharing and enjoying the moment.
Roll up your sleeves and give it a go; you won’t regret diving into this scrumptious adventure!
Frequently Asked Questions
What are some easy baked walleye recipes for beginners?
For beginners, the baked walleye fillets with a lemon dill crust is the perfect recipe! It requires minimal ingredients and is straightforward to prepare. Just season the fish, make your crust, and bake it doesn’t get easier than that!
How do I ensure my baked walleye stays moist and doesn’t dry out?
To keep your baked walleye fillets succulent, avoid overcooking them; they should reach an internal temperature of 145°F (63°C). If you’re baking at home, keep an eye on them and consider basting with olive oil for extra moisture.
Also, don't forget to let the fish rest for a few minutes after baking it helps retain those delicious juices!
Can I use frozen walleye fillets in baked walleye recipes?
Absolutely! When using frozen walleye, make sure to fully thaw the fillets and pat them dry before seasoning. This will help the seasoning adhere better and ensure even baking, keeping your dish light and flaky.
What sides pair well with baked walleye?
Baked walleye pairs wonderfully with roasted asparagus or a fresh arugula salad with vinaigrette. For a heartier meal, consider serving it with new potatoes or wild rice for that classic British fish and-chips vibe without the frying!
How should I store leftover baked walleye?
If you have any leftovers (which is rare!), store them in an airtight container in the fridge for up to 3 days. Reheat gently in a low oven to maintain the fillet’s moistness, rather than using the microwave, which can dry it out.
How can I make baked walleye recipes healthier?
To lighten up your baked walleye, consider using whole wheat panko instead of regular breadcrumbs, and use less butter or substitute with olive oil for the crust. Additionally, serve with a side of steamed vegetables, and watch your portion sizes for a balanced meal!
Baked Walleye Fillets With A Zesty Lemon Dill Cr
Ingredients:
Instructions:
Nutrition Facts:
| Calories | 310 |
|---|---|
| Fat | 12g |
| Fiber | 2g |
