Chocolate Chip Waffles: Shattering Crust
- Time: Active 10 minutes, Passive 10 minutes, Total 20 minutes
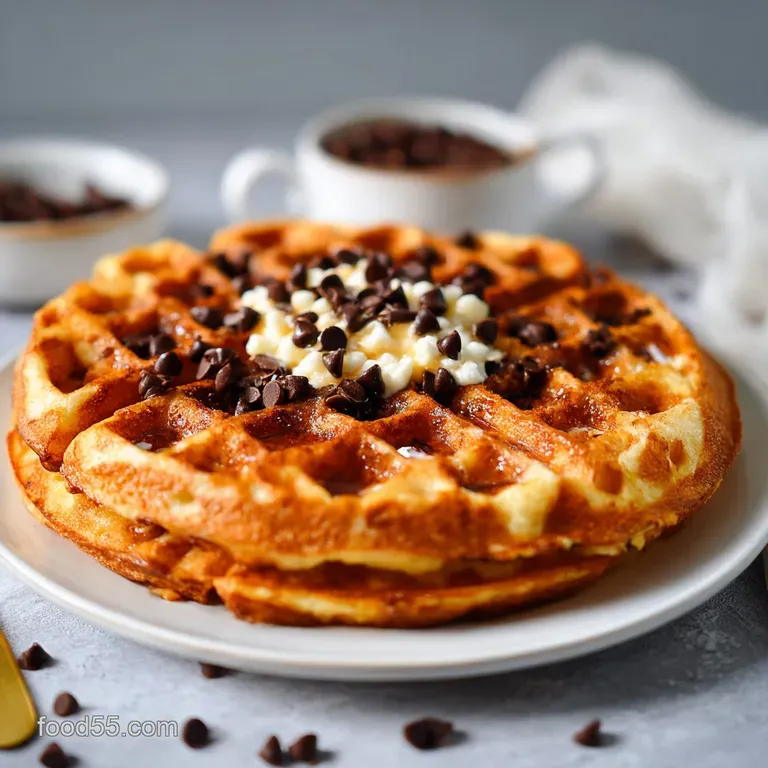
- Flavor/Texture Hook: A shattering golden crust with velvety, molten chocolate pockets.
- Perfect for: Slow Saturday mornings, celebratory brunches, or a quick weeknight "breakfast for dinner" treat.
- Unlock the Secret to Homemade Chocolate Chip Waffles
- Physics of the Golden Crunch
- Component Analysis for Success
- Selecting Your Breakfast Ingredients
- Essential Tools for the Sizzle
- Step by Step To Greatness
- Fixing Every Potential Waffle Fail
- Creative Flavor Twists to Try
- Debunking Morning Kitchen Myths
- Storage and Best Reheating Tips
- What Pairs Best with Waffles
- Recipe FAQs
- 📝 Recipe Card
Unlock the Secret to Homemade Chocolate Chip Waffles
I still remember the first time I tried to make waffles for a group of friends. I was so excited, but I ended up with a pile of soft, floppy bread that looked more like sad sponges than breakfast.
The chocolate chips I used were too big, so they sank to the bottom and scorched against the hot iron, creating a bitter, smoky mess that filled my kitchen. It was a disaster, but it taught me everything I needed to know about temperature and ingredient ratios.
The real magic happens when you hear that first hiss as the batter hits the plates. That sizzle is the sound of moisture turning to steam, which is exactly what creates those airy pockets we love. When you add chocolate into the mix, you aren't just making a sweet treat, you're creating a shared experience.
There is something about the aroma of warming vanilla and melting cocoa that just pulls everyone into the kitchen before the first one is even plated.
We aren't looking for basic diner food here. We want something that feels special but doesn't require a culinary degree to pull off. This recipe is the result of countless trials, a few burnt fingers, and a lot of testing to ensure your chocolate stays melty and your edges stay crisp.
Let's get into the details so you can avoid the soggy mistakes I made back in the day.
Physics of the Golden Crunch
The Starch Snap: Cornstarch interferes with gluten development, which creates a more brittle, "shattering" structure rather than a chewy, bread like one.
Mini Chip Suspension: Using mini chips ensures a higher surface area to mass ratio, allowing them to stay suspended in the batter and melt faster without sinking.
The Steam Release: High initial heat flashes the water in the milk and eggs into steam, which is the primary leavening agent that pushes the batter into the waffle peaks.
| Method | Time | Texture | Best For |
|---|---|---|---|
| Fast Method | 15 minutes | Soft and cake like | Busy weekday mornings |
| Classic Method | 20 minutes | Crispy and light | Traditional brunch vibes |
| Aged Batter | Over 1 hours | Deep, yeasty crunch | Ultimate weekend luxury |
If you have a little extra time, letting the batter rest for just 5 minutes before cooking allows the flour to fully hydrate. This small pause makes a world of difference in how even the interior texture becomes.
It’s the difference between a good waffle and one that people will actually text you about later asking for the recipe.
Component Analysis for Success
| Ingredient | Science Role | Pro Secret |
|---|---|---|
| All purpose flour | Structural base | Weigh it (250g) to avoid a dense, "bready" interior. |
| Cornstarch | Moisture absorber | The secret to a "shatter crisp" exterior that stays crunchy longer. |
| Mini chocolate chips | Flavor pockets | They distribute evenly so every single bite has chocolate. |
| Unsalted butter | Fat for richness | Melt and cool it so it doesn't accidentally cook the eggs. |
Wait until the butter is room temperature before mixing. If it's too hot, it can clump up when it hits the cold milk, and you'll end up with greasy spots instead of a velvety, smooth batter.
Selecting Your Breakfast Ingredients
- 2 cups (250g) All purpose flour: This provides the protein needed for structure.
- Substitute: White whole wheat flour works, but the texture will be slightly heartier and less airy.
- 1 tbsp (10g) Cornstarch: Essential for that crisp snap. Why this? Breaks up gluten for crunch.
- Substitute: Potato starch or arrowroot powder if you are out of cornstarch.
- 2 tbsp (25g) Granulated sugar: Helps with browning via caramelization.
- Substitute: Brown sugar for a deeper, more molasses like flavor profile.
- 1 tbsp Baking powder: The chemical lift that creates height.
- Substitute: 1 tsp baking soda plus 1 tsp cream of tartar.
- 0.5 tsp Salt: This balances the sweetness and makes the chocolate "pop."
- Substitute: Sea salt, but use a pinch more if the grains are coarse.
- 1.75 cups (415ml) Whole milk: Provides the liquid for the steam and a rich mouthfeel.
- Substitute: Buttermilk (add 0.5 tsp baking soda) for a tangier result.
- 2 Large eggs: The binder and source of protein for the rise.
- Substitute: Flax eggs work, though the waffle will be denser and less "crispy."
- 0.5 cup (115g) Unsalted butter, melted and cooled: Adds flavor and prevents sticking.
- Substitute: Neutral oil like avocado or canola for a slightly crisper, less buttery finish.
- 1 tsp Pure vanilla extract: The floral backbone of the recipe.
- Substitute: Almond extract (use only 0.25 tsp) for a nutty twist.
- 0.5 cup (90g) Mini semi sweet chocolate chips: Even distribution is key here.
- Substitute: Finely chopped dark chocolate bar for a more sophisticated, melting puddle effect.
Essential Tools for the Sizzle
You don't need a professional kitchen, but a good waffle iron is non negotiable. I prefer a Belgian style iron with deep pockets because they hold more toppings and create a better contrast between the edges and the center.
You will also want a large balloon whisk to get as much air as possible into the wet ingredients before they meet the flour.
A wire cooling rack is another "secret" tool that most people skip. If you put a hot waffle directly onto a plate, the steam from the bottom will get trapped and turn your crispy masterpiece into a soggy mess within seconds.
Setting them on a rack allows air to circulate all around, keeping that crunch intact until you're ready to eat.
step-by-step To Greatness

Phase 1: The "No Lump" Prep
- Whisk the dry. Combine the 2 cups flour, 1 tbsp cornstarch, 2 tbsp sugar, 1 tbsp baking powder, and 0.5 tsp salt in a large bowl. Note: Whisking aerates the flour and prevents heavy clumps.
- Mix the wet. In a separate jug, whisk the 1.75 cups milk, 2 eggs, 0.5 cup cooled butter, and 1 tsp vanilla until the eggs are fully incorporated. Wait for the sweet, floral scent of vanilla to fill the air as you stir.
- Combine gently. Pour the wet ingredients into the dry. Use a spatula to fold until just combined.
- Fold the chips. Gently stir in the 0.5 cup mini chocolate chips. Note: Don't overmix, or you'll develop too much gluten and make the waffles tough.
- Let it rest. Allow the batter to sit for 5 minutes. This is when the baking powder starts to react, creating tiny bubbles.
Phase 2: The Heat Cycle
- Preheat the iron. Set your waffle iron to a medium high setting. Note: A hot iron is crucial for that immediate "sear" that locks in the shape.
- Pour the batter. Use a measuring cup to pour batter onto the center of the plates. Listen for the loud, aggressive sizzle—that’s the sound of the exterior setting.
- Close and wait. Cook for about 3-5 minutes depending on your iron's settings. Look for the steam to stop escaping the sides of the iron; this is the visual cue that the interior is set.
Phase 3: The Sensory Cues
- Check for crispness. Open the iron carefully. The waffle should be golden brown and the chocolate should smell like a toasted marshmallow.
- Cool on wire. Remove the waffle and place it on a wire rack for 30 seconds before serving. This ensures the steam escapes from the bottom so the "shatter" stays consistent.
Fixing Every Potential Waffle Fail
Why Your Waffles Are Soft
If your waffles come out limp, it's usually because the iron wasn't hot enough or you didn't cook them long enough. Waffles need high heat to evaporate the water in the batter. If they are still soft, try leaving them in for an extra minute even after the "green light" on your machine turns on.
To Prevent Burnt Chocolate
Burnt chocolate has a bitter, charcoal like taste. This happens when the chips are too large and make direct contact with the hot metal plates for too long. Stick to mini chips or ensure your batter fully coats the chips.
If you're still having trouble, try sprinkling the chips onto the batter after you've poured it into the iron rather than mixing them in the bowl.
| Problem | Root Cause | Solution |
|---|---|---|
| Waffle Sticking | low-fat or cold iron | Add more butter or wait for the iron to fully preheat. |
| Heavy Texture | Overmixing the batter | Stir until "just combined" lumps are actually your friend here. |
| Uneven Browning | Crowded iron plates | Pour batter in the center and let it spread naturally to the edges. |
Common Mistakes Checklist
- ✓ Never peek too early; opening the iron before the structure is set will tear the waffle in half.
- ✓ Preheat the iron for at least 5 minutes before the first batch to ensure even heat.
- ✓ Use room temperature eggs so they don't seize the melted butter.
- ✓ Don't stack hot waffles; the steam from the bottom one will soften the one on top.
- ✓ Measure your flour by weight if possible; a packed cup of flour can add 20% more weight than needed.
Creative Flavor Twists to Try
If you want to change things up, try swapping the vanilla for almond extract or adding a teaspoon of cinnamon to the dry ingredients. If you are in a baking mood, these chocolatey flavors remind me of my Classic Chewy Chocolate recipe, which uses a similar balance of fats and sugars to get that perfect texture.
High Protein Waffle Swaps
For those mornings when you need a bit more fuel, you can substitute half of the flour with a high-quality vanilla protein powder. Just be sure to add an extra tablespoon of milk, as protein powders tend to absorb more liquid than standard flour.
Best dairy-free Options
You can easily make these dairy-free by using almond or oat milk and swapping the butter for melted coconut oil. Coconut oil actually has a higher smoke point, which can lead to an even crispier exterior, though you will lose that signature buttery flavor.
| Servings | Flour Amount | Milk Amount | Egg Count |
|---|---|---|---|
| 5 People | 2 cups | 1.75 cups | 2 Eggs |
| 10 People | 4 cups | 3.5 cups | 4 Eggs |
| 15 People | 6 cups | 5.25 cups | 6 Eggs |
Debunking Morning Kitchen Myths
"You must beat egg whites separately for fluffy waffles." While this does add air, a good amount of baking powder and the steam created by a hot iron provide plenty of lift without the extra dishes. Save the egg beating for soufflés; for these waffles, a whole egg whisking is more than sufficient.
"Oil is better than butter for waffles." While oil can provide a slight edge in crunch, it lacks the milk solids that brown and provide that rich, nostalgic flavor. Using melted butter gives you the best of both worlds: a crispy shell and a superior taste.
Storage and Best Reheating Tips
To store leftovers, let the waffles cool completely on a wire rack. Place them in a single layer inside a gallon sized freezer bag, separating layers with parchment paper. They will stay fresh in the fridge for 3 days or in the freezer for up to 3 months.
When you're ready to eat, skip the microwave! Microwaving makes them rubbery and tough. The best way to reheat is in a standard toaster on a medium setting or in a 350°F oven for about 5 minutes.
This brings back that "shatter crisp" exterior and gets the chocolate chips melty again. If you have extra batter, you can store it in the fridge for 24 hours, but the waffles won't rise quite as high as the first day because the baking powder will lose its "oomph."
What Pairs Best with Waffles
While maple syrup is the classic choice, I love serving these with a dollop of salted butter and maybe a few fresh raspberries to cut through the richness of the chocolate. If you want a full spread for a big group, check out my How to Make recipe for another family staple that uses similar pantry ingredients.
If you are feeling truly indulgent, a side of thick cut bacon or crispy breakfast sausage provides the salty contrast that makes the Chocolate Chip Waffles shine. Just remember, the goal is to bring people together, so don't stress the small stuff.
As long as they're hot and the chocolate is melty, everyone is going to be happy.

Recipe FAQs
Can you put chocolate chips in a waffle maker?
Yes, absolutely, but use mini chips. Mixing them directly into the batter ensures even distribution, but large chips can sink and scorch on the hot iron surface.
When should I add the chocolate chips to the waffle batter?
Fold them in last, right before cooking. After mixing the wet and dry ingredients until just combined, gently stir the chips in so you don't overdevelop the gluten, which results in tough waffles.
Why do restaurant waffles often taste much better than mine?
Restaurants often use cornstarch or pearl sugar in their recipes. Cornstarch inhibits gluten formation, creating that desirable, shattering crisp exterior which homemade recipes often lack.
What is the difference between a Belgian waffle and a regular waffle?
Belgian waffles use a yeast or egg white leavening base and have deeper pockets. This results in a lighter, airier interior structure compared to the denser, cake like texture of standard American waffles.
How do I ensure my chocolate chip waffles stay crisp after cooking?
Place them immediately on a wire cooling rack. Stacking them on a plate traps steam, which softens the crust you worked hard to achieve. If you master this texture control, you can apply the same cooling principles to our SafetoEat Cookie Dough recipe for perfect no-bake structures.
How do I prevent my chocolate chips from burning on the waffle iron?
Ensure your iron is adequately preheated and use mini chips. High initial heat immediately sets the exterior batter, minimizing the contact time the chips have with the metal, which is crucial for preventing scorching.
How can I make my chocolate chip waffles richer without making them dense?
Use melted and cooled butter instead of oil, and use whole milk. The fat from the butter adds superior flavor, while the whole milk ensures you have enough moisture content to create steam for lift.
Chocolate Chip Waffles Recipe

Ingredients:
Instructions:
Nutrition Facts:
| Calories | 543 kcal |
|---|---|
| Protein | 11.4 g |
| Fat | 29.2 g |
| Carbs | 60.2 g |
| Fiber | 1.9 g |
| Sugar | 22.1 g |
| Sodium | 396 mg |
