Oreo Cheesecake: the Crumbly Crown Jewel of Classic Baked Desserts

- Beyond the No-Bake: Why a Classic Baked Oreo Cheesecake is Superior
- Culinary Science: Achieving the Ideal Baked Cheesecake Texture
- Gather Your Tools: Essential Ingredients for Ultimate Oreo Cheesecake
- Ingredient Prep and Swaps: Customizing Your Classic Cheesecake
- Section 1: Crafting the Deep Dark Oreo Crumb Base
- Section 2: Mixing, Folding, and The Crucial Water Bath Technique
- Expert Tips and Troubleshooting Your Baked Oreo Cheesecake
- Storage, Freezing, and Longevity of Oreo Cheesecake
- Presentation Matters: Decadent Toppings and Serving Pairings
- Recipe FAQs
- 📝 Recipe Card
Beyond the No-Bake: Why a Classic Baked Oreo Cheesecake is Superior
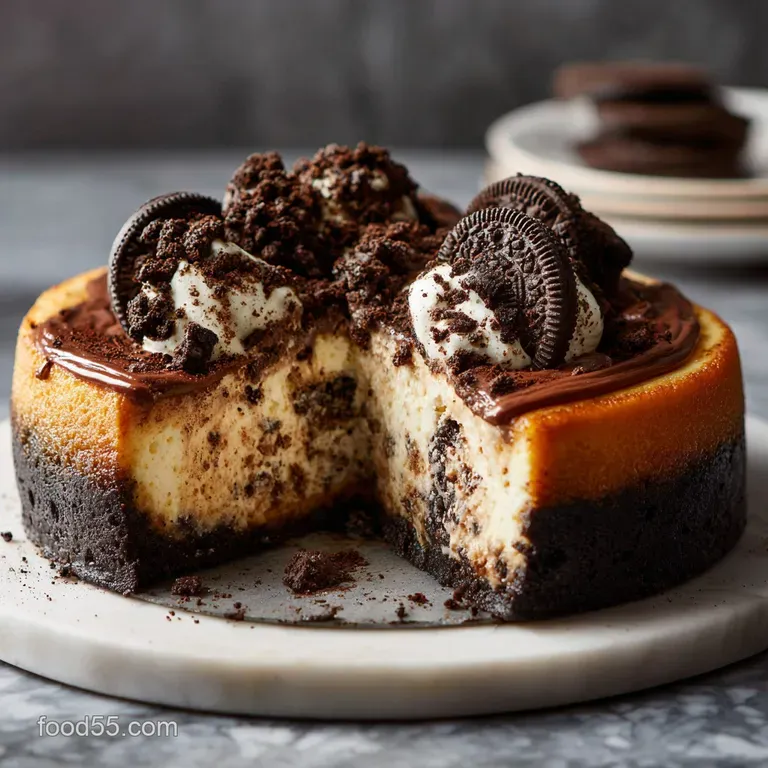
Forget complicated layer cakes; this Classic Baked Oreo Cheesecake is the real star of any dessert table. The aroma alone that mix of dark chocolate Oreo crust and sweet, tangy, baked cream cheese will genuinely make you stop whatever you’re doing.
It’s unbelievably dense, perfectly creamy, and honestly, every rich slice feels like a glorious comfort hug.
Yes, I know the no-bake versions are faster, and if you’re short on time, try my recipe for No Bake Cookie Dough Cheesecake Triple Chocolate, No Oven Needed . But honestly, they never achieve the luxurious, velvety, New York style texture that a proper baked cake delivers. This recipe creates a showstopper dessert that looks intensely complicated, but is actually very straightforward once you master a single, crucial technique: the water bath.
We are not skipping corners here; we are going to master the proper baked technique, ensuring you get the best, most crack free, Creamy Oreo Cheesecake you’ve ever tasted. It requires patience, yes, but the payoff is a silky interior and that perfect, dark Oreo crumb.
Let’s get that springform pan wrapped and start crushing some cookies!
Culinary Science: Achieving the Ideal Baked Cheesecake Texture
If you want a cheesecake that doesn't collapse, crack, or turn into crumbly sadness, you need to understand three simple concepts. We are fighting two enemies: fast cooking and dramatic temperature changes.
The Crumbly Crown Jewel: Defining the Oreo Crust
The best crust is a simple crust, and Oreos are the easiest base ever. We use the whole cookie , cream filling and all, because that filling contributes vital fat and sugar to the crumb.
When combined with melted butter, the result is a beautifully moist, dark, and deeply flavorful foundation that holds up against the rich filling.
The Perfect Texture: Dense, Creamy, and Crack Free
The goal is a cheesecake that is dense but simultaneously velvety smooth. The secret weapon here isn't the cream cheese; it's the sour cream and the cornstarch. Sour cream adds essential tang and moisture, preventing the cake from drying out during the long bake.
Cornstarch is the binder that keeps everything stable and helps prevent that ugly center collapse or major cracking when cooling.
Decoding the Difficulty: Managing the Water Bath (Medium Level)
This step is truly non-negotiable for a perfect finish. The water bath (or bain marie ) creates a humid oven environment. This moisture ensures the heat is gentle and evenly distributed, preventing the edges from baking too quickly and drying out before the center has a chance to set.
The water bath ensures a slow, even bake.
The Role of Full Fat Cream Cheese (Why Temperature Matters)
I once made the mistake of rushing a batch by using cold cream cheese. The result? Lumpy, curdled sadness. Room temperature cream cheese is absolutely essential for achieving that beautifully smooth, lump free batter. The fat emulsifies much better when soft, creating that flawless texture.
Preventing Soupy Filling: Achieving the Right Binder Ratio
We use four eggs, but they must be added last and mixed minimally. Eggs are the final binder that sets the custard, but if you introduce too much air while mixing the eggs, that air will expand in the oven and then rapidly deflate as the cake cools.
That deflation is what causes deep sinking and cracks right down the middle.
The Slow Chill Method: Avoiding Cracks and Sinking
Patience is a virtue, especially in cheesecake making. The two-stage cool down first in the cooling oven, then at room temperature is vital. This prevents the cheesecake from experiencing a temperature shock, which is the primary cause of those deep, unsightly fissures.
Gather Your Tools: Essential Ingredients for Ultimate Oreo Cheesecake
You don’t need a complicated list of obscure ingredients for this Best Oreo Cheesecake Recipe . Quality matters here, especially with the cream cheese.
Ingredient Prep and Swaps: Customizing Your Classic Cheesecake
For the Deep Dark Oreo Crumb Base
You need whole Oreos, cream and all, and good quality melted butter. That's it. Crush them until they look like wet sand, ensuring the butter is evenly distributed.
The Rich, Tangy Cheesecake Filling Components
This recipe relies heavily on full fat dairy. The tang from the sour cream cuts the intense sweetness of the cookies, balancing the flavor beautifully.
Ingredient Deep Dive: Must Use Full Fat Cream Cheese
Please, trust me on this: Do not buy the reduced fat or whipped varieties. They contain too much water and stabilizers, ruining the texture of a baked cheesecake. Go full fat for that dense, creamy mouthfeel.
Handling Temperature: Why Ingredients Must Be Room Temperature
Seriously, set your cream cheese and eggs out about two hours before you start mixing. If they feel slightly cool to the touch, they aren't ready. This ensures your final batter is smooth and easy to mix without overworking it.
Alternative Baking Pan Options
I swear by a 9 inch springform pan, simply because it makes un-molding so easy. You could potentially use a standard 9x13 pan, but the baking time and height will change dramatically, yielding more of a Caramel Apple Cheesecake Bars Recipe: Ultra Creamy, Spiced Sticky consistency than a traditional tall cake.
Can I Use Reduced Fat Cream Cheese? (Spoiler: No)
Absolutely not. Reduced fat cream cheese has too much water, making your cheesecake weep and preventing that ideal structure from setting properly. You’ll end up with something that tastes vaguely cheesy and is tragically wobbly.
| Ingredient | Viable Substitute | Notes |
|---|---|---|
| Oreo Cookies | Chocolate Wafers + 1 Tbsp Cocoa Powder | Adds richness and darkness. |
| Sour Cream | Full Fat Greek Yogurt (Plain) | Maintain the essential acidic tang. |
| Cornstarch | All-Purpose Flour | Use the exact same amount for stabilization. |
| Granulated Sugar | Caster Sugar | Finer sugar dissolves faster, ensuring no grit. |
Section 1: Crafting the Deep Dark Oreo Crumb Base
Processing the Oreos and Adding the Butter Binder
Toss those 36 cookies directly into your food processor cream and all. Pulse until you have fine crumbs, roughly the texture of coarse sand. Pour in your melted butter and pulse again until the mixture clumps together when squeezed. It should look like rich, wet earth.
Achieving the Perfect Press: Packing the Crust Evenly
Grease your foil wrapped springform pan slightly, then dump in the crumbs. Use the bottom of a measuring cup or a flat drinking glass to press the crumbs firmly and evenly across the bottom. This compaction is key; it prevents a crumbly, loose crust.
The Initial Bake: Setting the Foundation
Chill the crust while you prepare the filling (the freezer works fast). This firming stage helps the butter set, ensuring the crust won't dissolve when the creamy filling hits it.
Section 2: Mixing, Folding, and The Crucial Water Bath Technique
Preparing the Springform Pan and Water Bath Setup
Preheat your oven to 160°C / 325°F. Tightly wrap the exterior of your springform pan with two layers of heavy duty foil, ensuring it goes right up the sides to form a waterproof barrier. Place the wrapped pan inside the large roasting pan on your oven rack. Have your boiling water ready to go.
Creaming the Filling: Avoiding Over Mixing for Smoothness
In your stand mixer, beat the room temperature cream cheese until it is unbelievably smooth, scraping the bowl often. Add the sugar and cornstarch and mix until just combined, then add the sour cream and vanilla. Stop mixing when it looks silky.
Chef's Note: When incorporating the eggs, do them one at a time, mixing only until the yellow yolk streak disappears. If you introduce too much air at this stage, you are asking for trouble in the cooling phase. Use your mixer on the lowest speed possible.
Gentle Folding: Incorporating Chopped Oreo Pieces
Take those extra 12 chopped Oreos and gently fold them into the finished batter using a spatula. We don't want to activate the gluten or force the air out. Pour the filling over the chilled crust.
Assembling the Water Bath
Place the springform pan carefully inside the roasting pan. Now, pour the boiling water into the roasting pan, ensuring it goes about halfway up the sides of the springform pan. Carefully slide this setup into the oven.
Expert Tips and Troubleshooting Your Baked Oreo Cheesecake
How to Prevent the Infamous Cheesecake Crack
The crack happens because the internal structure shrinks faster than the baked edges, pulling the cake apart. The solution is the two-step, gentle cooling process. After the 70 minutes of baking, turn the oven off, prop the door open slightly with a wooden spoon, and leave the cake inside for a full hour.
This slow descent in temperature is your best friend.
The Water Bath Necessity: Science vs. Convenience
Some recipes tell you to skip it, usually for ease of clean-up. Don't listen to them. Skipping the water bath is almost guaranteed to give you an overbaked, dry edge and a gaping, terrible crack. If you wrapped your foil tightly enough, you’ll have minimal mess.
The Importance of Slow Cooling (The Oven Door Trick)
Seriously, do not pull it out when the timer goes off. The heat trapped inside the oven slowly lowers the temperature, allowing the delicate custard structure to settle gradually. If you pull it out immediately, the shock of cold air will make it weep and crack horribly.
Dealing with a Soggy Bottom Crust
If you end up with a soggy bottom, it means your foil wrap was breached and water seeped into the pan. Fix: Use heavy duty foil, check for holes, and ensure you wrap high up the sides.
Also, pre-baking the crust slightly ( 10 minutes before adding filling) helps waterproof it somewhat.
Storage, Freezing, and Longevity of Oreo Cheesecake
Refrigeration Guidelines: How Long Does It Last?
Once fully chilled, your Homemade Oreo Cheesecake will last beautifully in the refrigerator for 5 7 days. Always store it covered (but don't seal it immediately after baking; wait until it’s fully cold). I find it tastes best and is easiest to slice on Day 2.
step-by-step Guide to Freezing Slices
But does it freeze well? You bet! Cheesecake is one of the best desserts for freezing.
- Chill and Slice: Ensure the cheesecake is fully chilled and set (at least overnight). Slice the cake into individual portions.
- Wrap: Tightly wrap each individual slice first in plastic cling film, then again in aluminum foil.
- Freeze: Place the wrapped slices in a large freezer safe container to prevent crushing. It will keep for up to 3 months.
- Thaw: To serve, transfer the wrapped slices to the refrigerator overnight. Do not try to thaw it at room temperature, as this can affect the texture.
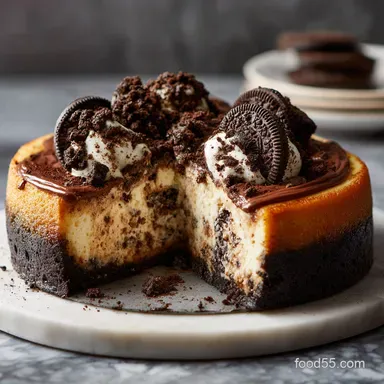
Presentation Matters: Decadent Toppings and Serving Pairings
I usually top my classic version with simple whipped cream and extra Oreo crumbles, but feel free to go wild.
Try these delicious pairings:
- A dark chocolate ganache drizzle makes it extra decadent.
- A dollop of sharp, tart raspberry coulis cuts through the richness beautifully, providing great color contrast.
- If you're feeling adventurous, try swapping the Oreos for the mint variety and adding a light mint chocolate ganache. It's a fun twist, similar to the idea behind my Apple Crisp Mini Cheesecakes: Easy, Individual Fall Dessert Recipe but with mint!

Recipe FAQs
Why did my baked cheesecake crack?
Cracks usually result from rapid temperature change or overbaking, causing the cake to shrink unevenly. Ensure you utilize the water bath for even cooking, and crucially, allow the cheesecake to cool very slowly ideally resting it inside the turned off oven with the door slightly ajar for an hour before transferring to a rack.
Is the water bath really necessary for a perfect texture?
Yes, the water bath (or bain marie) is highly recommended for achieving the classic, creamy New York style density. It provides gentle, moist, and even heat, preventing the outer edges from setting before the center and ensuring a silky, crack free surface.
If you skip it, the cheesecake is much more likely to dry out and curdle at the edges.
My filling turned out grainy or lumpy. What went wrong?
A grainy texture is most often caused by cold ingredients, specifically the cream cheese, which must be fully softened to room temperature before mixing. Additionally, stop mixing as soon as the eggs are incorporated, as overmixing develops air pockets that contribute to a denser, lumpy final texture.
Can I use different cookies for the crust instead of Oreos?
Absolutely; most crisp, dark chocolate wafers or shortbread cookies will work wonderfully for substitution, though the flavor profile will change slightly. You may need to slightly adjust the amount of melted butter used, as the fat content of different cookies varies widely.
Ensure the texture is similar to wet sand when pressed.
How do I know when the baked cheesecake is perfectly done?
The cheesecake is done when the outer edges are fully set, but the inner 2-3 inches of the center still have a noticeable 'jiggle' when you gently tap the pan. This slight wobble is critical because the residual heat during the cooling process will fully set the center, ensuring the final product is creamy and not dry.
How should I store leftover cheesecake, and can I freeze it?
Leftover cheesecake should be stored covered in the refrigerator for 4-5 days. For long term preservation, you can freeze the whole, cooled, unadorned cheesecake by first chilling it until firm, then wrapping it tightly in several layers of plastic wrap and aluminum foil; it will remain fresh for up to one month.
Can I modify this recipe to make a no-bake Oreo cheesecake?
This specific recipe is formulated for baking stability and high density, and converting it to no-bake would require fundamental changes to the stabilizers. For a successful no-bake result, you must use thickening agents like gelatin, cornstarch, or higher ratios of whipped cream, so it is best to consult a dedicated no-bake recipe instead.
Classic Baked Oreo Cheesecake Recipe
Ingredients:
Instructions:
Nutrition Facts:
| Calories | 585 kcal |
|---|---|
| Fat | 42.5 g |
| Fiber | 1 g |
