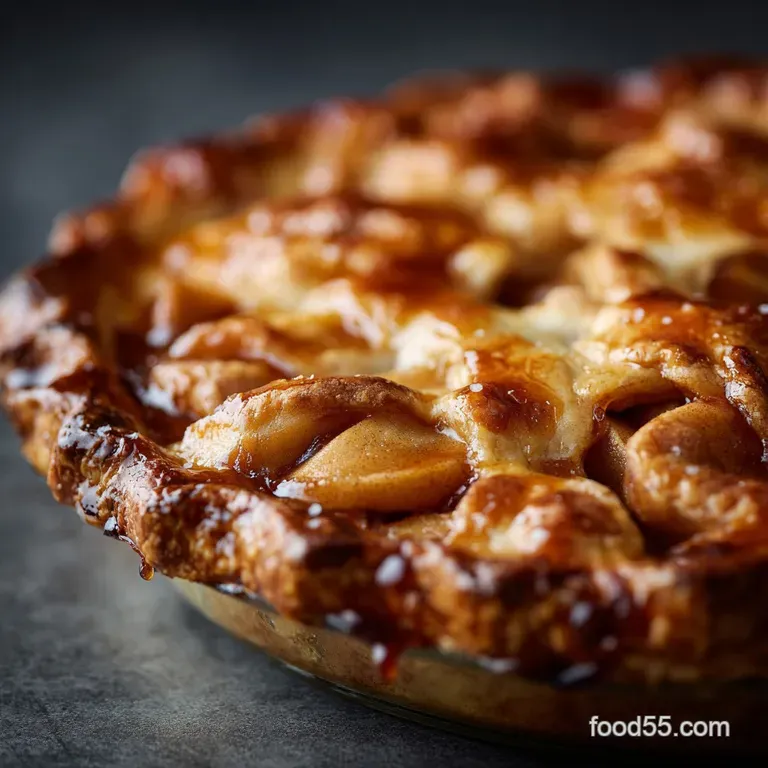
Apple Pie Recipe: the Quintessential Flaky Crust Bramley Apple Filling
- The Ultimate Comfort: Why This Classic Apple Pie Recipe Rules
- Gathering Your Arsenal: Essential Tools and Pantry Staples
- Beyond the Recipe Card: Equipment Needed for the Perfect Apple Pie
- Step and by-Step Mastery: Building Your Iconic Dessert
- Baking Perfection: Temperature Control for a Golden Finish
- Expert Tips and Baker's Notes for Maximum Flavour
- Nutritional Breakdown: Understanding Your Slice
- Recipe FAQs
- 📝 Recipe Card
The Ultimate Comfort: Why This Classic Apple Pie Recipe Rules
Right then, let's talk pie. Not the sad, shop and bought discs that crumble into dust. I’m talking about the real deal. The one that smells like the best parts of autumn and reminds you of your grandmother’s kitchen (even if your grandma only microwaved things).
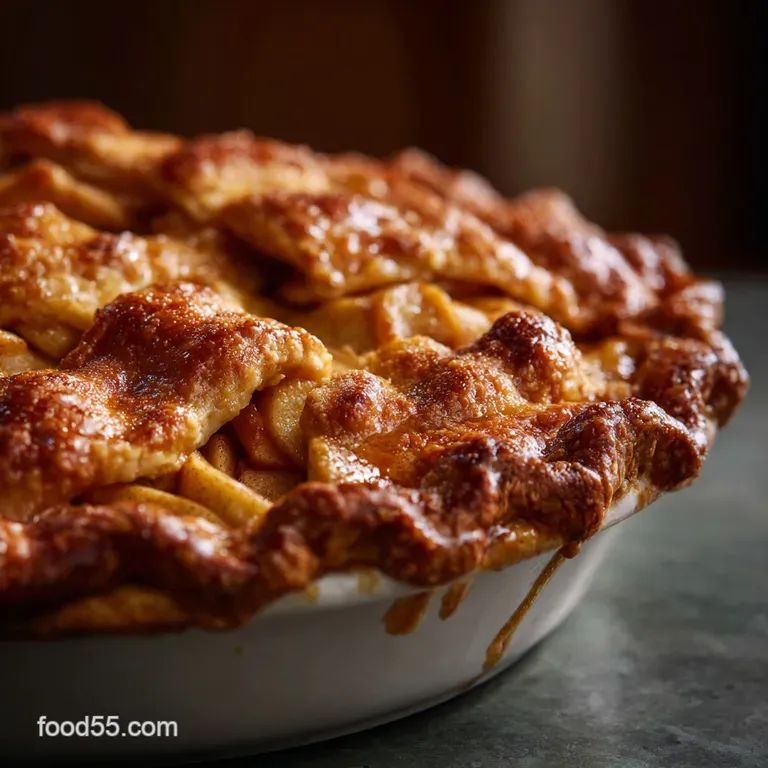
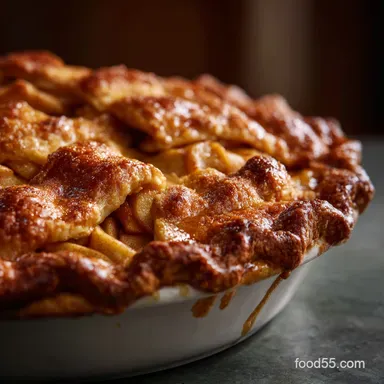
This isn't just an apple pie recipe; it's the formula for pure, unadulterated comfort. It is the classic centerpiece for any proper Sunday roast dessert table. We are going for a deep and dish, richly spiced filling encased in a pastry so tender it practically shatters when you slice into it.
Trust me, once you nail these few essential techniques, you’ll never look at another apple pie recipe again.
Achieving Flakiness: The Science of the Shuttering Crust
Look, pastry is the make and or-break element here. We are using a simple Pâté Brisée, which sounds fancy, but really just means a pastry based on butter and minimal liquid. The magic lies in the cold butter. You want pockets of fat remaining in that dough.
When those pockets hit the heat of the oven, the water content in the butter turns to steam, violently lifting the layers of flour around it. That is how you get those beautiful, light layers.
Crucial Warning: If your kitchen is warm, or if you handle the dough too much, the butter melts, the steam lift fails, and you end up with a tough, sad crust. Keep your hands cool and your movements swift. If you start to panic, throw the whole bowl in the freezer for five minutes. Seriously.
Banishing Watery Bottoms: Mastering the Filling Consistency
This is where many home cooks fall down, including Past and Me. You spend three hours making this incredible looking pie, only to slice it open and watch a river of thin, sugary juice leak out, turning your beautiful bottom crust into a soggy nightmare.
We fix this in two ways: first, corn starch (or cornflour, if you're in the UK) is non and negotiable. It thickens beautifully without adding cloudiness. Second, and this is the trick I learned the hard way: after you mix the sliced apples with the sugar, they need to sit for 15 minutes.
The sugar draws out moisture. You must, absolutely must, drain that excess liquid before piling the apples into the shell.
The British Touch: Harnessing the Power of Bramley Apples
Forget the sweet, mushy apples American recipes often call for alone. For a proper, complex British Apple Pie (or really, any fruit pie), you need structure and acidity. Ready for the secret weapon? The Bramley apple.
It’s too sharp to eat raw, but when baked, it collapses beautifully into a soft, tangy cushion while holding enough structure to not just dissolve into goo. We mix the Bramley (for structure and tartness) with a slightly sweeter, firmer apple like a Gala or a Cox (for balance).
This blend gives you a filling that tastes bright and dynamic, not just cloyingly sweet.
Gathering Your Arsenal: Essential Tools and Pantry Staples
If you are cooking with me, you know I don't believe in specialty tools unless they actually make a huge difference. For this apple pie recipe, most of the stuff you need is already kicking around the kitchen. The ingredients are simple too, but quality counts. Use proper butter (the 82% fat kind) and fresh spices.
It makes all the difference.
Beyond the Recipe Card: Equipment Needed for the Perfect Apple Pie
I am opinionated about baking dishes. Skip the cheap metal ones for pie. They heat too fast and too unevenly.
| Tool | My Recommendation | Why I Love It |
|---|---|---|
| Pie Plate | 9 inch Deep Dish (Ceramic or Glass) | Holds more filling. Heats slowly, which helps the bottom crust cook completely before the top burns. |
| Rolling Pin | French Tapered Pin | No handles, gives you better control for even rolling thickness. Essential for the top crust and lattice work. |
| Baking Sheet | Standard Rimmed Sheet | Place this under the pie. Catches drips and provides crucial thermal mass to the oven, which helps the bottom cook faster. |
Preparing the Pâté Brisée: Cold Fats and Swift Hands
I prefer using a food processor for the initial mixing. It’s fast. Speed is key, remember? Pulse, pulse, pulse until the butter is pea and sized. Then, transfer it to a bowl and add the ice water by hand. You need to stop mixing the second the dough holds together. It should look shaggy. It should look messy.
If it looks perfectly smooth, you’ve overworked it, and you're already headed toward toughness. Chill time (60+ minutes) is not optional.
Selecting Your Bramleys: The Best Apples for Baking Excellence
If you can’t find a Bramley (they can be harder to source outside the UK), look for any apple marketed specifically as a "cooking apple." Failing that, a full substitution of Granny Smiths is fine for the tart component, but you MUST increase the sugar slightly to compensate for their intense sharpness.
Slice them thin (about 1/4 inch thick). Thick slices won't cook down properly and will leave air gaps under your top crust.
The Spice Blend Secret: Balancing Cinnamon, Nutmeg, and Clove
Everyone throws cinnamon into apple pie. Big deal. Cinnamon is lovely, but on its own, it’s flat. The secret to that deep comforting aroma is balance. Nutmeg adds warmth and earthiness. Allspice or a tiny pinch of clove adds complexity and depth. I only use 1/4 teaspoon of clove, maybe even less.
Too much and it tastes like Christmas potpourri, but just the right amount makes people say, "What is that flavour? It's incredible."
The Unsung Heroes: Measuring Cups and Rolling Pin Recommendations
Honestly, invest in decent measuring cups. If you’re baking, accuracy matters. Also, if you use a plastic rolling pin, just stop. Get yourself a heavy wooden one. It does all the work for you.
Applying gentle, even pressure is the only way to avoid a crust that’s paper thin on one side and thick on the other.
Prepping Your Tin: Choosing the Right Depth and Material
We want a deep dish because we are stuffing this pie full of apples. Use a ceramic or glass pie plate. Never grease it. The high fat content in the pastry means it will naturally shrink away from the sides during baking.
Don't worry about sticking (unless you are using a non and stick tin, in which case, still don't grease it).
Related Recipes Worth Trying
- Apple Pie Recipe: The Perfect Classic Flaky Crust Bake — This classic Apple Pie features a tender, buttery flaky crust and a tart, spiced Apple Pie Filling. Learn how to bake the perfect Apple Pie at home with our...
- Apple Pie: Best Homemade Classic Recipe with Flaky All-Butter Crust — This is the ultimate Apple Pie, designed by a professional chef to eliminate the soggy bottom. Follow our precise steps for a flawless, flaky all-butter...
- Apple Crisp Mini Cheesecakes: Easy, Individual Fall Dessert Recipe — Apple Crisp Mini Cheesecakes combine creamy filling with a buttery crumble topping. These easy apple crisp mini cheesecakes are the ideal fall dessert...
Step and by-Step Mastery: Building Your Iconic Dessert
This is where we pull everything together. Timing is everything here.
Baking Perfection: Temperature Control for a Golden Finish
This is the non and negotiable element of achieving a cooked bottom crust and a golden top without burning the pastry. We shock the pie. We blast it with high heat initially to set the pastry, then drop the temperature dramatically to allow the apples to tenderize completely.
Phase One: Crafting and Chilling the Butter and Rich Dough
Remember the cold rule! Get the two discs wrapped up tight. If you accidentally forget about the smaller disc and it hardens like a stone, let it sit on the counter for five minutes before rolling. Trying to roll frozen dough just results in cracks.
Always roll from the center outwards, turning the dough frequently to prevent sticking.
Phase Two: Slicing, Seasoning, and Marinating the Apple Filling
Slice, season, wait, drain. That is the mantra for the filling. The lemon juice is vital because apples oxidize quickly (turn brown), and the acidity also cuts through the sweetness beautifully. I always line my colander with a clean tea towel to drain the apples for those crucial 15 minutes.
This is where you get rid of that potential river of sadness.
Phase Three: The Crucial Assembly and Lattice Techniques
You need to pile those apples high. They shrink dramatically while baking, so don’t be shy about mounding them up over the edge of the plate. Once filled, dot the top with those little pea and sized bits of butter. They melt down and mingle with the spices, creating a richer sauce.
When sealing the edges, press firmly to ensure the steam doesn’t escape everywhere except the vents you cut. Brush on that egg wash (just the yolk, mixed with water for colour) and sprinkle on coarse sugar for crunch.
Troubleshooting Your Bake: Dealing with Excessive Browning
So, you’re 30 minutes in, and the edges are already mahogany brown while the center is pale? Happens all the time. Simply take strips of aluminum foil, fold them over twice, and gently ring the pie edges. This shields the crust and allows the center to catch up.
Don't shield the whole pie unless the top is browning too fast; we want that beautiful golden color eventually.
The Waiting Game: Why Cooling is Mandatory for a Set Slice of Apple Pie
I know, I know. It smells amazing. The thought of waiting three hours while the pie just sits there is agony. But if you cut it hot, the corn starch hasn't finished its job. It needs to cool to fully gel and set the filling. If you don't wait, your slice will collapse into a runny pile.
If you do wait, you get that perfect, firm, sliceable wedge. Patience pays dividends here.
Expert Tips and Baker's Notes for Maximum Flavour
- Pre and Bake Your Bottom? Some recipes tell you to par and bake the bottom crust. I only do this if I'm using a very high and moisture filling (like peach or cherry). For this recipe, if you drain your apples and use the high and to-low temperature trick, you absolutely do not need to pre and bake. Saves time, too.
- A Dash of Vanilla: Add 1 teaspoon of vanilla extract to the apple mixture right before putting it in the crust. It’s a subtle boost that makes the whole pie taste richer.
- Freezing Strategy: This pie freezes brilliantly! Assemble the entire pie (without the egg wash and sugar), wrap it tightly in foil, and freeze. When ready to bake, brush with egg wash and bake straight from frozen (add about 20- 25 minutes to the total baking time).
Nutritional Breakdown: Understanding Your Slice
Let's be real. This is not health food. This is comfort food. This pie is rich because of the proper butter in the crust and the sugar needed to balance the tart Bramleys. It’s the kind of thing you enjoy fully, maybe once a month, not something you worry about macro and counting for.
It’s worth every single calorie.
Reheating and Storing Leftovers: Keeping the Crust Crisp
Store leftovers (if there are any) covered loosely at room temperature for up to two days, or in the fridge for up to four. To reheat, don't use the microwave unless you enjoy steamed, soggy pastry (I don't).
Pop a slice into a toaster oven or regular oven at 180°C (350°F) for 10- 15 minutes. The crust crisps right back up.
Customising Your Crust: Vegan and Gluten and Free Alternatives
If you need a vegan crust, use chilled vegetable shortening (like Crisco) or a proper plant and based baking block instead of butter. Keep it extremely cold, just as you would the butter.
For gluten and free, use a high and quality gluten and free flour blend that includes Xanthan gum, and consider adding an extra tablespoon of ice water, as GF flour tends to absorb moisture faster.
Serving Suggestions: The Best Accompaniments for Hot Apple Pie
For me, it’s homemade custard. Always. A thick, warm stream of vanilla crème anglaise over a slice of hot apple pie. Nothing beats it. But if you’re a fan of contrast, a proper scoop of vanilla bean ice cream is a total classic.
If you're going full luxury, try a dollop of clotted cream it adds incredible richness.
Common Mistakes and How to Avoid Them
| Mistake | Prevention |
|---|---|
| Soggy Bottom | Drain the apples after seasoning them, and use the hot and to-cold baking method. |
| Tough Crust | Use cold ingredients and mix minimally. Stop mixing when the dough is shaggy. |
| Pie Overflow | Always use a baking sheet underneath, and ensure you cut ample steam vents. |
| Runny Filling | Wait until the pie is fully cooled (3+ hours) before slicing. |
Scaling the Recipe: Adjusting Quantities for Different Pie Sizes
If you are using a smaller 8 inch plate, you can drop the filling ingredients by about 1/4. If you are making mini hand pies or individual pies, the filling quantity remains mostly the same, but the dough recipe will yield enough for at least 6 8 small pies.
Just keep the ingredient ratios (especially the thickener) consistent. Don't try to double the recipe in one go; make two separate batches of dough and filling for the best results. Large quantities tend to warm up too fast while you’re prepping.

Recipe FAQs
How do I avoid the dreaded soggy bottom on my pie?
The secret weapon against a soggy bottom is to drain any liquid released by the sugared apples before assembly, and always place your assembled pie on a preheated baking sheet for the first 15 minutes of the bake. The high initial temperature helps set the bottom crust immediately.
I can’t get Bramley apples; what’s the best alternative mix for this classic British Apple Pie?
If you can't source Bramleys, aim for a 50/50 split between a tart, firm apple (like Granny Smith) and a sweeter, crisper variety (such as Honeycrisp or Fuji); this ensures the filling is both flavourful and holds its shape nicely once cooled.
Can I prepare the pastry or the whole pie in advance to save time?
Absolutely! The pastry dough can be made up to three days ahead and stored tightly wrapped in the fridge, or you can assemble the entire pie (unbaked), wrap it tightly, and freeze it for up to two months, baking it straight from frozen (adding about 20 minutes to the cook time).
My filling is runny when I cut the pie. What went wrong, and how long does it need to cool?
A runny filling typically means the starches didn't fully set; you must allow the pie to cool completely ideally for 3 4 hours before slicing, as the thickening process continues long after it leaves the oven.
What is the best way to serve and store the leftover Apple Pie?
The quintessential serving is warm with a generous pour of proper homemade custard or a scoop of vanilla ice cream, and any leftovers should be covered and stored at room temperature for up to two days for the best quality.
Classic Bramley Apple Pie Recipe
Ingredients:
Instructions:
Nutrition Facts:
| Calories | 420 kcal |
|---|---|
| Protein | 4.0 g |
| Fat | 18.0 g |
| Carbs | 63.0 g |
