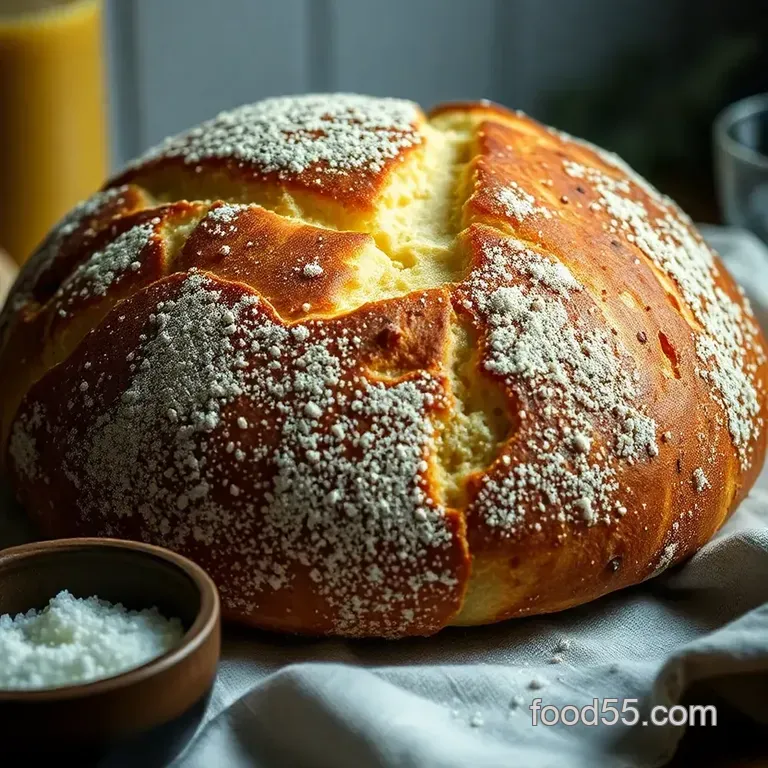
Classic French Bread: Crusty Perfection

Introduction to Classic French Bread: Crusty Perfection
Oh my gosh! Have you ever whipped up a fresh loaf of bread and felt like a culinary wizard? That aroma wafting through your kitchen? Pure magic! Who knew baking bread could make you feel like you’re in a Parisian café, right in your own home?
Today, we’re diving into an amazing french bread recipe that will have your family begging for seconds!
So, let’s get real for a minute. i’ll never forget the first time i attempted making a loaf of homemade french bread.
It was a rainy sunday afternoon, which is perfect for cozy baking. i had flour dusted everywhere, dough sticking to my fingers, and let’s not even talk about the cleanup! but the moment that golden crust emerged from the oven? total joy! the satisfaction of breaking bread with loved ones is like no other.
I mean, who doesn’t love a good french baguette fresh from the oven?
The Magic Behind the Recipe
Did you know that french bread has been around for centuries? its roots trace back to 16th-century france, where bakers experimented with techniques and ingredients.
Today, it’s a staple that’s become incredibly popular in homes and restaurants alike seriously, who can resist that crusty goodness? with this easy french bread recipe , you’ll be channeling all the artisan vibes.
Now, you might be wondering how difficult this all sounds. don’t sweat it! this recipe is rated medium on the difficulty scale.
Don't let that intimidate you. sure, it takes a little time and patience, around three hours total , to let that dough rise beautifully.
But trust me, the rewards are oh-so-worth it! plus, this recipe yields two glorious loaves perfect for sharing or hoarding (no judgment here).
When it comes to cost, it’s super budget friendly. you probably already have most of the ingredients in your pantry, and it’ll only set you back a few bucks.
That’s way cheaper than any fancy bakery! so why not whip up some homemade bread that tastes like a dream?
The Benefits of Homemade French Bread
Let’s chat about health for a sec because this recipe brings some flair to your plate! this homemade french bread is made with simple, wholesome ingredients that you can feel good about.
No weird preservatives or additives here just flour, water, yeast, and salt. it's a great source of carbs to fuel your day as well.
And if you’re looking to impress at dinner parties or cozy gatherings, this bread is a great way to elevate any meal.
It’s just perfect for soaking up that rich french onion soup or served alongside a fresh green salad. plus, it’s great for special occasions like birthdays, holidays, or even just because it’s tuesday!
But here’s the kicker: when you make this french bread recipe , you’re not just baking; you’re creating memories. the aroma, the laughter, and the simple act of gathering make it truly special.
It stands out because it’s totally unpretentious yet deliciously delightful compared to store-bought versions.
Ready to Get Started?
Are you excited to dive into this delicious journey? homemade breads bring people together, and baking from scratch can be so satisfying.
Whether it’s your first attempt or you’re a seasoned pro, i promise you’ll feel a sense of achievement when you pull those loaves from the oven.
So grab your flour and let’s go! Up next, we’ll check out the ingredients for this scrumptious Classic French Bread: Crusty Perfection . Get ready to create some kitchen magic!
Essential Ingredients Guide for Bread Lovers
Alright, my fellow home bakers let’s dive into the essential ingredients for creating the perfect loaf of bread, especially if you're tackling that classic french bread recipe .
I mean, who doesn’t love the smell of freshly baked bread wafting through the house? it's like a hug for your kitchen! whether you’re going for that crusty baguette or a soft, fluffy loaf, knowing your ingredients is key.
Premium Core Components
When it comes to bread making, you want to focus on quality. Here’s the lowdown:
Flour : Choose all-purpose flour for a great all-around loaf. If you’re feeling adventurous, bread flour gives you that awesome chewiness. For measurements, you need 4 cups (500g) of flour.
Yeast : active dry yeast is your go-to, at about 2 ¼ teaspoons (7g) . make sure it’s fresh this is vital for that lovely rise.
You can tell if it's good if it foams up after you mix it with warm water and sugar.
Water : Warm water is key. You’re looking for about 110° F ( 43° C) . Too hot, and you’ll kill the yeast; too cold, and it just won't do much.
Salt and Sugar : Just a teaspoon of salt to boost flavor and a tablespoon of sugar to feed those little yeast creatures. Simple but essential!
Storage tip : Keep your flour in an airtight container in a cool, dark place. It'll last about 6-8 months if stored right.
Signature Seasoning Blend
Now, the magic happens when you get to the seasonings. This is where you can really put your stamp on your bread!
Herbs : Think rosemary or thyme for that extra kick. Just a teaspoon mixed in will take your bread to the next level.
Flavor Enhancers : Garlic powder or even a dash of cheese can add incredible depth.
Regional Variations : Want to go Italian? Toss in some oregano. Feeling Cajun? Crawfish bread is a thing, so use some spicy seasoning!
Smart Substitutions
Let’s face it sometimes you don’t have everything on hand, and that's okay! Here are some smart swaps:
No yeast? Use baking soda and vinegar instead. It won't have the same flavor, but desperate times, right?
Gluten sensitivity? Try using almond flour or a gluten-free flour mix. Just make sure it includes xanthan gum to help with texture.
Fresh herbs not available? Dried herbs will do in a pinch. Just remember, they’re more concentrated so cut back a bit!
Kitchen Equipment Essentials
You don’t need a fancy schmancy kitchen to make bread. Here are the must have tools:
Mixing Bowl : A large one is ideal. You'll be doing a lot of stirring and kneading.
Baking Sheet or Pizza Stone : If you want that bakery quality crust, a pizza stone is worth the investment, but a regular baking sheet will work too!
Sharp Razor Blade for Scoring : This might seem optional, but scoring helps the bread expand properly while baking.
Kitchen Scale (optional) : If you really want precision, weigh your ingredients for the most consistent results.
Prep Tip : Assemble your tools before you start mixing; it makes everything smoother, trust me!
So, now that you’ve got the lowdown on all these essential ingredients , isn’t it time to roll up your sleeves? whether you’re a seasoned baker or just getting started, this guide will help you whip up a fantastic homemade french bread or any other loaf you fancy.
I mean, can you picture breaking bread with friends and family, or indulging in some warm, homemade goodness all by yourself? it’s not just baking; it’s creating a feast for the soul!
Ready to explore the world of bread making? Strap in and let’s jump into those step-by-step instructions for that easy French bread recipe you’ve been dreaming about!
Get Ready to Bake: Unlocking the Secrets of Professional Cooking
Let’s dive deep into the culinary world, shall we? today, we’re going to break down some essential professional cooking methods that can seriously elevate your at-home game, especially if you’re thinking about a french bread recipe .
Seriously, there’s something magical about homemade bread. so, grab your apron, and let’s make some crusty, golden perfection together!
Essential Preparation Steps
First things first mise en place ! this french term basically means “everything in its place.” before you even think about starting to mix your dough, get all your ingredients and tools lined up.
It’s a lifesaver! think about it no more scrambling for that missing tablespoon of sugar right when the dough is calling for it.
Time management is also key in professional kitchens. aim to prep your ingredients, then set a timer. you’d be surprised how much smoother things go when you allow the process to breathe.
Give yourself at least 30 minutes for prep. that includes everything from warming your water to measuring those 4 cups of flour .
Organization strategies come next. keep your space tidy! a cluttered countertop is a one-way ticket to mishaps. trust me; i’ve learned that the hard way.
Also, pay attention to safety considerations . cuts are no fun, so make sure to handle your knives carefully, especially when you’re scoring your bread before it bakes.
step-by-step Process
Now, let’s break it down into clear, simple steps.
Activate that yeast ! combine 1 ½ cups of warm water (aim for 110° f ) with your sugar and yeast.
Let it sit for about 5- 10 minutes until it’s frothy. if it doesn’t froth, toss it and restart.
Yeast is finicky like that!
Mix your dough : In your large bowl, combine your flour and salt, create a little well, and pour in that magic yeast mixture. You’ll start to see the dough form.
Time to knead ! Flip that dough onto a floured surface and work it for about 8- 10 minutes until it becomes smooth and elastic.
For the first rise , pop it in a greased bowl and cover it. let it chill for 1-1. 5 hours until it doubles.
You want the dough to be puffy and ready for action!
After punching the dough down (yes!!), divide it into two and mold those loaves. Think about the shape of a classic French baguette here!
Let it rise again— 30- 45 minutes should do the trick. Preheat your oven to 450° F .
Score those loaves with a sharp blade, and bake them for 25- 30 minutes until they’re broth laden brown!
Allow them to cool before slicing and tearing into that heavenly goodness.
Expert Techniques
Now, let’s sprinkle in some pro tips! Temperature control is crucial. If your water is too hot, your yeast will kick the bucket, and we don’t want that.
Here’s a pro tip: tap the bottom of your loaf . it should sound hollow if it’s done. it’s like a secret handshake for your bread.
Also, a pan of hot water in the oven creates steam, helping get that beautiful crust.
And hey, if things go south don’t stress! Bread is forgiving, so if it doesn’t rise as much as you hoped, just embrace it as a rustic loaf.
Success Strategies
Aren’t we wise with all this knowledge? But let’s not forget some common mistakes. Rushing the rise leads to dense bread, so give it the time it deserves! And double check your measurements 1 tablespoon of sugar is not the same as 1 cup (I learned that the hard way with my first Homemade French Bread attempt)!
For quality assurance , take notes. keep track of what worked and what didn’t. and if you want to make-ahead, you can freeze the dough after its first rise.
Just thaw and shape when ready.
Additional Information
So there you have it a deep dive into professional cooking methods that can transform your homemade bread recipes easy into artisan level quality.
Making french bread is all about learning the balance between technique and patience. so grab those ingredients, and before you know it, you'll be breaking bread with your family and friends, probably with some yummy soups and a glass of wine.
Happy baking, and enjoy the process!
Additional Recipe Information
So, you’re interested in making that classic french bread , huh? honestly, there’s just something magical about crafting your own homemade french bread .
The smell wafting through your kitchen is almost like a warm hug! let me share some pro tips, presentation ideas, storage secrets, and even some cool variations that can elevate your baking game.
Pro Tips & Secrets
Alright, let’s dive into my secret stash of baking vibes. first off, activation is key! when you're waking up that yeast, make sure your water is warm, but not hot .
You want it around 110° f (or about 43° c) to coax those lil’ guys into action without nuking them.
Now, when you knead, don’t just slap the dough around. really get into it! use the heel of your hand, push it away, fold it back this helps develop that gluten.
It's like a workout for your dough!
And speaking of workouts, patience pays off here. give your dough time to rise; it makes all the difference. and i swear by tossing a pan of hot water in the oven.
It creates steam hello, amazing crust!
Perfect Presentation
Okay, here’s where things get fun. when your loaves are done, they should be golden brown and just begging to be presented beautifully.
Start by scoring the tops with a sharp blade. not only does this look cool, but it also helps your bread rise more evenly.
Garnish ideas? a sprinkle of sea salt right before baking could amp up that flavor. and for plating, think about contrasting colors! you could pair your french baguette with some vibrant roasted veggies or a sprinkle of fresh herbs.
Make it look instagram ready, because honestly, we all want that “ooh” factor!
Storage & make-ahead
Now, if you end up with some leftovers (though i doubt it!), here’s the lowdown: let the bread cool completely before wrapping it in something breathable, like a cotton bag or paper towel avoid plastic, or it gets soggy.
You can keep it at room temperature for a couple of days, but for longer storage, pop it in the freezer! just be sure to wrap it tightly in plastic wrap.
When you’re ready to enjoy your homemade creation again, just thaw it at room temperature and pop it in a hot oven for about 10 minutes to get that freshness back.
Creative Variations
This is where you can really let your creativity shine! want to make this easy french bread recipe a bit more fun? toss in some herbs rosemary or thyme could be game changers! you could even fold in some olives or sun-dried tomatoes for a mediterranean twist.
Or, if you’re feeling seasonal, why not add some pumpkin spice in the fall? embrace those holiday vibes! and for those with dietary needs, you might swap all-purpose flour for a gluten-free blend.
Just be sure to check your ratios; bread making sometimes plays hard to get!
Complete Nutrition Guide
Getting a sense of how this french bread recipe fits into your diet? it’s not just delicious; it’s also pretty straightforward in terms of nutrition.
A slice will run you about 150 calories , with only half a gram of fat and 4 grams of protein.
There’s some fiber in there, too, so you’re not just filling up on carb goodness.
If you're counting carbs or looking out for sugar, this bread has no added sugars which is always a win in my book.
Just be mindful about portions; it's all too easy to munch away on this deliciousness.
Ending on a High Note
So, my friends, as you gear up to try your hand at this classic french bread , remember: baking is all about breaking bread .
It's about sharing, enjoying, and maybe a little laughter in the kitchen. even if it doesn’t come out perfect the first time hey, that’s part of the charm! bring out that apron, roll up your sleeves, and let’s make this happen.
Your homemade french baguette is just a few hours away! happy baking!
Frequently Asked Questions
What is the best flour to use for a French bread recipe?
For the best results, all-purpose flour works wonderfully in this French bread recipe. If you prefer a chewier texture, consider using bread flour, which has a higher protein content. Just remember, the quality of the flour can impact the final loaf significantly!
How can I tell if my dough has risen enough?
The dough should roughly double in size during the first rise, which usually takes 1 to 1.5 hours. You can perform the "poke test" by gently poking the dough with your finger; if the indent remains, it’s ready to be shaped into loaves. If it springs back, give it more time.
Can I make this French bread recipe ahead of time?
Absolutely! You can do the first rise and then shape the loaves, cover them with plastic wrap, and refrigerate overnight. When you’re ready to bake, let them sit at room temperature for about 30 minutes before baking to allow them to puff up again. Perfect for a Sunday roast!
What’s the secret to a crusty French bread?
A few tricks will give you that perfect crust! First, adding steam to the oven while baking helps develop a crispy exterior. You can achieve this by placing a pan of hot water at the bottom of the oven. Also, scoring the top of the dough allows steam to escape beautifully, enhancing both texture and appearance.
How should I store French bread to keep it fresh?
To keep your French bread fresh, store it in a paper bag at room temperature. Avoid plastic bags, as they can make the crust gummy. If you've got leftovers, you can also slice and freeze them; just toast them straight from the freezer for a lovely warm snack later on!
Can I add herbs or other ingredients to the French bread recipe?
Yes, you can customize your bread! Add dried herbs like rosemary or thyme into the dough for delicious flavor. For a Mediterranean twist, incorporating olives or sun-dried tomatoes can elevate this classic recipe. The beauty of bread making is that you can really make it your own!
Classic French Bread Crusty Perfection
Ingredients:
Instructions:
Nutrition Facts:
| Calories | 150 |
|---|---|
| Fat | 0.5g |
| Fiber | 1g |
