The Ultimate Comfort Classic Potato and Cheese Pierogi
- Unlocking the Magic of Authentic Polish Dumplings
- Why Handcrafted Pierogi Deserve a Place on Your Table
- Gathering the Necessities for Perfect Pockets
- The Components of Our Signature Filling
- Mastering the Two Pillars: Dough and Filling Preparation
- The Assembly Line: Shaping and Sealing Your Pierogi
- The Final Transformation: Boiling to Edible Perfection
- Elevating Your Boiled Dumplings with Sizzling Toppings
- Strategies for Storing Your Homemade Polish Delights
- Troubleshooting Common Dumpling Dilemmas
- Recipe FAQs
- 📝 Recipe Card
Unlocking the Magic of Authentic Polish Dumplings
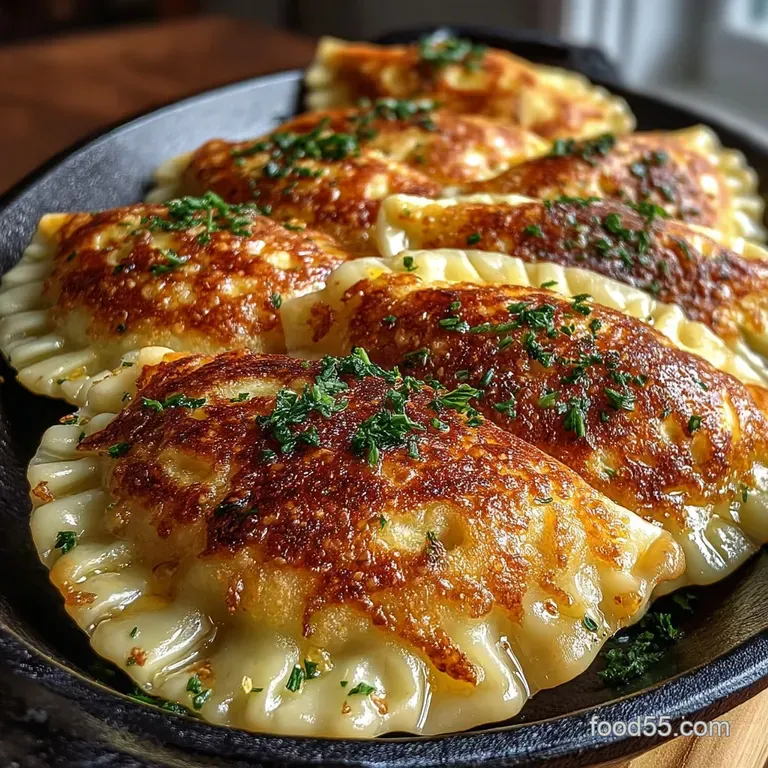
Welcome to the heart of Polish comfort food! These homemade pierogi feature a tender, slightly chewy dough wrapped around a rich, savoury filling of creamy mashed potatoes blended with sharp farmer’s cheese (or ricotta/cream cheese substitute).
Traditionally served boiled and then pan-fried until beautifully golden and crisp, they are finished with sweet, caramelised onions and a dollop of sour cream. They taste exactly like a Sunday dinner at your favourite aunt’s house absolutely unbeatable.
This Recipe With Pierogi guides you through achieving that authentic texture and flavour.
Why Handcrafted Pierogi Deserve a Place on Your Table
Making Pierogi From Scratch might seem daunting, but trust me, the satisfaction derived from biting into a perfectly sealed, tender dumpling that you created yourself is unparalleled.
While store-bought options are convenient, they rarely capture the delicate balance of flavour and texture found in a truly great homemade version. This Homemade Pierogi Recipe is designed to demystify the process, breaking it down into manageable stages.
This is more than just cooking; it’s creating culinary heritage.
A Warm Welcome to the Ultimate Comfort Food Recipe
This Easy Homemade Pierogi guide keeps things classic potato and cheese because it’s the gold standard for a reason. The estimated yield of 40 50 pieces ensures you have plenty for a large family meal or ample leftovers, as these reheat beautifully.
The complexity lands squarely in the "Medium" range, not because of difficult techniques, but because of the necessary choreography between dough, filling, and assembly. With about 45 minutes of active prep time, and a total time investment under two hours, this is entirely achievable on a weekend afternoon.
Understanding the Heart of 'Pierogi Ruskie'
The filling we are focusing on here is often referred to as Pierogi Ruskie (Ruthenian Pierogi), named for the historic region where this combination gained prominence.
The key to its richness lies in the combination of smooth mashed Russet potatoes and tangy farmer’s cheese ( twaróg ). If twaróg is unavailable, a good quality, drier ricotta or even smooth cream cheese provides the necessary body and tang to balance the starchy potato base.
We are aiming for a velvety core, so ensuring the potatoes are lump free is paramount.
Essential Gear for Dumpling Success
While you don't need specialized equipment, a few tools elevate the process significantly. A large mixing bowl is essential for managing the slightly sticky dough, and a reliable rolling pin is non-negotiable for achieving the right thickness.
Crucially, you'll need a round biscuit cutter, ideally around 3 inches (7.5 cm) in diameter, to ensure uniform size, which guarantees even cooking. Finally, have a very large pot ready for boiling and a good non-stick skillet for the critical pan-frying finish.
Gathering the Necessities for Perfect Pockets
Before we dive into the making, let’s ensure our pantry is stocked. The beauty of this Pierogi Recipe is that it relies on simple, rustic ingredients.
We will need 3 cups (360g) of All-Purpose Flour, fine sea salt, one room temperature egg, and, critically, 1 cup of boiling water for the dough. For the filling, 2 lbs of Russet Potatoes, 8 oz of your chosen cheese, 4 tablespoons of butter, a small minced onion, salt, and pepper complete the core components.
Don't forget the finishing touches: plenty of butter and two large yellow onions, thinly sliced, for that indispensable caramelised topping.
The Components of Our Signature Filling
The flavour profile of the farsz (filling) hinges on texture and balance. The filling must be substantial enough to hold its shape but soft enough to yield pleasantly when bitten into. It must also be completely cool before assembly to avoid compromising the delicate dough structure.
Dough Components: Flour, Water, and Soul
The secret weapon for elastic, tender dough is the incorporation of boiling water. This process, similar to making pasta dough, gelatinizes some of the starch, making the dough incredibly pliable. This results in a dough that stretches beautifully during rolling and maintains its integrity during the boil.
The small amount of melted butter adds richness and helps prevent the dough from becoming too tough.
Sourcing the Ideal Cheese for Creaminess
When selecting your cheese, remember we are aiming for a slightly dry texture to avoid a watery filling. While traditional Polish twaróg is best, if substituting, drain any excess moisture from ricotta or press cream cheese slightly before using.
The fat content in the cheese, combined with the butter, ensures the mashed potatoes become luxurious rather than gluey.
Measuring Precisely: Avoiding Chewy Disasters
When working with dough, precision in measurement is your friend. Too much flour will lead to tough, chewy pierogi, while too little will result in a dough that sticks to everything. Use the 'spoon and level' method for measuring flour rather than scooping directly from the bag.
Consistency here is what separates an Easy Pierogi Recipe from a frustrating one.
Mastering the Two Pillars: Dough and Filling Preparation
We tackle the filling first because it requires time to cool, allowing us to focus on the dough while it rests.
Whipping Up the Velvety Potato and Cheese Core
Start by boiling your peeled, quartered Russet potatoes in heavily salted water until they are completely tender. The drainage process is vital; drain them thoroughly and allow any residual steam to escape before mashing them smooth.
Melt 4 tablespoons of butter and gently sauté your finely minced onion until it is translucent and sweet, then incorporate this fragrant butter mixture into the potatoes. Finally, fold in the cheese, salt, and pepper until just combined.
A warm filling will inevitably lead to soft edges, so chilling is non-negotiable.
Creating the Supple Dough That Hugs the Filling
While the filling cools, turn your attention to the Pierogi Dough Recipe . Whisk the flour and salt together, create a well, and add the room temperature egg and cooled melted butter.
Now, slowly pour in the boiling water while stirring rapidly, first with a wooden spoon, then transitioning to your hands. Turn the shaggy mass onto a lightly floured surface and knead firmly for 5 to 8 minutes until it becomes smooth and elastic.
Cover this dough tightly and allow it to rest at room temperature for a minimum of 30 minutes; this resting period relaxes the gluten structure, making the subsequent rolling far easier.
Related Recipes Worth Trying
- Homemade Pierogi Grandmas Secret Potato Cheese Recipe — My classic Homemade Pierogi recipe These Polish dumplings are filled with potato cheese just like Grandma made almost Get the easy pierogi recipe here
The Assembly Line: Shaping and Sealing Your Pierogi
This is where the magic happens! Divide the rested dough in half, keeping the unused portion covered to prevent drying. Roll one half out thinly about 1/8 inch (3mm) is perfect. Use your 3 inch cutter to stamp out circles. Place a modest teaspoon of the cooled potato filling directly in the centre of each circle.
Techniques for Rolling, Cutting, and Crimp Sealing
The sealing technique is crucial to ensure your Pierogi survive the boil without bursting. Fold the circle over to form a perfect half moon, aligning the edges precisely. Press firmly down the entire seam, pushing out any trapped air before sealing.
For an added layer of security and traditional aesthetics, use the tines of a fork to crimp the edges firmly all the way around. Place the finished dumplings on a sheet lined with parchment paper dusted lightly with flour, ensuring they do not touch one another.
The Final Transformation: Boiling to Edible Perfection
Once you have a good batch ready, it’s time to cook.
The Gentle Art of the Boil: When Are They Done?
Fill a large pot with water and add a generous amount of salt it should taste pleasantly seasoned. Bring this to a gentle boil; a rolling, aggressive boil can cause the dumplings to tumble violently and tear. Drop the pierogi in batches, stirring gently at first to prevent sticking to the bottom.
They will sink, then rise to the surface. Once they float, let them continue to simmer gently for another 2 to 3 minutes. Use a slotted spoon or spider strainer to remove them gently from the water.
Elevating Your Boiled Dumplings with Sizzling Toppings
While boiled pierogi are acceptable, the true Polish experience involves finishing them in fat. This step adds texture, depth, and irresistible flavour.
Classic Accompaniments: Butter, Onions, and Beyond
Thinly slice two large yellow onions and sauté them slowly in 6 tablespoons of unsalted butter over medium low heat. This low-and-slow approach is what achieves deep caramelisation and sweetness, taking about 15– 20 minutes.
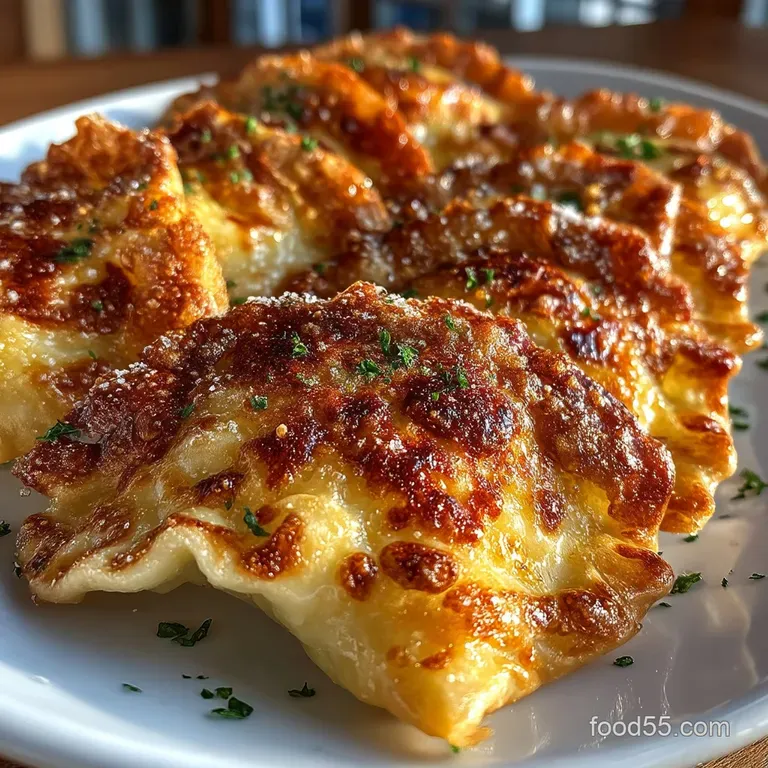
In a separate, large skillet, melt another 2 tablespoons of butter over medium heat. Add the boiled pierogi in batches and pan-fry them until they achieve a lovely golden brown crispness on both sides. Serve immediately, generously smothered with the sweet onions and a cooling dollop of sour cream.
Strategies for Storing Your Homemade Polish Delights
If you aren't serving them all immediately, your dedication won't go to waste. The freezer is your best friend for preserving these labours of love.
How to Successfully Freeze Uncooked vs. Cooked Pierogi
For freezing uncooked pierogi, arrange the sealed, raw dumplings on a parchment lined baking sheet without letting them touch. Place the entire tray in the freezer until they are rock solid, which usually takes a couple of hours. Once frozen solid, you can transfer them to heavy duty freezer bags.
When cooking from frozen, add about 2– 3 minutes to the standard boiling time. Cooked pierogi can also be frozen after boiling and chilling, then reheated later either by simmering briefly or pan-frying from thawed.
Troubleshooting Common Dumpling Dilemmas
Even expert cooks encounter minor hiccups. Knowing how to correct them will ensure your next attempt is even smoother.
Fixing Dough That Tears or Shrinks
If the dough tears during rolling, it often means the gluten hasn't rested enough or the dough is too dry. If it tears upon boiling, the seal was weak, or the dough was rolled too thinly. If the dough shrinks significantly when boiled, it usually indicates it was kneaded too long or was too stiff initially.
For tears, patch them gently with a scrap piece of dough moistened with water before boiling.
Creative Filling Swaps for Next Time
Once you have mastered this classic version, experimentation is highly encouraged. Consider swapping the potato and cheese for savoury combinations like ground sautéed mushrooms mixed with sautéed cabbage ( Kapusta ), or even a sweet variety using farmer’s cheese blended with sugar and vanilla, served with melted butter and cinnamon sugar.
This entire Homemade Pierogi Recipe offers a rewarding cooking experience. From the elastic Pierogi Dough Recipe to the satisfying, golden crisp of the finished product, you’ll be proud to share this taste of Poland.
Enjoy every bite of your homemade Pierogi !

Recipe FAQs
My Pierogi dough is tough and tears when I roll it out. What am I doing wrong?
Ah, that’s a common kerfuffle! Usually, this means the dough hasn't rested long enough, or you might have overworked it during kneading. Ensure you knead only until it’s smooth (5-8 minutes), and always let it rest for the full 30 minutes; this relaxes the gluten, making it far more pliable.
How can I stop my Pierogi from bursting open while they are boiling?
The main culprit here is usually overfilling or a weak seal remember, don't be greedy with the filling! Also, ensure your water is at a gentle simmer, not a rolling boil, as aggressive bubbling can knock them about and tear the delicate edges. Give them a gentle stir right after dropping them in.
Can I make these Pierogi ahead of time, and what’s the best way to freeze them?
Absolutely, freezing pierogi is practically tradition! Lay the uncooked, freshly sealed dumplings on a baking sheet lined with parchment paper, ensuring none are touching. Pop the tray into the freezer until they are rock solid, then transfer them to a labelled freezer bag.
They cook beautifully straight from frozen; just add a few extra minutes to the boiling time.
I can't find Farmer’s Cheese (Twaróg). What's the best substitute for the potato filling?
Don't fret if you can’t find Twaróg; plenty of us outside of Poland struggle with that one! The next best option is a very dry, pressed ricotta cheese, drained well so it doesn’t add excess moisture.
Alternatively, a smooth, full fat cream cheese works in a pinch, though you may need to increase the seasoning slightly.
Is it mandatory to pan-fry the pierogi after boiling, or can I just eat them boiled?
While boiled pierogi are perfectly edible, the pan-frying step is what truly elevates them from good to glorious! Frying them in butter until golden brown gives them that essential crispy texture to contrast with the soft filling it’s the classic way we enjoy them.
If you must skip it, make sure to drown the boiled ones in melted butter and onions!
Are there any good meat free filling variations aside from potato and cheese?
Oh yes, there are loads of hearty vegetarian options! A classic Polish alternative is Kapusta (sauerkraut) mixed with sautéed wild mushrooms, giving you a lovely tangy and earthy flavour profile.
For something different, try a mash of roasted butternut squash blended with sage and browned butter instead of frying fat.
Classic Potato Pierogi Recipe

Ingredients:
Instructions:
Nutrition Facts:
| Calories | 65 kcal |
|---|---|
| Protein | 1.0 g |
| Fat | 6.0 g |
| Carbs | 4.8 g |
| Fiber | 0.8 g |
| Sodium | 913 mg |
