Creamy Coconut Cake Delight: the Queens Extra Moist Layer Cake

- Introducing The Ultimate Creamy Coconut Cake: An Overview
- The Triple-Threat Technique: Why This Coconut Cake Stands Out
- Gathering Your Tropical Pantry: Ingredients and Necessary Swaps
- Mastering The Layers: A Step-by-Step Guide to Baking Perfection
- Expert Baker Secrets for a Flawless Creamy Coconut Cake
- Keeping Your Dream Cake Fresh: Storage and make-ahead Tips
- Pairing Perfection: How to Serve and Garnish Your Regal Dessert
- Recipe FAQs
- 📝 Recipe Card
Introducing The Ultimate Creamy Coconut Cake: An Overview
Forget everything you think you know about dry, cardboard like coconut cakes, because this extra creamy coconut cake recipe is a miracle. As it bakes, your entire kitchen transforms into a warm, tropical oasis, smelling sweet, buttery, and utterly irresistible.
The texture is the real winner here; it’s dense yet impossibly moist, almost melting on your tongue.
This creamy coconut cake recipe from scratch is deceptively simple, relying on smart use of pantry staples for a seriously impressive result. It looks like a wedding cake, but it comes together quickly enough to make for a weekend treat.
It truly is the perfect showstopper for a celebration, or just a Tuesday when you desperately need a sophisticated pudding.
We are going all out using a triple soak method to guarantee that every single forkful is tender, saturated, and intensely coconutty. Get your mixer running; we are making the Queen of Cakes, and you are going to learn all my sneaky tricks. Let's crack on.
The Triple Threat Technique: Why This Coconut Cake Stands Out
What Defines the "Extra Creamy" Difference?
The secret to this easy coconut cake recipe lies in maximizing moisture from three different sources. We use buttermilk and full fat coconut milk in the batter, which keeps the crumb tender before it even hits the oven. Then comes the magic: a heavy, sweet condensed milk soak applied after baking.
This layering ensures the cake is dense, rich, and melts in your mouth, which is exactly what we want from a creamy coconut cake delight recipe.
Equipment Checklist: Tools for Layer Cake Success
You absolutely need a stand mixer or a sturdy, high powered hand mixer for the frosting. Do not try to hand whisk that cream cheese; trust me, you will regret it. Make sure your cake pans are the same size (two 9 inch rounds are standard), and please, for the love of neat baking, invest in parchment paper rounds.
They are absolute lifesavers for preventing sticking.
Prep Time and Pacing: Planning Your Baking Schedule
Baking a layer cake is definitely a marathon, not a sprint. The longest time requirement here is the cooling and chilling phase, where the layers need at least two hours of rest after soaking to firm up. Pro Tip: Make the layers the day before you plan to serve.
Let them soak overnight in the fridge, and then just worry about whipping up the frosting and assembling the cake on serving day.
The Buttermilk and Coconut Milk Base: Achieving Maximum Tenderness
Buttermilk provides a gentle acidity that tenderizes the flour, reacting perfectly with the baking soda to lift the cake without drying it out. The canned, full fat coconut milk brings unmatched richness and tropical flavor without adding unnecessary water.
This combination ensures an incredible rise and a wonderfully soft crumb for your creamy coconut cake recipe from scratch.
The Secret Creamy Soak: Preventing Dry Cake Layers
This step is non-negotiable for achieving that signature extra creamy texture. We pierce the warm cake layers dozens of times and douse them in a mixture of condensed milk and heavy cream. This liquid immediately locks into the sponge, preventing the cake from ever becoming stale.
I learned this trick years ago after baking a famously dry brick like cake never again.
Chef’s Note: The soak liquid is what makes the interior feel like a rich creamy coconut cake filling, even though there’s no separate filling layer inside the sponge. Pour slowly!
Perfecting the Tangy Cream Cheese Frosting Balance
Cream cheese frosting needs that lovely, essential tang to balance the intense sweetness of the soaking liquid. Crucial Rule: Your cream cheese and butter must be truly soft and at room temperature for a smooth, homogenous emulsion.
Cold ingredients lead to stubborn lumps that no amount of subsequent beating will fix, resulting in grainy frosting.
Gathering Your Tropical Pantry: Ingredients and Necessary Swaps
Cake Flour vs. All-Purpose: Does the Difference Matter Here?
I use standard all-purpose flour here because the sheer fat content from the oil, butter, and coconut milk, plus the tenderizing buttermilk soak, is enough to guarantee a soft result. Using AP keeps this whole process easier for the average home cook.
If you only have cake flour, reduce the amount by 2 tablespoons per cup to compensate for its lower protein content.
Understanding Coconut Products: Cream of Coconut vs. Coconut Milk
You must use high-quality, full fat canned coconut milk the thick stuff used in curries and sauces. Do not accidentally grab "Cream of Coconut." Cream of coconut is a syrupy, intensely sweetened mixer usually reserved for making piña coladas.
It is not interchangeable with canned coconut milk in this recipe.
Butter Temperatures and Emulsification Notes
If your butter is too cold, it won't trap air properly during the creaming stage, leading to a denser, heavier cake. If it’s melted or oily, the batter might split or curdle when you add the eggs and liquids.
If you notice a curdled look, quickly add a tablespoon of your dry mixture and mix briefly to stabilize the emulsion before moving on.
Sourcing the Best Shredded Coconut for Toasting
Sweetened shredded coconut works perfectly in the cake batter because it adds flavour and moisture directly into the sponge. However, for the beautiful garnish, try to find large, unsweetened coconut flakes if you can.
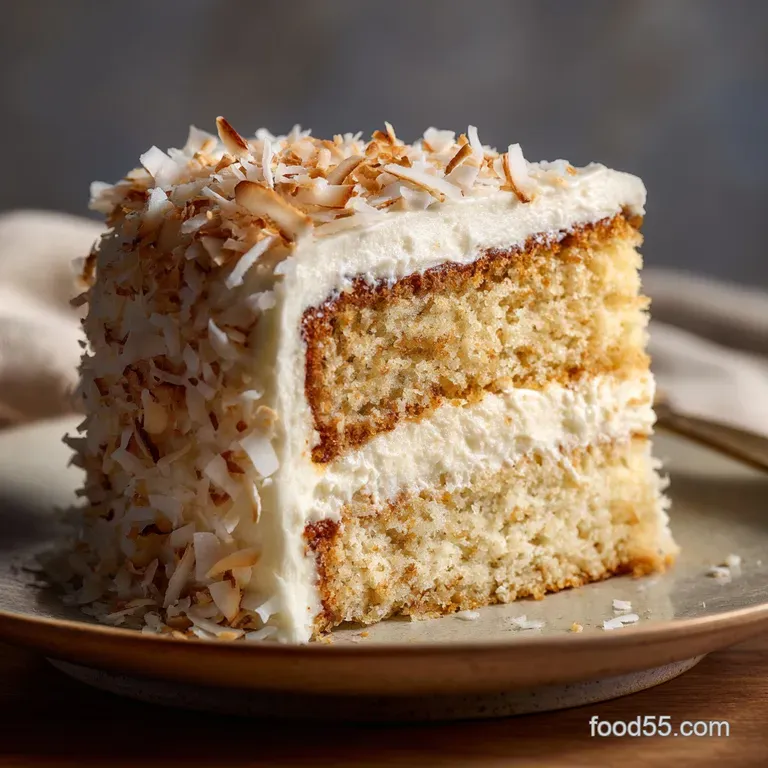
Toasting them transforms them from mildly sweet to richly nutty, adding a necessary textural crunch against the incredibly soft cream coconut cake.
| Ingredient | Viable Substitute | Notes on Swap |
|---|---|---|
| Buttermilk | Whole Milk + 1/2 Tbsp White Vinegar | Let sit for 10 minutes until slightly curdled. |
| Vegetable Oil | Refined Coconut Oil (Melted) | Use refined, not virgin, to avoid an overpowering flavor. |
| Heavy Cream (Soak) | Evaporated Milk | Slightly less rich, but it absorbs moisture well. |
| Sweetened Shredded Coconut (Batter) | Desiccated Coconut + 1 Tbsp Sugar | Hydrate the desiccated coconut slightly with a splash of milk first. |
Mastering The Layers: A step-by-step Guide to Baking Perfection
Phase 1: Mixing and Baking the Moist Cake Layers
Preheat the oven to 350°F (175°C) and prep those pans; organization is always key! In your mixer, cream the softened butter, oil, and sugar hard until the mixture is visibly lighter and fluffy, trapping plenty of air. Add the eggs one at a time, beating completely after each addition.
Now, on low speed, alternate adding the dry ingredient mixture with the coconut milk and buttermilk. Mix only until the last streak of flour disappears. Divide evenly and bake for 30– 35 minutes until a skewer comes out clean.
Phase 2: Drenching the Warm Cake with the Coconut Soak
Take the cakes out of the oven and let them cool in the pan for 15 minutes before flipping them onto a cooling rack. While they are still pleasantly warm, pierce them absolutely everywhere with a skewer be generous.
Whisk your condensed milk soak and pour half of it very slowly over each layer. Don't rush this part. Let them absorb all that creamy goodness before transferring the layers to the fridge for at least one hour to firm up.
Phase 3: Whipping the Frosting to a Stable Consistency
Beat the room temperature cream cheese and butter hard until they are absolutely smooth and lump free. Gradually add the sifted powdered sugar, alternating with the heavy cream, until it reaches a beautiful spreadable consistency.
Beat it on medium high for a minute at the end; this final burst incorporates air and ensures the frosting is light and fluffy.
Phase 4: Constructing and Finishing the Layered Cake
Always start your construction with the flattest cake layer on your serving platter. Top it with a generous layer of frosting and spread evenly. Place the second layer on top, making sure it’s centred.
Apply a quick, thin crumb coat this seals in all the loose crumbs and chill for 15 minutes. Finish with the thick, smooth layer of remaining frosting, then press that beautiful, nutty toasted coconut garnish onto the sides and top.
Expert Baker Secrets for a Flawless Creamy Coconut Cake
Most people fail layer cakes right at the finish line, often due to impatience or temperature issues.
- Stop Overmixing: Once the flour hits the wet ingredients, gluten starts developing fast. Overmixing is the number one cause of tough, dry cake. Mix until just combined, then stop. You must trust the process.
- Test Internal Temperature: If you pull the cake out based only on time, you risk dry edges. The cake is perfectly done when an instant read thermometer inserted into the center reads 200°F (93°C).
- Chill Time is Mandatory: Do not try to frost the cake until the layers are fully chilled after soaking. The condensed milk soak makes the layers delicate, and if they are warm or room temperature, they will tear, slump, and refuse to cooperate under the weight of the frosting.
Keeping Your Dream Cake Fresh: Storage and make-ahead Tips
This creamy coconut cake actually gets better the day after it is made, once the soak has fully settled into the sponge. Store the fully frosted cake loosely covered in the fridge for up to 4 days.
For long term storage, wrap unfrosted, fully cooled, and soaked layers individually in plastic wrap, then foil, and freeze for up to 3 months. Thaw them overnight in the fridge before you decide to apply the frosting. They will taste totally fresh and delicious.
Pairing Perfection: How to Serve and Garnish Your Regal Dessert
Because this cake is so unbelievably rich and sweet, I usually serve it alongside something sharp and tart for contrast. A simple side of fresh, tart raspberries or a light lime curd sauce works wonders. It's the perfect contrast to other heavy, creamy desserts, just like my own Oreo Cheesecake: The Best Classic Baked Showstopper Dessert Recipe — if you are hosting a truly massive dessert buffet. Sometimes, a tiny glass of something strong and sweet, like a small Limoncello Pudding Shots The Best Creamy, No-Bake Adult Dessert , makes the perfect finishing touch alongside the slice.
Troubleshooting: Why Your Batter Curdled (And How to Fix It)
Curdling usually happens when one ingredient, most often the eggs or the buttermilk, is significantly colder than the fats. If you notice the batter looking chunky or separated, stop the mixer.
Add one tablespoon of the dry flour mixture and beat it in quickly; the extra starch often helps re-emulsify the fats and liquids, salvaging your cake.
Achieving Perfectly Flat Cake Tops (No Dome Woes)
The biggest culprit for forming large domes is an oven that is too hot, causing the outside edges to set before the center rises. Check your oven temperature with a separate thermometer. Plus,, making sure all your cold ingredients are truly at room temperature encourages even baking and reduces doming.
The Art of Toasting Coconut Flakes for Garnish
You can toast the flakes either in a dry skillet over medium heat or spread them on a baking sheet at 325°F (160°C). The main thing is to watch them like a hawk! They go from perfectly golden to charred black in about three seconds, seriously. You want them just nutty brown and fragrant.
How Long Does Cream Cheese Frosting Last at Room Temperature?
Because of the high dairy content (butter and cream cheese), the frosting is best kept chilled. A fully frosted cake can safely sit out at room temperature for up to two hours for serving. After that, it needs to go back into the fridge to keep the frosting stable and safe.
Freezing Unfrosted Cake Layers for Future Use
This is absolutely my favorite make-ahead trick. Once the layers are baked, cooled, and soaked, wrap them individually in plastic wrap, followed by a layer of aluminum foil. Label and freeze. They thaw perfectly overnight in the fridge and are ready to be frosted the next day.
The Best Way to Store a Frosted Cake Overnight
If you have one, use a large cake dome or an airtight cake carrier. If you don't, stick a few tall toothpicks into the top edge of the cake. Then, carefully tent plastic wrap over the toothpicks so the plastic doesn't actually touch or stick to the frosting.
This keeps it nice and moist and protects that lovely, creamy exterior.

Recipe FAQs
Why did my cake layers turn out dry, even after applying the coconut soak?
The most common cause of dry cake is over mixing the batter, which develops too much gluten and creates a tough crumb. Additionally, confirm your oven temperature with a thermometer; if the temperature is too high or the cake baked too long (even by a few minutes), the moisture will evaporate quickly.
Always use the toothpick test and remove the cake immediately when clean.
How much soak should I actually use on the layers? Won't the cake get soggy?
Use approximately half of the soak mixture for both layers combined, pouring it slowly over the still warm cake layers. The goal is saturation, not complete soaking, so the cake should absorb the liquid relatively quickly but still feel structurally sound.
If the cake is fully hot or too cold when you apply the soak, it may crumble or the liquid may pool on top, so ensure it is slightly cooled first.
I don't have buttermilk. What can I use as a substitute?
You can easily create a substitute by mixing 1 cup of regular milk (whole milk works best) with 1 tablespoon of white vinegar or lemon juice. Let the mixture sit for 5-10 minutes until it slightly thickens and curdles before incorporating it into the recipe.
For an added coconut richness, you can substitute the buttermilk with full fat canned coconut milk if desired.
My cream cheese frosting is runny and won't hold its shape. What went wrong?
The likely culprit is the temperature of the ingredients; if the butter or cream cheese is too warm, the emulsion breaks and the frosting becomes soupy. Place the mixing bowl (or just the finished frosting) into the refrigerator for 20-30 minutes to chill and firm up.
Once chilled, whip it again briefly on low speed to regain structure before attempting to frost the cake.
Can I make this cake fully dairy-free or vegan?
Yes, substitute the regular butter with a high-quality vegan butter stick and use full fat canned coconut cream in place of buttermilk/milk in the cake batter. For the frosting, use vegan cream cheese combined with vegan butter sticks, ensuring all ingredients are softened but still cold for the best whipping results.
Note that the texture will be slightly denser than the original.
How long can I store this cake, and does it need to be refrigerated?
Due to the cream cheese frosting and the moist coconut soak, this cake must be stored in the refrigerator, preferably in an airtight container or covered tightly. The cake will keep well for 3 to 4 days when refrigerated.
For the best flavor and texture, always allow the cake to sit at room temperature for 30 45 minutes before slicing and serving.
What is the best way to toast the coconut flakes for the garnish?
The most foolproof method is to spread the coconut flakes in a single layer on a baking sheet and bake at 325°F (160°C) for 5-10 minutes, stirring every two minutes until they turn golden brown.
Alternatively, you can toast them carefully in a dry skillet over medium low heat, stirring constantly for 3-5 minutes, ensuring they do not scorch.
Creamy Coconut Cake Dream Soak

Ingredients:
Instructions:
Nutrition Facts:
| Calories | 520 kcal |
|---|---|
| Protein | 6.0 g |
| Fat | 20.0 g |
| Carbs | 83.0 g |
