Oreo Bark: the Ultimate Easy No-Bake Monochrome Marble Classic
- Discovering the Magic of No-Bake Oreo Bark
- The Science of Crunch and Cream: Why Oreo Bark Satisfies
- Gathering Your Supplies: Essential Ingredients and Swaps
- How to Master the Monochrome Marble Swirl: Step-by-Step Instructions
- Troubleshooting and Expert Secrets for Perfect Oreo Bark
- Maximizing Shelf Life: Storing Your Oreo Bark
- Recipe FAQs
- 📝 Recipe Card
Discovering the Magic of No-Bake Oreo Bark
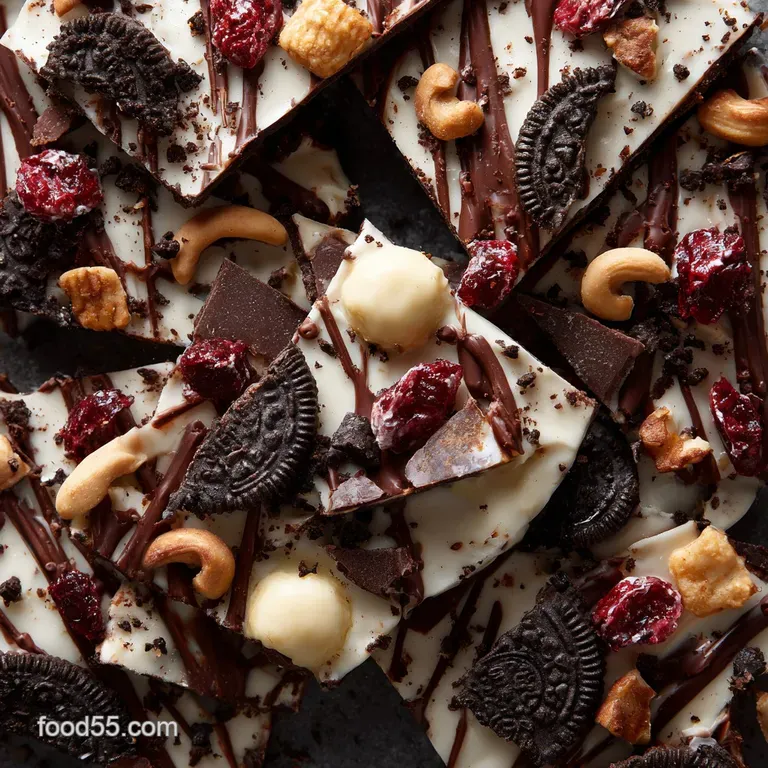
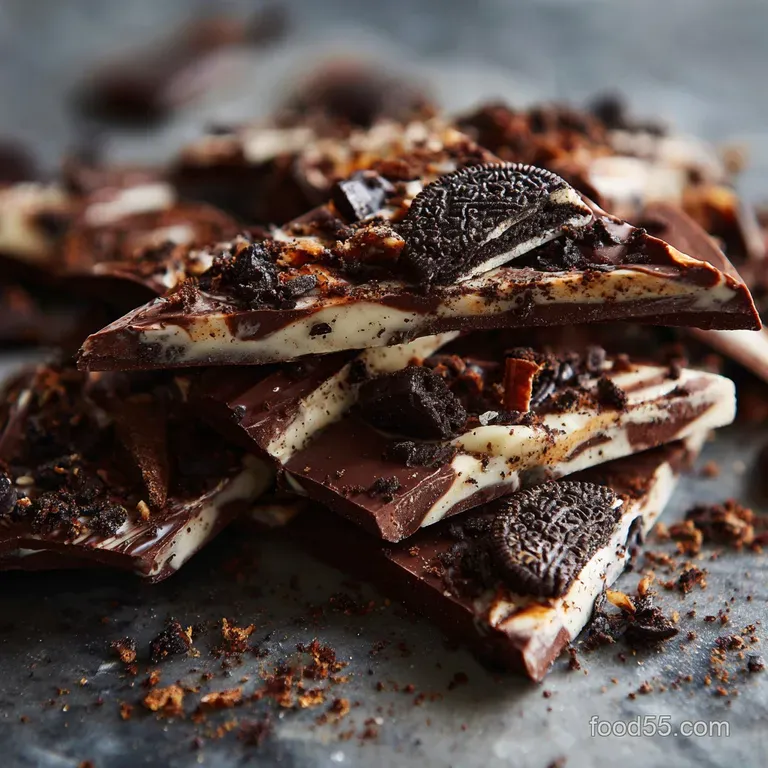
Have you ever heard that perfect, glorious snap of hardened chocolate studded with creamy, crunchy cookie chunks? That sound, my friend, is the sound of success. This Oreo Bark Recipe Easy isn't just candy; it’s a textural symphony of dark, rich chocolate and that classic vanilla crème filling we all secretly crave. The monochrome marbling we're doing makes it look incredibly sophisticated, too.
This is my absolute lifesaver dessert, especially during the holidays when the oven is perpetually booked for pies and roasts. It requires zero baking time, minimal clean-up, and you can churn out a stunning batch in under 20 minutes of active work.
If you need a gorgeous, impressive gift without breaking the bank or your sanity, this [No-Bake Oreo Bark] is the answer.
We aren't just dumping cookies into melted chocolate and hoping for the best today, though; we are aiming for that elegant, perfect ratio. Trust me, these tiny tweaks are what separate a good bark from a truly phenomenal, gift worthy [White Chocolate Oreo Bark]. Now, let's crack on and make some candy!
What is "Bark" and Why is it the Ultimate Easy Dessert?
"Bark" is simply a large, thin sheet of melted chocolate mixed with flavorings or nuts, then allowed to cool and broken into irregular pieces. It’s the easiest homemade candy you can make, requiring no thermometers, molds, or precise tempering (unless you want to get really fancy).
It's beloved because of its textural simplicity and speed. When the chocolate cools completely, it solidifies into a delightful, sharp, snappy texture that contrasts beautifully with the soft, crumbly cookies. Think of it as a quicker, less fussy cousin to my beloved Saltine Cracker Toffee: Easiest No-Fail Cracker Toffee Bark Recipe .
The Visual Appeal: Achieving the Perfect Monochrome Look
For this version, we ditch the brightly colored sprinkles and focus on contrast. The dark chocolate provides a deep, glossy canvas for the bright white chocolate swirl. This monochromatic approach black, white, and the classic cookie texture is incredibly striking and always feels sophisticated, even when serving a total comfort food.
A Treat for Every Occasion: Versatility and Prep Time
Seriously, this recipe is fast. You only need about 15 minutes of prep time, which mostly involves crushing cookies and melting chocolate. It's the ultimate make-ahead treat, ideal for when you suddenly remember you signed up for a school bake sale or need a quick housewarming gift.
The Science of Crunch and Cream: Why Oreo Bark Satisfies
The magic in perfect [Oreo Bark] is managing the fat and sugar content efficiently. Good chocolate, especially dark chocolate, provides a slightly acidic, bitter contrast to the immense sweetness of the Oreo filling and the white chocolate drizzle. This balance stops the bark from tasting sickeningly sweet.
We fold in the crushed cookies after the dark chocolate has melted, allowing the residual heat to warm them slightly without melting the cream filling entirely. This prevents the filling from dissolving fully into the chocolate base, ensuring you get pockets of distinct vanilla flavor.
Pro Tip: Never overmix the cookies into the chocolate, or you'll lose that essential textural definition!
Gathering Your Supplies: Essential Ingredients and Swaps
Optimizing the Oreo to Chocolate Ratio
I use a generous amount of cookies here 36 cookies for 12 ounces of chocolate base. Why so many? Because you want the bark to be loaded. Every single bite needs that distinct black and white crunch. This is the difference between chocolate with a few crumbs and true [Oreo Bark Cookies n Cream].
Balancing Sweetness: Choosing the Right Chocolate Base
I always advocate for dark chocolate (60 70% cacao) for the base. White chocolate is pure sugar and cocoa butter; using dark underneath creates complexity. If you only have milk chocolate, it’s fine, but consider adding a tiny pinch more salt to compensate for the extreme sweetness.
Choosing Your Chocolate Melting Method (Wafers vs. Chips)
This is crucial for that satisfying snap . Use melting wafers (couverture or high-quality compound chocolate) whenever possible. Chocolate chips contain stabilizers that help them keep their shape in the oven, meaning they melt poorly and yield a dull, soft bark.
Wafers, designed to melt smoothly, give you a professional gloss and a clean break.
Deciphering the Oreo Cookie Crush Size
You absolutely want variety here. If you use a food processor and turn everything into powder, the texture will be uniform and a bit boring. Use a zip-top bag and a rolling pin to get a mix of fine crumbs, medium pieces, and large, beautiful chunks. The large chunks go on top for maximum visual impact!
dairy-free and Vegan Bark Considerations
Making this dairy-free is surprisingly easy because most Oreos are already accidentally vegan. You just need to substitute the chocolate. Use high-quality, certified vegan dark and white chocolate melting wafers (often found near baking supplies). The process remains exactly the same.
| Ingredient | Substitute | Why it Works |
|---|---|---|
| Dark Chocolate Wafers | Semi sweet chocolate chips | Acceptable, but melt gently to avoid dull texture. |
| Oreo Cookies | Generic sandwich cookies | Works perfectly, but check the filling texture. |
| Flaked Sea Salt | Pink Himalayan salt | Adds texture and bursts of salinity. |
| White Chocolate Wafers | Vanilla Almond Bark | Melts easily and sets very hard, but may be too sweet. |
How to Master the Monochrome Marble Swirl: step-by-step Instructions
This method ensures you get beautiful streaks, not a muddy mess.
Prepping Your Pan: The Key to Easy Release
This is my #1 beginner tip: Always use parchment paper, leaving generous overhang on the long sides. You’ll be able to lift the entire, hardened slab out of the tray perfectly, ready for breaking.
I once forgot this step and spent 20 minutes trying to scrape sticky chocolate off the tray edges. Never again.
Melting Chocolate Safely: Microwaving vs. Double Boiler
I prefer the microwave for speed, but you must be patient. Heat the chocolate in 30 second intervals. After the second burst, it will look like nothing happened. Keep stirring! You want the heat from the melted chocolate to finish melting the remaining chunks, which prevents scorching.
For white chocolate, use 15 second bursts; it burns faster than dark.
Incorporating the Crushed Cookies for Uniformity
Once your dark chocolate base is perfectly glossy, add the main batch of crushed Oreos and the salt. Fold, don’t stir aggressively. You want the cookies suspended in the chocolate, not completely mashed into the bottom. As soon as everything looks coated, stop mixing.
The Swirl Technique: Creating Stunning Marbling
Spread the dark chocolate base evenly. Then, melt your white chocolate, maybe adding that tiny bit of shortening to make it thin and easy to drizzle. Drizzle the white chocolate in parallel lines across the dark base. Using a skewer or the dull tip of a knife, gently drag across the white lines, perpendicular to them.
You are only pulling the top layer; do not dig deep into the bark or the swirl will become thick and ugly.
Chef's Note: If you want a fun variation, use the white chocolate drizzle as a base for another great bark option like my The Best Easy Dark Chocolate Peanut Butter Bark Recipe — the peanut butter swirl is amazing.
Troubleshooting and Expert Secrets for Perfect Oreo Bark
Preventing Seized Chocolate: Rescue Methods
Seized chocolate is thick, grainy, and unusable. It happens because a tiny bit of water or steam got into the bowl, or you overheated it. If your chocolate seizes, don't panic! Add 1 teaspoon of neutral oil (like canola or vegetable oil) or melted shortening, and stir furiously.
This can often re-emulsify the mixture, making it smooth enough to salvage for bark, though it may lose a little gloss.
Achieving Clean Breaks: The Importance of Setting Time
If your bark bends instead of snaps, it needs more time in the fridge. Simple as that! A thin layer of bark should fully harden in 60 to 90 minutes. If you used a deep dish or a heavy hand, give it two hours.
A fully set bark should look matte, not glossy, when it comes out of the fridge.
Handling Humidity: Tips for Crisp Oreo Bark
Humidity is chocolate's nemesis. If your kitchen is warm and sticky, the bark may develop "sugar bloom" (white spots) or feel tacky. Always store the bark in an airtight container once broken. If you live somewhere very humid, plan to chill the bark until the very last minute before serving.
Maximizing Shelf Life: Storing Your Oreo Bark
Fridge, Counter, or Freezer? Optimal Conditions
Bark is quite durable, but the high fat content means it melts easily. If your home is cool (below 70°F/21°C), you can store it in an airtight container on the counter for a few days. However, I prefer keeping [Christmas Baking] items like this bark in the fridge. The fridge maintains that satisfying hard snap.
How Long Does Homemade Bark Last?
Stored airtight in the refrigerator, this bark will easily last for two to three weeks, though it never survives that long in my house. You can also freeze it! Wrap tightly in plastic wrap, then place in a freezer bag. Thaw overnight in the fridge before serving.
Garnish Ideas for Extra Pizazz (Salt, Sprinkles)
I love the visual simplicity of the monochrome marble, but sometimes you need a little extra sparkle, especially if you are using it as a gift.
- Salt: A light dusting of flaked sea salt over the top right before chilling is non-negotiable for me. It completely transforms the flavor profile.
- Sprinkles: For a festive version, add silver or gold edible glitter or tiny white nonpareils over the white chocolate drizzle.
- The Ultimate Decadence: Serve a piece of bark alongside a slice of my incredibly rich Oreo Cheesecake: The Best Classic Baked Showstopper Dessert Recipe for an extreme cookies and cream experience.

Recipe FAQs
Why did my chocolate seize or become grainy while melting?
Seizing occurs when even a single drop of water or steam contacts the melting chocolate, causing the sugar crystals to clump instantly. Always melt chocolate slowly using a double boiler or 50% power in the microwave, ensuring all tools are completely dry before use.
If the chocolate seizes, you can sometimes rescue it by stirring in one teaspoon of neutral oil (like vegetable oil) or melted cocoa butter.
Can I use regular chocolate chips instead of confectionery coating or baking bars?
While you can, be aware that standard chocolate chips contain stabilizers that prevent them from melting into a thin, smooth consistency suitable for bark. For the best snap and texture, it is highly recommended to use melting wafers, high-quality baking chocolate (couverture), or specific candy melts designed for easy coating.
Using quality chocolate ensures a superior mouthfeel and a cleaner break when snapped.
What is the best way to store Oreo Bark, and how long does it last?
Store Oreo Bark in an airtight container at room temperature for optimal crunch and flavor, where it will last deliciously for about 1 2 weeks. You may also store it in the refrigerator if your kitchen is very warm, but allow it to sit out for 10 minutes before serving.
Avoid humid conditions, as moisture can cause 'blooming' (white streaks) on the chocolate surface.
How finely should I crush the Oreos for the best texture?
Aim for a mixture of textures some fine crumbs to help bind the chocolate, and large, coarse chunks for maximum textural contrast and visual appeal within the bark. Roughly chop about half the cookies with a knife, and use a food processor only briefly to pulse the remaining half into medium sized pieces.
If the pieces are too small, the bark will lose some of its classic crunch.
Is it possible to make this Oreo Bark vegan or dairy-free?
Yes, the original Oreo cookies are surprisingly dairy-free, but you must replace the chocolate coating with certified vegan dark chocolate bars or chips. Look for high-quality dark chocolate (often 70% cocoa or higher) that is specifically labeled 'dairy-free.' The white chocolate swirl must also be substituted with a vegan white confectionary product.
How long does the bark take to set, and can I speed up the process?
At standard room temperature, the bark usually takes about two to three hours to set completely firm and achieve a satisfying snap. To accelerate this, you can place the tray in the refrigerator for 30 45 minutes, monitoring closely to prevent hardening.
Avoid freezing, as the drastic temperature change can sometimes cause the fat to separate, leading to condensation upon thawing.
What are some simple ways to vary the flavor or appearance of the bark?
Before the chocolate sets, you can easily add a festive flair by sprinkling crushed peppermint candies, flaky sea salt, or specialized edible glitter onto the surface. For an enhanced flavor profile in the base dark chocolate, try stirring in a teaspoon of pure vanilla extract or a dash of espresso powder before spreading.
Consider adding toasted chopped nuts (like pecans) for extra crunch.
Easy No Bake Monochrome Oreo Bark

Ingredients:
Instructions:
Nutrition Facts:
| Calories | 185 kcal |
|---|---|
| Fat | 11 g |
| Fiber | 1 g |
