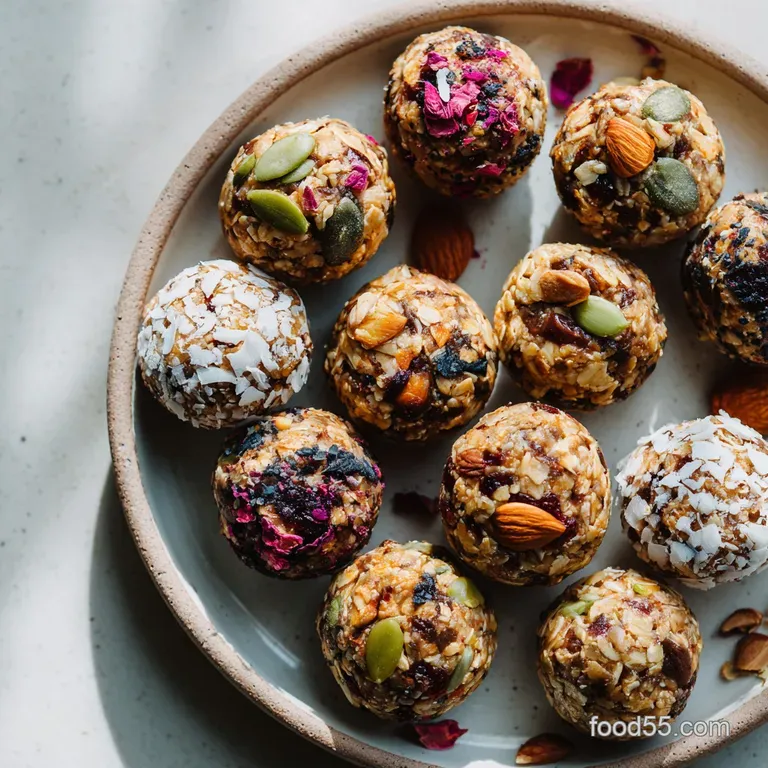
Easy No Bake Protein Balls Recipe
- Time: Active 10 minutes, Passive 20 minutes, Total 30 minutes
- Flavor/Texture Hook: Chewy toasted oats with a velvety peanut butter finish
- Perfect for: Busy weeknight meal prep or a post workout protein boost
- Why This Easy No Bake Protein Balls Recipe Wins Every Time
- Why This Healthy Snack Stays Together
- Essential Components for the Perfect Protein Energy Balls
- The Simple Tools for a Mess Free Kitchen
- Step by Step Guide to Rolling These Treats
- Solving the Sticky Situation of Homemade Snacks
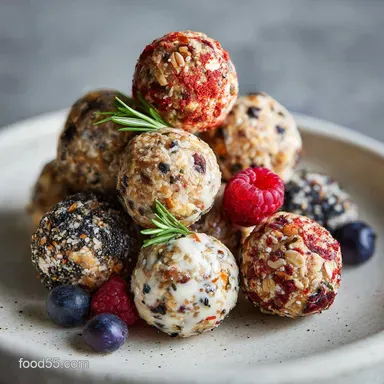
- Creative Variations for Your Healthy Snack Prep
- Myths About Cold Set Snacks
- How to Store and Preserve Your Batch
- The Best Ways to Enjoy These Energy Bites
- Common Questions About Making Healthy No Bake Snacks
- Recipe FAQs
- 📝 Recipe Card
Why This Easy No Bake Protein Balls Recipe Wins Every Time
You know that feeling around 3 PM when your brain starts to fog over and you’d give anything for a chocolate bar? I used to reach for those expensive store-bought bars, but they always tasted a bit like chalk and left me feeling sluggish.
That all changed when I started playing around with this Easy No Bake Protein Balls Recipe in my own kitchen. The first time I made them, I didn't realize how much the oats would soak up the honey, and I ended up with a crumbly mess that I had to eat with a spoon.
It was a disaster, but it taught me everything about the balance of wet and dry ingredients.
The magic here is the way the ingredients come together without any heat. When you stir that raw honey into the peanut butter, you get this incredible, floral aroma that fills the kitchen. It’s a scent that reminds me of lazy Sunday mornings. This isn't just a snack; it's a way to bring people together.
I often find my kids hovering around the bowl, waiting to "help" roll the balls just so they can lick the spatula. It's become a shared ritual in our house, a little moment of connection before the chaos of the week begins.
We've all been there, staring at a pantry full of ingredients and wondering how to turn them into something useful. This recipe is your answer. It's forgiving, it's fast, and it uses things you probably already have in your cupboard. But most importantly, it actually works. No more crumbling apart in your gym bag or sticking to the roof of your mouth. We’re going for that perfect, pillowy chew every single time. If you’re looking for more ways to skip the oven, you might also enjoy my No Bake Cookie recipe which uses a similar cold setting technique.
Why This Healthy Snack Stays Together
- Cold Setting Hydroscopy: The rolled oats act as tiny sponges, slowly absorbing the moisture from the honey and peanut butter to create a solid, cohesive structure without the need for heat based proteins.
- Lipid Sugar Emulsification: The natural fats in the peanut butter wrap around the sugar molecules in the honey, creating a tacky, flexible binder that prevents the balls from becoming brittle when chilled.
- Mechanical Interlocking: As you roll the mixture, the fiber strands in the oats and the tiny chia seeds physically hook into one another, providing a structural framework that holds the round shape.
The science of why it works is actually quite simple. It relies on starch hydration and fat stability. Basically, the oats need a little time to "drink" the liquid ingredients so they soften into that perfect texture.
| Component | Science Role | Pro Secret |
|---|---|---|
| old-fashioned Oats | Structural Base | Pulse them 3 times in a blender for a smoother, less "chunky" bite. |
| Natural Peanut Butter | Emollient & Glue | Use the "drippy" kind from a fresh jar for better mixing. |
| Chia Seeds | Moisture Regulator | These absorb 10x their weight in liquid, keeping the balls moist for days. |
The key to a successful easy protein balls recipe uk style or otherwise is all about the moisture balance. If your protein powder is particularly "thirsty," you might notice the mixture looks dry. This is where the science of hydration comes in.
You need enough liquid to satisfy the dry starches without making the mix so slick that it won't hold a shape.
Essential Components for the Perfect Protein Energy Balls
To get started, you'll need to gather a few basics. I always suggest using the best quality honey you can find because its flavor really shines through here.
- 1.5 cups (135g) old-fashioned Rolled Oats: These provide the hearty, chewy base. Why this? They hold their shape better than quick oats, which can turn mushy.
- Substitute: Quinoa flakes (adds a slight nutty bitterness).
- 0.5 cup (45g) Vanilla or Chocolate Protein Powder: This is your main protein source. Why this? Whey or plant based both work, but they affect hydration differently.
- Substitute: Collagen peptides (same protein, less structural bulk).
- 1 tbsp (10g) Chia Seeds: For a little crunch and healthy fats. Why this? They act as a secondary binder through mucilage formation.
- Substitute: Flaxseeds (same binding power but a nuttier flavor).
- 0.5 cup (125g) Natural Creamy Peanut Butter: The fatty "glue" of the recipe. Why this? Natural versions without added palm oil mix more easily.
- Substitute: Almond butter (richer flavor but slightly more expensive).
- 0.33 cup (110g) Raw Honey: The primary sweetener and binder. Why this? Its viscosity is perfect for holding dry oats together.
- Substitute: Maple syrup (adds a woody sweetness but makes the balls softer).
- 1 tsp (5ml) Pure Vanilla Extract: For that classic bakery scent. Why this? It rounds out the earthy flavors of the oats.
- Substitute: Almond extract (use only 1/4 tsp as it is very strong).
- 0.25 cup (45g) Mini Dark Chocolate Chips: For a bit of indulgence. Why this? Mini chips distribute better so you get chocolate in every bite.
- Substitute: Cacao nibs (adds a sophisticated, bitter crunch).
- 1 pinch (1g) Sea Salt: To balance the sugars. Why this? It sharpens the flavor of the chocolate and peanut butter.
- Substitute: Himalayan pink salt (adds a subtle mineral note).
The Simple Tools for a Mess Free Kitchen
You don't need a fancy stand mixer for this, though a good one like a KitchenAid can certainly help if you're doubling the batch for a crowd. I usually just stick to a large glass mixing bowl and a sturdy silicone spatula.
The spatula is key because the mixture gets very thick and tacky wooden spoons tend to get things stuck in the grain.
I also highly recommend using a small cookie scoop (about 1 tablespoon size). It keeps your hands cleaner and ensures every ball is the same size, which is great if you're tracking macros. If you find the mixture sticking to the scoop, a quick spray of non stick oil works wonders.
Also, keep a sheet of parchment paper or a silicone baking mat nearby to place the balls on before they head into the fridge.
| Feature | Stovetop Method (Melting) | No Bake Method (Mixing) |
|---|---|---|
| Texture | Firm and fudge like | Soft and chewy |
| Flavor | Deeply caramelized | Fresh and bright |
| Effort | Requires heat and cleanup | One bowl and easy |
If you enjoy the process of making bite sized snacks like these, you'll find it very similar to the prep for my Sausage Balls recipe, where uniform sizing is the secret to even results.
step-by-step Guide to Rolling These Treats
- Whisk the dry. Combine 1.5 cups old-fashioned Rolled Oats, 0.5 cup protein powder, 1 tbsp chia seeds, and a pinch of sea salt in a large bowl. Note: Mixing the dry stuff first prevents protein powder "clumps" later.
- Add the aromatics. Stir in 1 tsp pure vanilla extract. Wait until you smell the sweet, woody aroma of the vanilla hitting the dry oats.
- Introduce the binder. Pour in 0.33 cup raw honey and 0.5 cup natural peanut butter. Note: If your peanut butter is stiff, microwave it for 10 seconds first.
- Fold and press. Use a spatula to fold the mixture, pressing down firmly to ensure the oats are fully coated.
- Add the crunch. Gently fold in 0.25 cup mini dark chocolate chips. Look for the dark speckles evenly distributed throughout the tan dough.
- Check the texture. Grab a small amount and squeeze; it should hold together without falling apart or sticking excessively to your palm.
- Scoop and roll. Using a tablespoon sized scoop, portion the mix and roll between your palms into 15 even spheres.
- The final chill. Place the balls on a tray and refrigerate for 20 minutes. Touch the surface; they should feel firm and set, not squishy.
Chef's Tip: To get a perfectly smooth exterior, slightly dampen your hands with water before rolling. This prevents the honey from sticking to your skin and creates a glossy finish on the balls.
Solving the Sticky Situation of Homemade Snacks

Even the best easy no bake protein balls recipe can go sideways if the humidity in your kitchen is high or your peanut butter is particularly oily. The most common issue I see is a mixture that simply won't roll.
Why Your Protein Balls Are Falling Apart
If your balls are crumbling the moment you touch them, they are likely too dry. This usually happens if you packed your oats too tightly in the measuring cup or used a very "chalky" protein powder.
To fix this, add a teaspoon of water or extra honey at a time until the mixture feels like damp sand that holds its shape when squeezed.
| Problem | Root Cause | Solution |
|---|---|---|
| Too Sticky to Roll | Excess honey or warm PB | Chill the entire bowl of dough for 15 mins before rolling. |
| Sandy/Gritty Texture | Protein powder didn't hydrate | Let the rolled balls sit in the fridge for an extra hour. |
| Chocolate Chips Falling Out | Mix is too dry | Add 1 tsp of warm water to help the "glue" activate. |
Why Your Protein Balls Are Too Soft
On the flip side, if they look more like puddles than spheres, you’ve got too much liquid. This is common when using maple syrup instead of honey. To remedy this, add an extra tablespoon of oats or a little more protein powder to soak up that extra moisture.
Creative Variations for Your Healthy Snack Prep
The "Power Mocha" Swap
For an early morning kick, replace the vanilla extract with a teaspoon of instant espresso powder dissolved in a tiny bit of hot water. This creates a deep, roasted flavor that pairs beautifully with chocolate protein powder. It’s like a latte in snack form.
The Low Carb Adjustment
If you're watching your sugar intake, you can swap the honey for a sugar-free fiber syrup (like Vitafiber). Just be aware that these syrups are often less viscous than honey, so you might need to increase the oats by a tablespoon to maintain the structure.
| Original Ingredient | Substitute | Why It Works |
|---|---|---|
| Raw Honey (0.33 cup) | Maple Syrup (0.33 cup) | Sweet but thinner consistency. Note: Results in a softer, stickier ball. |
| Peanut Butter (0.5 cup) | Sunflower Seed Butter | Nut free and creamy. Note: Adds a slightly earthy, green tint. |
| Dark Choc Chips (0.25 cup) | Dried Cranberries | Adds a tart, chewy contrast. Note: Increases the overall fiber content. |
If you find yourself enjoying these healthy adaptations, you might also like the light texture of my Homemade Cake Flour recipe, which is all about achieving the right structural balance in the kitchen.
Myths About Cold Set Snacks
One of the biggest misconceptions I hear is that you must use whey protein for the balls to stay together. In reality, plant based proteins often work better because they are more absorbent, creating a sturdier ball. Another myth is that the oats need to be cooked to be digestible.
Because we are using old-fashioned rolled oats, they have already been steamed during processing, making them perfectly safe and easy to eat raw.
Finally,, people often think you can't over mix these. While you aren't worried about gluten, over mixing can actually cause the oils in the peanut butter to separate, leaving you with a greasy finished product. Mix until just combined for the best velvety texture.
How to Store and Preserve Your Batch
These are a meal prepper's dream because they actually taste better after a day or two in the fridge. The flavors have time to meld, and the oats soften completely.
- Fridge: Store in an airtight container for up to 10 days. I like to layer them with parchment paper so they don't fuse together into one giant protein brick.
- Freezer: These freeze beautifully for up to 3 months. In fact, I often eat them straight from the freezer for a firmer, fudge like texture.
- Zero Waste Tip: If you have crumbs at the bottom of the bowl that won't roll, don't throw them away! Save them to sprinkle over your morning yogurt or oatmeal as a high protein granola topping. Even the "mistakes" are useful.
The Best Ways to Enjoy These Energy Bites
While these are great on their own, I love serving them as part of a larger spread. If I'm hosting a casual brunch, I'll put out a plate of these alongside some fresh fruit and perhaps my SafetoEat Cookie Dough recipe for those who want a bit more indulgence.
The "Deconstructed" Yogurt Bowl
Crumble two protein balls over a bowl of Greek yogurt with a drizzle of extra honey. The contrast between the cold, creamy yogurt and the chewy, chocolate studded balls is incredible. It feels like eating dessert for breakfast, but with the macros to keep you full until lunch.
Post Workout Fuel
Pair these with a piece of fruit like a banana or apple. The quick digesting sugars from the fruit combined with the sustained energy from the oats and protein powder make this the perfect recovery snack. Just three balls give you about 18g of protein, which is plenty to kickstart muscle repair.
Common Questions About Making Healthy No Bake Snacks
People often ask me if they can use quick oats instead of old-fashioned. The answer is yes, but the texture will be much softer and less "hearty." If you go that route, you might not need as much honey. Another frequent question is about the stickiness.
If you find they are sticking to your teeth too much, it's a sign you used a bit too much honey or your peanut butter was too oily.
If you're looking for a savory high protein snack to balance things out, my Golden Baked Chicken recipe is another great one to prep on Sundays. It provides a nice contrast to the sweetness of these protein balls throughout the week. Remember, the best part about this recipe is that it’s yours to play with. Don't be afraid to add a pinch of cinnamon or a handful of shredded coconut. That's how new family favorites are born!

Recipe FAQs
How to make 4 ingredient protein balls?
Combine 3 key ingredients and mix. Mix equal parts natural peanut butter and honey with 1.5 cups of rolled oats and your chosen protein powder until a dough forms. If you love simple mixes, check out our Homemade Dinner Rolls The Ultimate Fluffy Buttery Recipe for another quick pantry staple.
What is the best binder for protein balls?
Natural peanut butter and honey are ideal. The fats in peanut butter help emulsify with the sugars in honey, creating a sticky yet pliable mixture that holds oats and protein powder together beautifully.
How to make easy healthy protein balls?
Focus on whole food ingredients and minimal added sugars. Start with a base of rolled oats and natural peanut butter, then add your protein powder and a touch of natural sweetener like honey or maple syrup. For a different kind of wholesome snack, explore our Homemade Chicken Kofte Kebabs Juicy Tender Turkish Dinner Ideas.
Are protein balls actually healthy?
Yes, when made with nutrient dense ingredients. They provide a good source of protein and fiber from oats and protein powder, healthy fats from nut butters, and natural energy from sweeteners. Watch out for added sugars and processed ingredients in store-bought versions.
Can I make protein balls without oats?
Yes, but the texture will change significantly. You can substitute oats with ingredients like puffed rice cereal, shredded coconut, or even ground nuts for a different crunch. If you're exploring alternative textures, our How to Bake Peanut Butter Cookies - Quick & Easy: My Grandmother's Secret Recipe offers a delightful chewy outcome.
Why are my no-bake protein balls too dry?
Likely a lack of moisture or too much dry ingredient. This can happen if your protein powder is very absorbent or if you packed your oats too tightly. Add a teaspoon of water, milk, or extra honey at a time until the mixture holds together when squeezed.
How long do homemade protein balls last?
Up to 10 days in the refrigerator. Store them in an airtight container to maintain freshness and prevent them from drying out. They also freeze well for up to 3 months, offering a convenient grab and-go option.
Easy No Bake Protein Balls
Ingredients:
Instructions:
Nutrition Facts:
| Calories | 135 calories |
|---|---|
| Protein | 6 g |
| Fat | 6 g |
| Carbs | 16 g |
| Fiber | 1.5 g |
| Sugar | 7.5 g |
| Sodium | 33 mg |
