Flaky Vegetable Pastry Bites
- Master the Art of Flaky Vegetable Pastry Bites
- Why You'll Love This Version
- Health and Nutrition Highlights
- Recipe at a Glance
- Essential Components Guide
- Kitchen Equipment Essentials
- Flaky Vegetable Pastry Bites: Mastering the Pastry Cutter Technique
- Essential Preparation Steps
- Professional Cooking Method
- Expert Techniques
- Success Strategies
- Professional Secrets
- Perfect Presentation
- Storage and Make-Ahead
- Creative Variations
- Complete Nutrition Guide
- Expert FAQ Solutions
- 📝 Recipe Card
Have you ever wondered what goes into making those flaky little pockets of deliciousness you bite into at fancy gatherings? you know, the ones with that buttery crust that just melts in your mouth?
If you’ve felt both intrigued and intimidated by the art of pastry making, then let’s delve into a delightful journey together.
Today, i’m all about flaky vegetable pastry bites , a recipe that's not just a crowd pleaser but is also surprisingly easy once you get the hang of it.
With a prep time of about an hour and a quarter and a medium difficulty level don’t worry, i’ll guide you through these pastries are perfect for both novice and seasoned cooks alike.
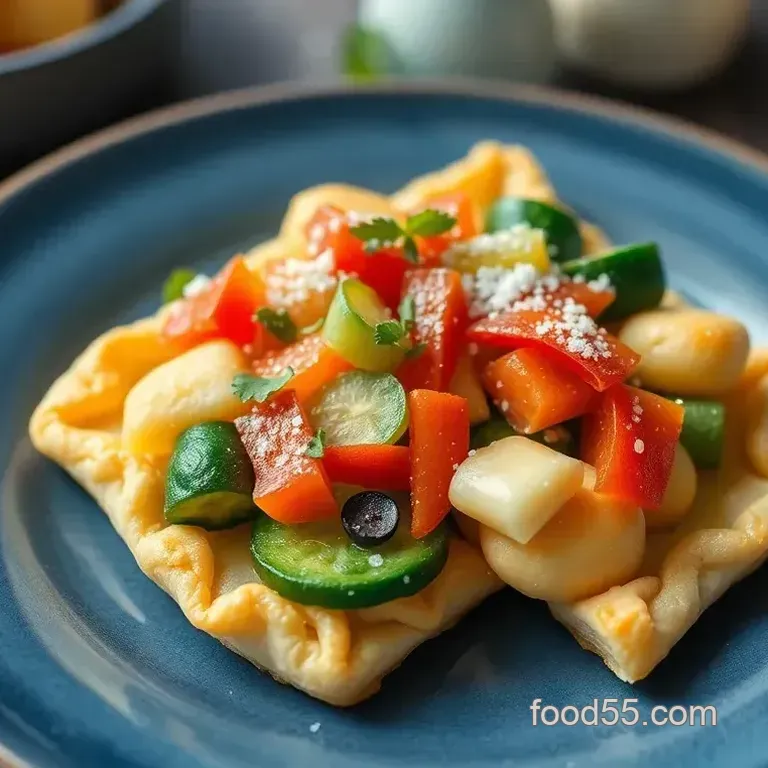
Flaky vegetable pastry bites , originating from the cozy kitchens of traditional european dishes , essence lies in the savory fillings of seasonal vegetables nestled in a glorious flaky crust.
It’s fascinating to think about how these little bites have evolved through history, from rustic village fare to the haute cuisine of elite banquets.
The pastry itself, with its roots tracing back centuries, mirrors the warmth of home cooking, where families would gather around the hearth, conversing over fresh baked treats.
Not only are these pastries delightful on the palate, but they also provide an excellent opportunity to showcase seasonal vegetables, which can be used in myriad ways to customize your filling.
They serve as a testament to food customization whether you're trying to use up what’s in your fridge or impress friends at a gathering, these pastries are your canvas!
Master the Art of Flaky Vegetable Pastry Bites
As i mentioned, there’s a rich culinary heritage wrapped up in making savory pastries . the process of creating that flaky crust is a dance of temperature, technique, and good quality ingredients.
Do you ever wonder how these mouthwatering bites got their start? the ancient folks of europe embraced simple ingredients, crafting pastries by hand, using technique inherited from generation to generation.
Fast forward to today, and we still respect those time honored methods, but with some nifty shortcuts.
In today’s world, these little gems have gained immense popularity not just as appetizers at gatherings, but as wonderful snacks that fit seamlessly into a cozy night in or a potluck with friends.
Honestly, who can resist a cute little veggie filled square?
Why You'll Love This Version
So, why will you adore my take on these flaky pastry recipe ideas ? first, the unique flavor combinations of sautéed vegetables and herbs create a delightful medley that dances on your taste buds! and trust me, this recipe is all about foolproof techniques.
With my expert tested method , you’ll master the use of a pastry cutter to achieve that delicately flaky crust, and i promise, you won’t be left scratching your head at any point.
What’s particularly wonderful is its flexibility and your ability to switch it up based on seasonal vegetables, whether you’re using zucchini, bell peppers, or whatever else speaks to you at the market.
With these quick recipes, you get nutritious fillings wrapped in a heavenly, buttery crust perfect for elevating your cooking game while keeping things efficient.
Health and Nutrition Highlights
Now, let’s talk a little about the good stuff. these savory pastries can be quite nutritious , especially when you load them up with a variety of vegetables! spinach has iron, bell peppers bring in vitamin c, and you’ve got a hefty dose of fiber going on.
Plus, with the ability to substitute for dairy alternatives in baking or even whip up a gluten-free pastry version, there’s something for everyone even your gluten averse friends!
Recipe at a Glance
Here’s what you’re getting into:
- Total preparation time: 1 hour 15 minutes
- Skill level required: Medium
- Serving size: Yields 12 pastry bites
- Cost efficiency: Decently economical, especially when using in-season veggies!
As we venture into the heart of this recipe, let’s chat about the ingredients. you’ll need some basic kitchen tools for baking , including that trusty pastry cutter , a rolling pin, and a baking sheet.
And i promise, with a little practice, you’ll get the hang of rolling dough like a pro!
Stay tuned to fill your kitchen with the delightful scents of homemade goodness and trust me, your taste buds will thank you!
Essential Components Guide
Hey there, fellow food lover! if you've ever fantasized about whipping up some flaky pastries that practically melt in your mouth, you are in for a taste bud-tantalizing ride.
Let’s dive into the essential components you need, with all the tips for a pastry making adventure that would impress even the pickiest of eaters at your gathering.
Premium Core Ingredients
First up, let’s talk about the premium core ingredients . You guys, the base for a good flaky pastry lies in the dough. Here are your staples:
- Flour: Get yourself 2 cups of all-purpose flour. Look for something that’s finely milled this ensures a lighter dough.
- Butter: The game changer! Use 1 cup of unsalted butter, chilled and cubed. That’s the secret to a buttery crust . Honestly, you can taste the difference if it’s cold, so don’t skimp on chilling!
- Water: You’ll need 6-8 tablespoons of cold water. It binds everything together without melting the butter right away.
Let's break it down a little more when selecting your butter, try to get the best quality you can find. organic if you can swing it! as for storage, keep any leftover butter covered in the fridge trust me on this; you’ll want to save some for later recipes.
Signature Seasoning Blend
Now, we can’t forget about the magic that seasoning brings. Your signature seasoning blend can make those pastries sing:
- Dried Herbs: A teaspoon of dried thyme adds an earthy flavor that can take your savory pastries from ordinary to extraordinary.
- Salt and Pepper: Seriously, these are non-negotiable. A dash of each can elevate your filling beautifully.
- Vegetable Filling: Keep it fresh! Use 1 cup of seasonal veggies like zucchini or bell peppers, finely chopped. It makes your pastry not just tasty but visually appealing too.
A small hint here: sautéing your veggies with a bit of olive oil before adding them to your filling will intensify the flavor.
Smart Substitutions
If you find yourself in a pinch (we've all been there), remember, smart substitutions can save the day:
- For a gluten-free version , that all-purpose flour can be swapped out for a quality gluten-free blend.
- No butter? No problem at all! Use coconut oil instead for a dairy-free option.
- Got leftover fillings? Toss in whatever seasonal vegetables you have on hand for a little extra flair.
Remember, flexibility is key in cooking. Embrace experimentation!
Kitchen Equipment Essentials
Now, what about the gear? we’re diving into essential kitchen equipment for your pastry making journey. first and foremost, you really need to grab a pastry cutter .
It's your best friend for helping achieve that coveted flaky texture. here are some other must have tools:
- Rolling Pin: While the old-school wooden one is classic, you can also find handy silicone versions.
- Baking Sheet : Get a sturdy, non-stick baking sheet lined with parchment paper a lifesaver for cleanup and preventing sticking.
- Mixing Bowls: I recommend a good set of large mixing bowls. You’ll want enough room to mix and toss your ingredients around.
Pro Ingredient Tips
Lastly, let’s wrap this up with some pro ingredient tips :
- Quality Markers : Look for fresh herbs; they should feel vibrant and smell fragrant. Wilted herbs? Just say no!
- Storage Solutions: After making your dough, cover it tightly with plastic wrap and chill it. This helps with that lovely flaky texture.
- Money Saving Tip: Buy seasonal vegetables they're often cheaper and fresher! Plus, you'll get to enjoy some deliciously nutritious fillings.
So, don't worry if you feel a little overwhelmed; just remember, every step you take in the kitchen is a step toward mastering new skills.
We're set and ready to move forward! Next, let’s tackle how to actually put all this knowledge into practice. I’ll share all the juicy details in the instructions section , so grab your dough cutter and let’s roll!
Flaky Vegetable Pastry Bites: Mastering the Pastry Cutter Technique
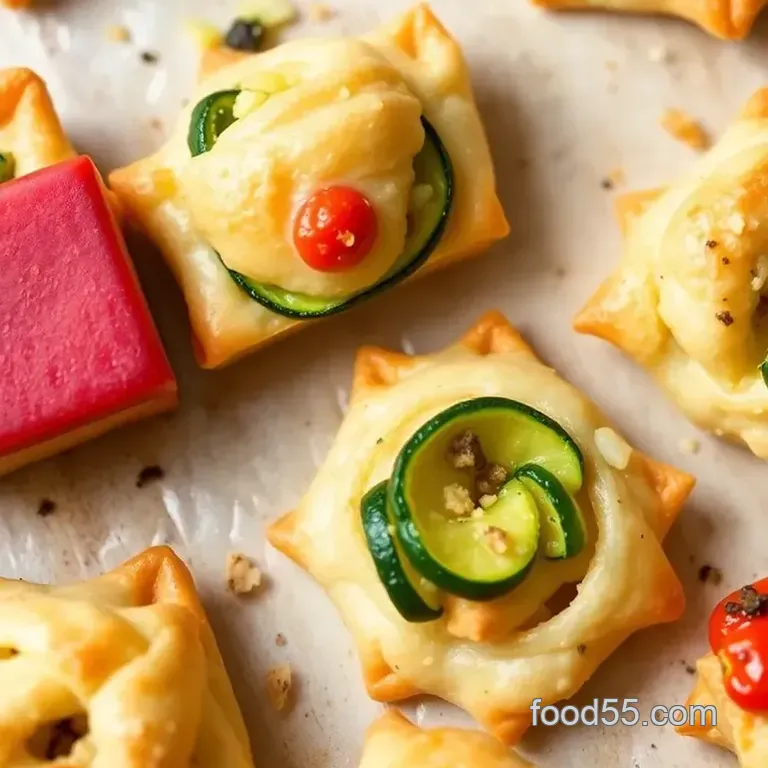
Hey there, food lover! so, let’s talk about something that makes my heart skip a beat flaky vegetable pastries . they’re like little golden pockets of happiness, bursting with seasonal veggies and all that buttery goodness.
Seriously, who can resist? imagine serving these beauties at your next gathering or whip them up as a snack while binge watching your favorite series.
Trust me, your taste buds will thank you!
Alright, let’s dive into the nitty gritty of making these bad boys. Grab your pastry cutter and let’s get to it!
Essential Preparation Steps
Mise en Place Details
Mise en place is just a fancy way of saying get everything ready before starting. honestly, it’s a total lifesaver! so, before you even think about turning on that oven, gather your ingredients and tools.
You’ll need all-purpose flour, unsalted butter, seasonal vegetables (zucchini, bell peppers whatever tickles your fancy), and your trusty pastry cutter .
Prep Techniques
First, for the dough whisk together the flour and salt in a large mixing bowl. the key here is using that pastry cutter to mix in the chilled butter until it looks like coarse crumbs.
This is where the magic happens; it’s how you get that flaky crust!
Time Management
Give yourself about 20 minutes for active prep and then 30 minutes to chill the dough. this break is essential because it helps the butter firm up, which means way flakier pastries later on.
Don’t multitask too much here focus on getting these ingredients just right!
Organization Tips
Keep your workspace tidy. Maybe throw on some music something upbeat to keep you pumped while you work. A clean kitchen = a happy chef!
Professional Cooking Method
Step-by-step Process
Prepare the dough: in a large bowl, whisk together flour and salt. use that pastry cutter to cut in the chilled butter till it resembles coarse crumbs.
Slowly add cold water about 6-8 tablespoons until the dough comes together. form it into a disk, cover with plastic, and throw it in the fridge for 30 minutes .
Prepare the filling: in a skillet, heat up some olive oil over medium heat, then sauté diced onions until they're nice and translucent.
Toss in those finely chopped seasonal vegetables, dried thyme, salt, and pepper. cook until they soften. seriously, the smell is divine!
Assemble the pastries: preheat the oven to 400°f (200°c) . roll out your chilled dough on a floured surface to about 1/8 inch thickness .
Cut it into 3 inch squares. place a spoonful of that delicious veggie filling in the center of each square don’t skimp on the filling and fold the dough over, sealing the edges with a fork.
It’s like making little veggie pockets!
Temperature Control
This is crucial! Make sure your oven is hot enough. It should stay at 400°F to get those pastries perfectly golden and flaky.
Timing Precision
Bake them for 20-25 minutes , keeping an eye on them so they turn a lovely golden brown. That’s when you know they’re done!
Expert Techniques
Professional Methods
Don’t be shy when using your pastry cutter . Work quickly to achieve that crumbly texture and maintain the temperature of the ingredients.
Critical Steps
Chill your ingredients and don’t toss the dough around too much. This ensures the buttery crust stays flaky and doesn’t turn gummy.
Precision Points
When rolling out the dough, try to keep it even. Uneven dough means some bites might burn while others are undercooked. No one wants that!
Quality Checks
Look for that lovely golden hue and flaky texture as indicators of success! Trust me, they’ll look as good as they taste.
Success Strategies
Troubleshooting Tips
If you’ve overworked the dough, it might get tough. Make sure to handle it as little as possible! If your dough feels too warm, pop it back in the fridge.
Quality Assurance
Taste as you go! If your filling is lacking, a little more seasoning can elevate it to perfection.
Perfect Results Guide
Serve these flaky pastries warm, either alone or with a tangy yogurt dip. pair them with a fresh green salad , maybe some wine , if you’re in the mood for a treat.
This really makes them shine!
And there you have it! you’ve tackled the art of flaky pastry making like a pro. these pastries will impress anyone and suit any occasion.
Plus, they’re easy to customize with whatever filling you have on hand.
In the next section, we’ll dive into some bonus tips and ideas, making sure you really master these homemade pastries ! Whether you’re after easy pastry recipes or looking to experiment with more savory fillings , I’ve got you covered!
Professional Secrets
Ah, the art of pastry making ! it’s like a secret society where the pastry cutter is your trusted companion and the dough is your canvas.
There are these absolutely golden rules that can make even a novice look like a pro.
First off, i learned that it’s essential to keep your ingredients cold. seriously! cold butter is the key to that oh-so-flaky crust.
I once forgot to chill my butter, and let me tell you, it was a sad day for flaky pastry! also, don't shy away from being generous with your salt and seasoning in your filling.
A little bit of kitchen wisdom goes a long way in creating that flavorful bite!
And oh, my favorite technique? using that dough cutter to incorporate butter into flour! you want it to mimic the texture of coarse breadcrumbs.
It’s these little expert techniques and insider tips that can turn a pastry disaster into a flaky masterpiece. trust me, when you nail that buttery crust, you can guarantee success!
Perfect Presentation
Now, let’s talk about making those pastries look like masterpieces. The first step? Plating techniques . You know, it’s all in the angles! Placing your flaky pastry bites on a rustic wooden board adds that rustic charm that just screams, “I put effort into this!”
And the garnishes! a sprinkle of fresh herbs can take your presentation from drab to fab. i’ve experimented with various herb blends, but my go-to is always a handful of freshly chopped parsley .
And don’t forget the egg wash it gives that beautiful golden sheen that makes you want to dive right in.
Visually appealing dishes not only tantalize the taste buds but also make your gatherings feel a tad more special.
Storage and make-ahead
One of the best parts about making your own delightful pastries is that they’re super easy to store . if you find you’ve made a bit more than you can munch on in one sitting (which, let’s be honest, i often do), you can easily pop those babies in the fridge.
Keep the baked appetizers in an airtight container, and they should last a few days.
For make-ahead fun, you can prepare the chilled pastry dough and freeze it. just wrap it tightly in plastic wrap and tuck it away for a rainy day (or your next pizza night because let’s be real, pastry is the way to everyone’s heart).
When you’re ready to indulge, simply thaw it out in the fridge. pro tip: don’t bake the pastries from frozen, or you might end up with soggy bottoms!
Creative Variations
One of the joys of baking your own pastries is the ability to get a bit wild with your filling options.
I mean, why not? if it's a rainy day, you could swap seasonal vegetables for whatever you’ve got lurking in the fridge.
I’ve done a delightful mix of zucchini and cheese that sings of summer!
And let’s not forget dietary modifications. whether you’re cooking for a crowd or just yourself, thinking about healthy pastry options like gluten-free pastry or using dairy alternatives in baking can make your recipes accessible for everyone.
Believe me, your pals will be amazed when you whip up a batch with a savory filling that’s just as good without the gluten.
Complete Nutrition Guide
Alright, so we should have a quick chat about the nutrition in these pastry bites. you might be wondering, “how bad are these golden delights for my waistline?” well, in moderation, they can be a delightful, nutritious treat!
Besides tasting fabulous, these pastries can pack a punch with those seasonal veggies.
Peppers, spinach, and onions are loaded with vitamins, fiber...you name it!
As a rough estimate, a serving of these flaky bites offers 240 calories , 4g of protein, and a good dose of heartwarming fats.
Perfect for those quick snacks or gatherings! always keep an eye on portion sizes you know what they say: “one for the mouth, two for the heart!”
Expert FAQ Solutions
Now for some of the common concerns i’ve encountered while diving into the world of pastry making. “why is my dough tough?” you ask.
Ah, the infamous pitfall! it usually happens when you work the dough a bit too much. make sure you’re not kneading it like it owes you money.
A light hand is key here.
Another question is about the vegetable filling . “what if it's too watery?” great point! always sauté the veggies first to remove excess moisture before adding them to your pastries.
Trust me, you don’t want a soggy bottom!
So there you have it, my friends! a journey through flaky pastry bites and all their deliciousness. embrace the little mishaps along the way they’re part of the magic of cooking at home!
With a dash of patience, a sprinkle of creativity, and just enough seasoning, you’ll be mastering your very own flaky vegetable pastries in no time.
Now, roll up those sleeves, grab that pastry cutter, and let the baking adventures begin!
Flaky Vegetable Pastry Bites