Marshmallow Recipes: Gourmet Vanilla Bean Marshmallows
- Mastering Homemade Marshmallow Recipes: The Fluffiest Guide You'll Ever Need
- The Sweet Science: Understanding Marshmallow Structure
- Core Components: Ingredients and Smart Substitutions
- Detailed Guide: Step-by-Step Instructions
- Troubleshooting Common Marshmallow Mistakes
- Extending Shelf Life: Storage and Freezing Instructions
- Creative Usage: Gourmet Marshmallow Recipes and Pairings
- Recipe FAQs
- 📝 Recipe Card
Mastering Homemade Marshmallow Recipes: The Fluffiest Guide You'll Ever Need
Remember that satisfying whir of the stand mixer when it’s working overtime? That sound signals you’re about to create the fluffiest, most deeply satisfying confection known to humankind.
Forget those waxy, store-bought cardboard cubes; we are diving headfirst into the world of truly exceptional marshmallow recipes . Specifically, the kind of towering, melt-in-your mouth squares that absolutely shatter expectations.
If you thought making your own marshmallow recipes was too tricky because of the dreaded candy thermometer drama, trust me, I’ve failed enough times for both of us (resulting in everything from sticky soup to dense bricks).
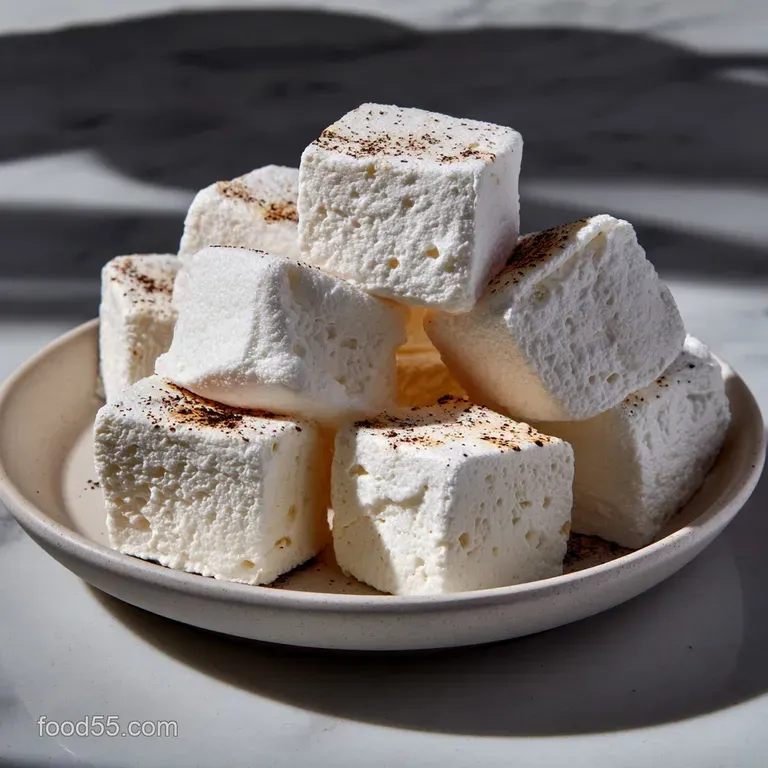
But I cracked the code, and now I’m sharing the secret to perfectly light, bouncy, Homemade Gourmet Marshmallows . The payoff is massive: a square that melts like a velvet cloud in hot cocoa or toasts into a beautifully crackled crust for S’mores.
Ready to ditch the bags and stock your pantry with the best Vanilla Bean Marshmallows possible? Let’s talk about why these work, and then we’ll get that sugar syrup bubbling.
The Sweet Science: Understanding Marshmallow Structure
Why This Works: The Gelatin Superpower
Making marshmallows is essentially creating an incredibly stable, edible foam. It's a precise balance of temperature, structure, and air.
The key player is the gelatin. When you bloom the gelatin (soaking it in cold water), it hydrates and gets ready to work. Once you pour in that screaming hot, 240°F sugar syrup, the gelatin doesn't just dissolve it forms a massive, microscopic matrix of interlocking protein chains.
As the stand mixer whips the mixture for 12– 15 minutes, two critical things happen:
- Air Incorporation: The whisk forces millions of tiny air bubbles into the thick, sticky syrup.
- Thermal Stabilization: The whipping action simultaneously cools the syrup down to room temperature.
The gelatin structure then hardens and sets around these trapped air bubbles, creating a stable, light, and spongy structure. If you stop whipping while the mixture is still warm, the gelatin matrix hasn't fully set, and the air pockets collapse, giving you deflated, chewy sadness instead of voluminous, fluffy marshmallow recipes .
You must wait until that mixing bowl feels completely cool before you quit!
Core Components: Ingredients and Smart Substitutions
Accuracy is key for marshmallow recipes easy or hard, but sometimes you need a quick swap.
| Ingredient Component | Role in Marshmallow Structure | Smart Substitution / Note |
|---|---|---|
| Unflavored Gelatin | The structural backbone; creates the foam. | For Homemade Marshmallows Without Corn Syrup and Vegan: Use 2 Tbsp Agar Agar powder, boiled for 2 mins with water to activate. |
| Light Corn Syrup | Controls sugar crystallization (prevents graininess). | Agave Nectar, Brown Rice Syrup, or Glucose Syrup. Note: Honey can be used, but it imparts a strong flavor. |
| Granulated Sugar | Provides sweetness and mass. | Caster sugar dissolves faster, but standard white sugar is fine. Do not use brown sugar here. |
| Water | Hydrates gelatin and dissolves sugar. | Can substitute 1/4 cup of the water with strong espresso for Flavored Marshmallows . |
| Dusting Mixture | Prevents sticking. (50% Cornstarch, 50% Powdered Sugar) | Tapioca flour or potato starch can replace cornstarch if needed, but cornstarch is best. |
If you’re already craving this much sugar, and you just want another instant hit of chocolatey goodness, you must check out my Cake Mix Recipes: Triple Chocolate Fudge Crumb Bars .
Detailed Guide: step-by-step Instructions

Prep Time: 20 min active | Setting Time: 2- 4 hours | Yields: 64 cubes
1. The Critical Prep & Bloom
- Dust the Pan: Whisk the confectioners' sugar and cornstarch together. Lightly grease your 9x13 pan, then line it with parchment, leaving a substantial overhang. Sift the dusting mixture liberally over the parchment, coating the bottom and sides completely. Set this pan aside. This is the only barrier between you and a catastrophic sticky mess.
- Bloom the Gelatin: Pour the cold water into the bowl of your stand mixer. Sprinkle the gelatin powder evenly over the water. Do not stir! Let it sit for 5 to 10 minutes; it will turn into a stiff, spongy yellow mass.
2. Syrup Sizzle
- Combine: In a heavy bottomed saucepan, combine the granulated sugar, corn syrup, remaining water, and salt. Stir gently just until the sugar looks wet. Clip your candy thermometer securely to the side.
- Heat: Turn the heat to medium high. Do not stir the syrup once it boils! Washing down the sides with a wet pastry brush can help prevent sugar crystals from forming and causing a grainy marshmallow texture.
- Target Temp: Boil until the syrup hits precisely 240°F (116°C). This is the Soft Ball Stage and it’s non-negotiable for stable marshmallow recipes .
3. The Whipping Transformation
- Slow Stream: As soon as the syrup hits 240°F, remove it immediately from the heat. Turn your stand mixer onto the lowest speed to loosen the bloomed gelatin. With the mixer still running low, carefully and slowly pour the screaming hot syrup down the side of the mixing bowl (not directly onto the whisk, or it will splatter).
- Whip Hard: Once all the syrup is added, increase the speed gradually to medium high. Now, let it rip! Whip for 12 to 15 minutes. The mixture will triple in size, turning into a beautifully opaque, snowy white fluff. It’s done when it holds stiff, satiny peaks and the outside of the mixing bowl is completely cool to the touch.
- Flavor Drop: Reduce the speed to low and pour in the vanilla extract. Mix just until incorporated.
4. Setting and Cutting
- Pour & Spread: Work fast! The fluff sets quickly. Scrape the marshmallow mixture immediately into your prepared pan. Use a lightly oiled spatula to gently spread it into an even layer.
- Cure: Leave the marshmallows uncovered at room temperature for a minimum of 4 hours, or preferably overnight. Do not chill them in the fridge that creates condensation and stickiness!
- Cut: Use the parchment paper overhang to lift the entire slab out. Dust a large, sharp knife or pizza cutter with the dusting mixture. Cut the slab into desired cubes. Toss the freshly cut, sticky sides in the remaining dusting powder until every surface is fully coated. These make perfect Marshmallow Recipes Desserts !
Troubleshooting Common Marshmallow Mistakes
If you’ve tried to make marshmallow recipes before and ended up with something weird, here’s why.
| Mistake/Symptom | The Science Behind It | The Fix |
|---|---|---|
| Marshmallows are dense/chewy/not fluffy. | The mixture wasn't whipped long enough, or the syrup temperature was too low, resulting in collapsed air pockets. | Always whip until the bowl is cool to the touch (12- 15 minutes minimum). Use a calibrated thermometer to ensure 240°F. |
| They are grainy or gritty. | Sugar crystallization occurred, usually because you stirred the syrup while it was boiling, or crystals clung to the side of the pan. | Stop stirring once the syrup boils. If you must, brush the sides of the pan with a wet pastry brush. |
| The cut squares are impossibly sticky. | Not enough dusting powder used initially, or you refrigerated them (which adds moisture). | Never refrigerate! When cutting, generously coat the knife, then toss the sticky sides of the cut cubes in fresh dusting mixture immediately. |
Extending Shelf Life: Storage and Freezing Instructions
These Homemade Gourmet Marshmallows are so good, they rarely last long, but knowing how to store them is essential for safety and texture.
Optimal Storage Containers and Conditions
Once cut and fully coated in the dusting mixture, store your homemade marshmallows in an airtight container at room temperature . Keep them away from heat and direct sunlight. They retain their best texture for about 1 to 2 weeks. Do not store them in the fridge, ever.
The cold air causes the starch/sugar coating to sweat and makes them uncontrollably sticky.
Can You Freeze Homemade Marshmallows?
Yes, absolutely! Freezing is a great option for prepping Marshmallow Recipes Ideas far in advance.
- Preparation: Ensure the marshmallows are thoroughly coated in the cornstarch/sugar mixture.
- Flash Freeze: Place the cubes in a single layer on a parchment lined baking sheet and freeze for 1 hour.
- Transfer: Transfer the hardened cubes to a heavy duty freezer bag or airtight container, removing as much air as possible.
- Shelf Life: They hold well for up to 3 months.
- Thawing: Thaw them overnight in the fridge in the sealed container to minimize condensation, then bring them back to room temperature before serving.
Since this is a massive sugar bomb, you might need a substantial dinner afterward. Seriously, fuel up with some Cuban Food Recipes: Authentic Ropa Vieja (The Comfort Classic) .
Creative Usage: Gourmet Marshmallow Recipes and Pairings
These aren't just for cocoa; they are gourmet ingredients!
- Elevated Hot Cocoa Toppings: Cut them into super large squares (2 inches!) and use them in hot cocoa. The texture as they melt is absolutely velvety.
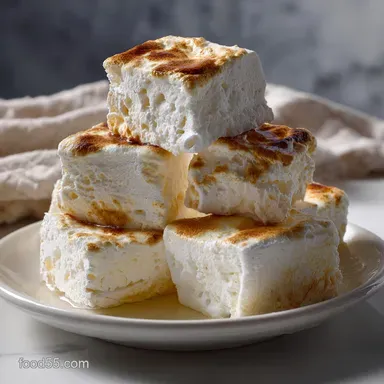
- Perfect S'mores: When toasted over a flame, the crust instantly shatters, yielding to an impossibly gooey interior. This is the best use for these gourmet cubes.
- Quick Roasting: Dust a few cubes with cocoa powder and place them on a foil lined sheet under the broiler for 30 60 seconds, watching constantly until they are deeply golden and sizzling. Serve immediately with fruit for a decadent mini dessert.
Try experimenting with flavored marshmallows —a few drops of high-quality peppermint oil or almond extract totally changes the game! Now go forth and create the fluffiest, dreamiest marshmallow recipes you’ve ever tasted.

Recipe FAQs
What is the best marshmallow recipe, and how easy is it to make at home?
The best recipes utilize a hot sugar syrup blended with bloomed gelatin, which yields a texture far superior to store-bought varieties. While this process requires attention to detail, specifically precise temperature management of the syrup, the actual blending steps are straightforward using a stand mixer until the mixture triples in volume and becomes perfectly airy and fluffy.
What are the best recipes that use homemade marshmallows, and what creative things can I make with them?
Homemade gourmet marshmallows significantly elevate classic uses like S'mores, hot cocoa, and rice cereal treats. For creative applications, try dipping them in melted dark chocolate, rolling them in specialty spice blends like matcha or cinnamon sugar, or cutting them into small geometric shapes to garnish layered desserts and parfaits.
Why is careful temperature management so important when making marshmallows from scratch?
Accurate temperature management is crucial because the sugar syrup must reach 240°F (the soft ball stage) to ensure the final product sets correctly without crystallizing. This high heat is necessary both for stabilizing the sugar structure and properly activating the gelatin when combined during the blending process.
Why didn't my marshmallow mixture rise or become fluffy after blending?
Failure to rise usually indicates that the hot sugar syrup did not reach the correct temperature (240°F) or that the mixture was not blended long enough. You must continue blending the hot syrup into the gelatin mixture for 10 15 minutes until it triples in volume, achieving the signature airy quality, and the mixing bowl is cool to the touch.
How long do these homemade vanilla bean marshmallows last, and what is the best way to store them?
When properly stored in an airtight container at room temperature, homemade marshmallows typically remain fresh and maintain their texture for about two to three weeks. To prevent them from sticking together, ensure they are thoroughly dusted on all sides with a mixture of powdered sugar and cornstarch before placing them in the container.
Can I use store-bought marshmallows instead of making the gourmet vanilla bean recipe?
While store-bought marshmallows are convenient, they lack the rich, deep vanilla essence and superior, airy texture achieved by this gourmet method. The process of blending the hot sugar syrup until the mixture triples in volume is essential to deliver the perfectly soft, melt-in-your mouth chew that sets homemade confections apart.
Gourmet Vanilla Bean Marshmallows
Ingredients:
Instructions:
Nutrition Facts:
| Calories | 40 calories |
|---|---|
| Protein | 0.5 g |
| Fat | 0 g |
| Carbs | 10 g |
| Fiber | 0 g |
| Sugar | 7 g |
| Sodium | 10 mg |
