Homemade Butter: Fresh, Sweet, and Cultured
- Beyond the Supermarket: The Ultimate Guide to Farmhouse-Style Butter
- The Science of Separation: Why Cream Turns into Golden Butter
- Selecting Your Star Ingredient: Dairy Choices for the Best Homemade Butter
- Churning Mastery: Detailed Instructions for Making Your Own Butter
- Troubleshooting and Expert Tips for Perfect Fresh Butter
- Maximizing Freshness: Storing Your Finished Homemade Butter
- Elevating Every Meal: Creative Uses and Pairings for Fresh Butter
- Recipe FAQs
- 📝 Recipe Card
Beyond the Supermarket: The Ultimate Guide to Farmhouse Style Butter
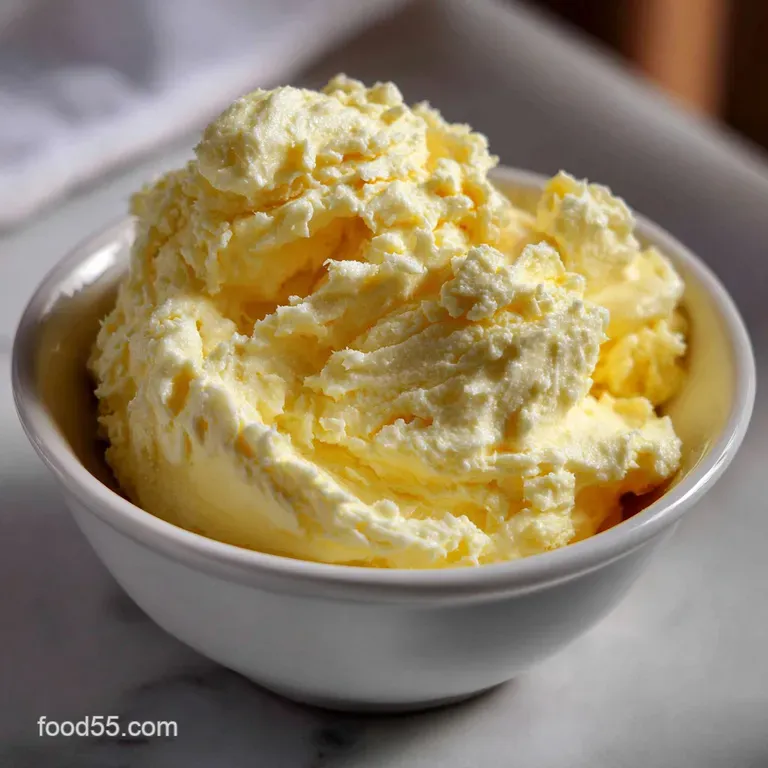
The difference between mass produced, pale butter and the fresh stuff you churn yourself is monumental. The aroma alone slightly sweet, incredibly creamy, maybe even a little tangy if you cultured it is enough to convert you.
When you taste truly fresh Homemade Butter , you realize the store-bought blocks taste muted, sometimes metallic. The texture is completely different, melting instantly on your tongue and coating your palate with pure, rich flavor.
Seriously, making your own butter is one of the easiest kitchen victories you can score. It requires only one main ingredient (heavy cream, naturally) and is done mostly by simple agitation, usually handled by your trusty stand mixer.
It’s a great way to use up cream nearing its date, and frankly, the result is so superior, it makes every slice of toast or baked potato feel luxurious.
We are going to go way beyond the basic churning process today. This comprehensive guide covers the essentials, from picking the best high fat cream to achieving that sophisticated cultured tang, and most importantly, the trick to washing it correctly so your incredible golden spread lasts for weeks.
Trust me, once you master this, you’ll never look back.
The Science of Separation: Why Cream Turns into Golden Butter
The magic behind making butter is simple physics: fat molecules hate water. Cream is essentially fat globules suspended in water (whey or buttermilk). When you whip or shake cream violently a process called churning you damage the membranes surrounding the fat globules.
As those membranes break, the fat particles stick together, gathering into larger and larger clumps until they separate entirely from the liquid. That clump is your beautiful, solid butter, and the leftover liquid is homemade buttermilk .
Defining Sweet Cream vs. Tangy Cultured Butter
The basic process outlined here results in "sweet cream" butter, which is neutral, clean, and tastes purely of fresh dairy. This is what most Americans are used to. But if you want that complex, slightly sour, nutty flavor the taste that makes European butter so famous you need to culture it first.
Culturing simply means adding a tiny bit of live starter (like commercial buttermilk or yogurt) to the cream and letting it sit overnight. The bacteria deepen the flavor, yielding a far more interesting and nuanced block of Homemade Butter .
Essential Equipment Check: What You Need Before You Churn
While the pioneers used a wooden dash, we have electricity, thank goodness. I highly recommend a stand mixer fitted with the whisk attachment; it’s the easiest way and keeps the splatter relatively contained. You can also use a robust food processor, which works incredibly fast often in under two minutes!
Just be sure to use short pulses to avoid overheating the butterfat. For the actual washing stage, you absolutely need a fine mesh sieve and some cheesecloth or clean muslin.
Is Making Homemade Butter Worth the Effort?
Absolutely, yes. While the initial price of quality heavy cream might seem steep, you are getting two high value products from one source: a block of intensely rich butter and thick, flavorful homemade buttermilk .
The quality of this final product surpasses nearly all but the most expensive specialty artisan brands. Plus, knowing exactly where your food came from and mastering the technique is intensely satisfying.
This whole endeavor is why learning the techniques for Homemade Butter is so valuable for any home cook.
Achieving Optimal Butterfat Content and Texture
This is not the place to skimp on ingredients. Look for heavy cream or whipping cream that explicitly states it has 35% or higher milk fat. If the fat content is too low, you'll end up whipping for ages, possibly overheat the mixture, and yield a smaller amount of finished butter.
Higher fat means better yield, firmer texture, and a superior flavor for your resulting Homemade Butter .
The Importance of Temperature in the Churning Process
Temperature is king, truly. The cream must be very cold, pulled straight from the refrigerator, ideally between 45°F and 55°F (7°C 13°C). If the cream is too warm, the fat will smear onto the walls of the bowl instead of clumping together, making it impossible to separate the solids from the liquid.
If your kitchen is warm, you might even consider placing the mixing bowl inside a larger bowl of ice during the churning phase.
Washing the Buttermilk Out: The Secret to Long Shelf Life
This is the single most critical step that separates good butter from magnificent, long lasting Homemade Butter . Residual buttermilk contains milk solids and sugars that will spoil quickly, even in the fridge, giving your butter a rancid or cheesy flavor within days.
Washing is simply the act of kneading the butter solids under ice-cold water until every last trace of that milky liquid is flushed out. If the rinse water isn't perfectly clear, you aren't done!
Selecting Your Star Ingredient: Dairy Choices for the Best Homemade Butter
High Fat Cream Selection: Why Quality Matters Most
Since cream is the only ingredient (besides salt), its quality dictates the final taste of your butter. Look for local, grass fed cream if possible. Its flavor profile is often much richer, slightly yellowed naturally, and contains superior vitamins compared to conventionally produced dairy.
If you are going to invest the time in making the best Homemade Butter , start with the best source.
Optional Step: Pre-Culturing the Cream for European Flavor
To create that gorgeous tangy profile, you just need a starter. I use 2 tablespoons of live buttermilk the kind that clearly states it has active cultures per quart of cream. Stir it in, cover the jar loosely, and let it hang out at room temperature for 12– 24 hours.
The cream will thicken slightly and smell like faintly sour yogurt. Then you chill it back down, and proceed with churning.
Chef's Note: If you don't have buttermilk, use 2 tablespoons of full fat plain yogurt with live cultures as a viable substitute. It works just as well to start the tang!
Salt Content: Mastering the Salting Process (Salted vs Unsalted)
This choice is totally up to you. Salt acts as a preservative and, obviously, adds flavor. If you plan to use your butter primarily for baking, leave it unsalted so you can control the sodium levels in your recipe. If you’re planning to spread it on bread or use it as a finishing butter (like topping my Steamed Carrots: Perfectly Tender with Brown Butter Finish ), add salt! I recommend 1/2 teaspoon of fine sea salt per pound of finished butter, but you should taste and adjust.
Churning Mastery: Detailed Instructions for Making Your Own Butter
The Critical Stage: From Whipped Cream to Butter Grains
Pour your chilled cream into the mixer bowl and start slow. You'll quickly pass through the stages of soft and then stiff whipped cream. Do not stop! Keep whipping on medium high speed. The cream will suddenly deflate, turning dense and slightly yellow, resembling scrambled egg yolk or cottage cheese.
Listen carefully: the sound of the mixer will change from a smooth whir to a heavier, sloshing noise. That is the moment the butter solids separate and your Homemade Butter begins to form! Stop immediately once you see clear separation.
Draining the Buttermilk and Initiating the Wash
Carefully pour the contents of the mixer bowl through a fine mesh sieve lined with cheesecloth. Reserve that incredible buttermilk it’s gold! Now, place the rough butter solids into a clean bowl and cover them completely with ice-cold water.
Using a wooden spoon or clean hands, press the butter aggressively under the water. The water will turn cloudy white instantly as the trapped buttermilk escapes. Drain the cloudy water and repeat. You must repeat this process three to five times until the water runs completely clear. Seriously, don't skip this.
Kneading and Shaping the Fresh Butter Block
Once the wash water is clear, transfer the clean butter solids to a sheet of dry parchment paper or a fresh piece of cheesecloth. Press and fold the butter firmly to squeeze out any remaining water droplets. If you are adding salt, do it now, working the salt thoroughly into the butter until it’s evenly mixed.
Finally, press the finished Homemade Butter into a mold, roll it into a tight log using the parchment paper, or shape it into a block.
Troubleshooting and Expert Tips for Perfect Fresh Butter
Why Won't My Cream Turn? Common Churning Issues
If your cream has been whipping forever (more than 15 minutes) and is just sitting there like soupy whipped cream, there are two likely culprits. First, your cream is too warm; try chilling the bowl and cream again, or adding a couple of ice cubes to the mixer (but pull them out before separation).
Second, the fat content is too low if you used "light" cream, it simply won't work. The only way to fix that is to add a higher fat cream and keep whipping.
Infusing Flavor: Creating Herb and Compound Butters
This fresh base is the perfect canvas for flavor infusion. Before shaping, you can mix in anything you like. Try finely minced garlic and chives, or maybe some lemon zest and cracked black pepper. For a sweet treat, try adding maple syrup and a pinch of cinnamon perfect for spreading on my Gooey Butter Cookies: Easy St. Louis Cake Mix Recipe . The possibilities for your finished Homemade Butter are endless.
How to Repurpose Leftover Buttermilk
Never, ever throw away that leftover liquid! Homemade buttermilk is far superior to the store-bought version. It’s thick, creamy, and wonderfully tangy. It makes the fluffiest pancakes and incredible baking powder biscuits. This liquid is also absolutely essential for marinades; the acidity tenderizes meat like nothing else. In fact, this homemade buttermilk is ideal for the soaking stage in my Fried Frog Legs Recipe: Ultra Crispy Southern Buttermilk Style .
Maximizing Freshness: Storing Your Finished Homemade Butter
Proper Refrigeration Techniques for Optimal Texture
Once shaped, store your finished Homemade Butter wrapped tightly in parchment paper, then placed in an airtight container in the refrigerator. Properly washed and salted butter will last 2 to 3 weeks in the fridge.
If it smells sour or develops any off-color spots, it means you didn't wash out enough buttermilk discard it and be more diligent next time!
Long Term Freezing: Wrapping Methods That Prevent Freezer Burn
But does it freeze well? You bet. If you made a massive batch of Homemade Butter , wrap it first tightly in parchment paper, then securely in aluminum foil, and finally place it in a freezer bag, squeezing out all the air. This triple wrapping prevents freezer burn.
It will last beautifully for up to six months. Thaw it slowly overnight in the fridge before using.
Clarifying Homemade Butter into Pure Ghee
If you want the ultimate over high heat cooking fat, you can clarify your fresh block. Simply melt the butter in a saucepan over low heat. As it simmers gently, the water evaporates, and the milk solids sink to the bottom and brown lightly.
Skim any foam from the top, and carefully pour the clear, liquid yellow fat through a cheesecloth lined sieve. That resulting oil is ghee liquid gold perfect for high temperature searing or frying.
Elevating Every Meal: Creative Uses and Pairings for Fresh Butter
There is no replacement for fresh Homemade Butter —it has a clean, almost delicate flavor that enhances everything it touches. Use it generously on warm rolls, melt it over roasted asparagus, or whip it into the base of the most velvety Gooey Butter Cookies: Easy St. Louis Cake Mix Recipe you have ever tasted. Take pride in that beautiful golden block, because you made it happen. It’s simple, sensational, and definitely worth the occasional spatter zone in the kitchen!

Recipe FAQs
What kind of cream is best for churning homemade butter?
You must use heavy whipping cream that has a fat content of at least 35%. Crucially, ensure the cream is pasteurized but avoid ultra pasteurized (UHT) cream, as the high heat treatment destabilizes the fat molecules, often preventing proper separation and butter formation.
Why is my cream not separating into butter and buttermilk?
The most common cause of non-separation is incorrect cream temperature; the ideal range is 50°F to 65°F (10°C to 18°C). If your cream is too cold, let it warm up slightly on the counter before resuming churning; if it's too warm, chill it briefly to encourage the fat globules to solidify and clump together.
Why is washing the butter absolutely essential?
Washing the butter thoroughly with ice-cold water removes all residual buttermilk, which is high in lactose and milk proteins. If the buttermilk remains, the butter will spoil quickly and turn rancid much sooner, drastically reducing its refrigerated shelf life.
How do I make the optional tangy, European style cultured butter?
To create cultured butter, stir in 1-2 tablespoons of live active buttermilk or plain yogurt into your heavy cream and cover it loosely. Allow the mixture to sit at a warm room temperature (around 70°F/21°C) for 12 to 24 hours until it thickens and develops a distinct, pleasant tang before moving to the churning stage.
How long will homemade sweet cream butter stay fresh?
Properly washed and salted homemade butter will last 1 to 2 weeks refrigerated in an airtight container. For long term preservation, you can freeze butter for 6 to 9 months; ensure it is wrapped tightly in parchment paper and kept in a sealed freezer bag to prevent freezer burn.
Can I make butter without a stand mixer or food processor?
Yes, while more labour intensive, butter can be made by shaking cream vigorously in a tightly sealed jar. You can also use a high powered blender, though this method requires careful monitoring to ensure the butter doesn't seize into a tough, solid mass.
When should I add salt or other flavorings to the finished butter?
Salt should always be kneaded in after the final washing and draining process, typically using 1/2 to 1 teaspoon of fine salt per cup of finished butter. If adding fresh herbs, garlic, or spices to make compound butter, mix these in at the very end, noting that fresh additions will slightly decrease the overall shelf life.
Handmade Butter In 20 Minutes

Ingredients:
Instructions:
Nutrition Facts:
| Calories | 105 calories |
|---|---|
| Fat | 12 grams |
| Fiber | 0.1 grams |
