Heavenly Nilla Vanilla Wafer Banana Pudding
- Let’s look into into Heavenly Nilla Vanilla Wafer Banana Pudding!
- Essential Ingredients Guide for Heavenly Nilla Vanilla Wafer Banana Pudding
- Mastering the Art of Cooking: Elevate Your Skills
- Pro Tips & Secrets for Heavenly Nilla Vanilla Wafer Banana Pudding
- Perfect Presentation: Make It Instagram-Worthy!
- Storage & Make-Ahead: Keep it Fresh!
- Creative Variations: Mix It Up!
- Complete Nutrition Guide: Keeping It Real
- Frequently Asked Questions
- 📝 Recipe Card
Let’s look into into Heavenly Nilla Vanilla Wafer Banana Pudding!
You know that feeling when you’re just craving something nostalgic and sweet? for me, it's always that comforting bowl of nilla vanilla wafer banana pudding .
I remember the first time i made it i'd invited some friends over for a bbq, and half of the crew was like, “what’s for dessert?” and the other half was just drooling over the idea of this creamy, dreamy pudding.
So, naturally, i thought, why not whip up a giant batch and bring everyone together? spoiler alert: it was a total hit!
Banana pudding isn’t just any old dessert; it’s a southern classic, often holding its own at family gatherings, picnics, or even just a tuesday night craving.
It’s rich, creamy, and has this amazing crunchy layer thanks to the nilla wafers whoever decided to combine bananas with pudding deserves a medal, right?
A Sweet Slice of History
So where did this deliciousness come from? legend has it that banana pudding has its roots deep in the south, where it became popular during the early 19th century as american cooks got comfortable with using puddings.
Fast forward to today, and it’s gone from being a simple dessert to a full-on phenomenon. the magnolia banana pudding recipe ? yeah, it took things to a whole new level of fame, and folks just can't get enough!
Now, if you’re looking to whip this up, you're in luck. prep time only about 15 minutes , and you can chill it while you watch that netflix series, then just get ready to dive in.
Plus, it doesn't involve any complex techniques, making it a perfect choice for beginners or seasoned pros alike.
This Recipe Is a Budding Star for Many Reasons!
Now let’s get down to the benefits of this delightful dish! first off, it’s not just sweet; it has health benefits too! bananas bring potassium to the table, while the nilla wafers just make everything way more fun.
You can easily customize it for any occasion birthdays, potlucks, or even just as a midweek treat for yourself (because self care!).
What’s great about this recipe, compared to other banana dessert recipes like banana bread pudding , is that it’s light, refreshing, and super easy to make.
You really can’t mess this one up! plus, if you ask me, there’s nothing better than diving into a big bowl of creamy, dreamy homemade banana pudding after a long day.
Fruity Goodness at a Fraction of the Price
Feeling budget conscious? this recipe is not only affordable but also gives you a solid yield. for just a few dollars, you can serve 8 people (or one really hungry one, no judgment here), making it the perfect option for parties or cozy gatherings.
And let's be real, who wouldn’t want to share this heavenly dessert?
Now that we’ve waxed poetic about the joys of nilla vanilla wafer banana pudding , you might be wondering what’s next.
Ready to make it for yourself? well, here are the ingredients you’ll need to create this sweet masterpiece. trust me once you dig in, you’ll be hooked!
Essential Ingredients Guide for Heavenly Nilla Vanilla Wafer Banana Pudding
Let’s dive into the scrumptious world of that beloved classic, heavenly nilla vanilla wafer banana pudding . this isn’t just a dessert; it’s a trip down memory lane.
If you're hungry for a dessert that speaks nostalgia, look no further! grab your apron, and let's break it down ingredient by ingredient.
Premium Core Components
First off, here are the banana pudding ingredients you absolutely need:
- 2 cups (480 ml) whole milk : Go for whole milk for that creamy goodness.
- 1/2 cup (100 g) granulated sugar : Just the right amount for sweetness.
- 1/4 cup (30 g) cornstarch : This is your thickening agent. No cornstarch? No pudding!
- 1/4 tsp salt : Just a pinch to balance that sweetness.
- 1 tsp vanilla extract : Use pure extract for maximum flavor.
- 3 large ripe bananas , sliced: The star of this dessert!
Quality indicators and storage tips:
Always choose ripe bananas ! you'll want them sweet and soft for that dreamy texture. and hey, bananas can go brown pretty fast.
Store them in the fridge if you need to slow that down. but don’t wait too long to use them; they shouldn’t sit there for weeks.
Aim for a shelf life of about a week to enjoy peak sweetness.
Signature Seasoning Blend
Now, let’s sprinkle in some magic. While banana pudding is pretty straightforward, you can pump up those flavors.
Think about signature spice combinations . vanilla is your best friend here, but like that southern charm, a bit of cinnamon can work wonders too.
If you want to bring in a twist, consider adding a lemon twist for brightness. or pair it with some nutmeg for warmth.
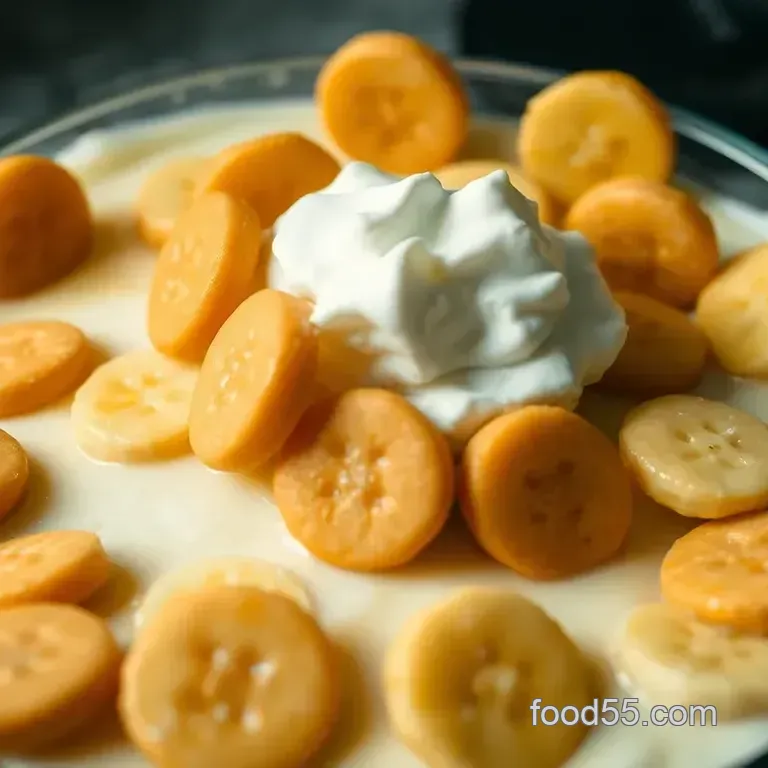
For extra flair, consider topping off your masterpiece with whipped cream and maybe a sprinkle of crushed nilla wafers for that lovely crunch we all adore.
This layering makes for a pudding that not only tastes good but looks good too!
Smart Substitutions
Sometimes, our pantries don’t match our cravings. No worries! Here’s the lowdown on some common alternatives if you find yourself in a pinch.
Missing the nilla wafers? try any buttery vanilla cookie; they might change the flavor profile slightly, but they’ll still hold up well.
Want a healthier option? use oat milk or almond milk instead of whole milk for a dairy-free vibe.
And if it's a hot summer day, and you crave that chill dessert? Freezing the bananas before slicing can create a frosty treat!
Kitchen Equipment Essentials
Alright, the tools! Here’s what you’ll need to whip up this easy banana pudding.
- Medium saucepan : For cooking that creamy mixture.
- Whisk : To make sure everything blends perfectly.
- Mixing bowl : You'll use it for layering and mixing.
- 9x9 inch baking dish or trifle bowl : Pick whatever suits your style!
Don’t have a fancy dish? No biggie! Most anything will work, so use what you have. And when it comes to cleaning up, a simple plastic wrap can work wonders for chilling.
Now, you've got the essentials down. each ingredient serves a purpose, adding layers to your delightful pudding. and as you're prepping, you can practically hear those southern roots calling with every step you take.
If you're ready to move on to the fun part putting this dreamy dish together keep reading the instructions section. You’re gonna love it!
Mastering the Art of Cooking: Elevate Your Skills
So, you’re diving into the world of professional cooking, and i’m here to share some of the secrets i’ve gathered along the way.
Today, let’s focus on how to level up your cooking game. trust me; with a few essential preparation steps and expert techniques, you’ll whip up favorites like heavenly nilla vanilla wafer banana pudding without breaking a sweat.
Essential Preparation Steps
First things first, let’s talk about mise en place that fancy french term just means “everything in its place.
” before you cook, chop your ingredients and measure your stuff. this makes the process smoother than a jazz saxophonist at a sunday brunch.
Time management is key set a timer and keep your phone handy. we all know how easy it is to get distracted while concocting something fabulous!
Organization is equally important. keep your workspace tidy; a cluttered counter leads to a cluttered mind. and, don't forget safety! keep those kitchen tools sharp and away from little hands.
Also, it’s crucial to ensure that you’re washing your hands often, especially when handling raw ingredients. safety first, y’all!
step-by-step Process
Now that you’re prepped, let’s break it down. Here’s a clear, numbered guide to making your Nilla Vanilla Wafer Banana Pudding .
Prepare the pudding base: start by whisking together 2 cups of whole milk , ½ cup sugar , ¼ cup cornstarch , and a pinch of salt in a medium saucepan.
Cook this over medium heat, stirring constantly until it thickens and bubbles this takes about 5- 7 minutes . remove it and add in 1 tsp of vanilla extract .
Layer up: grab a 9x9 inch baking dish and create your first layer with a handful of nilla wafers . pour in half of your pudding and sprinkle half of your three sliced bananas on top.
Repeat: Add another layer of Nilla Wafers, the rest of the pudding, and then top with the remaining banana slices.
Chill It: Cover your dish tightly with plastic wrap, and chill for at least 30 minutes —but larger flavors come out when left to sit for 1- 2 hours .
Serve & Enjoy: Top with some whipped cream if you're feeling extra and dig in!
The crucial part? keep an eye on your pudding as it sets in the fridge. too short a chilling time can leave it runny, which is a huge bummer.
You’ll know it’s perfect when it holds its shape!
Expert Techniques
Alright, now let’s talk about some expert level tips. When making this pudding, use ripe bananas. The riper, the better. They’re not just tastier; they add sweetness and creaminess that can’t be beaten.
Quality checkpoints are vital. After layering, always double check that the bananas aren’t browning too fast. No one wants to serve up a sad, brown dessert; keep things fresh!
If things go sideways like your pudding not thickening try cooking it a few more minutes and whisk like crazy! Remember, patience can turn a good dish into a great one.
Success Strategies
Now, let’s cover the common pitfalls. don’t skimp on the chilling time or the pudding will be soupy. no one wants banana soup for dessert! also, too many crushed nilla wafers on top can lead you down the path of soggy sadness; layer wisely.
And here’s a pro tip: you can make this pudding ahead of time . Whip it up a day in advance for parties. Stress free entertaining? Yes, please!
In summary, this nilla vanilla wafer banana pudding isn’t just dessert; it’s a sweet journey. whether it’s a family gathering, backyard bbq, or just treating yourself, mastering this recipe bridges the gap between amateur and pro.
As i wrap up this section, remember that cooking is as much about love as it is technique. the right tools and a bit of patience will get you those perfect results every time.
Additional Information
In the next section, we'll dive deeper into more banana pudding variations and substitutions, plus some exciting serving ideas that’ll leave your friends asking for seconds! so, stick around and let’s keep this tasty adventure going.
Pro Tips & Secrets for Heavenly Nilla Vanilla Wafer Banana Pudding
So, you've decided to make the heavenly nilla vanilla wafer banana pudding ? awesome choice! i gotta tell you, this isn’t just any ordinary banana pudding it’s a sweet trip down memory lane.
Now, before you dive in, here are a few pro tips just for you.
Chef's Personal Insights
You know when everyone digs into dessert and the room goes silent? yup, that’s the power of this pudding! the trick? use ripe bananas .
Seriously, the more speckles they have, the sweeter and creamier your pudding will be. trust me; this small change can turn a good pudding into a great one.
Time Saving Techniques
Ain't nobody got time to be stressed about dessert, right? here’s my golden rule: prep the pudding base in advance.
You can whip it up the night before and then layer in those nilla wafers and bananas just before serving.
This will save you a ton of time and your guests will think you were slaving away in the kitchen!
Flavor Enhancement Tips
Want to elevate the taste? toss in some crushed nilla wafers on top just before you serve. it gives that extra crunch and oodles of nostalgia.
And if you really wanna mix it up, try adding a spoonful of peanut butter or nutella between layers for a fun twist.
How cool is that?
Presentation Advice
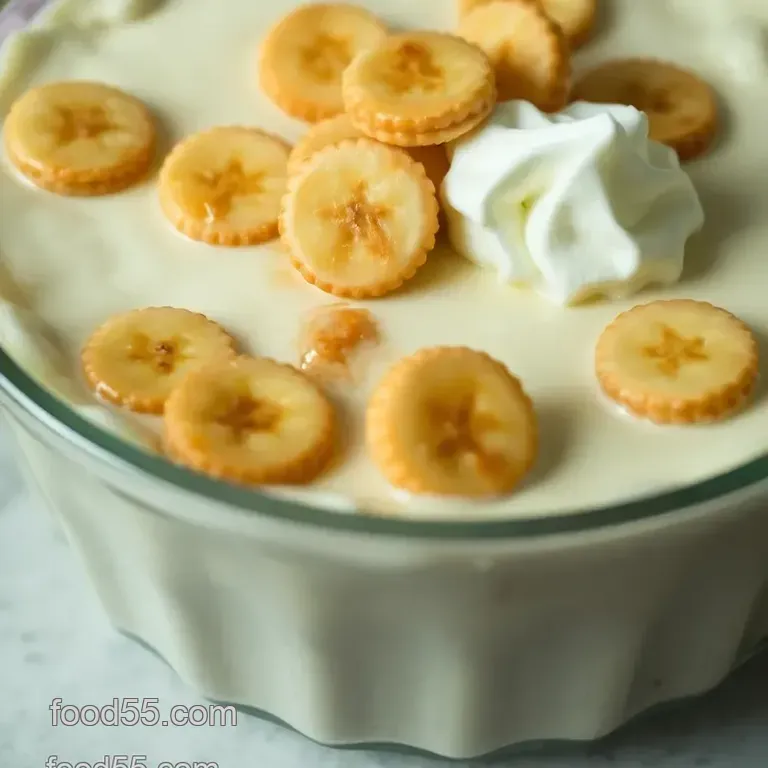
Now, let’s chat presentation. no one likes a sad-looking dessert. layering is everything. make sure your layers of wafers, pudding, and bananas are even.
It makes your dish look so much more appealing. try using a clear trifle bowl for a beautiful visual effect; it shows off all those scrumptious layers!
Perfect Presentation: Make It Instagram Worthy!
Honestly, how your food looks matters, especially today. A well presented dish can make the same old feel exciting!
Plating Techniques
Spoon the pudding into glass cups for individual servings. It’s fancy yet uncomplicated. Plus, it’s super easy for guests to grab one and go.
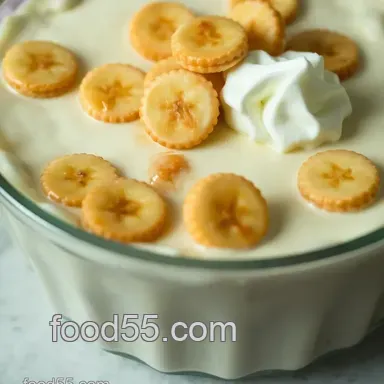
Garnish Ideas
A little whipped cream on top and a banana slice can do wonders. Want to go the extra mile? Add a mint leaf for that pop of color.
Color Combinations
Play around with colors! Use dark chocolate shavings or bright berries on top. Trust me, a splash of color makes folks wanna dig in even more.
Visual Appeal Tips
Lighting is everything for photos. Natural light? Yes, please! Snap a pic in sunlight to make those creamy layers glow.
Storage & make-ahead: Keep it Fresh!
Now, let’s face it: sometimes, we just can’t finish a whole dessert in one sitting. Here’s how to preserve every bit of that banana goodness.
Storage Guidelines
Cover your banana pudding tightly with plastic wrap or pop a lid on it. This prevents any weird fridge smells and keeps it fresh.
Preservation Methods
Chill it in the fridge for up to three days . But remember, the Nilla Wafers will soften as days pass still delicious but different!
Reheating Instructions
Honestly, there’s no reheating required here. Serve it cold, straight from the fridge.
Freshness Duration
Your pudding is best enjoyed within two days after making it for ideal texture and flavor.
Creative Variations: Mix It Up!
Feeling adventurous? Let’s give your pudding a twist!
Flavor Adaptations
Want a chocolate lover's dream? Use half chocolate pudding mix and half vanilla pudding. Boom! You have a delicious chocolate banana pudding !
Dietary Modifications
If you’re dairy-free, swap out whole milk for almond or coconut milk. It’s an easy fix that keeps all the flavors you love.
Seasonal Twists
What about adding some pumpkin spice this fall? Just a sprinkle can bubble up the seasonal feels!
Regional Variations
Ever had bananas foster ? Mix in some rum extract for a grown-up version of this classic dessert. You'll thank me later!
Complete Nutrition Guide: Keeping It Real
It's always good to know what’s going into your body, right?
Detailed Breakdown
This banana goodness packs about 320 calories per serving. Remember, moderation is key.
Health Benefits
Bananas are high in potassium, so you’re getting some good for-you benefits. Plus, the whole pudding scenario? A balance of fat, carbs, and a sprinkle of joy.
Dietary Considerations
Double check your ingredient labels if you’re gluten-free or have other dietary needs. It's all about making it work for you!
Portion Guidance
This recipe serves 8 . It’s perfect for family gatherings or a small get-together with friends.
So, whether you’re jazzing up a picnic or just looking for a comforting dessert on a cozy night in, the Nilla Vanilla Wafer Banana Pudding will impress and satisfy, guaranteed! Get your apron on, grab those bananas, and let’s make some deliciousness! 🍌
Frequently Asked Questions
What is the best way to store my Nilla Vanilla Wafer Banana Pudding?
To keep your Nilla Vanilla Wafer Banana Pudding fresh, cover it tightly with plastic wrap or a lid and store it in the refrigerator. It’s best enjoyed within 2-3 days, as the wafers may become too soggy if left for too long. Just be sure to add any whipped cream right before serving!
Can I make Nilla Vanilla Wafer Banana Pudding ahead of time?
Absolutely! This dessert is perfect for making a day in advance, allowing the flavors to meld beautifully. Just remember to give it enough time in the fridge, ideally at least a couple of hours or overnight, for the best texture.
How can I adapt this recipe for a chocolate version?
If you fancy a chocolate twist, you can easily modify the recipe by swapping out half of the vanilla pudding for chocolate pudding mix. It’s a delightful variation that chocolate lovers will adore!
What types of bananas work best for Nilla Vanilla Wafer Banana Pudding?
Use ripe bananas that have plenty of spots for the sweetest flavor. They should be firm yet soft enough to slice easily without turning mushy. Riper bananas not only taste better but also give your pudding that creamy, rich texture!
Can I use other cookies instead of Nilla Wafers for the pudding?
Definitely! If you can't find Nilla Wafers, any buttery vanilla cookie will work just fine. Graham crackers or even shortbread cookies can also provide a delicious alternative while still creating those lovely layers.
Is there a way to make a dairy-free version of Nilla Vanilla Wafer Banana Pudding?
Yes, you can easily substitute whole milk with almond milk, coconut milk, or another dairy-free milk of your choice. Just keep in mind that the resulting pudding might have a slightly different texture but will still be delicious!
Heavenly Nilla Vanilla Wafer Banana Pudding
Ingredients:
Instructions:
Nutrition Facts:
| Calories | 320 |
|---|---|
| Fat | 8g |
| Fiber | 2g |
