Easy Hershey's Red Velvet Blossom Cookie with Chocolate Kisses

- Time: Active 45 minutes, Passive 10 minutes, Total 55 minutes
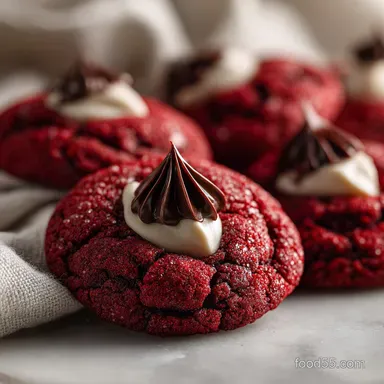
- Flavor/Texture Hook: A buttery, cocoa infused "shatter" on the outside with a soft, fudgy heart.
- Perfect for: Holiday gift tins, Valentine’s Day parties, or a cozy weekend baking session.
- Bake Easy Hershey's Red Velvet Blossom Cookie with Chocolate Kisses
- Science Behind the Crimson Crumb
- Essential Specs for Cookie Success
- Selecting Your Core Baking Elements
- Tools for a Seamless Bake
- Steps for the Crimson Bloom
- Solving Common Red Velvet Issues
- Fun Flavor and Dietary Swaps
- Storing and Preserving Your Batch
- Styling Your Holiday Cookie Platter
- Recipe FAQs
- 📝 Recipe Card
Can you smell that? It is the scent of butter and sugar hitting the whisk, followed quickly by that sharp, earthy tang of cocoa powder. We have all been there, standing in the kitchen during the holidays or a rainy Tuesday, wanting something that looks impressive but doesn't require a culinary degree.
This easy Hershey's Red Velvet Blossom Cookie with Chocolate Kisses recipe is the perfect sweet treat to bake today. Honestly, it is the kind of recipe that makes your whole house smell like a high end bakery within ten minutes.
I remember the first time I tried making these. I was in such a rush that I skipped the chilling step, and my beautiful red dough turned into one giant, flat crimson puddle on the baking sheet. It was a disaster, but it taught me exactly what not to do.
Now, I have dialed in the process so you get that perfect "bloom" every single time. We are going for a cookie that has a slight crunch on the edges but stays soft enough to yield when you bite into it.
You are going to love the way the bright red dough looks against the silver wrapped chocolate. It is a visual treat as much as a physical one. We’re not just making cookies; we are building a little moment of joy that you can share with friends or keep all to yourself with a cold glass of milk.
Let's crack on and get these in the oven.
Bake Easy Hershey's Red Velvet Blossom Cookie with Chocolate Kisses
There is something almost magical about the way these cookies come together. If you’re a fan of deep chocolate notes, you’ll find these have a different profile than my Classic Chewy Chocolate recipe. While those are all about the brown sugar and chips, these blossoms focus on the chemical reaction between the cocoa and the acid. It results in a texture that is tighter and more refined.
Why Does Vinegar Belong?
You might think putting vinegar in a cookie sounds like a mistake, but it is the soul of red velvet. In traditional baking, the acid in vinegar reacts with non alkalized cocoa powder to bring out a natural reddish tint.
Even though we use food coloring for that punchy vibrance, the vinegar still works behind the scenes to break down gluten strands, ensuring every bite is tender rather than bready.
The Residual Heat Strategy
One of the biggest mistakes I see is people leaving the cookies in the oven until they look "done." By then, they are overbaked. These need to come out when they are still slightly puffed and soft. The residual heat from the baking sheet finishes the job. This is the same logic I use in my Foolproof Baileys Chocolate recipe, where the carryover heat sets the ganache without scorching it.
Chilling Is Non Negotiable
Trust me on this: the 30 minute chill time in the fridge isn't a suggestion. When the butter stays cold, it takes longer to melt in the oven. This prevents the cookies from spreading too thin and ensures they have enough structure to hold up that heavy chocolate kiss in the center.
Science Behind the Crimson Crumb
The Science of Why it WorksAcid Base Reaction: The white vinegar reacts with the baking soda to create carbon dioxide bubbles, providing a lift that prevents the heavy cocoa dough from becoming dense. This creates a "velvety" crumb structure that gives the cookie its famous name.
Chef's Tip: Freeze your unwrapped Hershey's Kisses for 20 minutes before you start baking. When you press a cold chocolate into a hot cookie, it holds its shape perfectly instead of melting into a messy puddle.
- Temperature Check 1: Ensure your butter is exactly 65°F (18°C). It should be soft enough to indent with a finger but not greasy or shiny.
- Temperature Check 2: Set the oven to 350°F (175°C) and use an oven thermometer if you have one; red velvet is sensitive to browning if the heat is too high.
- Weight Check: For uniform baking, each dough ball should weigh approximately 18 grams (about 1 tablespoon).
Essential Specs for Cookie Success
Before we grab the bowls, let’s look at how this method compares to the "shortcut" version many people use. While a cake mix hack is fast, the texture of a scratch made dough is incomparable.
| Feature | Fresh Scratch Dough | Cake Mix Shortcut |
|---|---|---|
| Texture | Fudgy and dense with a crisp edge | Airy, cake like, and often crumbly |
| Flavor | Deep cocoa with a buttery finish | Predominantly sugar and artificial vanilla |
| Structure | Strong enough to hold the chocolate | Often collapses under the weight of the Kiss |
This table shows why we bother with the extra steps. The scratch dough provides a much more stable base for the chocolate kisses.
Selecting Your Core Baking Elements
The quality of your ingredients dictates the final result. Don't grab the cheapest cocoa on the shelf; look for something with a high fat content.
- 1.75 cups (210g) All purpose flour: The foundation of the structure.
- 3 tbsp (15g) Unsweetened cocoa powder: Provides the earthy chocolate base. Why this? It provides the chemical base for the red color reaction.
- 0.5 tsp Baking soda: Our leavening agent that reacts with the vinegar.
- 0.25 tsp Salt: To balance the sweetness of the sugar and chocolate.
- 0.5 cup (113g) Unsalted butter, softened: For that rich, melt in-the mouth feel.
- 0.75 cup (150g) Granulated sugar: For sweetness and a crisp exterior.
- 1 Large egg: Room temperature is vital for a smooth emulsion.
- 1 tbsp Milk: Adds a touch of moisture to the cocoa heavy dough.
- 1 tsp Vanilla extract: Enhances the chocolate notes.
- 1.5 tsp Red food coloring: Use gel for the most intense color. Why this? Liquid coloring can thin the dough too much; gel is concentrated.
- 0.5 tsp White vinegar: The "secret" ingredient for the red velvet texture.
- 0.33 cup Granulated sugar: Specifically for rolling the dough balls.
- 24 Hershey’s Kisses: The iconic finish.
Ingredient Deep Dive
| Ingredient | Science Role | Pro Secret |
|---|---|---|
| Unsweetened Cocoa | Provides tannins and flavor | Sift it first to avoid tiny white clumps in the red dough |
| White Vinegar | Denatures flour proteins | Adds a subtle tang that cuts through the sugar |
| Red Food Dye | Visual aesthetic only | Mix it into the liquid ingredients for even distribution |
Choosing the right substitute can change the whole vibe. If you’re out of something, use this guide.
| Original Ingredient | Substitute | Why It Works |
|---|---|---|
| White Vinegar | Lemon Juice | Same acidity level. Note: Adds a very faint citrus note. |
| Granulated Sugar | Brown Sugar | Higher moisture. Note: Will make the cookie much softer and darker red. |
| Unsalted Butter | Coconut Oil (Solid) | Same fat ratio. Note: Adds a tropical scent and makes edges crispier. |
Tools for a Seamless Bake

You don't need a professional kitchen, but a few specific tools make this much easier. A stand mixer (like a KitchenAid) is great, but a hand mixer works just as well. I highly recommend using a silicone baking mat or parchment paper.
Red velvet dough is notorious for sticking to bare metal, and you don't want to lose those crispy bottoms.
A small cookie scoop (the 1 tablespoon size) is your best friend here. It ensures all 24 cookies are the same size so they bake evenly. If some are big and some are small, the small ones will turn brown and dry before the big ones are even set. Finally, have a wire cooling rack ready.
If you leave the cookies on the hot pan for more than five minutes after they come out, the bottoms will overcook.
Steps for the Crimson Bloom
- Whisk dry ingredients. Combine the flour, cocoa powder, baking soda, and salt in a medium bowl until no streaks remain.
- Cream butter and sugar. Beat the softened butter and 0.75 cup sugar in a large bowl until light, fluffy, and pale. Note: This aeration is key for a soft texture.
- Add liquids. Mix in the egg, milk, vanilla, food coloring, and vinegar. until the mixture is a bright, uniform crimson.
- Combine. Gradually add the flour mixture to the wet ingredients. Mix on low until a soft, sticky dough forms.
- Chill the dough. Cover and refrigerate for at least 30 minutes. until the dough is firm enough to roll.
- Prep the oven. Preheat to 350°F and line your baking sheets. Unwrap all 24 Hershey's Kisses now.
- Roll and coat. Form 1 inch balls, then roll each in the 0.33 cup sugar until completely encrusted in crystals.
- Bake. Place balls 2 inches apart. Bake for 10 minutes until the edges are set but the centers are still soft.
- The Bloom. Immediately press a chocolate kiss into the center of each hot cookie until the cookie edges crack slightly.
- Cool. Let them sit on the pan for 5 minutes, then move to a wire rack until the chocolate is firm again.
Solving Common Red Velvet Issues
Even the best bakers hit a snag sometimes. Don't panic if your first tray doesn't look like a magazine cover.
Why Is Dough Too Sticky?
If the dough is sticking to your palms while rolling, it hasn't chilled long enough. The butter needs to be cold. Also, ensure you didn't accidentally use extra milk or liquid food coloring. If it's still a mess, pop it back in the freezer for ten minutes.
Why Did Kisses Melt?
If the chocolate loses its point and turns into a puddle, the cookies were either too hot or the kitchen is too warm. This is why freezing the Kisses beforehand is a pro move. If they start to melt, put the whole tray of finished cookies in the fridge immediately to "shock" the chocolate back into a solid state.
Why Are Cookies Brown?
Overbaking is the main culprit. Red food dye turns brown when it gets too hot for too long. Check your oven temperature. If they are browning on the bottom, use a light colored baking sheet instead of a dark one, as dark metal absorbs more heat.
| Problem | Root Cause | Solution |
|---|---|---|
| Flat Cookies | Butter was too warm | Chill dough for an extra 20 minutes |
| No Cracking | Dough was too wet | Add 1 tbsp of flour to the remaining batch |
| Hard Cookies | Overbaked | Reduce bake time by 1-2 minutes next time |
Fun Flavor and Dietary Swaps
If you want to change things up, the "decision shortcut" is easy: If you want a deeper chocolate hit, swap half the all purpose flour for dark cocoa powder. If you want a festive look, roll the dough in green sparkling sugar instead of plain white sugar.
If you want a surprise, tuck a tiny piece of marshmallow inside the dough ball before rolling.
The Grinch Blossom Variation
For a fun twist, you can actually omit the red food coloring and use neon green instead. Keep the cocoa powder low so the green remains vibrant. It makes for a hilarious and delicious "Grinch" themed cookie that kids absolutely love.
Can I Go gluten-free?
Yes! I have tested this with a 1:1 gluten-free flour blend (like King Arthur or Cup4Cup). Because this recipe relies heavily on the cocoa and butter for flavor, the texture holds up surprisingly well. The only thing you might notice is a slightly "grittier" mouthfeel from the rice flour in the blends.
Storing and Preserving Your Batch
These cookies are best when they are fresh, but they keep remarkably well if you treat them right. Store them in a single layer if possible. If you must stack them, put a piece of parchment paper between the layers so the chocolate kisses don't get smooshed into the bottoms of the cookies above them.
- Fridge: Keep in an airtight container for up to 5 days.
- Freezer: These freeze beautifully for up to 3 months.
- Zero Waste: If you have broken cookie pieces, crush them up and use them as a topping for vanilla ice cream or a chocolate pudding.
Freeze the Unbaked Dough
You can actually roll the balls and coat them in sugar, then freeze them on a tray. Once they are frozen solid, toss them into a freezer bag. When the craving hits, you can bake them straight from the freezer just add 2 minutes to the baking time. It is the ultimate "emergency cookie" strategy.
Styling Your Holiday Cookie Platter
When it comes to serving, these are the stars of the show. Their bright red color naturally draws the eye. I like to arrange them on a white ceramic platter to make the crimson pop. If you're feeling fancy, dust the whole platter with a tiny bit of powdered sugar to mimic fallen snow.
Since these have a soft, velvety texture, they pair perfectly with something crunchy. I often serve them alongside my Buttery Shells recipe, as the light, airy French cookies balance the richness of the red velvet and the solid chocolate kiss.
Another trick is to vary the "blossom." You can use the striped "Hug" kisses or the dark chocolate ones to create a mosaic effect on your tray. It shows a bit of extra effort and gives your guests a choice in chocolate intensity.
Whatever you do, make sure you save one (or three) for yourself before the tray disappears!

Recipe FAQs
When to add Hershey Kisses to cookies?
Immediately after baking, while the cookies are still hot. Press the unwrapped Hershey's Kiss into the center of each cookie until the edges of the cookie crack slightly. This allows the residual heat to soften the chocolate enough to embed it without it completely melting.
Can I use Hershey Kisses instead of chocolate chips?
Yes, for this specific recipe, Hershey's Kisses are the intended centerpiece. They provide a distinct visual and flavor element that works perfectly with the red velvet dough, creating the "blossom" effect.
What can I bake with Hershey Kisses?
Hershey's Kisses are fantastic for "blossom" style cookies like these red velvet ones, or as a topping for brownies and cupcakes. You can also melt them down to create frostings or dips, similar to how we'd use melted chocolate in our Cookie Dough Cheesecake: Ultimate Restaurant Style Dessert.
Can I melt down Hershey Kisses?
Yes, Hershey's Kisses can be melted down. Use a double boiler or microwave them in 30-second intervals at 50% power, stirring between each, to avoid scorching. They are great for frostings or candies.
Why are my red velvet cookies not red?
Likely an issue with the cocoa powder or food coloring. Ensure you are using non-alkalized (natural) cocoa powder, as Dutch processed cocoa will not react with the vinegar to produce the red hue. Also, make sure to use enough red food coloring, preferably gel, for an intense color.
How do I prevent my red velvet cookies from spreading too much?
Chilling the dough is crucial for controlling spread. Cold butter solidifies in the oven longer, preventing the cookies from flattening out excessively. If you enjoyed mastering dough consistency here, apply the same principles to our Classic Peanut Butter Cookie Recipe: Chewy, Nutty, and Delicious by ensuring your butter is at the right temperature.
How do I get the signature "crackled" look on my red velvet cookies?
The crackle comes from the reaction between the baking soda, vinegar, and cocoa powder, combined with the gentle "shock" of pressing the kiss in. When the hot cookie is gently pressed, it causes the soft dough to push outwards and crack.
Over baking will prevent this, so remove them when the edges are set but the centers are still soft.
Hershey S Red Velvet Blossom Cookie
Ingredients:
Instructions:
Nutrition Facts:
| Calories | 129 kcal |
|---|---|
| Protein | 1.6 g |
| Fat | 5.4 g |
| Carbs | 18.3 g |
| Fiber | 0.5 g |
| Sugar | 12.2 g |
| Sodium | 52 mg |
