Libby's Pumpkin Pie: Failure-Proof and Silky
- Time:10 minutes active + 55 minutes baking + 3 hours cooling = Total 4 hours 5 mins
- Flavor/Texture Hook: Velvety, spice forward custard with a shatter crisp base
- Perfect for: Thanksgiving dinner, seasonal get togethers, or beginner bakers wanting a win
- The Real Secret to a Flawless Libby's Pumpkin Pie Recipe
- The Quick Breakdown: Timing and Texture
- Pantry Staples for a Velvety Pumpkin Filling
- The Essential Gear for a No Soggy Crust
- Step-by-Step: Bringing the Autumn Classic to Life
- Fixing Cracks and Sogginess Before They Happen
- Creative Twists for Your Seasonal Bake
- Keeping Your Slices Fresh and Silky
- Plating Your Pie from Casual to Fancy
- Recipe FAQs
- 📝 Recipe Card
The Real Secret to a Flawless Libby's Pumpkin Pie Recipe
The smell of ground cinnamon and cloves hitting a hot oven is, for me, the official signal that autumn has actually arrived. I remember one specific November a few years back when I tried to take a shortcut.
I skipped the pre baking step of the crust, thinking the filling would just "cook it through." I ended up with what I call "pumpkin sponge" - a soggy, pale bottom that didn't so much slice as it did collapse. It was a disaster, but it taught me that the foundation of a great pie is just as important as the filling.
Since then, I've leaned into the specifics of this Libby's pumpkin pie recipe because it's remarkably consistent. When you use the pure puree, you're in control of the sweetness and the spice profile.
There's something so satisfying about seeing that bright orange mixture transform into a deep, golden custard that holds its shape perfectly on the plate. It's not about being fancy; it's about respecting the process so you don't end up with a puddle of pumpkin.
You can expect a pie that is dense but silky, with a spice profile that feels warm rather than aggressive. We're going for a texture that's velvety and a crust that actually provides a snap. If you've ever had a pie that felt too "wet" or had a weird film on top, we're fixing all of that here.
Trust me, the extra few minutes of prep make the difference between a basic dessert and the one people actually ask for the recipe for.
The Quick Breakdown: Timing and Texture
Getting the timing right is where most people trip up. This isn't a "guess timate" kind of bake. If you pull it too early, the center wobbles like Jell O; if you leave it too long, you get those dreaded cracks across the top.
The key is the transition from the over high heat blind bake to the steady, lower heat custard set.
The total time of 4 hours 5 mins might seem daunting, but most of that is just the pie hanging out on your counter. That cooling period is non negotiable.
The custard continues to set as it drops in temperature, and if you cut into it while it's still warm, you'll ruin the structural integrity of the slice.
| Servings | Ingredient Adjustments | Pan Size | Cook Time |
|---|---|---|---|
| 4-6 people (Small) | 2/3 of all ingredients | 8 inch pan | 40-45 mins |
| 10 people (Standard) | Use exact Schema amounts | 9 inch pan | 50-55 mins |
| 20 people (Double) | 2x ingredients (split into 2 pans) | Two 9 inch pans | 50-55 mins |
Right then, let's look at the specifics. You'll spend about 10 minutes prepping the filling and crust, 55 minutes in the oven, and then a solid 3 hours letting the chemistry happen on the counter.
It's a slow burn, but the result is a professional looking slice every single time.
Pantry Staples for a Velvety Pumpkin Filling
The star here is the pure pumpkin puree. I always insist on the pure version rather than the "pumpkin pie mix" because the pre spiced versions can taste a bit metallic and lack depth.
By adding our own cinnamon, ginger, and cloves, we get those vibrant, fresh notes that make the dish feel like it was made from scratch, even with the help of a can.
Another hero is the evaporated milk. Unlike regular milk or heavy cream, evaporated milk has had some of its water removed. This concentration is what gives the pie its stability. If you use regular milk, the filling is too thin; if you use too much cream, it can become overly heavy and mask the brightness of the pumpkin.
It's a delicate balance that just works.
| Ingredient | Science Role | Pro Secret |
|---|---|---|
| Libby's Pure Pumpkin | Provides structure and base flavor | Use a spoon to stir the can before measuring to avoid clumps |
| Evaporated Milk | Concentrated protein for a stable set | Keep it at room temp to avoid shocking the egg mixture |
| Extra Egg Yolk | Adds lecithin for a silkier mouthfeel | Room temp eggs incorporate faster without streaks |
| Brown Sugar | Moisture rich sweetness and color | Pack it tight in the cup for consistent sweetness |
For those looking to swap things around, remember that the moisture content is key. If you're trying to make this a bit lighter, be careful with the milk substitutes, as they can alter how the custard sets. If you love other fall flavors, you might enjoy my no bake pumpkin cheesecake for a different take on the season.
Essential Substitutions
| Original Ingredient | Substitute | Why It Works |
|---|---|---|
| Brown Sugar (3/4 cup) | Maple Syrup (1/2 cup) | Similar sugar profile. Note: Reduces overall thickness; might need 5 more mins bake time |
| Evaporated Milk (12 oz) | Coconut Milk (full fat, 12 oz) | Similar fat content. Note: Adds tropical notes, making it dairy-free |
| Premade Crust | Homemade Pâte Brisée | Flakier texture. Note: Requires more prep time and careful chilling |
| Ground Cloves | Ground Allspice | Similar warm, peppery profile. Note: Slightly less pungent than cloves |
Honestly, don't even bother with low-fat milk or sugar substitutes here. This is a seasonal treat, and the fats from the eggs and milk are what create that velvety texture we're after. If you cut the fat, you lose the soul of the pie.
The Essential Gear for a No Soggy Crust
You don't need a professional kitchen, but a few specific tools make this a breeze. A 9 inch pie plate is the standard, but make sure it's a glass or ceramic one so you can see the edges browning. If you're using a metal tin, just be a bit more mindful of the bottom.
The most overlooked tool is the pie weights. If you don't have professional ceramic weights, dried beans or uncooked rice in a jar work perfectly. You need something to hold the crust down, or it will simply bubble up and slide down the sides of the pan the moment it hits the heat.
I also highly recommend a fine mesh strainer or just a steady hand with a spoon for the skimming step. Removing the foam from the top of the batter is the difference between a surface that looks like a mirror and one that has tiny, unsightly air bubbles after it bakes.
Chef Note: If your premade crust is too soft, pop it in the freezer for 10 minutes before fitting it into the pan. It'll hold its shape much better and won't tear as you press it into the edges.
step-by-step: Bringing the Autumn Classic to Life
Let's crack on with the actual process. The goal here is precision and patience. We're not rushing the oven or the cooling.
Phase 1: Securing the Base
- Preheat your oven to 375°F.
- Fit the premade crust into the pie plate, trimming the edges. Line the crust with parchment paper and fill with pie weights.
- Bake for 10 minutes, remove weights and paper, brush the bottom with melted butter, and bake for another 5 minutes until the base looks dry and matte. Note: The butter creates a moisture barrier to prevent sogginess.
- Lower oven temperature to 350°F.
Phase 2: The Smooth Mix Filling
- In a large bowl, whisk the pumpkin puree, brown sugar, cinnamon, ginger, cloves, and salt until smooth.
- Beat in the eggs and extra yolk one at a time until fully incorporated. Note: Adding them individually prevents the mixture from breaking.
- Slowly stir in the evaporated milk.
- Let the mixture sit for 5 minutes and skim any foam off the top until the surface is completely clear. Note: This ensures a velvety finish without air pockets.
Phase 3: The Precision Bake
- Pour the filling into the pre baked crust, smoothing the top with a spatula.
- Bake at 350°F for 50–55 minutes until the edges are set but the center has a slight, gentle jiggle.
- Remove from oven and allow the pie to cool for 3 hours until it is room temperature and fully set.
Fixing Cracks and Sogginess Before They Happen
If your pie comes out with a giant crack down the middle, you probably overbaked it or beat too much air into the eggs. When you whisk the filling, keep it steady. If you use a hand mixer on high, you're just incorporating air that will expand and then collapse in the oven.
Sogginess usually comes from two things: skipping the butter brush on the crust or not using pie weights. Without the weights, the crust shrinks, leaving a gap where the filling pools and soaks into the dough.
Common Texture Issues
| Problem | Root Cause | Solution |
|---|---|---|
| Center is oozy | Underbaked or not cooled enough | Bake for 5 more mins or wait full 3 hours to cool |
| Surface cracks | Oven too hot or over whisked | Lower temp by 10°F next time; whisk by hand |
| Soggy bottom | No blind bake or butter barrier | Use pie weights and brush melted butter before filling |
To make sure you don't run into these, keep this checklist handy while you work:
- ✓ Pat your pie plate dry before adding the crust.
- ✓ Ensure the oven temperature is verified with a thermometer if possible.
- ✓ Use a spatula to gently push air bubbles to the edge before baking.
- ✓ Don't open the oven door every 10 minutes - let the heat stay consistent.
- ✓ Let the pie cool on a wire rack to allow airflow under the bottom crust.
Creative Twists for Your Seasonal Bake
While the classic version is a winner, you can easily tweak this to fit your mood. If you want a deeper, more complex flavor, try adding a tablespoon of maple syrup or a pinch of nutmeg.
For something slightly more adult, a splash of bourbon stirred into the filling adds a smoky warmth that pairs beautifully with the cloves.
If you're feeling adventurous with your side dishes, this pie is the perfect finale after a comforting meal like creamy pumpkin mac and cheese. The savory cheese and the sweet pumpkin create a great seasonal balance.
Customizing Your Flavor
If you want a "Bourbon Spiced" version, replace 1 tablespoon of the evaporated milk with 1 tablespoon of high-quality bourbon. The alcohol burns off, but the oaky sweetness remains.
For a dairy-free twist, use full fat coconut milk as mentioned in the substitutes table, but be aware that the flavor will lean more tropical.
If you prefer a more rustic feel, you can use a homemade graham cracker crust. Just be sure to press it firmly into the pan and pre bake it for about 8 minutes to ensure it doesn't crumble when you slice into it.
Keeping Your Slices Fresh and Silky
Pumpkin pie actually tastes better on day two because the spices have more time to meld. Keep it in the fridge, tightly wrapped in plastic wrap or stored in an airtight container to prevent it from picking up "fridge smells."
Fridge: Store for up to 4-5 days. Freezer: You can freeze the baked pie for up to 2 months. Wrap it in a double layer of foil and plastic wrap. To thaw, move it to the fridge 24 hours before serving.
Reheating: I don't recommend reheating the whole pie in the oven, as you'll likely overcook the edges. Instead, let the slices come to room temperature naturally, or pop a slice in the microwave for 10-15 seconds just to take the chill off.
Zero Waste Tip: If you have leftover crust scraps, bake them with a bit of cinnamon sugar for a quick snack. If you have a bit of filling left over, freeze it in an ice cube tray and stir it into your morning oatmeal for a pumpkin spice kick.
Plating Your Pie from Casual to Fancy
The way you present this dish can change the entire vibe of the meal. Since the pie is a deep, monochromatic orange, adding contrast is the goal.
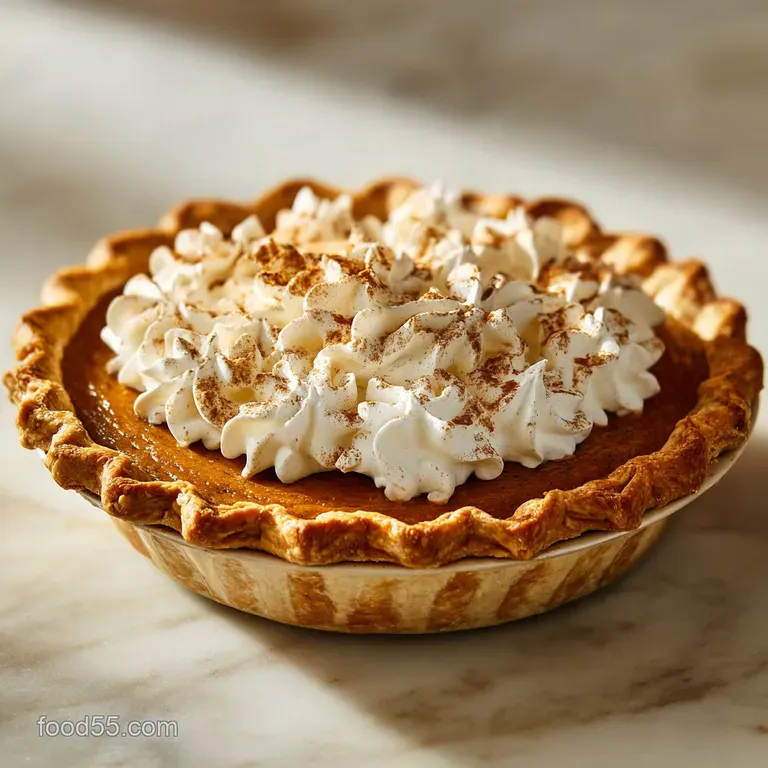
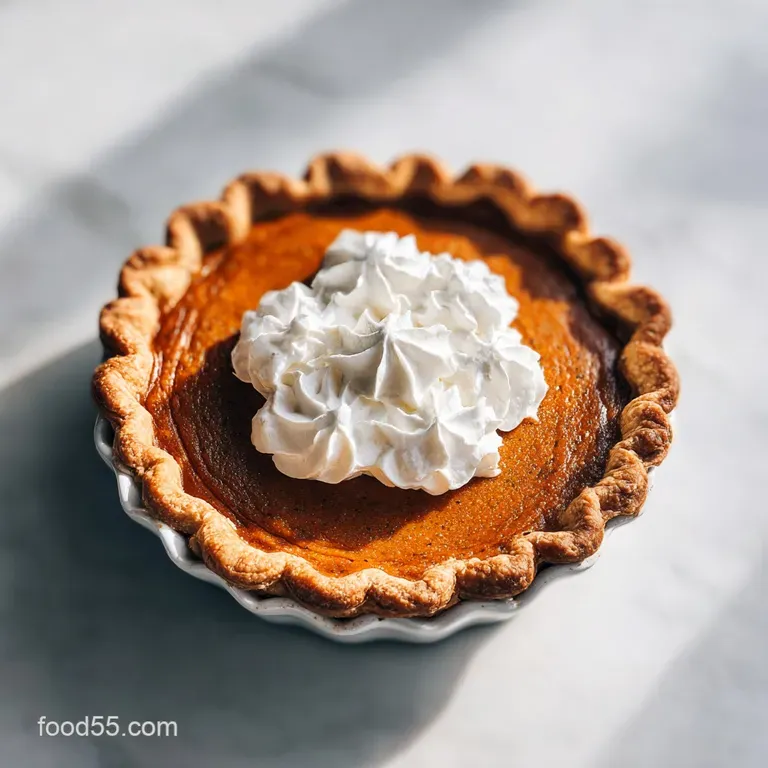
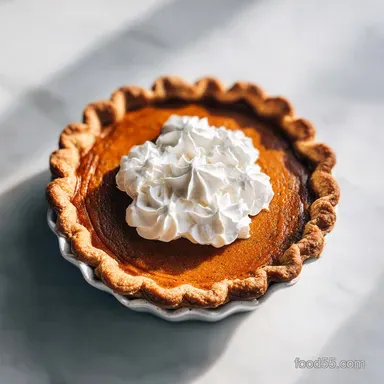
Simple Level: The Homey Dollop
Just a generous scoop of whipped cream placed right in the center of the slice. Dust the top with a tiny bit of cinnamon. It's classic, comforting, and exactly what people want at a family dinner.
Polished Level: The Café Style
Use a piping bag with a star tip to create three distinct swirls of whipped cream across the slice. Add a single fresh mint leaf or a small piece of candied ginger on top for a pop of color.
Restaurant Level: The Modern Plate
Place the slice slightly off center. Use a squeeze bottle to create three small dots of salted caramel sauce around the plate. Garnish with a sprinkle of toasted pumpkin seeds (pepitas) for a crunch that contrasts the velvety filling.
| Plating Element | Simple | Polished | Restaurant |
|---|---|---|---|
| Cream | Spooned dollop | Piped swirls | Quenelle (oval scoop) |
| Garnish | Cinnamon dust | Mint leaf | Toasted pepitas |
| Sauce | None | Maple drizzle | Salted caramel dots |

Recipe FAQs
Did Libby's change their pumpkin pie recipe?
No, the core components of the classic recipe remain unchanged. The puree is processed consistently to ensure the same flavor and texture for every holiday season.
Is it better to use condensed milk or evaporated milk in pumpkin pie?
Use evaporated milk. It creates the proper custard like consistency and balanced sweetness, whereas condensed milk is too thick and sugary for this specific recipe.
How to make Libby's easy pumpkin pie mix?
Whisk the pumpkin puree, brown sugar, cinnamon, ginger, cloves, and salt until smooth. Beat in the eggs and extra yolk one at a time, then slowly stir in the evaporated milk.
How much pumpkin pie spice to use in Libby's pumpkin pie?
Combine 1 tsp cinnamon, 1/2 tsp ginger, and 1/4 tsp cloves. Using these individual measurements ensures the spices complement rather than overpower the pumpkin puree.
Is it true that you don't need to pre-bake the crust?
No, this is a common misconception. Pre-baking at 375°F and brushing with melted butter prevents a soggy base. If you've mastered this blind baking technique, you can apply it to our pecan pie for similar results.
Why is my pumpkin pie still jiggly in the middle after baking?
It needs more time to cool. The custard continues to set as the temperature drops; allow the pie to cool for a full 3 hours before slicing.
How to prevent bubbles or foam on top of the pie?
Let the filling sit for 5 minutes before pouring. Skim any foam off the surface with a spoon to ensure a perfectly smooth, professional finish.
Libby S Pumpkin Pie Recipe
Ingredients:
Instructions:
Nutrition Facts:
| Calories | 278 kcal |
|---|---|
| Protein | 7.2g |
| Fat | 11.1g |
| Carbs | 37.0g |
| Fiber | 1.8g |
| Sugar | 26.5g |
| Sodium | 285mg |
