Niangao Aka Mochi Cake: Fluffy Baked Good
- Time: Active 15 minutes, Passive 1 hours, Total 1 hours 15 minutes
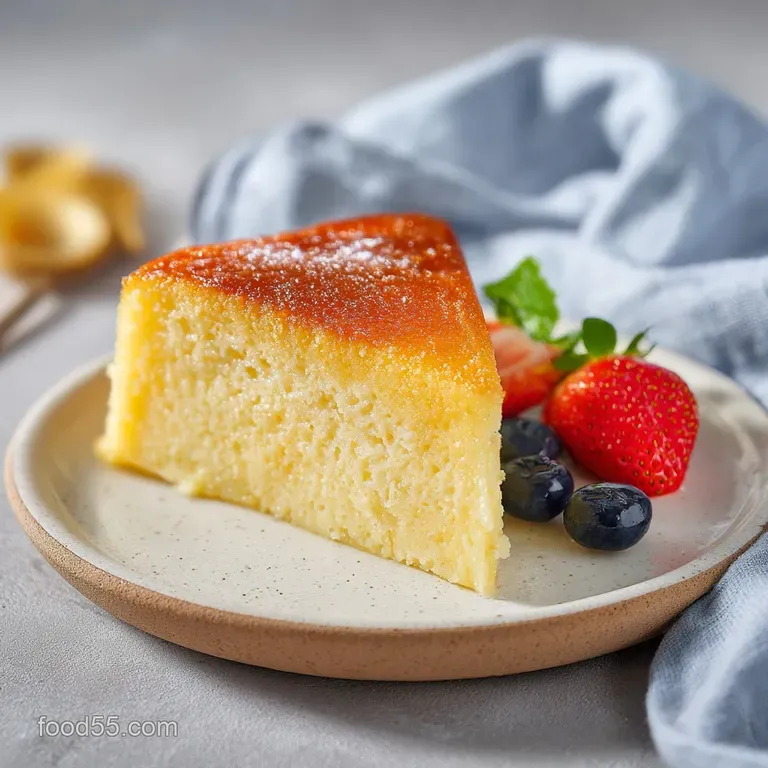
- Flavor/Texture Hook: Toasted coconut aroma with a springy, "Q" bite
- Perfect for: Lunar New Year celebrations or a standout brunch dessert
Mastering This Niangao aka Mochi Cake
I still remember the first time I pulled a tray of this Niangao aka Mochi Cake out of the oven. The kitchen was thick with the scent of toasted coconut and warm vanilla, a fragrance so heavy it felt like a blanket.
I had spent years eating the traditional steamed version, which is lovely, but the moment my knife hit that shatter crisp top layer of the baked version, I knew I could never go back.
This recipe represents a beautiful intersection of textures. It's an innovative take on the classic Chinese rice cake, utilizing modern baking techniques to achieve a crust that most traditional methods simply can't touch.
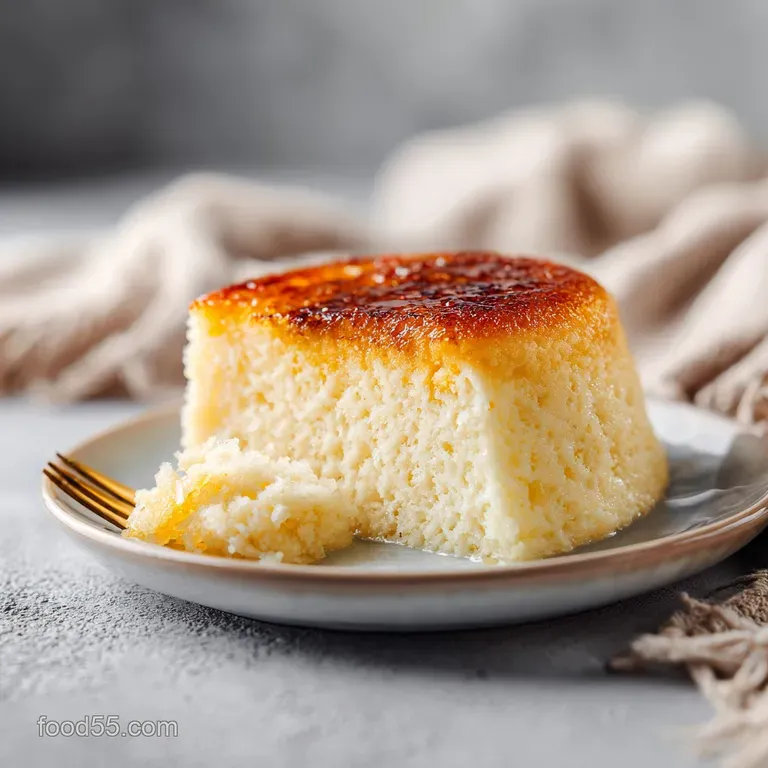
We're moving away from the purely soft, gummy texture and introducing a buttery, golden exterior that makes every bite an experience. Trust me on this, once you see how the edges caramelize against the pan, you'll be as obsessed as I am.
The beauty of this Niangao aka Mochi is its minimalist aesthetic combined with a complex mouthfeel. It's a culinary artist's dream because it acts as a blank canvas for flavors like matcha, black sesame, or even salted egg yolk.
Whether you're making this for a festive gathering or just a weekend project, the result is always a sophisticated, contemporary treat that looks as stunning as it tastes.
Essential Specs for Your Bake
The Physics of the Chew: Starch in glutinous rice flour expands and gels when hydrated by coconut fats, creating a springy, "Q" texture that remains flexible even after cooling. This starch gelatinization is the secret to that iconic bounce.
| Method | Time | Texture | Best For |
|---|---|---|---|
| Traditional Oven | 1 hours | Crisp top, chewy core | Maximum contrast |
| Stovetop (Steamed) | 45 minutes | Uniformly soft, gummy | Traditionalists |
| Toaster Oven | 35 minutes | Extra dark edges | Small batches |
Choosing the oven method allows for the Maillard reaction to occur on the surface, which is something you miss out on with steaming. That golden brown crust isn't just for looks, it provides a nutty, toasted flavor that balances the sweetness of the coconut milk.
The Core Building Blocks
| Ingredient | Science Role | Pro Secret |
|---|---|---|
| Mochiko Flour | Structural Base | Use only "sweet" or "glutinous" rice flour for the bounce. |
| Coconut Milk | Fat & Emulsion | Full fat milk provides the velvety mouthfeel and rich aroma. |
| Baking Powder | Leavening | It creates tiny air pockets to prevent the cake from being a brick. |
Getting the right rice flour is non negotiable here. Unlike regular rice flour, which is gritty, Mochiko is ground from short grain glutinous rice. This is what gives the Mochi Cake its signature elasticity. If you've ever enjoyed a Pillowy Mochi recipe, you'll recognize that specific, satisfying pull.
Tools for Culinary Success
You don't need a professional pastry kitchen to pull this off, but a few specific tools make the process much smoother. I personally prefer a 9x13-inch glass baking dish because it allows you to see the color of the bottom crust, though a dark metal pan will give you even crispier edges.
A heavy duty whisk or a stand mixer is helpful for ensuring the batter is completely smooth. You're looking for a consistency that resembles thick heavy cream. Any lumps of dry flour will turn into hard, chalky beads in the finished cake, which is a mistake I once made during a rushed holiday prep.
Take the extra 60 seconds to whisk it properly.
Executing the Perfect Bake
- Preheat your oven to 350°F. Note: A stable temperature ensures the leavening agent reacts evenly.
- Whisk 1 lb Mochiko, 1.25 cups sugar, 2 tsp baking powder, and 0.5 tsp salt in a large bowl.
- Combine 13.5 oz coconut milk, 0.5 cup whole milk, 0.5 cup melted butter, 3 eggs, and 1 tbsp vanilla in a separate vessel.
- Slowly stream the liquids into the dry ingredients while whisking. Mix until the batter is silky and fluid.
- Grease your 9x13 pan generously with butter or coconut oil. Note: This prevents the sticky rice from bonding to the glass.
- Pour half the batter into the pan.
- Dollop 0.5 cup sweetened red bean paste over the batter and swirl with a knife.
- Top with the remaining batter, smoothing the surface with a spatula.
- Bake for 1 hours until the top is golden and the center is set.
- Rest the cake for at least 30 minutes before slicing. Cooling is mandatory for the starch to set.
Pro Techniques and Fixes
Why Your Mochi Cake Sinks
If you find the center of your cake dipping significantly as it cools, it's often a sign that the eggs weren't at room temperature or the oven door was opened too early. The structure needs that initial burst of heat to set the "walls" of the cake.
Another culprit is over whisking once the eggs are added, which incorporates too much air that eventually collapses.
Is My Cake Too Sticky?
Cutting this cake can be a bit of a challenge because it's naturally tacky. To get those sharp, clean lines you see in food photography, wait until the cake is completely cool. Use a plastic knife or lightly oil a sharp metal knife before each cut.
It sounds strange, but a plastic knife actually glides through rice flour batter much better than steel does.
| Problem | Root Cause | Solution |
|---|---|---|
| Gritty Texture | Rice flour not fully hydrated | Whisk longer or let batter rest 10 mins before baking. |
| Hard Exterior | Overbaked or oven too hot | Cover with foil if browning too fast; check at 50 mins. |
| No Bounce | Used regular rice flour | Ensure the bag specifically says "Glutinous" or "Sweet". |
Common Mistakes Checklist
- ✓ Use room temperature eggs to ensure a smooth emulsion with the fats.
- ✓ Don't substitute the sugar with liquid sweeteners, as it alters the hydration.
- ✓ Grease the pan higher than you think, as the cake will rise and then settle.
- ✓ Let the melted butter cool slightly so it doesn't scramble the eggs.
- ✓ Always check the expiration date on your baking powder for the best lift.
Creative Variations and Swaps
The versatility of this aka Mochi Cake is one of its best features. While the red bean is a classic choice, I've seen incredible results with a Strawberry Mochi Cake variation where you fold in freeze dried strawberry powder for a punch of color and tartness.
If you're feeling adventurous, a Matcha Black Sesame twist adds a sophisticated bitterness that cuts through the sweetness of the coconut.
| Original Ingredient | Substitute | Why It Works |
|---|---|---|
| Coconut Milk | Evaporated Milk | Similar fat content. Note: Loses the tropical aroma but adds a milky richness. |
| Whole Milk | Oat Milk | Keeps the batter fluid. Note: Slightly earthier flavor profile. |
| Red Bean Paste | Nutella | High fat and sugar content. Note: Creates a modern, decadent fusion. |
If you want a deeper, more aromatic experience, consider using the same floral notes found in my Cardamom Cake From recipe. A teaspoon of ground cardamom added to the dry ingredients transforms this into a completely different, globally inspired dessert.
Preserving and Reviving Texture
One of the few trade offs with any Niangao aka Mochi is that it tends to firm up over time. To store it, keep it in an airtight container at room temperature for up to 2 days. If you're keeping it longer, the fridge is fine for 5 days, but the cold will make it quite hard.
To bring it back to life, a quick 15 second zap in the microwave will restore that "Q" bounce. However, if you want to be a true culinary artist, try pan frying the leftover slices in a little bit of butter. This creates a secondary sear on the cut sides, making it almost like a mochi French toast.
It's honestly better than the first day.
For long term storage, you can freeze individual slices wrapped tightly in plastic wrap for up to 2 months. Thaw them on the counter and then toast them in a toaster oven for a few minutes to regain that outer crunch.
Pairings and Plating Art
When it comes to presentation, I like to think in levels. This cake is inherently rustic, but it can be presented with high end finesse depending on how you slice and garnish it.
- Simple Plating: Cut into large, honest squares and serve on a wooden board. It's communal, approachable, and highlights the golden crust.
- Polished Plating: Cut into small, precise rectangles. Dust with a light veil of powdered sugar and top with a single fresh raspberry or a mint leaf.
- Restaurant Plating: Sear a slice in a hot pan with a tiny bit of sugar until it's brûléed. Place it off center on a dark plate, add a dollop of whipped coconut cream, and a sprinkle of toasted black sesame seeds.
| Level | Visual Goal | Key Element |
|---|---|---|
| Simple | Rustic Comfort | Large squares, bare surface |
| Polished | Precise Elegance | Small rectangles, sugar dust |
| Restaurant | Modern Fusion | Brûléed edge, cream, garnish |
If you want X, do Y: If you want a crustier edge, use a dark metal pan and increase the butter by 1 tablespoon. If you want a softer center, pull the cake from the oven at 55 minutes while it still has a slight jiggle.
If you want a deeper flavor, brown the butter in a saucepan before cooling and adding it to the batter.
Kitchen Myths
One common misconception is that you can't over mix mochi batter because it doesn't have wheat gluten. While it's true you won't get "tough" gluten strands, over mixing incorporates too many air bubbles.
This leads to a cake that puffs up like a soufflé and then craters in the middle, leaving you with a dense, unappealing ring.
Another myth is that you must use expensive imported coconut milk. While quality matters, any full fat canned coconut milk will work perfectly. The key is to shake the can vigorously before opening to ensure the coconut cream and water are fully integrated, providing a consistent fat ratio for the entire batter.
This ensures every slice of your Niangao aka Mochi Cake has that same velvety finish.

Recipe FAQs
Can I substitute standard all-purpose flour for the Mochiko (Glutinous Rice Flour)?
No, absolutely not. Standard flour will result in a dense, bread like texture; you must use glutinous rice flour to achieve the essential bouncy, elastic "Q" quality that defines Niangao.
How to tell when the Niangao is fully baked without cutting into it?
Insert a thin wooden skewer near the center; it should come out mostly clean. The top must be deeply golden brown, and the cake should pull slightly away from the edges of the baking pan when gently nudged.
Is it true that over whisking the batter ruins the final texture?
Yes, this is true, counterintuitively. While there is no gluten to worry about, over mixing incorporates too much air, causing the cake to rise aggressively and then collapse into a dense crater as it cools.
How to achieve the signature crisp, shatter like top layer?
Bake at 350°F for the full duration and ensure a high fat ratio. The high temperature encourages the Maillard reaction on the surface, which is what creates that perfect textural contrast to the soft interior.
Can I make this dairy-free by substituting coconut milk for the whole milk?
Yes, you can substitute the whole milk with more coconut milk, though results vary. For a completely dairy-free bake, you should also swap the melted butter for coconut oil; if you enjoyed learning about fat manipulation here, see how the same principle applies to achieving a stable emulsion in our Valentines Day Cake recipe.
How long should I allow the cake to rest before attempting to slice it?
Allow the cake to cool at room temperature for a minimum of 30 minutes. Slicing too early will result in the sticky starches pulling apart messily; cooling allows the structure to firm up enough for cleaner cuts.
What is the best way to serve leftover Niangao that has gone hard in the fridge?
Reheat it briefly in the microwave for 15 seconds to restore the softness. For a better textural experience, lightly pan fry the slices in butter until the exterior is golden again, similar to how we develop crust flavor in the Classic Sock It recipe.
Niangao Aka Mochi Cake Recipe

Ingredients:
Instructions:
Nutrition Facts:
| Calories | 302 kcal |
|---|---|
| Protein | 4.1 g |
| Fat | 12.4 g |
| Carbs | 44.2 g |
| Fiber | 1.1 g |
| Sugar | 19.7 g |
| Sodium | 115 mg |
