Oven Baked Baby Back Ribs: the No-Fuss Way to Fall-Off-The-Bone Perfection
- The Low and Slow Secret to Tender Baby Back Ribs
- Mastering the Texture: The Science Behind Perfect Oven Baked Baby Back Ribs
- Essential Ingredients for Your Signature Baby Back Ribs Dry Rub
- Prepping the Ribs: Removing the Membrane and Trimming
- The 4 Step Method for Baking Tender Baby Back Ribs in the Oven
- Cooking Time and Temperature Breakdown
- Expert Tips and Troubleshooting Common Oven Rib Mistakes
- Storing, Freezing, and Reheating Oven Baked Baby Back Ribs
- Pairing Perfection: What to Serve Alongside Your Ribs
- Recipe FAQs
- 📝 Recipe Card
The Low and Slow Secret to Tender Baby Back Ribs
The smell of smoky, sweet caramelisation hitting you when you open the oven is just the best, right? Forget everything you’ve heard about grilling being the only way to achieve truly spectacular ribs.
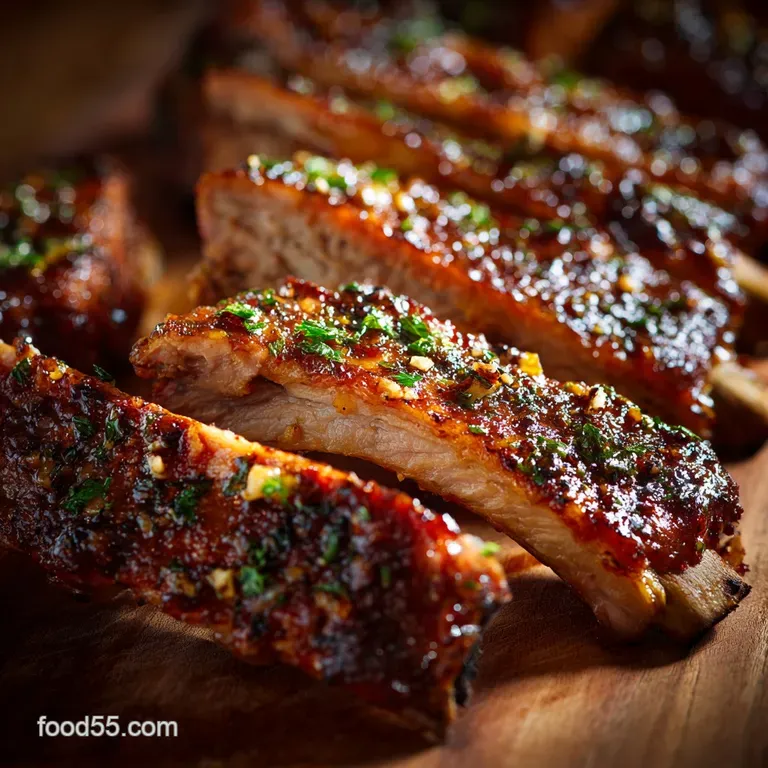
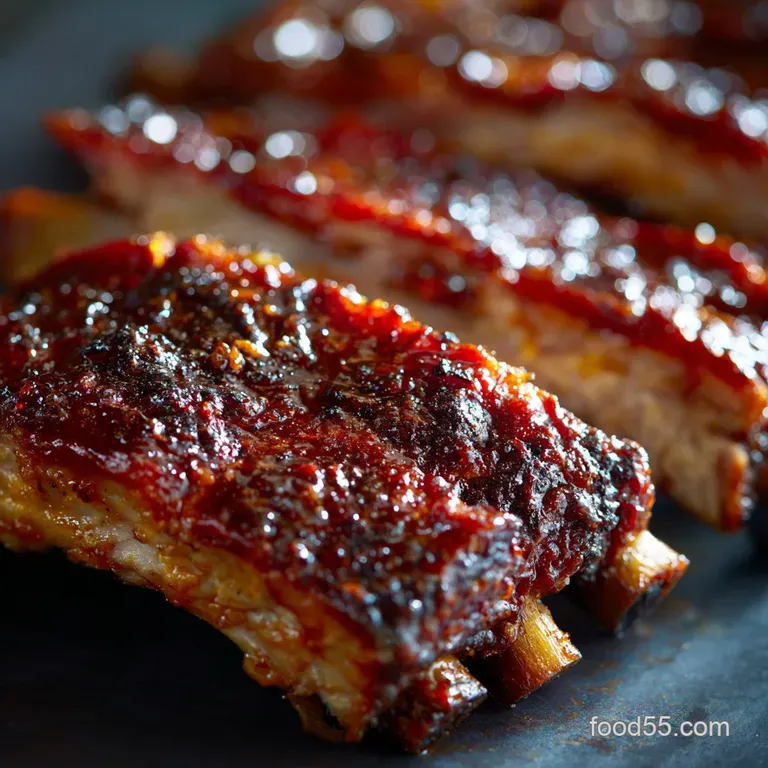
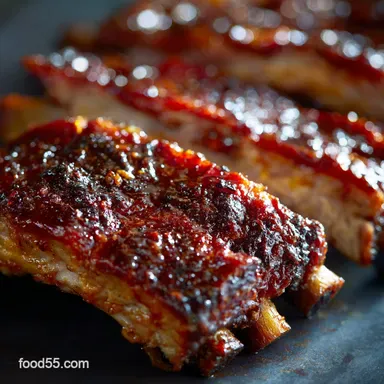
These [Oven Baked Baby Back Ribs] are so unbelievably tender they practically melt the moment they hit your tongue. You get that sticky, charred crust and meat that effortlessly pulls clean off the bone every single time.
Let's be real, managing a smoker or a grill for hours is often stressful and unpredictable. This oven method is the ultimate lifesaver for achieving professional "low and slow" results with zero stress or expensive equipment.
It’s cheap, uses standard ingredients you already own, and guarantees ridiculously fall off-the-bone texture. Seriously, once you master this temp and time, you’ll never look back, and you'll realize the oven is the best way to get consistent results.
We’re diving deep into the secrets today, from the essential dry rub cure to the critical step of the foil wrap. This comprehensive guide gives you the ultimate oven baked baby back ribs recipe, designed for maximum flavor and minimal fuss. Ready to make the best BBQ ribs in the oven you’ve ever had?
Let’s crack on and get messy.
Mastering the Texture: The Science Behind Perfect Oven Baked Baby Back Ribs
Why the Oven Guarantees Fall Off-The-Bone Texture
The magic here is simple: time and steady heat. We are cooking the ribs at a super low temperature for an extended period, which is exactly what tough cuts of meat need. The extended time allows the tough connective tissue (collagen) in the rib meat to melt down completely.
When collagen breaks down, it transforms into luxurious gelatin, which is what gives you that signature, melt-in-your mouth experience.
Grill vs. Oven: Achieving Consistent Moisture and Tenderness
While a grill offers amazing smoke flavor, it struggles with consistent temperature control, leading to potential dryness. The oven provides a perfectly stable, gentle heat source. By using the oven for the bulk of the cooking, we can ensure every centimeter of the rack cooks evenly.
We save the over high heat blast for the very end, just to crisp up that glaze and add that desirable charred texture.
The Magic of the Overnight Dry Rub Cure
Don't skip the overnight chill, I’m serious. The key components in our oven baked baby back ribs dry rub salt and sugar do the heavy lifting long before the ribs hit the heat.
Salt pulls moisture out of the meat, then the mixture re-absorbs that salty, sugary liquid, flavouring the meat deep within the muscle fibers. This process is called curing, and it results in a deeper flavor than simply rubbing and cooking immediately.
Steam Baking: Protecting the Meat with Aluminum Foil
Wrapping the ribs tightly in heavy duty aluminum foil during the initial bake is absolutely non-negotiable. This creates a steamy, humid little sauna inside the packet. The small amount of added liquid (vinegar and water) turns into steam, preventing the ribs from drying out while the fat renders.
This step is the difference between dry ribs and juicy ribs.
The Final Glaze: Broiling for Sticky, Charred Edges
Once the ribs are tender, the foil comes off, and the heat goes up. This over high heat phase, either via increased bake temperature or a quick broil, serves two main purposes. First, it thickens and caramelizes the brown sugar in the BBQ sauce, creating that sticky, beautiful exterior.
Second, it evaporates the surface moisture, locking in the structure.
Essential Ingredients for Your Signature Baby Back Ribs Dry Rub
We are building an American BBQ flavor profile that leans on sweet, smoky, and savory notes. My go-to dry rub recipe is heavy on smoked paprika and brown sugar because they create the best color and crust.
| Ingredient | Role in Flavor | Simple Swap |
|---|---|---|
| Pork Baby Back Ribs | The main event! | St. Louis Style Spareribs (Increase cook time slightly.) |
| Light Brown Sugar | Crucial for caramelisation | Honey powder or Dark Muscovado Sugar |
| Smoked Paprika | Color and deep, smokey flavor | Regular Sweet Paprika + a tiny dash of Liquid Smoke |
| Apple Cider Vinegar | Moisture, tang, and acid balance | Water + 1 Tbsp White Vinegar |
| Mustard Powder | Adds savory depth, binds the rub | Garlic Powder or 1 Tbsp of prepared yellow mustard (used as a binder) |
| high-quality BBQ Sauce | Finishing glaze | Hoisin sauce mixed with ketchup for an Asian twist |
Prepping the Ribs: Removing the Membrane and Trimming
Selecting the Right Rack: Pork Baby Back Ribs vs. Spare Ribs
Baby back ribs are the leaner, more tender ribs cut from the upper section of the hog, near the loin. They cook faster than spareribs, which are fattier and require a longer cook time. I find baby back ribs are perfect for the home oven since they fit more easily on a standard sheet pan.
Building the Flavor Base: Paprika, Brown Sugar, and Secret Spices
The secret to a knockout dry rub is balancing the elements: sugar for sweetness, salt for cure, and spice for complexity. Don’t be shy with the application! We are using every bit of that rub to fully coat the pork. You want a thick, visible layer of spice pressed firmly onto the meat.
Sauce Selection: Finding the Best Barbecue Glaze
I usually use my favorite commercial sweet and sticky sauce, but if you want to get really nerdy, you can totally make your own. Since the ribs already have plenty of spice, aim for a sauce that is rich, slightly tangy, and high in sugar content for maximum stickiness.
A step-by-step Guide to Removing the Silverskin
This step is a massive game changer for tender ribs. The silverskin (or membrane) is a tough layer on the underside of the rack that prevents the rub from penetrating the meat. It doesn't break down during cooking, meaning your finished ribs will be chewy instead of tender.
- Flip the rack bone side up.
- Use a small, sharp knife to slide under the membrane near a corner bone. Just lift enough to create a small flap.
- Grab the flap tightly with a paper towel or kitchen roll this gives you grip!
- Pull steadily and firmly across the rack. It should peel off in one glorious, thick sheet. If it tears, just start over at the new edge.
Chef's Note: The paper towel trick is essential. I once spent ten minutes trying to grab that slippery membrane with my bare fingers. It was a disaster. Use a paper towel, trust me.
Simple Swaps for Common Dry Rub Ingredients
If you are missing onion powder, simply increase the garlic powder slightly. If you don't like spice, omit the cayenne pepper entirely. For a richer color, use dark brown sugar instead of light brown sugar. Easy peasy.
The 4 Step Method for Baking Tender Baby Back Ribs in the Oven
This is the system the foolproof process for amazing oven baked baby back ribs.
Cooking Time and Temperature Breakdown
Step 1: Rubbing and Curing the Rack (The overnight prep)
Once the membrane is gone, coat the entire rack generously with the dry rub, pressing it firmly into the meat. Wrap the seasoned ribs tightly in plastic wrap and refrigerate for a minimum of 2 hours, but preferably overnight (8– 12 hours).
This is how we build the deep flavor base.
Step 2: Low-Temperature Baking in Foil (The initial 'steam' phase)
Preheat your oven to 140°C (285° F) . Tear off two large pieces of heavy duty foil and lay them overlapping slightly on your baking sheet. Place the rubbed ribs bone side down, pour the vinegar/water mixture along the length, and seal the packet tightly.
Bake for 3 hours and 15 minutes .
Step 3: The Unveiling and Initial Glaze Application
Carefully pull the ribs out, open the foil (watch out, it's hot steam!), and discard the liquid. Raise your oven temperature to 200°C (400° F) . Place the ribs on a wire rack over the baking sheet (or just back on the sheet).
Brush the rack generously with about half of the BBQ sauce and return them to the hotter oven for 15 minutes.
Step 4: Broiling to Perfection (Achieving the sticky finish)
Remove the rack again. Brush with the remaining BBQ sauce. Put them back in the oven for a final 10– 15 minutes, until the glaze is bubbling, slightly sticky, and beautifully caramelized.
If your oven has a broiler, you can use it for the last 5 minutes to intensify the char, but watch them very closely so they don't burn.
Verifying Doneness: What Temperature Should Ribs Be?
While you can use a thermometer (look for an internal temperature of 90°C/195°F for collagen breakdown), the best way to verify doneness for fall off-the-bone tenderness is visual. The meat should be significantly pulled back from the ends of the bones, maybe half an inch.
If you lift the rack, it should bend dramatically and look like it might break in half.
Adjusting Cook Times for Different Rack Sizes
If you have a particularly meaty rack (over 3 pounds), add 30– 45 minutes to the initial foil wrapped baking time. If you use St. Louis Style Spareribs instead of baby back ribs, you’ll also need an extra 45 minutes in the foil.
Always check for that characteristic meat pullback.
Expert Tips and Troubleshooting Common Oven Rib Mistakes
Mistake 1: Why Your Ribs Are Dry (And How to Fix It)
Dry ribs are usually caused by two things: too high a temperature or insufficient steam. You must stick to that low 140°C/285°F temperature. Also, ensure your foil packet is sealed perfectly . If the steam escapes, the ribs dry out before the connective tissue fully breaks down.
If your ribs look dry midway through, add another tablespoon of water and seal the foil tightly again.
The Foil Debate: When to Seal and When to Uncover
Seal the ribs for the first 90% of the cook time to ensure tenderness and juiciness. Uncover the ribs only when you are ready to apply the sauce and caramelize the glaze. Trying to glaze too early will result in a tough crust and dry interior.
Resting Time: Why Patience is Key Before Slicing
I know you want to dig in, but please give the oven baked baby back ribs a 10 minute rest after they come out of the final glaze stage. This allows the meat fibers to relax and redistribute the juices that migrated during the over high heat finish.
Slicing immediately means all that lovely juice runs out onto the board.
Storing, Freezing, and Reheating Oven Baked Baby Back Ribs
Best Practices for Storing Leftover Ribs (Refrigeration)
Leftover ribs should be cooled to room temperature relatively quickly, then stored in an airtight container in the refrigerator. They are best eaten within 3 to 4 days . If they are very saucy, the high sugar content acts as a mild preservative, but stick to the four day rule to be safe.
The Best Way to Reheat Ribs Without Drying Them Out
The microwave is a sadness for leftover ribs. The best method is to reheat them slowly in the oven. Wrap the cold, sliced ribs tightly in a fresh piece of aluminum foil with a tablespoon of water or extra BBQ sauce inside the packet.
Reheat at 150°C (300°F) for 15– 20 minutes until piping hot throughout.
Freezing Ribs
Ribs freeze incredibly well! Once they are completely cool, wrap them tightly either whole or pre-sliced in plastic wrap, then seal them inside a freezer safe bag or container. They will last up to 3 months. Thaw overnight in the fridge before reheating using the oven method above.
Pairing Perfection: What to Serve Alongside Your Ribs
Ribs are rich, sweet, and smoky, so they need sides that offer coolness, tang, and texture contrast.
Classic American Sides That Complement BBQ Pork
- Tangy Coleslaw: A crisp, vinegar based coleslaw is the perfect palate cleanser.
- Starches: You can't go wrong with classic baked beans or a creamy potato salad. If you want a crispy, comforting side, you absolutely must try my [Baked Sweet Potato Recipe: Ultra Crispy Skin Fluffy Interior]. The creamy interior is the perfect match for the sticky ribs.
- Dessert Pairing: Since the main course is heavy, I usually opt for something bright and cold afterwards. Maybe not as heavy as an [Oreo Cheesecake: The Best Classic Baked Showstopper Dessert Recipe], but definitely something cooling like a fruit crumble or a simple ice cream.
Enjoy these ribs! They truly are the best way to do low and slow cooking without firing up the smoker (If you are looking for a true, traditional low and slow smoker recipe, I’ve got one of those, too: [Baby Back Ribs: The Low Slow Recipe for Fall Off-The-Bone Tenderness]).

Recipe FAQs
Why did my oven baked ribs turn out tough or dry?
Toughness usually results from insufficient cooking time or baking at too high a temperature, which prevents the internal connective tissues (collagen) from fully breaking down into gelatin.
Ensure your oven temperature is accurate and that the ribs are wrapped tightly to retain moisture during the initial low-and-slow phase.
Do I really need to remove the silverskin (membrane) from the back of the ribs?
Yes, removing the membrane is highly recommended for optimal texture and flavour penetration. If left on, it becomes tough and leathery when cooked, preventing the dry rub and any eventual sauce from adhering properly to the meat.
How can I tell when the ribs are perfectly done and "fall off-the-bone"?
The best indicator is the bend test: pick up the rack with tongs in the center, and if the meat starts to crack and tear away from the bone easily, they are ready. For precision, the internal temperature of the meat should reach 200 205°F (93 96°C), which signals that the collagen has fully rendered.
My ribs are tender, but they lack that smoky flavour; how can I fix this?
Since the oven does not provide true smoke, you can integrate smoky flavour by adding a teaspoon of liquid smoke to your baste before wrapping the ribs, or ensuring your dry rub contains smoked paprika. For deeper flavour, consider finishing them briefly on a charcoal grill after glazing.
Can I prepare the dry rub and refrigerate the ribs ahead of time?
Absolutely; preparing the ribs ahead of time is a highly beneficial technique known as 'curing' or 'marinating' with the dry rub. Apply the rub, wrap the rack tightly, and refrigerate it for a minimum of 4 hours up to 24 hours before you begin the baking process.
How do I achieve a nice, caramelized crust and glaze if the ribs are cooked low and slow?
Low-and-slow cooking typically sacrifices exterior crust for interior tenderness. To get a beautiful glaze, apply your barbecue sauce during the last 15 20 minutes of baking with the foil removed, then finish the ribs for 3 5 minutes under a hot broiler to caramelize the sauce.
What is the best way to store and reheat leftover baby back ribs?
Store leftover ribs tightly wrapped in aluminum foil and refrigerate for up to 4 days, or freeze them wrapped in plastic and foil for up to 3 months. To reheat, wrap the cold ribs tightly in foil with a splash of water or cider vinegar, and bake at 300°F (150°C) until warmed through, about 20 minutes.
No Fuss Oven Baked Baby Back Ribs
Ingredients:
Instructions:
Nutrition Facts:
| Calories | 421 kcal |
|---|---|
| Protein | 28.3 g |
| Fat | 17.9 g |
| Carbs | 41.8 g |
