Double Chocolate Chip Cookie from Pastry Box
- Time: Active 15 minutes, Passive 12 minutes, Total 27 minutes
- Flavor/Texture Hook: A velvety, fudgy center protected by a delicate, shattering crust.
- Perfect for: Gift giving, cozy weekend baking, or impressing guests at a dinner party.
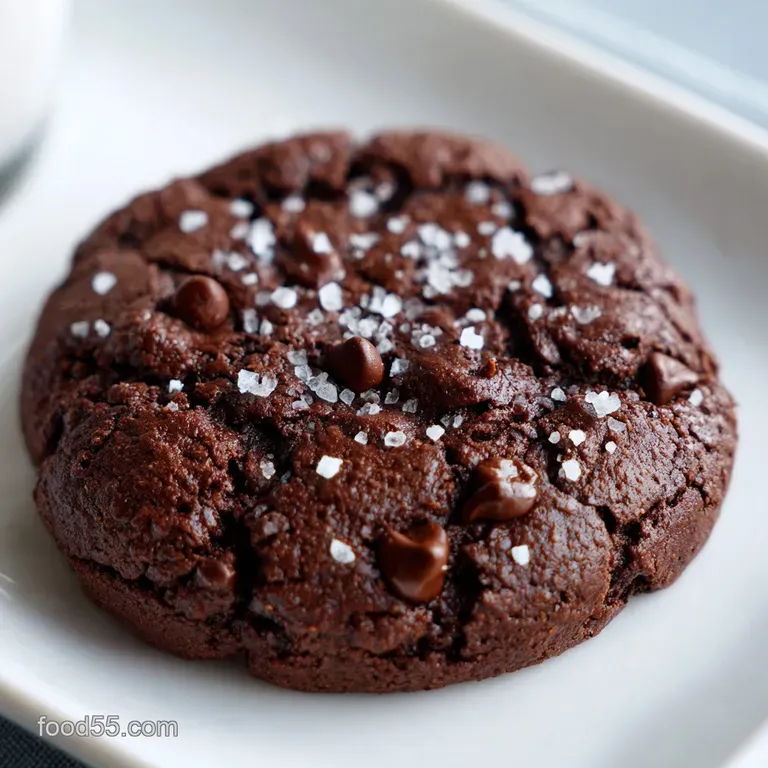
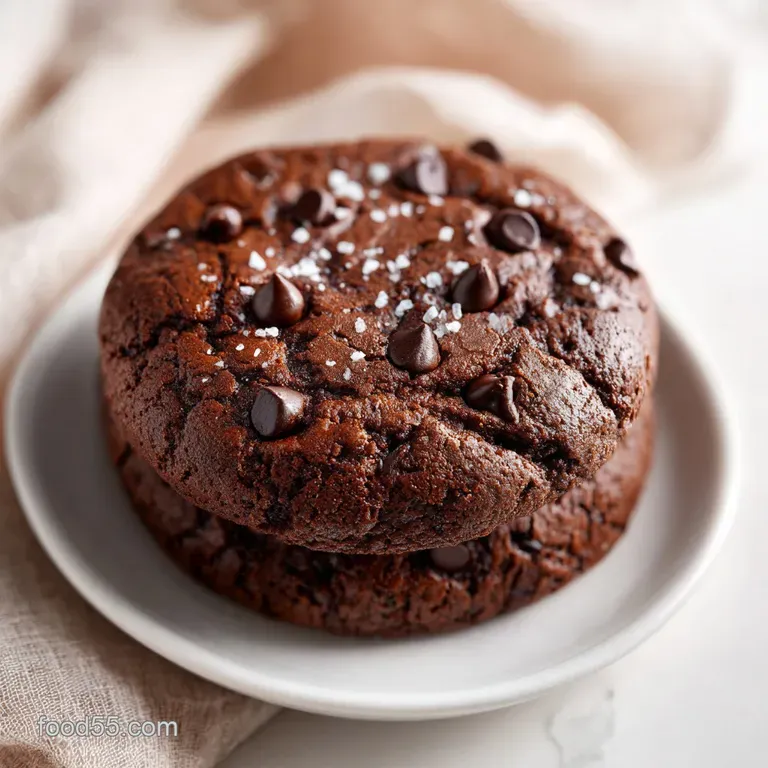
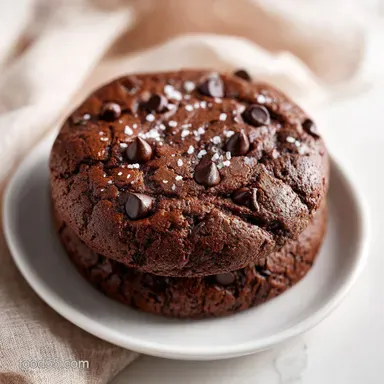
- Double Chocolate Chip Cookie From Pastry Box with Sea Salt
- Defining Characteristics of This Bake
- Selecting high-quality Elements for Depth
- Ingredients and Substitutes
- Tools for Bakery Style Precision
- Executing the Method for Fudgy Results
- Avoiding Common Baking Pitfalls
- Scaling for Different Needs
- Debunking Common Kitchen Beliefs
- Flavor Variations and Creative Twists
- Storing and Reviving Your Treats
- Pairing Your Cookies for Maximum Joy
- Recipe FAQs
- 📝 Recipe Card
Double Chocolate Chip Cookie From Pastry Box with Sea Salt
The first time I pulled these from the oven, the aroma of Dutch process cocoa hit me like a warm hug from a Parisian patisserie. It wasn't just sweet; it was dark, complex, and slightly earthy.
I remember standing in my kitchen, watching the edges set while the centers remained enticingly soft, wondering if the sprinkle of salt would truly make a difference. Craving a bakery worthy treat? This article unveils the ultimate double chocolate chip cookie from a pastry box, finished with a sprinkle of sea salt.
We have all been there staring at those gorgeous cookies in a professional pastry box, wondering how they get that specific look. I spent months tweaking the ratio of brown sugar to cane sugar until I found the sweet spot that provides both chew and a slight crunch.
This version is my pride and joy because it doesn't require fancy equipment, just a real appreciation for deep chocolate flavors.
You're going to love how the bittersweet chips melt into the dough, creating little pockets of molten gold. It's the kind of cookie that demands a cold glass of milk and a quiet moment to yourself.
We're going for a texture that's more like a brownie than a standard biscuit, and I'm going to show you exactly how to get there without breaking a sweat.
Defining Characteristics of This Bake
When we talk about a professional grade cookie, we are looking for a specific set of contrasts. The exterior needs to have a slight snap, while the interior should feel almost like truffle ganache. These specs ensure every bite is balanced and satisfying.
- The Flavor Map: Bitter cocoa, toasted butter, molasses rich sugar, and sharp mineral salt.
- The Sensory Experience: A velvety crumb that gives way to the occasional crunch of a sea salt flake.
The Physics of the Crumble
Hygroscopic Action: Brown sugar pulls moisture from the air and holds onto the liquids in the dough, ensuring the center stays fudgy even after cooling. This prevents the starch from drying out completely, keeping the structure pliable.
The Salt Catalyst: Flaky sea salt doesn't just add "saltiness"; it suppresses our perception of bitterness in the cocoa while heightening the sweetness of the sugar. This creates a multidimensional flavor profile that keeps your palate interested.
Fat Saturation: Using 170g of grass fed butter provides a higher butterfat content than standard sticks, which means less water and more silkiness. This results in a cookie that melts the moment it touches your tongue.
Serving Size and Batch Planning
| Servings | Ingredient Adjustments | Pan Size | Cook Time |
|---|---|---|---|
| 12 People | 1/2 batch (use 1 small egg) | 1 Baking sheet | 10-12 minutes |
| 24 People | Full recipe as listed | 2 Baking sheets | 12 minutes |
| 48 People | 2x ingredients (340g butter) | 4 Baking sheets | 15 minutes (rotate pans) |
Getting the batch size right is essential when you're planning a gathering. If you find yourself with extra dough, it's worth noting that the flavors actually deepen if you let the scooped balls sit in the fridge overnight. Much like the technique in my Classic Chewy Chocolate recipe, cold hydration allows the flour to fully absorb the fats and sugars.
Selecting high-quality Elements for Depth
The secret to that "pastry box" look is starting with ingredients that carry their own weight. We aren't just using any cocoa here; we're going for the dark stuff. The quality of your chocolate chips will also dictate whether these taste like a childhood snack or a gourmet dessert.
Component Analysis
| Ingredient | Science Role | Pro Secret |
|---|---|---|
| Dutch Process Cocoa | Neutralizes acidity for deep color | Sift it twice to avoid "cocoa bombs" in the dough |
| Dark Brown Sugar | Provides acidity for the leavening | Pack it tightly to ensure consistent moisture |
| Bittersweet Chips | Adds varying melting points | Use chunks for larger, "puddled" chocolate pools |
Ingredients and Substitutes
Here is everything you'll need to pull this off. I recommend weighing your ingredients in grams if you have a scale it's the only way to be 100% sure your cookies won't spread into one giant pancake.
- 180g All purpose flour: The structural backbone. Why this? Provides enough protein for a chewy, non cakey bite.
- Substitute: 1:1 gluten-free baking flour (with xanthan gum) works well here.
- 45g Dutch process cocoa powder: For that dark, "Oreo like" richness. Why this? It's treated with alkali to reduce bitterness and darken the color.
- Substitute: Natural cocoa powder, but add an extra 1/4 tsp baking soda.
- 1 tsp Baking soda: Our lifting agent. Why this? Reacts with the molasses in the brown sugar to create lift.
- Substitute: 3 tsp baking powder (but the texture will be cakier).
- 1/2 tsp Espresso powder: The secret weapon. Why this? It doesn't taste like coffee; it just makes the chocolate taste "more."
- Substitute: Instant coffee granules crushed into a fine powder.
- 1/2 tsp Fine sea salt: For internal seasoning.
- 170g Unsalted grass fed butter: Softened but still cool to the touch. Why this? Higher fat content equals a more velvety mouthfeel.
- Substitute: Vegan butter sticks (not tub margarine).
- 150g Dark brown sugar: For moisture and chew.
- 50g Cane sugar: For those crispy, golden edges.
- 1 Large egg: At room temperature. Why this? Emulsifies better with the fats when not cold.
- 2 tsp Pure vanilla bean paste: For aromatic depth.
- 225g 70% Dark bittersweet chocolate chips: The star of the show.
- 2 tbsp Flaky sea salt: For the signature finish.
Chef's Tip: Freeze your chocolate chips for 15 minutes before folding them in. This prevents them from melting prematurely during the mixing process, ensuring they stay as distinct, gooey pockets of chocolate rather than streaking the dough.
Tools for Bakery Style Precision
You don't need a professional kitchen, but a few specific items make the process much smoother. I always use a kitchen scale because flour is notoriously difficult to measure by volume; one person's "cup" is another person's "cup and a half."
- Digital Kitchen Scale: Essential for the 180g flour measurement.
- Electric Hand Mixer: Or a stand mixer like a KitchenAid.
- Silicone Baking Mat: Prevents the bottoms from scorching.
- Large Cookie Scoop: Ensures all 24 cookies are the same size for even baking.
- Wire Cooling Rack: Crucial for airflow so the bottoms don't get soggy.
Executing the Method for Fudgy Results
- Prep the oven. Preheat to 350°F (180°C) and line two large sheets with parchment or silicone.
- Whisk dry goods. Combine the 180g flour, 45g cocoa, baking soda, espresso powder, and fine salt. Note: Whisking aerates the cocoa powder so you don't get lumps.
- Cream the fats. Beat the 170g butter with both sugars for 3 minutes until pale and fluffy.
- Emulsify the egg. Add the egg and vanilla bean paste, beating for another minute. Note: This creates a stable structure that prevents the cookies from collapsing.
- Integrate the base. Turn the mixer to low and add the flour mixture until just a few streaks of white remain.
- Add the chocolate. Fold in the 225g bittersweet chips by hand using a spatula.
- Scoop the dough. Portion into 2 tablespoon balls and place 2 inches apart on the sheets.
- Bake the cookies. Bake for 10-12 minutes until the edges look matte and set.
- Finish with salt. Immediately sprinkle the flaky sea salt over the hot cookies. Note: The heat helps the salt crystals adhere to the surface.
- Cool properly. Let them sit on the pan for 5 minutes before moving to a wire rack.
Achieving the Iconic Shattering Crust
To get that crinkly, bakery style top, try the "pan banging" technique. About 2 minutes before the timer goes off, lift the baking sheet an inch off the oven rack and drop it. This causes the middle to collapse and ripples to form toward the edges.
It sounds aggressive, but it's the secret to those beautiful concentric circles you see in professional pastry boxes.
If you are looking for another way to enjoy this flavor profile without the oven, you might want to try my No Bake Cookie recipe which hits many of the same chocolatey notes.
Avoiding Common Baking Pitfalls
Baking can be fickle, especially with high cocoa doughs that can dry out quickly. If your cookies didn't turn out quite right, don't worry most issues are related to temperature or timing rather than your skills as a cook.
Why Your Cookies Spread
If your cookies turned into a single giant sheet, the butter was likely too warm. Butter should be "cool room temperature," meaning it yields to a thumb press but doesn't feel greasy. If it's too soft, the fat melts before the flour structure can set in the oven.
| Problem | Root Cause | Solution |
|---|---|---|
| Flat/Greasy | Butter was too warm or over creamed | Chill the dough balls for 30 minutes before baking |
| Dry/Crumbly | Too much flour or over baked | Measure flour by weight; pull from oven while centers look "wet" |
| No Crinkle Top | Oven temp too low or under creamed | Ensure oven is at 350°F and cream butter/sugar for full 3 mins |
Common Mistakes Checklist
- ✓ Never skip sifting the cocoa powder; it's prone to stubborn clumps.
- ✓ Don't overmix once the flour is added, or you'll activate too much gluten, making them tough.
- ✓ Ensure your egg is at room temperature to prevent the butter from curdling.
- ✓ Use a heavy duty baking sheet to prevent the bottoms from burning before the centers cook.
- ✓ Resist the urge to bake longer; they firm up significantly as they cool.
Scaling for Different Needs
Adjusting the batch size is easy, but keep an eye on your ratios.
- To Scale Down (12 cookies): Use exactly half the ingredients. For the egg, whisk it in a small bowl first, then measure out 25g (about half) to keep the moisture balance correct.
- To Scale Up (48 cookies): Double everything but keep the espresso powder and salt at 1.5x the original amount. Spices and leaveners don't always need a linear 1:1 increase.
- Baking Large Batches: If you're baking multiple sheets at once, rotate them from top to bottom halfway through to ensure even heat distribution.
Debunking Common Kitchen Beliefs
One of the biggest myths is that "more salt makes things salty." In reality, salt is a flavor enhancer. In a double chocolate recipe, it actually works to cut through the richness, making the chocolate taste darker and more intense.
Another misconception is that the dough doesn't need to rest. While you can bake these immediately, resting the dough for even 2 hours allows the enzymes in the flour to break down into simpler sugars, resulting in a deeper, more caramel like flavor.
It's a small step that yields a massive difference in the final result.
Flavor Variations and Creative Twists
While the classic version is hard to beat, I love playing with the textures by adding different mix ins.
- For the "Nutty" Pastry Box Variant: Add 1/2 cup of toasted, chopped pecans or walnuts. The earthy crunch pairs beautifully with the bittersweet chocolate.
- The White Chocolate Contrast: Swap half the dark chips for high-quality white chocolate chunks. The visual contrast against the dark dough is stunning.
- Orange Zest infusion: Rub the zest of one orange into the cane sugar before creaming. The citrus oils brighten the heavy cocoa notes instantly.
Storing and Reviving Your Treats
These cookies are at their peak about 30 minutes after baking, but they keep surprisingly well if stored correctly.
- Storage: Keep them in an airtight container at room temperature for up to 4 days. Pro Tip: Toss a piece of white bread into the container. The cookies will absorb the moisture from the bread, staying soft for much longer.
- Freezing: You can freeze the baked cookies for up to 3 months. To freeze the dough, scoop the balls onto a tray, freeze until solid, then transfer to a zip top bag. Bake directly from frozen, adding 2 minutes to the cook time.
- Reheating: To get that "just baked" sizzle, pop a cookie in the microwave for 8-10 seconds. It will soften the chocolate chips and revive the velvety texture.
Pairing Your Cookies for Maximum Joy
Sharing these is the best part. I usually serve them on a wooden board with a few extra flakes of salt and some fresh berries to cut the richness.
If you're hosting a dessert spread, these pair beautifully with a strong espresso or a glass of cold, creamy milk. For something more adventurous, try crumbling one over a bowl of vanilla bean ice cream. The contrast between the cold cream and the dark, salty chocolate is absolutely transcendent.
Bringing people together over a tray of warm cookies is one of the simplest joys we can cultivate in our kitchens. Enjoy every bite!

Recipe FAQs
Can I substitute natural cocoa powder for Dutch process cocoa?
Yes, but adjust the leavening. Natural cocoa is acidic, so you must add an extra 1/4 teaspoon of baking soda to ensure the cookie lifts properly.
How to achieve the signature, crinkly top on these cookies?
Lift the baking sheet an inch and drop it near the end of the bake time. This "pan bang" technique forces the cookie structure to ripple, creating that desired, shattering crust.
Do these cookies need to chill before baking for the best texture?
No, immediate baking is acceptable, but chilling improves flavor. While you can bake right away, letting the scooped dough rest for 2 hours allows the flour to fully hydrate for a deeper, more complex taste, similar to the flavor development in a rich beverage like our How to Prepare recipe.
Is it true that using chunks instead of chips results in better pockets of chocolate?
Yes, using chocolate chunks is recommended for large pools of molten chocolate. Chunks have varying melting points compared to uniform chips, leading to those beautiful, uneven "puddles" on the finished cookie surface.
How long should I cream the butter and sugars for optimal chewiness?
Cream the butter and sugars for a full 3 minutes until pale and fluffy. This process incorporates air, which is essential for the cookie structure, ensuring you capture the right lift without making it cakey.
What is the proper way to prevent the bottoms from becoming too hard or burnt?
Use a silicone baking mat or parchment paper on a heavy gauge baking sheet. A heavy sheet distributes heat more evenly, protecting the base while the center finishes setting.
Can I substitute the flaky sea salt on top with regular table salt?
No, it is highly recommended you use flaky salt for the finish. Table salt dissolves too quickly and becomes overwhelmingly salty; the flaky texture provides necessary bursts of flavor contrast, much like the finishing salt on our Homemade Caramels recipe.
Pastry Box Double Chocolate Cookies
Ingredients:
Instructions:
Nutrition Facts:
| Calories | 174 kcal |
|---|---|
| Protein | 2.2 g |
| Fat | 10.3 g |
| Carbs | 19.6 g |
| Fiber | 1.4 g |
| Sugar | 10.8 g |
| Sodium | 124 mg |
