Cooked Chickpeas: the Gold Standard Stove-Top Method
- The Gold Standard: Perfectly Cooked Dried Chickpeas (Stove-top Method)
- Beyond the Can: The Case for Cooking Dried Chickpeas
- Required Equipment and Essential Ingredients for Superior Results
- Step-by-Step Guide to Perfectly Tender Cooked Chickpeas
- Troubleshooting Hard Beans: Avoiding Common Chickpea Cooking Mistakes
- How to Store and Freeze Your Batch of Cooked Chickpeas
- Culinary Applications: The Best Ways to Use Freshly Prepared Chickpeas
- Recipe FAQs
- 📝 Recipe Card
The Gold Standard: Perfectly Cooked Dried Chickpeas (Stove top Method)
When you pull a pot of perfectly prepared chickpeas off the stove, that earthy, slightly nutty aroma fills the kitchen, promising depth and incredible texture. Forget the bland, slightly metallic taste of the tinned variety; the texture of homemade Cooked Chickpeas is creamy, buttery, and melts away in your mouth.
This simple transformation elevates any meal you put them in.
I know, I know it feels like a lot of fuss when you can just pop open a can. But trust me, once you experience the tenderness of proper Cooked Chickpeas , especially in a velvety hummus or a hearty chana masala, there is no going back.
Plus, cooking dried beans saves you serious cash and drastically reduces sodium content. It’s an easy, economical win that makes you feel like a kitchen superhero.
This recipe isn't about just boiling some beans; it’s about understanding the science behind softening the skins and maximizing flavour absorption. We’re going to cover all the pitfalls I fell into early on, ensuring your first batch of homemade Cooked Chickpeas is the absolute best.
Ready to stop buying the canned stuff forever? Let's crack on.
Beyond the Can: The Case for Cooking Dried Chickpeas
I used to be a canned chickpea loyalist. It was fast, efficient, and what everyone else did. But then I tasted properly prepared dried beans and realized what I was missing: texture .
Canned beans are often slightly chalky and uniformly firm, but dried beans, when cooked correctly, can be tender while still holding their shape.
Achieving the Buttery Texture: Why Soaking and Baking Soda Are Key
The secret to ultra creamy, almost fudgy Cooked Chickpeas is simple: baking soda. It sounds crazy, but a tiny bit of alkalinity added during the soaking or cooking phase drastically alters the beans’ cell walls. This essentially gives the stubborn chickpea skin a head start in softening.
Without this step, even the freshest dried beans can take hours longer to cook, often resulting in some being mushy and others still hard a culinary nightmare.
Why Texture Matters for Silken Hummus and Robust Salads
If you are aiming for truly silken hummus, which should taste like the finest velvet, you need super soft beans. Tough skins resist blending and lead to gritty, disappointing dips.
Conversely, for a cold salad or a simple toss of spiced Cooked Chickpeas , you want beans that are tender enough to chew easily but sturdy enough not to turn to mush when dressed. This recipe delivers that perfect balance, making them ideal for all applications.
The Economic Advantage of Dried Chickpeas vs. Tinned
Let’s talk money. A single pound of dried chickpeas costs a fraction of the price of three to four cans, yet it yields the same volume of Cooked Chickpeas . If you cook regularly, the savings add up fast.
You are paying for water, processing, and a metallic tin flavour when you buy canned, which, frankly, is a rip-off when the dried version is so simple.
Prep Time vs. Active Cooking Effort
Yes, dried chickpeas require foresight. You must soak them for 8 to 12 hours. However, this is passive time! You put them in water before bed and forget about them.
The active cooking time is maybe 15 minutes of monitoring and skimming, followed by a gentle, unsupervised simmer. The yield of these incredible Cooked Chickpeas makes the passive wait absolutely worthwhile.
Understanding the Role of Hydration (The Soaking Step)
Soaking isn't just a suggestion; it’s mandatory unless you use a pressure cooker. It kickstarts the hydration process, softening the starches and reducing the final cooking time by at least 50%.
Skipping this step means your Cooked Chickpeas will be inconsistent, tough in the center, and potentially indigestible (nobody wants that).
The Science of Softening Chickpea Skins (Utilizing Alkalinity)
Dried beans contain pectin in their cell walls, which firms up during storage. By adding baking soda (bicarbonate of soda), you increase the pH of the water, which helps break down the pectin and speeds up the softening process.
This is the difference between an hour long simmer and a three hour struggle against stubborn, hard beans.
Flavor Boosters: Enhancing the Cooking Liquid
While we are mainly using water, don't underestimate the power of simple aromatics. Bay leaves, a smashed clove of garlic, or even a couple of dried chili flakes added to the cooking water infuse the finished Cooked Chickpeas with a subtle depth that plain water can't achieve.
Remember, these perfectly cooked beans absorb everything you put in the pot.
Required Equipment and Essential Ingredients for Superior Results
The beauty of making truly great Cooked Chickpeas is that you don't need fancy gear. You just need a robust pot and good ingredients.
Selecting the Best Quality Dried Chickpeas (Garbanzo Beans)
Always look for recently harvested, bright looking beans. Older chickpeas the ones that look dull and dusty will always take longer to cook, sometimes requiring double the time. I try to buy mine from stores with high turnover so I know they are relatively fresh.
Why Filtered Water is Recommended for Soaking and Cooking
If your tap water is very hard (high mineral content), it can actually inhibit the softening process of the beans, making the final batch of Cooked Chickpeas stubbornly tough.
I highly recommend using filtered water for both the soaking and the cooking phases, especially if you live in an area with notoriously poor water quality.
Essential Pantry Items: Salt and Optional Aromatics
Our pantry list is lean! Just good quality fine sea salt, which we only add at the end. For aromatics, I stick to bay leaves because they add a subtle, savory whisper without overpowering the versatile nature of the final Cooked Chickpeas .
If you plan on blending these immediately into hummus, skip the garlic or onion.
The Importance of a Heavy Bottomed Pot
A heavy bottomed stockpot is your best friend here. It helps maintain a gentle, consistent temperature once the heat is reduced, preventing scorching on the bottom and ensuring even cooking.
Thin pots cause the liquid to churn violently, which can break apart the delicate skins of your softening Cooked Chickpeas .
| Ingredient Swap | Original Ingredient | Substitution Notes |
|---|---|---|
| Baking Soda | Bicarbonate of Soda | If you don't have this, try using a very small pinch of baking powder, though results may vary. Do not omit entirely for the creamiest results. |
| Bay Leaves | Fresh Herbs (Rosemary/Thyme) | A small sprig of fresh rosemary or thyme will add a beautiful earthy note. Discard before serving. |
| Water | Vegetable Stock | For richer flavour, use a low-sodium vegetable stock instead of water for the cooking phase. |
step-by-step Guide to Perfectly Tender Cooked Chickpeas

Follow these steps exactly, and you will be amazed at how simple and superior your Cooked Chickpeas turn out.
Phase 1: Cleaning and Overnight Soaking
First, spread your dried chickpeas out and check them for little stones or duds. It happens! Then, give them a vigorous rinse. Place the beans in your large pot and cover them with at least three inches of cold water. Stir in the teaspoon of baking soda if you are using it and you absolutely should be.
Let them rest, uncovered, overnight (8 to 12 hours). They will swell dramatically.
Phase 2: Building the Cooking Pot (The Initial Boil)
Drain the soaked beans completely and rinse them again thoroughly under cold water. This removes the residue left from the baking soda, which can sometimes leave a strange flavour if not washed off.
Return the rinsed Cooked Chickpeas to the pot and cover them with fresh, cold water (about 10 cups), adding your bay leaves now. Bring the pot to a rapid, rolling boil over high heat.
Chef's Note: As the water boils, use a large spoon to skim off the foam and scum that rises to the top. This results in a cleaner flavour and clearer cooking liquid (which we want to save, hint, hint).
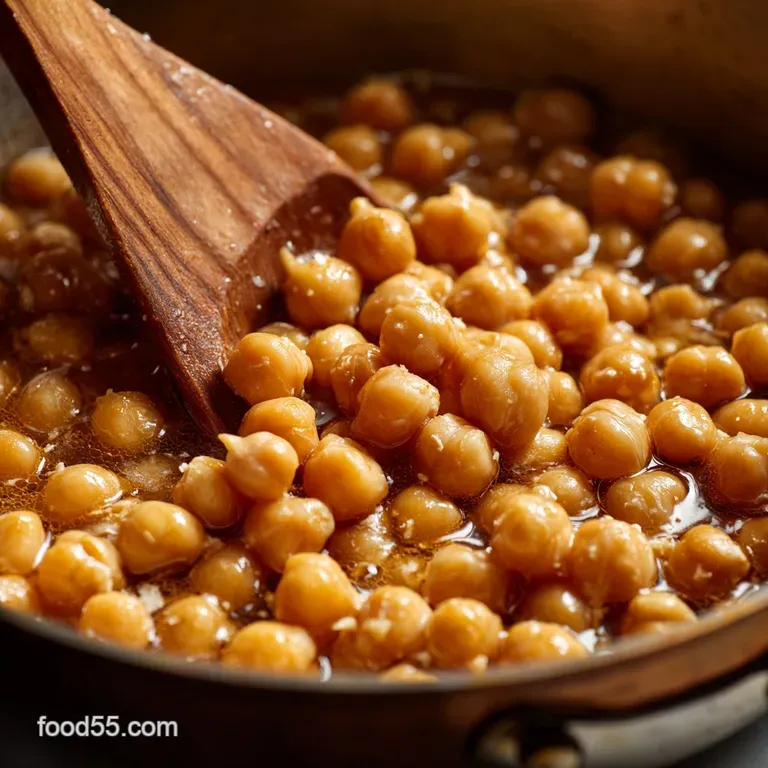
Phase 3: Gentle Simmering and Testing for Ideal Doneness
Reduce the heat immediately to the lowest setting possible we want a very gentle, lazy simmer. The water should only bubble occasionally, not violently churn. Cover the pot loosely and let the Cooked Chickpeas simmer for 60 to 90 minutes.
Start checking for doneness around the 60 minute mark. To test, pull one bean out, let it cool for a second, and press it between your thumb and forefinger. It should crush easily with no resistance.
Post Cooking: Cooling the Beans in Their Liquid for Maximum Creaminess
Once the chickpeas are perfectly tender, remove the pot from the heat and stir in the tablespoon of salt. This step is mandatory. Allowing the Cooked Chickpeas to cool down completely in their salty cooking liquid allows them to absorb all that lovely seasoning and retain their moisture.
If you drain them while hot, they tend to dry out and the seasoning stays on the outside.
Troubleshooting Hard Beans: Avoiding Common Chickpea Cooking Mistakes
We've all been there: staring at a pot of seemingly hard, underdone beans an hour after the recipe said they should be done. These three mistakes are usually the culprits.
Never Cook with Old or Hard Water (A Water Quality Check)
As mentioned, hard water makes bean cooking difficult. If you suspect your water quality is the issue, switch to bottled or filtered water next time. If the beans are still hard, you can try adding another pinch of baking soda and continuing the simmer, though this is a repair, not a solution.
Adjusting Cooking Times for Older, Stored Beans
If your bag of dried chickpeas has been sitting on the shelf for over a year, they are going to take longer. A lot longer. This is not a failure of technique; it's a failure of inventory management.
You might need to add 30– 60 minutes to the total cooking time and be patient. Older beans simply need more hydration time.
The Pitfall of Adding Salt Too Early in the Process
This is the number one mistake home cooks make with beans. Adding salt at the beginning or even halfway through the cooking process is bad news. Salt interferes with the beans’ ability to hydrate and soften their skins, resulting in tough, leathery Cooked Chickpeas .
Always, always wait until the end.
How to Store and Freeze Your Batch of Cooked Chickpeas
Since it takes effort to produce a batch of high-quality Cooked Chickpeas , we should make enough to last a while. Freezing these makes future weeknight meals lightning fast.
Short Term Refrigeration Guidance (Keeping Them Moist)
Drain your cooled Cooked Chickpeas , but reserve some of the cooking liquid that slightly thickened, flavorful liquid is called aquafaba , and it’s brilliant for vegan baking. Store the drained chickpeas in an airtight container in the fridge for up to five days.
If you keep them submerged in a bit of their aquafaba, they will stay even moister.
Best Practices for Freezing Large Batches
Freezing is perfect for long term storage. Measure out your Cooked Chickpeas into 2 cup portions, which is roughly equivalent to one standard can. Place them in freezer safe zip-top bags or containers, and add about 1/4 cup of the reserved cooking liquid (aquafaba) to each bag.
This liquid prevents freezer burn and ensures they retain their creamy texture upon thawing. They will keep beautifully for 3 to 4 months.
Thawing and Reheating Chickpeas Safely
To thaw, simply move the bag from the freezer to the fridge overnight. If you need them quickly, you can place the frozen beans in a colander and run cold water over them until thawed. To reheat, I simply toss them into a hot pan with whatever sauce or spices I'm cooking. They are ready to be used in salads, dips, or as a standalone snack, like my easy Crispy Air Fryer Chickpeas My LemonPaprika FailProof Snack .
Culinary Applications: The Best Ways to Use Freshly Prepared Chickpeas
Now that you have these magnificent, perfectly Cooked Chickpeas , what should you do with them? The options are endless, truly.
- The Hummus Upgrade: While the chickpeas are still warm (but fully cooled from the pot), immediately blend them with tahini, lemon juice, and ice water. The warmth helps them emulsify better, resulting in the creamiest hummus you have ever created. The difference between using canned beans and these homemade Cooked Chickpeas is astounding.
- Hearty Stews and Curries: They stand up wonderfully in deeply flavored sauces. Toss them into a quick weeknight curry or a long simmered vegetarian stew. They soak up the spices without turning to dust.
- Protein Packed Salads: Dress them simply with olive oil, red wine vinegar, herbs, and maybe some feta for a cold, refreshing side dish. This is where that firm yet-tender texture really shines.
These homemade Cooked Chickpeas are the ultimate pantry staple, delivering superior flavour and texture every single time. Stop relying on that salty, canned stuff and start preparing the gold standard yourself. You will never look back.

Recipe FAQs
Why are my chickpeas still hard after hours of simmering?
This is often due to using "hard water," which contains high mineral content (like calcium), preventing the beans from fully hydrating and softening. To combat this, ensure you are not adding salt until the chickpeas are fully tender, or try adding a small pinch of baking soda during the cooking process to neutralize the water’s mineral content.
Is it necessary to add baking soda, and what does it do?
Baking soda (bicarbonate of soda) is optional but highly recommended, especially if you plan to make ultra smooth hummus, as it significantly improves the creamy texture. It works by raising the pH of the water, which helps dissolve the pectin in the chickpea skins, resulting in a much softer, buttery interior.
What is the best way to store and freeze leftover cooked chickpeas?
Cooked chickpeas can be refrigerated in an airtight container, preferably submerged in their cooking liquid (aquafaba), for 3 to 5 days. For long term storage, freeze them in 1 to 2 cup portions along with a small amount of their liquid; they will keep well in the freezer for 4 to 6 months.
Can I cook dried chickpeas without soaking them first?
While technically possible, skipping the 8-hour soak is strongly discouraged as it drastically extends the cooking time, often doubling it, and can lead to a less uniform texture. Soaking also improves the digestibility of the chickpeas by allowing phytic acid to leach out.
Why did the skins start peeling off during cooking?
Skin peeling occurs when the cooking liquid is simmering too aggressively or if the chickpeas were agitated too much while stirring. To prevent this, maintain a very gentle simmer the surface should barely bubble and avoid stirring them until they are almost finished cooking.
Should I season the water with salt before or after cooking?
It is best practice to always salt the water after the chickpeas are fully tender and soft. Salting the cooking water too early can toughen the skins and prevent the inner starches from fully expanding and softening, leading to a gritty or chewy texture.
Can I use the cooking liquid (aquafaba) for anything?
Absolutely! The resulting cooking liquid, known as aquafaba, is highly valuable and should not be discarded, as it contains proteins and starches. It is a fantastic vegan substitute for egg whites and can be whipped to create meringues, mayonnaise, or light, frothy cocktails.
Perfect Cooked Chickpeas Recipe

Ingredients:
Instructions:
Nutrition Facts:
| Calories | 175 kcal |
|---|---|
| Protein | 9.0 g |
| Fat | 2.7 g |
| Carbs | 26.8 g |
