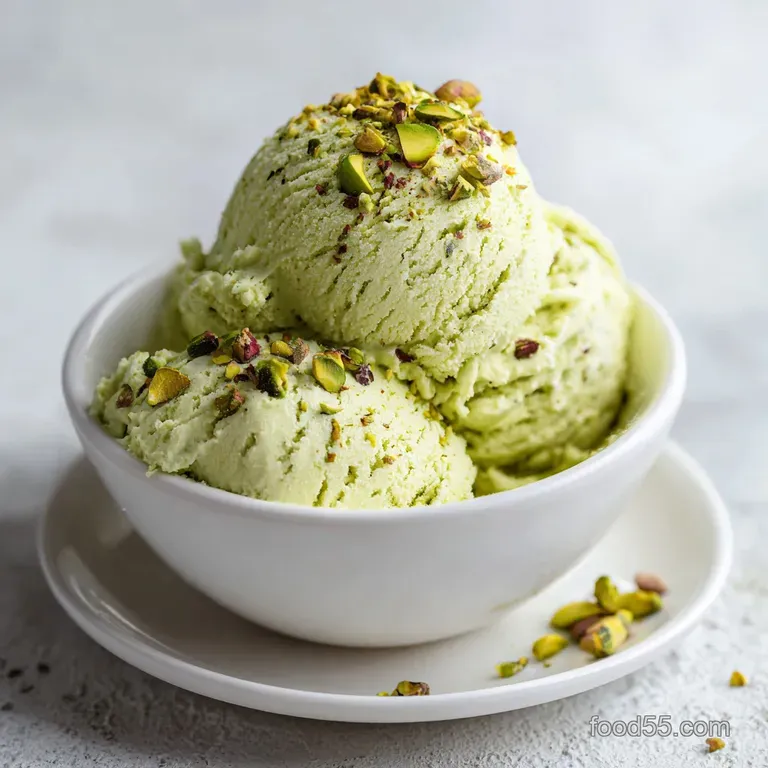
Pistachio Ice Cream: Creamy and Homemade
- Time: Active 20 min, Passive 6 hours, Total 20 min (active)
- Flavor/Texture Hook: Velvety smooth with a nutty shatter from roasted pistachios
- Perfect for: Seasonal dinner parties or high end dessert cravings
Creating a Velvety Pistachio Ice Cream
The smell of toasted pistachios hitting a hot pan is something I can't ignore. It's that warm, buttery aroma that fills the kitchen and tells you something special is happening. I remember the first time I tried making this, I spent an entire Saturday morning at a local farmers market, hunting for the most vibrant, green pistachios I could find.
I wanted that specific, electric green color that looks like a spring meadow.
Honestly, I used to think you needed a massive, expensive machine to get a professional result. I spent years thinking the "no churn" versions were just frozen foams. But then I realized the secret isn't the machine, it's the fat content and how you fold the air.
When you get it right, you get a scoop that doesn't just melt, it glides. Trust me on this, once you try the paste method, you'll never go back to just chopping nuts.
We're going for a result that feels like a luxury treat. It's rich, salty, and has those little bits of roasted nut that shatter when you bite into them. It's a bit of a celebration of the nut itself, highlighting that deep, earthy flavor without letting the sugar drown it out.
Let's crack on and get this into the freezer.
Quick Specs and Timing
Before we dive in, let's look at the logistics. This isn't a "wait 10 minutes" kind of dessert. It's a slow game of patience. The actual work is fast, but the freeze time is non negotiable. If you try to scoop this after three hours, you'll get a soft serve consistency.
It's tasty, but it's not the velvety experience we're after.
Since there's no actual cooking on a stove or in an oven, the "cook time" is zero. It's all about the prep and the chill. I find it's best to make this on a Friday if you're planning a weekend treat, so it has a full 24 hours to stabilize in the freezer.
| Method | Time | Texture | Best For |
|---|---|---|---|
| No Churn | 20 min prep | Velvety, dense | Easy hosting |
| Traditional | 4 hours+ | Airy, crystalline | Purest texture |
The One Step Most People Skip
Since we aren't using a machine, we have to rely on a few tricks to keep the texture from becoming a block of ice. Here is why this specific combination of ingredients actually works.
- Air Trapping: Beating the heavy cream creates millions of tiny bubbles that act as barriers against ice crystals.
- Sugar Depression: The high sugar content in condensed milk lowers the freezing point, keeping the scoop soft.
- Fat Stability: Pistachio paste adds a layer of emulsified fat that prevents the cream and milk from separating.
- Salt Balance: A tiny bit of sea salt cuts through the heavy fat, making the pistachio flavor pop.
Component Analysis
| Ingredient | Science Role | Pro Secret |
|---|---|---|
| Pistachio Paste | Flavor & Emulsion | Use 100% pure paste for the deepest green |
| Heavy Cream | Structural Volume | Keep it ice cold to get the stiffest peaks |
| Condensed Milk | Texture Modifier | Chill the can before opening for faster mixing |
The Essential Ingredient List
Right then, let's get the goods. I recommend buying your pistachios from a local supplier if you can, as the freshness changes the aroma completely. If your pistachio paste is too stiff, just a quick 10 second zap in the microwave makes it a dream to work with.
- 1/2 cup (120g) pistachio paste or butter Why this? Provides the intense, concentrated nut flavor
- 1/4 tsp fine sea salt Why this? Balances the sweetness of the condensed milk
- 1 tsp pure vanilla extract Why this? Rounds out the nuttiness with floral notes
- 2 cups (480ml) heavy whipping cream, chilled Why this? The primary source of air and creaminess
- 1 can (14oz/400g) sweetened condensed milk Why this? Acts as the sweetener and anti freeze
- 1/2 cup (60g) roasted salted pistachios, roughly chopped Why this? Adds the essential shatter and crunch
Ingredient Swaps
| Original Ingredient | Substitute | Why It Works |
|---|---|---|
| Pistachio Paste | Pureed Pistachios | Same flavor but slightly grainier texture |
| Heavy Cream | Coconut Cream | Same fat content. Note: Adds a tropical taste |
| Condensed Milk | Honey & Cream | Natural sweetener. Note: Denser, less airy result |
Tools for the Job
You don't need a laboratory here, but a few specific tools make the process way smoother. If you have a stand mixer, use it. It saves your arms from the heavy lifting of whipping the cream. If you're using a hand mixer, just be patient and keep the bowl tilted.
I always use a silicone spatula for the folding process. Metal spoons can deflate the air bubbles we worked so hard to create. Also, grab a shallow, airtight container. The more surface area you have, the more evenly the mixture freezes, which means no weird icy patches in the middle.
step-by-step Churning
Now we get to the fun part. The key here is gentleness. We want to keep as much air in the mixture as possible. If you over mix the pistachio paste into the cream, you'll lose that fluffy volume and end up with something more like a frozen custard.
Preparing the Nut Base
Combine the pistachio paste, vanilla extract, and salt in a small bowl. Stir until the mixture is a smooth paste. If the paste is too stiff, microwave it for 10 seconds to soften.
Whipping the Base
Pour the chilled heavy cream into a mixing bowl and beat on medium high speed until stiff peaks form. Note: Don't over beat or it'll turn into butter!
Folding for Air
Gently fold the sweetened condensed milk into the whipped cream using a spatula. Use a "figure eight" motion to keep the air bubbles intact.
Adding the Flavor
Swirl the pistachio infusion into the cream mixture, taking care not to over mix to preserve air bubbles. You want a few streaks of green for a marbled look.
The Final Crunch
Fold in the chopped roasted pistachios. Make sure they are evenly distributed so every bite has that nutty shatter.
Chilling to Perfection
Transfer the mixture into an airtight freezer container and freeze for at least 6 hours. I usually leave it overnight to be safe.
Preventing Common Texture Issues
The biggest headache with no churn ice cream is the "icy" feeling. This usually happens because of moisture. If your cream isn't cold enough, or if you let the mixture sit on the counter for too long before freezing, you'll get crystals.
Another issue is the sweetness. Some store-bought condensed milks are sweeter than others. If it feels like too much, a tiny pinch more of salt usually fixes the balance. If you're looking for other decadent treats, you might like my Oreo Cheesecake recipe, which uses a similar balance of rich fats.
Why Your Mix Is Too Soft
If your ice cream doesn't set after 6 hours, it's usually because the cream wasn't whipped to stiff enough peaks. This means there wasn't enough structure to hold the fats together.
| Problem | Root Cause | Solution |
|---|---|---|
| Icy Crystals | Temperature fluctuation | Freeze in the back of the freezer |
| Too Sweet | Low salt ratio | Add a pinch of salt to the final fold |
| Flat Texture | Over mixing the fold | Fold more gently with a spatula |
Common Mistakes Checklist
- ✓ Pat your bowl and beaters with a cold cloth before whipping
- ✓ Ensure the pistachio paste is fully incorporated before adding to cream
- ✓ Stop whipping the cream the second you hit stiff peaks
- ✓ Use a container with a tight seal to prevent freezer burn
- ✓ Don't skip the salt, even if the pistachios are already salted
Dietary Tweaks and Swaps
If you want to make this a bit more "healthy," you can try using a pistachio ice cream with cottage cheese base. You blend the cottage cheese until silky smooth and then follow the same folding steps. It adds a huge protein boost, though you lose a bit of that velvety luxury.
For those using a Ninja Creami, this recipe works great as a base. Just blend the paste, condensed milk, and cream together, freeze the pint for 24 hours, and spin on the "Ice Cream" setting. It'll be even creamier than the freezer method.
Adjusting the Batch Size
If you're making this for a huge crowd, don't just double everything in one bowl. I've found that if the volume is too high, the bottom of the mixture gets crushed by the weight of the top, and you lose the air. Work in two separate batches.
For a smaller version, use half the ingredients. Since you're using half a can of condensed milk, save the rest in a jar in the fridge for 2 weeks. You can use it in coffee or over pancakes.
Storage and Zero Waste
Store this in the coldest part of your freezer. If you're using a plastic container, press a piece of parchment paper directly onto the surface of the ice cream before closing the lid. This creates a barrier that stops ice crystals from forming on top.
As for zero waste, don't throw away the leftover pistachio shells if you're roasting them yourself. You can actually use them to infuse a small amount of sugar for a nutty garnish. Also, if you have a bit of pistachio paste left in the jar, stir it into a batch of Classic Pound Cake for a seasonal twist.
Fridge: 2 days (will be soft serve) Freezer: 3 months (best consumed within 1 month for peak flavor)
The Art of Presentation
This is where we focus on the visual. Since the ice cream is a soft, muted green, we need contrast to make it look professional. I follow a "Three Color Balance" strategy.
First, the base is green. Then, I add a stark white accent with a dollop of fresh whipped cream or a drizzle of coconut milk. Finally, I bring in a pop of deep red. Fresh pomegranate seeds or a single raspberry on top creates a stunning visual contrast against the green.
- - The Crunch
- Sprinkle an extra pinch of crushed pistachios right before serving so they don't soften.
- - The Drizzle
- A thin thread of honey or melted dark chocolate adds a professional touch.
- - The Freshness
- A tiny mint leaf adds a vibrant, fresh green that complements the nuttiness.
Right then, you've got a dessert that looks like it came from a boutique gelateria but was made in your own kitchen. Just remember: cold cream, gentle folds, and a lot of patience. Enjoy!

Recipe FAQs
What is the actual flavor of pistachio ice cream?
Nutty, buttery, and slightly sweet. The flavor comes from a combination of pistachio paste and roasted pistachios, creating a rich, earthy taste balanced by vanilla.
Who makes the best pistachio ice cream?
Homemade versions using pure pistachio paste. Using real nut butter instead of artificial extracts ensures a deeper, more authentic flavor and a creamier texture.
Is it true that pistachio ice cream is the unhealthiest ice cream?
No, this is a common misconception. While calorie dense due to the healthy fats in nuts, it often contains beneficial minerals and antioxidants that fruit based or candy loaded ice creams lack.
Why don't they put pistachios in pistachio ice cream?
Commercial brands often cut costs. Many mass produced versions rely on green dyes and almond flavorings, whereas this recipe uses both paste and chopped roasted nuts for authenticity.
How to fix pistachio paste that is too stiff to stir?
Microwave it for 10 seconds to soften. This makes it much easier to combine with the vanilla extract and salt into a smooth infusion.
How to prevent ice crystals from forming on top?
Press parchment paper directly onto the surface. Place the paper on the ice cream before sealing the lid to create a physical barrier against air.
How to ensure the ice cream stays fluffy?
Gently fold the ingredients using a spatula. Avoid over mixing the pistachio infusion into the whipped cream to preserve the air bubbles; if you enjoyed mastering texture control in a cheesecake, apply that same gentle folding technique here.
Pistachio Ice Cream
Ingredients:
Instructions:
Nutrition Facts:
| Calories | 504 kcal |
|---|
