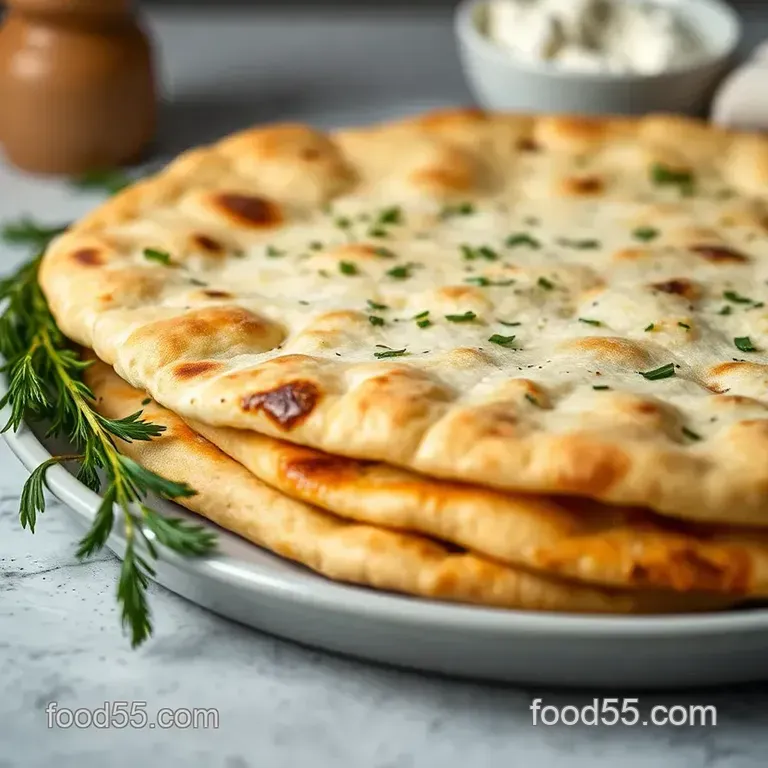
Quick Lavash Bread with Creamy Herb Filling

- Welcome to the World of Lavash!
- A Taste of History
- Why You’ll Love This Recipe
- Quick Overview
- Essential Ingredients Guide: Your Go-To for Quick Lavash Bread with Creamy Herb Filling
- The Art of Professional Cooking: Elevating Your Game in the Kitchen
- Pro Tips to Rock Your Quick Lavash Bread
- Perfect Presentation: Make it Pretty
- Storage & Make-Ahead Tips
- Creative Variations to Explore
- Complete Nutrition Guide
- Let’s Wrap This Up!
- Frequently Asked Questions
- 📝 Recipe Card
Welcome to the World of Lavash!
Oh my gosh, let me tell you about the first time i tried quick lavash bread with creamy herb filling ! i was at this adorable little middle eastern cafe, and honestly, when they brought out that warm, soft lavash, it felt like a warm hug for my taste buds.
I’d never tasted anything like it before crisp, yet chewy, and the creamy herb filling was the perfect kicker! when i got home, i thought, “i need to recreate this magic.
” and that’s how my version of homemade lavash was born.
So, have you ever craved a snack but didn’t feel like cooking a big meal? this easy lavash recipe is not only a delicious fix but also super quick to whip up.
The warm bread, paired with savory herb infused cream cheese , can bring a smile to anyone’s face, whether it's a casual tuesday lunch or a weekend get-together.
A Taste of History
Lavash is a traditional middle eastern flatbread that's been around for centuries. it’s a staple for many cultures, often enjoyed with dips or rolled with fillings.
Fast forward to today, and it’s just as popular! i mean, we’re all about quick meals for busy days, right? this version takes about 55 minutes total yup, you heard me! it’s easy , and you practically have a portable meal ready to go.
The best part? you can fill it with whatever tickles your fancy! i usually go for fresh herbs, but roasted veggies or even grilled chicken would be amazing.
Depending on what you choose, your cost can be pretty low, especially if you have some of the ingredients on hand already.
Why You’ll Love This Recipe
Eating healthy doesn't have to be boring, and this lavash is the perfect way to sneak some greens into your day.
With fresh herbs in cooking like parsley and dill in the filling you’ll discover tasty nutrition right in your hands! each bite packs flavor without being overly heavy.
Plus, if you're looking for low-calorie snack options , this is totally up your alley!
I love making this for parties, too. just imagine serving these adorable rolls with some cold or warm dips everyone’s favorite.
Whether you’re entertaining or just in need of quick lunch ideas , this recipe fits like a glove. you can even customize it with different vegetarian filling ideas if you want to mix things up and keep it interesting.
One unique thing about this lavash over other recipes? it's a quick bread that feels gourmet without all the fuss.
Seriously, once you master these basic baking techniques for lavash , you’ll wonder why you haven’t made it sooner!
Quick Overview
So, here’s a breakdown for you:
- Prep Time: 15 minutes
- Resting Time: 30 minutes (while you sip on your coffee and relax!)
- Cook Time: Just 10 minutes
- Yields: 4 servings
It’s a no-brainer for an afternoon snack or to impress your friends at a gathering. And trust me, you’ll want to make a double batch because it's that good!
Alright, I bet you're itching to dive into the ingredients. Let's get right into it so you can make this delightful Quick Lavash Bread with Creamy Herb Filling that you'll want to share with everyone!
Essential Ingredients Guide: Your Go-To for Quick Lavash Bread with Creamy Herb Filling
When it comes to whipping up a quick lavash bread with creamy herb filling , it all starts with understanding those essential ingredients.
Trust me; knowing what you’re working with can level up your kitchen game. this guide is your roadmap to deliciousness, making everything smoother from prep to yummy bites.
Premium Core Components
Let’s kick it off with the premium core components .
Flour: you’ll need 2 cups of all-purpose flour (240 g) . that’s your base. a good quality flour makes a world of a difference.
Look for that soft, powdery texture. if it feels gritty, it’s time for a new bag. store it in a cool, dry place, and it should last about a year.
Salt and baking powder: pay attention to your 1 tsp salt (5 g) and 1 tsp baking powder (5 g) .
They're not just for flavor! they help your lavash rise fluffily. for freshness, make sure you’re not using opened packs older than six months.
Olive oil: a good quality 2 tbsp olive oil (30 ml) adds richness. go for extra virgin if you can; it’s a flavor bomb! store it in a dark bottle, and your oil could last up to two years.
Water: Warm water is the magic potion here. Aim for about 3/4 cup (180 ml) . Not hot, just warm enough to bring that dough together. Room temperature is fine, too!
Signature Seasoning Blend
Now, let’s talk about your signature seasoning blend for that creamy herb filling. You’ll want herbs that sing together. My go-to is all about freshness.
Start with 8 oz cream cheese (225 g) . get that creamy texture goin’ and pair it with 1/4 cup (60 g) plain greek yogurt for extra tanginess.
Mix in ¼ cup fresh parsley (15 g) , 2 tbsp fresh dill (8 g) , and 1 tbsp chives (3 g) .
Trust me, these herbs marry so well. ain't nobody coming to your party and leaving without mentioning that dip! and hey, add a pinch of salt and pepper for good measure.
Smart Substitutions
Sometimes you just don’t have the exact thing on hand. No worries! I love that we can get creative with smart substitutions .
Running low on cream cheese? Use hummus instead for a lighter filling. If you’re dairy-free, go for a cashew cream or almond cream for that richness.
Don’t get too hung up on the herbs, either. if you don’t have dill, just double down on the parsley.
Or use dried if it’s all you've got just cut back to a third of the amount.
Kitchen Equipment Essentials
You don’t need a fancy kitchen to make magic happen. Here’s a list of must have tools for our lavash journey:
- Mixing bowls
- A rolling pin for that perfect flatbread shape
- A frying pan or skillet for cooking
- A spatula (because flipping your lavash without it is a disaster waiting to happen!)
I keep my storage solutions simple. Keep those herbs in airtight containers; they stay fresher longer, and you’ll always be ready to whip up those easy lunch ideas or snack recipes that wow!
Transition to Instructions
Now that you’ve got your ingredients lined up and the right tools at hand, you’re ready to dive into the cooking! get ready to make a delicious quick lavash bread with creamy herb filling that'll have you savoring every bite.
This isn’t just flatbread; it’s a game changer for your lunch, dinner, or those unexpected surprise guests. trust me, once you master this process, you’ll be whipping it out for entertaining appetizers in no time.
Time to roll up our sleeves and get cooking!
The Art of Professional Cooking: Elevating Your Game in the Kitchen
Cooking is not just about following a recipe. it’s about creating an experience, and professional cooking methods can seriously amp up your culinary skills.
Trust me, whether you’re whipping up a quick lavash bread with creamy herb filling or something more intricate, mastering the basics goes a long way.
So, let’s dive into some essential preparation steps and techniques that’ll make cooking feel less like a chore and more like a joyride!
Essential Preparation Steps
First things first, you gotta get your mise en place sorted. this fancy french term simply means “everything in its place.
” have all your ingredients ready before you start mixing and chopping. it saves time and helps avoid those last minute scrambles when you realize you're out of greek yogurt for that herb infused cream cheese filling.
Now, let’s talk time management . set a timer! it might sound basic, but keeping track of cooking times helps you stay organized.
For example, while your lavash dough is resting for 30 minutes , you can prepare that creamy filling. efficiency is key!
Speaking of organization, keep your workspace tidy. trust me; a clean kitchen is a happy kitchen. use bowls and containers to keep ingredients separate.
It helps prevent confusion (and mess) when you’re cooking up your middle eastern flatbread .
And remember safety! keep your workspace safe: use a sharp knife correctly, keep a damp cloth handy for spills, and always, always wash your hands.
Preventing accidents is just as vital as cooking.
Step-by-step Process: Foolproof Guide
Let’s break it down into quick, numbered steps —because who doesn’t love a good list?
Prepare the dough : combine 2 cups of flour, 1 tsp salt, and 1 tsp baking powder. add 2 tbsp olive oil and 3/4 cup warm water.
Knead for 2- 3 minutes trust me, it’s good for the soul!
Rest the dough for 30 minutes . Use this time wisely! Whip up that filling, featuring your favorite fresh herbs .
Roll out the dough into thin circles or rectangles , about 1/8 inch thick . This step is crucial; if it’s too thick, your lavash won’t get that lovely crispiness.
Heat a pan over medium high for a couple of minutes, then cook each lavash for 1- 2 minutes on each side .
Look for that golden brown color, and let that aroma fill your kitchen!
Now, fill ‘em up! Spread that luscious creamy herb filling over your lavash and roll it up. Serve warm because it’s way better that way.
Expert Techniques: Get You There
Now, if you want to cook like a pro, pay attention to these critical steps . sometimes, it’s all in the details! for instance, the dough's resting time is not just a suggestion.
It develops gluten, making it easier to roll out and achieve that perfect texture.
Use temperature control points as your guide. keep an eye on your pan’s heat medium high is your sweet spot. if it’s too high, you’ll burn your lavash; too low, and they won’t cook through properly.
Timing is absolutely everything!
And hey, don’t be afraid to troubleshoot. is the dough too sticky? add a sprinkle of flour. too dry? a dash of water will do.
Cooking is all about adjusting, and practice makes perfect!
Success Strategies: Score Major Points
Avoid common mistakes! don’t skip the resting step it’s essential. also, make sure your dough isn’t too thick; nobody wants chewy lavash! for perfect results, always taste your filling before you spread it.
You don’t want a bland vegetarian filling !
And here’s a little tip: if you’re preparing for guests, make-ahead options are a lifesaver. You can roll the lavash ahead and just heat them right before serving. Easy peasy!
If you’re serving at a picnic or throwing an get-together, consider pairing your lavash with cold dips like tzatziki or a warm bean dip. YUM!
Additional Information
So, there you have it! with these professional cooking methods and handy tips, you’ll be well on your way to impressing friends and family with delightful dishes like quick lavash bread with creamy herb filling .
Just remember, cooking should be a fun experience where you get to express creativity. keep experimenting, and don’t hesitate to share your own flavor combinations and twists! happy cooking!
Pro Tips to Rock Your Quick Lavash Bread
Okay, before we dive into the nitty gritty of this Quick Lavash Bread with Creamy Herb Filling , let’s chat about a few secret tips straight from my kitchen.
First off, resting your dough is key . kinda like letting a steak rest after cooking you want that gluten to chill and develop.
Just cover it up and let it relax for about 30 minutes . it’s like giving your dough a spa day!
But don’t just sit there twiddling your thumbs! use that time wisely. you can whip up your creamy herb filling .
Mix softened cream cheese with some greek yogurt , and toss in whatever fresh herbs you’ve got on hand. seriously, the flavor explosion is no joke .
I love adding in some garlic and a pinch of salt and pepper. think of it as a flavor hug.
When you cook your lavash, keep the heat at medium high. you want that beautiful golden brown color without burning. it’s all about that perfect cook .
And trust me, keep a spatula handy; you’ll need it!
Perfect Presentation: Make it Pretty
Remember, we eat with our eyes first. so how do we make your quick lavash look like a million bucks? plating matters.
Place the lavash on a nice plate, and try rolling it up like a burrito or folding it into triangles.
Now, let’s talk colors! feel free to sprinkle some extra chopped parsley or dill on top. got those fresh herbs in cooking ? use them! it adds that dash of color that’s seriously instagram worthy.
You can even serve it with a side of vibrant dips like tzatziki because who doesn’t love a couple of colorful options on their plate?
Storage & make-ahead Tips
Let’s be real, we aren’t always gonna eat 4 servings at once. so, let’s chat about storage. leftover lavash can be kept in an airtight container for about 2-3 days .
When you’re ready to eat it again, warm it up in a skillet for that freshly cooked texture.
If you want to prep ahead, make your lavash dough and freeze it. you can keep that in the freezer for up to a month.
Just let it thaw before rolling it out. talk about quick meals for busy days !
Creative Variations to Explore
Now, don’t be shy! you can play with this recipe like it’s a canvas. want something a little lighter? swap out the cream cheese for some hummus.
Trust me, you’ll still get that creamy goodness but with a twist.
If you want to switch things up based on seasons, throw in some roasted veggies in that filling when they’re in peak season.
How about some spicy jalapeños? go wild! the key is to brainstorm your favorite vegetarian filling ideas .
Feeling adventurous? Try making a sweet version with ricotta and honey, then top it off with some toasted nuts. Your taste buds will thank you!
Complete Nutrition Guide
Now for all you health ensoiasts, let’s break down the perks. each serving of this quick lavash bread with creamy herb filling packs in 290 calories , which isn't bad at all! it’s got decent protein, plus healthy fats from the cream cheese and olive oil.
But remember, if you're keeping an eye on your sodium intake, you might want to lighten the salt. making small adjustments can cater to different dietary considerations while still keeping it tasty.
I always believe that food should be enjoyed, not feared!
Let’s Wrap This Up!
Making quick lavash bread with creamy herb filling is like a little culinary adventure. it’s easy, quick, and oh-so-delicious. plus, you get to customize it however you want.
Think of it as your new go-to recipe for quick lunches, snacks, or even entertaining guests.
So grab your apron, call up some friends, and let’s get to cooking. i promise you won’t just be satisfied; you’ll be high fiving yourself for making such a delightful dish! this is a chance to get creative, experiment, and savor something truly special.
Enjoy!
Frequently Asked Questions
What is Quick Lavash Bread with Creamy Herb Filling, and how is it different from regular lavash?
Quick Lavash Bread with Creamy Herb Filling is a delicious combination of soft, homemade lavash flatbread paired with a rich cream cheese and herb filling. Unlike traditional lavash which can be more time consuming to prepare, this recipe is designed for quick results without sacrificing flavor or texture.
Can I use different fillings for the Lavash Bread?
Absolutely! The filling can be tailored to your taste. Popular variations include using hummus, adding roasted vegetables, or mixing in cooked meats. For a spicy twist, consider incorporating jalapeños or red pepper flakes into the filling.
How should I store leftover Quick Lavash Bread with Creamy Herb Filling?
To store leftovers, wrap them tightly in plastic wrap or place them in an airtight container to maintain freshness. They can last in the refrigerator for up to 3 days. For reheating, gently warm them in a skillet over medium heat to preserve their softness.
What are some tips for making perfect lavash bread?
One key tip is to allow the dough to rest for at least 30 minutes; this helps develop gluten and makes rolling easier. Cooking at medium high heat ensures even grilling without burning. Lastly, you can experiment with different flours or add spices to the dough for an extra flavor boost.
Is this recipe healthy? What are its nutritional benefits?
Yes, this recipe offers a balance of carbohydrates and healthy fats. With approximately 290 calories per serving, it provides protein from the cream cheese and yogurt, as well as vitamins and minerals from the fresh herbs.
You can further enhance the health factor by using whole wheat flour and adding more vegetables to the filling.
Can I make the lavash dough ahead of time?
Yes, you can prepare the dough ahead of time! After kneading, wrap it tightly in plastic wrap and refrigerate for up to 24 hours. When you're ready to use it, simply let it come to room temperature before rolling it out.
This can save you time when preparing Quick Lavash Bread with Creamy Herb Filling for a meal or gathering.
Quick Lavash Bread With Creamy Herb Filling