Spoon Rest: 5 Amazing Diy Crafting Ideas for Your Kitchen!
- Are Your Kitchen Tools as Charming as They Are Functional?
- Why Make Your Own Spoon Rest?
- Secrets Behind the Perfect Spoon Rest
- Your New Favorite Spoon Rest
- Health and Nutrition Highlights
- Recipe at a Glance
- Perfect Ingredients Selection
- Kitchen Equipment Essentials
- Foolproof Cooking Steps for Crafting an Artisanal Ceramic Spoon Rest
- Game-Changing Tips
- Perfect Presentation
- Storage and Make-Ahead
- Creative Variations
- Complete Nutrition Guide
- Expert FAQ Solutions
- 📝 Recipe Card
Are Your Kitchen Tools as Charming as They Are Functional?
Okay, let’s start with a question that might make you go, “Hmm…” Have you ever thought about how your kitchen accessories can add that special touch to your cooking vibe? I mean, a spoon rest might seem super basic, but hear me out!
This artisanal ceramic spoon rest isn’t just about functionality it’s a chance to combine your culinary creativity with a bit of craftiness.
With only a medium skill level required (yes, you can do this!) and about 30 minutes of hands-on prep time, it blends art and function beautifully.
So, get ready to dive into the world of pottery techniques and craft a kitchen item that wows your friends and keeps your countertops spick and span.
Why Make Your Own Spoon Rest?
First off, let’s talk history! spoon rests, like so many kitchen accessories, have their roots deep in traditional pottery . they served a purpose long before they became an aesthetic choice on kitchen countertops.
Often made from stoneware , these charming pieces remind us of generations past where each handmade item carried its own story! making one yourself not only adds to your rustic kitchen decor but also connects you to those timeless techniques.
Now, what makes this spoon rest special isn’t just its humble beginnings; it’s the ability to customize it to fit your kitchen style! want a funky design? go for it! or maybe something minimalist for that sleek look we see in magazines? you do you!
This spoon rest can also be a unique kitchen gift, bringing thoughtful charm and personalization to anyone who loves cooking.
Secrets Behind the Perfect Spoon Rest
Let’s get a bit passionate about its culinary heritage . this isn't just about a pretty piece of pottery; it’s a deeply rooted tradition.
Handcrafted from air-dry or stoneware clay, these spoon rests showcase the art of crafting pottery . each curve, each groove can tell a story about the craftsman or woman behind it.
Incorporating glazing techniques to finish it off gives you a piece that's not only functional but beautifully unique.
Have you ever thought about how often we overlook these little kitchen helpers? in today’s world, where we rave about artisanal everything, making your own spoon rest has become increasingly popular.
Plus, it just looks pretty sitting on your kitchen tabletop, doesn’t it? think about the texture, the colors, and how it fits with your overall kitchen aesthetics .
Your New Favorite Spoon Rest
Alright, here’s the deal creating this spoon rest isn’t just a standard project; it’s about mixing and matching flavors like you do with spices in your cooking! the unique texture of the clay, alongside various decorative elements , allows for endless combos that reflect your personality.
And the techniques we’ll be using? they’re not rocket science! with a few foolproof methods, this project will feel right at home even for the novice crafters among us.
Plus, you know what’s great about this? it’s seriously time saving! by creating a diy spoon rest, you’re not only adding beauty to your space but also organizing your cooking tools seamlessly.
Say goodbye to the messy countertops!
Health and Nutrition Highlights
Okay, let’s be honest this isn't exactly a meal we’re talking about, but let’s touch on something important: the materials! nowadays, a lot of people are concerned about food safety in kitchen items.
The beauty of your handmade spoon rest is that you get to choose food safe materials and glazing techniques that suit your cooking needs.
So while you may not be munching on your creation, making sure it’s safe to use is part of the fun!
Recipe at a Glance
So let’s break it down for you:
- Total Prep Time: 30 minutes (plus 24 hours for drying)
- Skill Level Required: Medium
- Serving Size: One stunning spoon rest (or multiple if you're feeling crafty!)
- Cost Efficiency: With a minimal investment in clay and tools, you end up with a unique piece that could easily be sold at a craft fair for much more!
Alright! now that you’re pumped about making your own spoon rest, it’s time to gather materials and dive into the fun part: the ingredients section .
Grab some clay, and let’s craft something beautiful together! you’re going to love this process trust me.
Perfect Ingredients Selection
When it comes to cooking, whether you're whipping up a classic yorkshire pudding or exploring new stoneware recipes, the importance of the right ingredients can't be overstated.
Trust me, nothing ruins a dish faster than subpar components.
Premium Core Ingredients
First off, let’s chat about those premium core ingredients you need. think about things like fresh vegetables, quality meats, and the finest herbs.
You don’t always have to break the bank, but the value is in knowing what to look for.
Detailed measurements matter, especially when baking. too much flour? hello, dry cake! i recommend using a kitchen scale for precision it's a game changer.
And when it comes to quality indicators, look for vibrant colors and firm textures. for example, fresh herbs should be bright green and fragrant, while berries should be plump and firm.
Selecting tips can make all the difference. when picking up produce, remember: seasonal offerings tend to taste better and are often more affordable.
And if you're doing a big cookout, try to buy in bulk; it cuts costs and guarantees quality!
Now, storage guidance is key if you want your lovely purchases to last. store fresh greens in a damp paper towel inside the fridge you’ll thank me later when they aren’t wilting into sad little piles.
Signature Seasoning Blend
Now onto one of my favorite topics: seasoning ! creating a signature seasoning blend can turn even the simplest dish into a culinary treasure.
Start with your go-to spices. i’m talking about a mix of paprika, cumin, and a hint of cayenne for that lovely warmth.
Or a fresh herb medley rosemary and thyme are classic choices.
Don’t forget those flavor enhancers ! adding a bit of garlic powder or onion powder can work wonders for your marinades.
And oh, the aromatic additions can’t be overlooked. a splash of vinegar or a squeeze of lemon juice brightens everything.
It’s like a burst of sunshine in your dish!
Smart Substitutions
Life happens, folks! So, let’s discuss smart substitutions . Sometimes you realize you've run out of something vital. Instead of panic, embrace the creative swap! No buttermilk? Combine regular milk and vinegar foolproof.
For any dietary swaps, think about how to keep the flavors without compromising. Swap out butter for a vegan alternative in your desserts; it opens up a whole new tasty world for your baking adventures!
And really, don't forget about those seasonal variations ! using ingredients that are in season doesn’t just make your dish taste better but also makes for a fantastic way to keep things fresh in your kitchen.
Kitchen Equipment Essentials
Alright, moving on to those kitchen equipment essentials . you don’t need every gadget under the sun, but a few trusty home cooking tools will have you whipping up gourmet meals in no time.
Must have tools include things like good kitchen knives, a sturdy cutting board, and decent pots and pans. you know what i mean; not the flimsy stuff that forgets its purpose after a few uses!
If you really want to go fancy, look into ceramic kitchenware or artisanal pottery for serving and cooking they elevate your aesthetic game while being functional.
A few recommended appliances are a quality blender and an air fryer. they become your best friends in the kitchen.
Trust me when i say an air fryer can make the crispiest potatoes without drowning them in oil. heaven!
As for helpful gadgets , think about little things like zesters, garlic presses, and measuring spoons. super handy! and hey, if you're looking for home alternatives , don’t shy away from diy spoon rests made from clay.
You can even get your crafty side on with some easy pottery projects.
Pro Ingredient Tips
Let’s wrap this up with some pro ingredient tips . The first secret? Always check for quality markers. When you're at the grocery store, pay attention to labels; look for those food safe materials especially if you’re into making your own kitchen accessories!
For storage solutions, if you have the chance to grab some eco-friendly options for keeping leftovers, do it! they’re stylish and save you money in the long run.
Speaking of saving money, if you can grow your own herbs even in a windowsill you’ll feel like a culinary wizard at a fraction of the price.
So now that your ingredients and tools are all lined up and ready to go, it's time to get to the fun part making your stunning spoon rest! Let’s jump into the instructions next, where we'll bring these clay masterpieces to life!
Foolproof Cooking Steps for Crafting an Artisanal Ceramic Spoon Rest
So, let me spill the beans. i've recently delved into a pocket of creativity: pottery! and oh my gosh, discovering how to make a ceramic spoon rest has been such a game changer for my kitchen.
Not only is it useful for resting my stirring utensils while i cook, but it also adds that rustic charm that just makes my heart flutter every time i glance at my countertop.
Now, if you're thinking of diving into this, i’m here to guide you through every step of the way. let’s make this happen!
Essential Preparation Steps
First things first mise en place ! that fancy french term really just means having all your gear and materials ready.
Grab yourself one pound of air-dry clay or stoneware clay (the good stuff, mind you). you’ll need a rolling pin, some tools like scissors for clay cutting, a sponge for smoothing, and a kiln if you're feeling ambitious with stoneware.
Take a moment to gather everything in neat organization. set up a sturdy work surface because trust me, you don’t want the clay to hitch a ride everywhere! keep a bowl of water handy for smoothing things out as you go.
Oh, and remember to keep your workspace tidy. a clean space not only helps your creativity flow but also makes the whole process easier.
Let’s say kitchen organization is a form of art as well, shall we?
Professional Cooking Method
Now, onto the fun part! Here’s how we achieve this spoon rest masterpiece step-by-step:
Prepare the Clay : Start by kneading your clay until it’s nice and soft. You don’t want any dry bits; they will disrupt your beautiful creation.
Shape the spoon rest : roll the clay out to about 1/4 inch thick. use your knife to cut out a circle or oval shape think of it like creating a mini pizza without the toppings! now gently curve those edges to form a shallow dish.
Add decorative elements : feel free to get a bit artsy. use stamps or textures to give your piece some personality.
Just be sure to smooth out any rough edges with your sponge.
Dry the Clay : This part takes a bit of patience. Let your creation dry completely (around 24 hours). You want to ensure it's fully hardened before moving forward.
Fire in the kiln : here’s where the magic happens! if you've opted for stoneware, pop your dried spoon rest into the kiln and fire according to the clay's guidelines.
Safety first, so make sure you follow all protocols no one wants any kiln mishaps!
Glaze (Optional) : Once cooled, you can apply a food safe glaze for that glossy finish, which adds both beauty and durability. Fire it once more to set that glaze.
Expert Techniques
Keep these critical tips in mind:
- When rolling and shaping, maintain your clay’s moisture. If it starts to dry and crack, add a bit of water and knead it gently.
- Check the thickness of your spoon rest consistently, because if it’s too thick, it won't dry or fire properly.
- When glazing, be thorough but gentle. Any missed spots can lead to an uneven finish.
Success Strategies
Let’s talk potential hiccups. if the edges crack while drying, that usually means it dried too quickly. a damp cloth over it can help slow the process down.
And if you’re unsure about your glazing skills, test on a small piece first to see how it reacts when fired.
Inspect your finished product thoroughly. any imperfections? use a soft cloth to polish gently until you're satisfied! if you find there's a bit more to smooth out, don’t hesitate to give it another round of gentle sanding.
Once your spoon rest is complete, it’s not just a useful kitchen accessory; it's a piece of you, a reflection of your culinary creativity! and here’s the kicker it makes for a perfect kitchen gift idea or a unique addition to your rustic kitchen decor .
Who wouldn’t love a handcrafted, custom ceramic design? just imagine gifting this alongside a lovely set of serving utensils or culinary goodies.
Now that you're all set up with this delightful spoon rest, stay tuned for more tips and tricks in the upcoming sections.
We'll explore additional ideas for enhancing your kitchen creativity, using both functional ceramics and cool kitchen accessories . i can’t wait to share more!
Game Changing Tips
Professional Insights
You know, there’s just something about handmade pottery that adds a unique touch to any kitchen. if you've ever browsed through your local artisan shop, you get what i mean! each piece has its own bit of character, especially when it’s crafted with love.
Now, when making your own ceramic spoon rest, don’t be intimidated. just remember, while you may not be a professional potter yet, it’s all about practicing those pottery techniques .
Expert Techniques
Let’s dive into the magic of hand built ceramics ! use air-dry clay if you're a newbie; it's so forgiving. i mean, who hasn't had a creative bust with clay before? but if you really want to elevate your spoon rest game, try using a pottery wheel.
Sure, it’s a bit advanced, but imagine the feeling when you nail that beautiful shape!
Kitchen Wisdom
Every good cook knows that the kitchen tools you choose can make all the difference. a well made spoon rest keeps your countertop clean and your stirring tools organized.
Plus, it just looks so darn charming next to your rustic kitchen decor!
Success Guarantees
One of the best things about crafting your own kitchen accessories is the guaranteed success that comes with a little patience and love! fire that clay piece in a kiln properly, and you have something that not only functions but also tells your unique story.
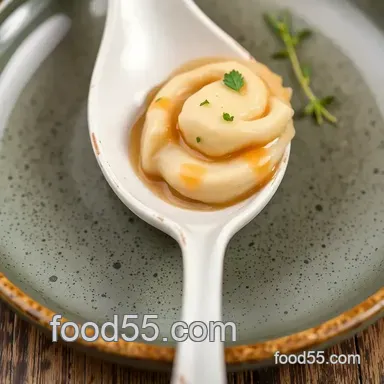
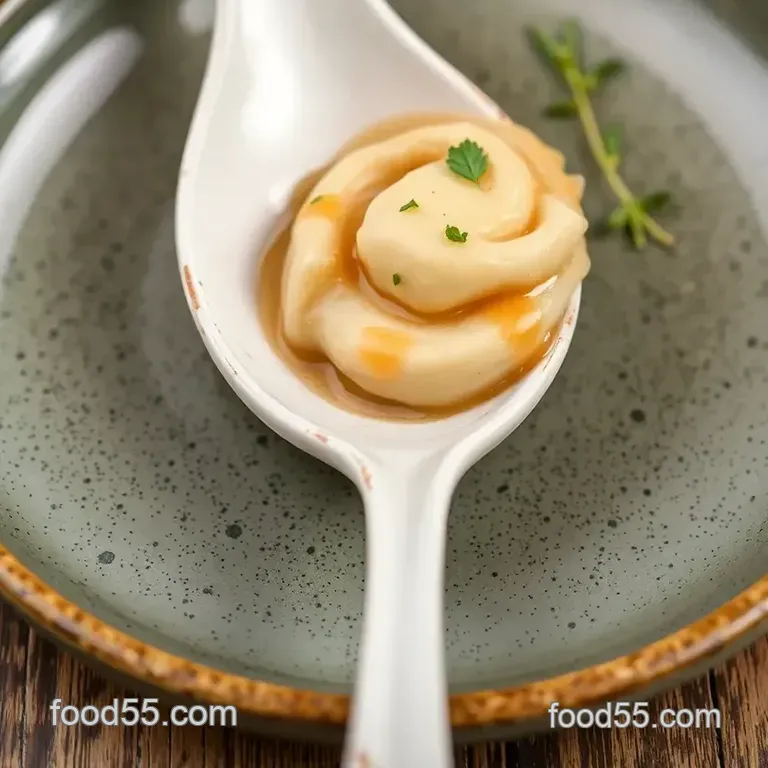
Perfect Presentation
Plating Techniques
While a spoon rest might seem simple, there are tons of ways to showcase it! pair it with a colorful plate or bold dishware for that pop of color.
It can act not just as a functional piece but also as a decorative item in your kitchen aesthetic.
Garnish Ideas
Why not stamp your spoon rest with herbs or floral patterns? it’s like creating edible art well, not edible in this case, but you get the picture! this adds that rustic flair without breaking the bank.
Serving Suggestions
Put your new creation to good use by displaying it alongside your favorite cooking tools. imagine setting the table for dinner and that stunning spoon rest is right there with your elegant serving utensils .
Visual Appeal Tips
To enhance visual appeal, play around with glazes. A little experimentation can lead to some awe-inspiring, artistic results! I cannot stress how important it is to have fun with this, so don’t hesitate to try a DIY glazing technique !
Storage and make-ahead
Storage Guidelines
Once you’ve crafted your ceramic spoon rest, the last thing you want is for it to gather dust. Store it in a dry place, away from moisture to prevent any mishaps.
Preservation Methods
If you plan on creating multiple spoon rests, consider using those adorable crates or decorative boxes as storage. It helps maintain that rustic kitchen decor vibe you’re going for!
Reheating Instructions
Now, while this isn’t a food item, if you ever glaze your spoon rest and need to refresh it, just toss it back in the kiln as per the manufacturer's recommendations.
Freshness Tips
When making multiple pieces, it’s handy to work with functional ceramics that are food safe. That way, you can incorporate them into your cooking easily and keep everything fresh!
Creative Variations
Flavor Adaptations
Feeling adventurous? Customize your spoon rest based on the seasons! Use leaf stamps in fall or floral designs in spring! That way, every time you cook, you're reminded of the seasons!
Dietary Modifications
Just as every kitchen needs unique recipes, every DIY project can be modified. If you're concerned about eco-friendliness, use food safe materials in your clay!
Seasonal Twists
Can you imagine a spoon rest shaped like a pumpkin for fall or a snowflake for winter? These small touches can make such a difference!
Regional Variations
Explore the beauty of artisanal pottery from different regions. From the classic blue tiles of Portugal to vibrant African designs, there's a whole world of inspiration out there for your projects!
Complete Nutrition Guide
Detailed Breakdown
Okay, so I know we’re talking about a spoon rest here, not a soufflé, but hear me out! Creating a visual guide to your culinary creations is super important when entertaining.
Health Benefits
Using stoneware recipes is not just about looks; using ceramics can have health benefits too! They’re less likely to leach chemicals than many plastics.
Dietary Information
Remind your guests that your creations are environmentally conscious and made with food safe materials. It shows you care about their dietary needs!
Portion Guidance
Again, we’re talking about a kitchen tool, but if you're serving dishes alongside, think about portion sizes less is often more, especially when plated beautifully!
Expert FAQ Solutions
Common Concerns
You might be wondering if you can really create a spoon rest yourself, right? Trust me, you can —especially with your passion for crafting!
Expert Answers
If you’re ever worried about glazes not adhering after firing, test them out on a scrap piece of clay before going all in.
Troubleshooting Guide
If something goes wrong during your pottery firing, it’s okay! Many a potter has had a bit of a mishap! Just take it in stride and learn for the next piece.
Success Tips
Keep practicing those pottery wheel methods and embrace the learning process. Every crafted item gets you one step closer to being that pottery pro you dream of!
In conclusion, crafting your own ceramic spoon rest is not only a fun project, but it also enhances your home cooking experience.
Embrace your creativity, make a unique kitchen gift, and enjoy cooking with a little extra charm on the side. so, grab that clay, and let’s get crafting!
Spoon Rest 5 Amazing Diy Crafting Ideas For Your