Sweet Anise Black Jellybeans
- A Sweet look into Into Nostalgia: The Allure of Anise-Infused Black Jellybeans
- Your Go-To Guide: Essential Ingredients for Homemade Sweet Anise Black Jellybeans
- Mastering the Art of Professional Candy Making: Sweet Anise Black Jellybeans
- Pro Tips & Secrets for Your Sweet Anise Black Jellybeans
- Perfect Presentation: Make Your Jellybeans Shine
- Storage & Make-Ahead: Candy That Lasts
- Creative Variations: Make It Your Own
- Complete Nutrition Guide: Sweet Knowledge
- Expert FAQ Solutions: Common Questions Answered
- Conclusion: look into Into Candy Making
- 📝 Recipe Card
A Sweet look into Into Nostalgia: The Allure of Anise Infused Black Jellybeans
Okay, can we take a moment to talk about the sheer delight of homemade candy? i mean, who doesn’t have a sweet spot for those nostalgic flavors that dance on your tongue? picture this: you’re cruising down memory lane, hitting up the local candy shop, and bam! you spot the black jellybeans.
Instantly, you’re transported back to your childhood. anise flavored sweets bring back all the feels, right? let me spill the beans on why these sweet anise black jellybeans are the perfect way to relive those cherished memories.
A Little Candy History with a Modern Twist
Okay, here’s the juicy scoop. black jellybeans aren't just a modern candy craze; they've got roots that trace way back to the traditional confectionery of yore.
They originated in europe , where the unique, herbal taste of the herb that gives flavor to black jellybeans you guessed it, anise was loved for its sweet and slightly spicy notes.
Fast forward to now, and those gourmet jellybeans are all the rage. they’ve made their way to birthday parties, halloween treats, and even cozy movie nights.
So, whether you're a candy making newbie or a seasoned pro, these jellybeans are just a fun project away!
As for time and difficulty? we’re looking at around 1 hour and 35 minutes to 2 hours and 15 minutes total.
It’s got that sweet spot of manageable, yet just tricky enough to make you feel like a kitchen rockstar. and don't sweat the cost; this recipe yields about 20 jellybeans and won’t send your wallet into a tizzy!
Why You’ll Love Making These Jellybeans
Let’s chat about the sneaky benefits of these delightful treats. first up, the health benefits of anise can't be ignored! aside from being delicious , it can help with digestion and has anti inflammatory properties.
Talk about a candy with a side of healthy vibes, am i right?
These homemade black jellybeans stand out because they let you flex your creativity. picture hosting a shindig and presenting your guests with these beauties.
Everyone’s popping them in their mouths, and you get to watch the joy unfold. while store-bought jellybeans are fun, they often miss that fresh out-of-the-kitchen vibe.
Plus, you can customize your chewy candy texture just the way you like it.
Got a special occasion? bring these to the table! they’re perfect for holiday gatherings, birthdays, or even just a “i need a pick-me-up” kind of day.
And hey, experimenting with flavors can lead to all sorts of unique twists! who knows? you might just find your new favorite sweet.
Moving Into the Ingredients Section
If you’re feeling pumped and ready to make your own anise infused treats , let’s roll up those sleeves and dive into what you’ll need.
Think of this as your essential shopping list for an awesome candy making adventure. from the anise extract to the gelatin, everything you’ll need is straightforward and easy to find.
So, grab your candy thermometer and let’s create some of the best sweet and herbal snacks this side of your kitchen! Who needs store-bought when you can whip up these adorable bites filled with childhood nostalgia and that distinct herbal taste we all know and love? Trust me, you won't want to skip any step!
Your Go-To Guide: Essential Ingredients for Homemade Sweet Anise Black Jellybeans
If you’re diving into the world of homemade candy, get ready for a sweet adventure! I’ll walk you through all the essential ingredients you need for those delicious Sweet Anise Black Jellybeans and trust me, you'll want to take notes!
Premium Core Components
Measurements Matter
Let's kick off with precise measurements. For our jellybeans, you'll need:
- 1 cup (200g) granulated sugar
- 1/2 cup (120ml) water
- 1 tablespoon (15ml) light corn syrup
- 2 teaspoons (10ml) pure anise extract
-
1/4 teaspoon (1g)
salt
And don’t forget about the gelatin! You’ll need 1 1/2 tablespoons (15g) of powdered gelatin to give those jellybeans that perfect chewy candy texture.
Quality indicators
when picking your ingredients, look for pure anise extract rather than imitation. it has a distinct herbal taste that really makes these jellybeans pop! the fresher your sugar and gelatin, the better your candy will turn out.
Storage guidelines
keep your ingredients safe! granulated sugar lasts indefinitely if stored in a cool, dry spot. anise extract? it should hang tight in the pantry as well, but check the bottle for freshness, just to be sure.
As for gelatin, keep it sealed and stored in a dry place to preserve its gelling magic.
Signature Seasoning Blend
Essential spice combinations
besides sugar, the star here is anise flavoring . its sweet and herbal quality is what gives our homemade black jellybeans their unique twist.
Pair it with a hint of salt to balance the sweetness!
Herb selections
if you're feeling adventurous, consider adding a touch of other herbs. basil or mint could bring a refreshing change and add a totally unique flavor twist.
But honestly, keeping it simple is often best!
Smart Substitutions
Common Alternatives
No light corn syrup? No worries! You can swap it for agave syrup or even honey. Keep in mind, using honey will give it a different flavor altogether but hey, variety is the spice of life!
Dietary modifications
for my vegan friends, guess what? you can totally skip the gelatin and go for agar agar instead.
It’s a great herbal substitute and works like a charm for a jelly like texture.
Emergency Replacements
Out of powdered sugar? You can make a quick swap with granulated sugar in a pinch. Just realize it might slightly change the texture.
Kitchen Equipment Essentials
Must have tools
ready to get started? grab a medium saucepan, a whisk, a candy thermometer (super important), and silicone molds or a lined baking sheet.
You don’t really need fancy tools for candy making, just some creativity and patience!
Alternative Equipment Options
No candy thermometer? You can test the consistency by dropping a bit of the candy mixture into cold water. If it creates a soft ball, you’re golden!
Enjoy Your Crafty Creation!
Candy making is like a fun science project, and these sweet anise black jellybeans will have you reminiscing about those nostalgic flavors from your childhood.
Remember to be patient the cooling time allows that sweet chewy texture to form. you’ll be whipping these up for birthdays, movie nights, or just because you want a sweet snack.
And hey, don’t forget about decorating your homemade candies ! A little dusting of cornstarch can enhance their charming finish.
So, are you ready to begin? the following section will walk you through all the nitty gritty steps for making these delightful anise infused treats .
Let’s get cooking and channel our inner candy artisans!
Mastering the Art of Professional Candy Making: Sweet Anise Black Jellybeans
So, let’s talk about something totally nostalgic and oh-so-delicious: homemade black jellybeans ! yep, the ones that take you back to your childhood and are such fun to make! if you’re ready to dive into candy making, i got your back.
We’re gonna use that herb that gives flavor to black jellybeans you guessed it, anise. whether you're a candy making novice or a seasoned pro, the joy of creating sweet, chewy, and uniquely flavored treats is unbeatable.
Essential Preparation Steps
Before diving into mixing things up, let's chat about that all-important concept: mise en place . it’s a fancy french term, but really, it just means getting your ingredients ready.
Measure out everything first. you’ll thank yourself later when you’re racing against the clock!
Speaking of the clock, time management is key. plan your steps. prep your molds before cooking. wait until your mixture reaches 240° f ( 115° c) before adding the gelatin, or you'll end up with a sticky mess.
Seriously, precision is critical here!
Organization is another trick to keep in mind. have your tools at hand: a candy thermometer, mixing bowls, and molds.
Trust me, it’s no fun scrambling for things in the middle of candy madness! plus, safety first hot sugar can splatter! keep a cool head, and watch out for splashes when you’re pouring that hot syrup!
A step-by-step Process
Now, let’s jump right in with clear, numbered instructions. Grab your apron and let’s roll!
- Prepare Molds: Lightly coat silicone molds with nonstick spray, or line a baking sheet with parchment paper.
- Combine Ingredients: In a medium saucepan, mix 1 cup of granulated sugar, 1/2 cup of water , and 1 tablespoon of light corn syrup until dissolved.
- Cook Mixture: Heat on medium high until it hits 240° F ( 115° C) . Seriously, use that candy thermometer for accuracy!
- Add Gelatin: Once at temp, pull it off the heat. Dissolve 1 1/2 tablespoons of gelatin in warm water and whisk that goodness into the mix along with 2 teaspoons of anise extract .
- Mix Until Smooth: Stir and make sure there are no clumps. You want a silky texture here.
- Pour Mixture: Carefully fill your molds. It’s hot, so go slow.
- Cool: Let them set for 1- 2 hours at room temp.
- Prepare Coating: Heat 1/4 cup of sugar with a little water over low heat, stirring until it’s dissolved. Add activated charcoal if you want that dark vibe (totally optional!).
- Coat Jellybeans: Once set, coat those little guys in your syrup.
- Final Drying: Dry them out on a rack for about 30 minutes . This step is key for the chewy candy texture!
Expert Techniques
Ready to make your jellybeans pop? here are some expert tips. watch for that glossy finish it indicates they've been coated perfectly! for troubleshooting, if they don’t set right, it could be your gelatin wasn’t mixed well.
Mix, mix, mix, my friend!
Success Strategies
We all make mistakes. one common mishap? not cooking the syrup long enough. you need that 240° f ! overcooking? mere minutes matter! if they’re too hard, adjust the cooking time next go-round.
Want to avoid that sticky situation? dust your jellybeans with cornstarch once they're set.
Now, if you want to make these ahead, you totally can! they keep well, so store them in an airtight container and pull them out for movie nights or dessert parties.
Who doesn’t love nostalgia, right?
As we wrap this up, keep in mind that making anise infused treats taps into classic candy making techniques, and the result is just as dreamy as you hope.
For a smoother road ahead, let’s transition into our last segment: Additional Information. Whether you're looking to master flavoring agents in candy or need tips on decorating homemade candies , there’s so much more to explore! Stay tuned for the next sweet adventure!
Pro Tips & Secrets for Your Sweet Anise Black Jellybeans
So you’re diving into candy making, huh? love it! taking the leap to whip up homemade black jellybeans is like stepping into a sweet candy wonderland.
Here are some fun little nuggets of wisdom that can totally elevate your candy game.
Chef's Personal Insights
I remember the first time i tried making my own jellybeans; i almost felt like willy wonka! the key to achieving that chewy texture everyone loves? precision .
Seriously, keep your eye on that candy thermometer . when your mixture hits 240° f ( 115° c) , you've struck gold! too hot, and you’ll get chewy little rocks instead of chewy candies.
Time Saving Techniques
Now, let's talk time. if you want those candies to set fast, pop ‘em in the fridge for 30 minutes.
This little hack can shave off a good chunk of waiting time, letting you enjoy your anise infused treats sooner. but don't rush it too much on the cooling part!
Flavor Enhancement Tips
Wanna crank up that flavor? go for quality ingredients! use high-quality anise extract instead of cheaper stuff. it truly makes a world of difference.
And if you like a stronger taste, don’t be shy! just add a touch more but don’t overdo it or things can get weird, you know?
Presentation Advice
Eating is just as much about looks as it is about taste! for a dazzling presentation, try dusting your jellybeans with cornstarch after coating them.
It keeps them from sticking together and also gives them this beautiful matte finish. bonus points if you make a colorful spread with them on a rustic wooden board!
Perfect Presentation: Make Your Jellybeans Shine
Now that you've mastered making those sweet treats, let’s talk about making them eye-catching!
Plating Techniques
It’s not just candy; it’s a dessert adventure ! use little candy cups to present them at parties or mix them into a larger dessert platter.
Trust me, your guests won’t just want one!
Garnish Ideas
Looking to jazz things up? How about adding a sprinkle of sea salt on top? It's an unexpected twist that contrasts beautifully with the sweet anise flavoring and makes for a memorable experience!
Color Combinations
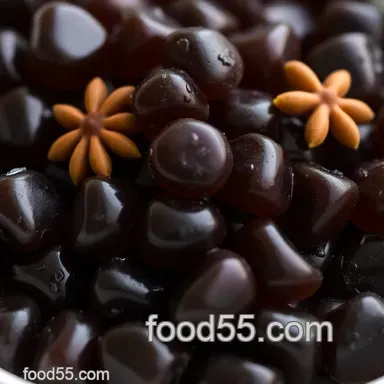
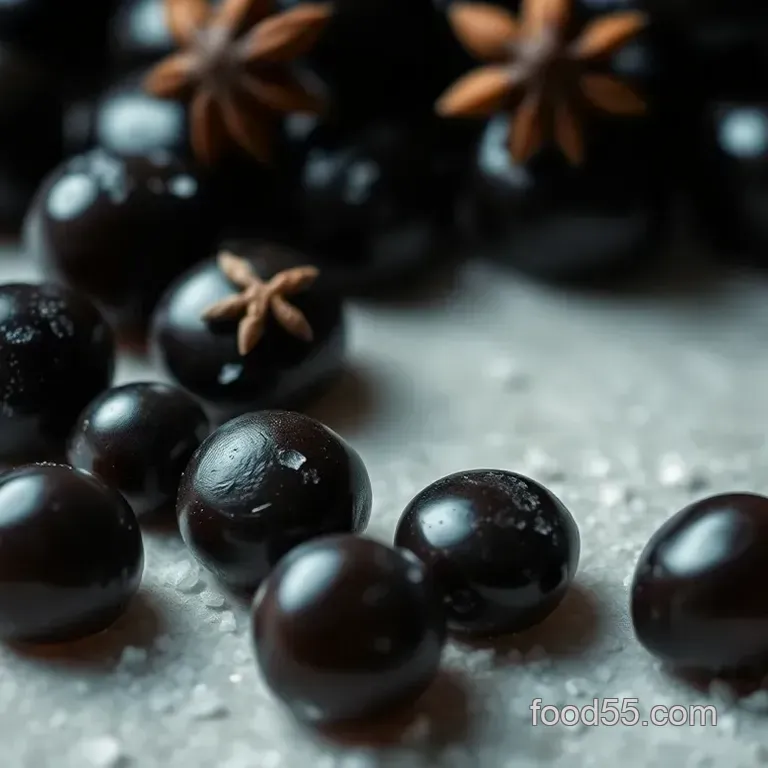
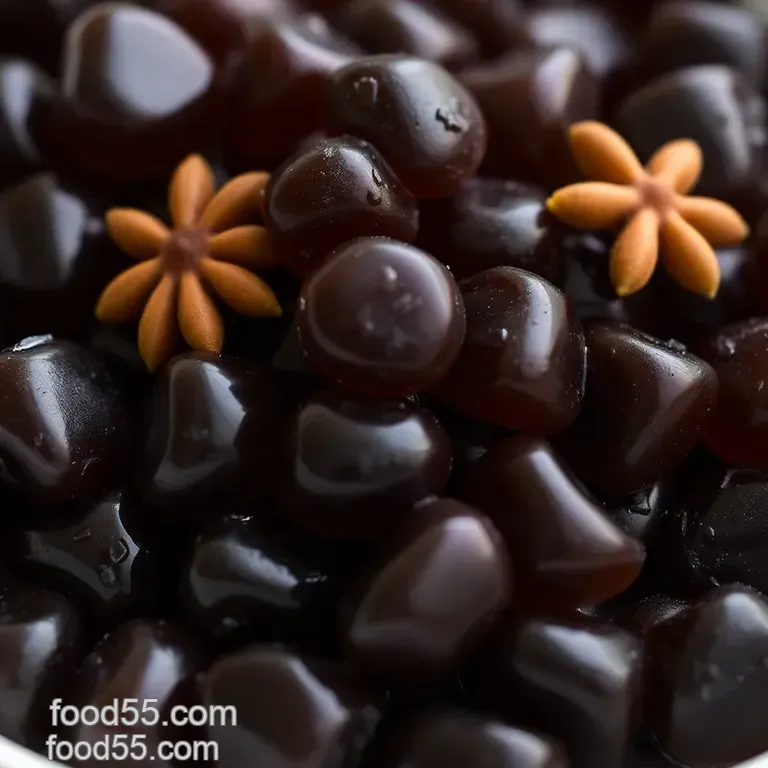
Jellybeans are all about color! you could even make a neat rainbow tray. feeling daring? use activated charcoal for an even deeper black color, which gives a more gourmet feel to your gourmet jellybeans .
Visual Appeal Tips
And don’t forget lighting! If you’re snapping pics for the 'Gram, natural light is your friend. A well lit shot of your jellybeans can turn that nostalgic treat into a head turning masterpiece.
Storage & make-ahead: Candy That Lasts
So, what happens if you’re not eating all these jellybeans in one go? Here’s how to store them right!
Storage Guidelines
Once cooled, pop your jellybeans in an airtight container to keep them fresh and chewy. You want them to last, right?
Preservation Methods
If you’re planning to keep them for more than two weeks, try sticking some silica gel packs in, too! They’ll soak up any moisture and prevent your jellies from becoming sticky blobs.
Reheating Instructions
If they do get a bit too hard, put them in a microwave for just a few seconds seriously! Like, 3-5 seconds . This little warm-up can restore that chewy texture!
Freshness Duration
Under the right conditions, those bad boys can last about 3 weeks ! But honestly, they probably won’t last that long because they’re just too darn good.
Creative Variations: Make It Your Own
Here comes the fun part! Want to take your jellybean mold recipes to the next level? Here’s how!
Flavor Adaptations
Switch up the flavoring agents! swap out anise for peppermint or even a citrus zest for a totally different vibe.
You can even use it as a base for seasonal flavors. peppermint for winter? yes, please!
Dietary Modifications
If you’re more plant based, swapping out corn syrup for agave makes it vegan friendly. You can still craft those chewy candies without missing out!
Seasonal Twists
As the seasons change, play with adding a dash of cinnamon for fall, or maybe some lemon zest for that summer zing!
Regional Variations
And let’s not forget those fun regional variations ! While anise is the star of the show, think about mixing in some local flavors that speak to your heart.
Complete Nutrition Guide: Sweet Knowledge
Alright, I get it. You want to know what you’re putting in your body. Here’s the lowdown.
Detailed Breakdown
Each jellybean comes in around 40 calories . Not too shabby for a sweet little indulgent bite!
Health Benefits
Anise isn’t just tasty; it also has some health benefits! It can help with digestion, so really, these are basically health food. Right?
Dietary Considerations
Keep in mind that each jellybean has sugar , so moderation is key especially if you're watching that sweet intake. Life's about balance, fam!
Portion Guidance
If you’re serving a crowd, I’d say around 4-5 jellybeans per person is a good bet. Keep it sweet, but not too much.
Expert FAQ Solutions: Common Questions Answered
Oh boy, I’ve been asked these a million times!
Common Questions
Can I use different molds? Absolutely! Just adjust cooling times based on the thickness.
Troubleshooting Guide
Got clumps in your gelatin? Make sure to mix it WELL before adding to the sugar.
Success Tips
Stay patient! If something goes wrong, it’s all part of the learning curve. Candy making recipes can be finicky!
Variations Explained
If you want chewy but not too sweet, just cut back on sugar and be liberal with the other flavoring ingredients!
Conclusion: look into Into Candy Making
So there you have it! from crafting those homemade black jellybeans to any variations you could dream of, i hope you’re feeling inspired.
Get creative, and don’t sweat the small stuff. like i always say, candy making is all about having fun and channeling that inner kiddo!
Give these a go, and who knows you might just discover a new favorite treat or spark a fun candy making adventure! Happy cooking, friends!
Sweet Anise Black Jellybeans