Beni Shoga: Vibrant Japanese Pickled Ginger
- Funky Ferments: Discovering Beni Shoga
- Essential Ingredients Guide
- Professional Cooking Method for Beni Shoga: Vibrant Japanese Pickled Ginger
- Pro Tips & Secrets for Making Beni Shoga
- Perfect Presentation of Your Beni Shoga
- Storage & Make-Ahead Tips
- Creative Variations on Beni Shoga
- Complete Nutrition Guide
- Expert FAQ Solutions
- Wrapping It Up
- 📝 Recipe Card
Funky Ferments: Discovering Beni Shoga
Have you ever cracked open a jar of those vibrant pink slices at a sushi restaurant? you know, the ones that add a zing to every bite? that’s beni shoga, my friends! the first time i tried it, i was blown away.
I mean, who knew pickled ginger could be that good? since then, i've been on a mission to master the beni shoga recipe at home and let me tell you, it’s a game changer for your meals.
The Story Behind Beni Shoga
Beni shoga hails from japan, where it’s commonly used as a side garnish. historically, it came about as a way to preserve ginger and add a punch to dishes.
It’s really cool how something so simple has been around for centuries in japanese cuisine. nowadays, you can find it in sushi places all over america, and even tucked in between plates of ramen.
It’s not just a pretty face; its unique flavor profile makes it a beloved condiment for many dishes.
This recipe is super easy trust me, anyone with a sharp knife can tackle it! you’ll be looking at around 10 minutes of active prep time, plus a day for it to marinate.
The total time is about 24 hours and 10 minutes, but don't let that scare you! most of it is just waiting for those flavors to dance together in your fridge.
Oh, and cost wise? it’s way cheaper to make your own homemade beni shoga than to buy it at a restaurant.
With the right ingredients, you can whip up about one cup of sweet, tangy goodness for just a few bucks!
Why Beni Shoga Rocks
Let’s dive into the reasons why you’ll want to whip this up in your kitchen. first off, the health benefits of ginger are off the charts! it’s known for its anti inflammatory properties, and it can do wonders for digestion.
Plus, if you’re into vibrant food, it adds a pop of color to your meal! trust me, your instagram followers will thank you when they see that bright ginger beautiful on your rolls.
And let’s not forget about versatility. beni shoga works wonders as a garnish for sushi , but it’s not just limited to that! try it on rice bowls, salads, or even grilled meats it's a tangy condiment that adds layers of flavor.
It’s like discovering a new spice; once you know how to use it, it’s hard to go back to life without it!
This pickled ginger is perfect for celebrations and everyday meals. whether it’s a casual dinner or a fancy sushi night, beni shoga can spice things up.
It’s also a fantastic side when hosting, showing off your culinary skills without having to sweat more than necessary.
From Ingredients to Pickling Magic
So, how do you get started? prepare your young ginger by peeling and slicing it nice and thin. seriously, though, the thinner, the better! then, mix up your pickling solution with rice vinegar, sugar, and salt.
I’ve found that letting everything chill in the fridge for at least 24 hours really allows those flavors to mingle.
Before you know it, you’ll be diving into the world of quick pickling and whipping up colorful food garnishes in no time.
If you crave some creativity, switch up the spices or even toss in some hot pepper flakes for a kick!
Get ready to load up on your pickled ginger uses ! it’s time to elevate your meals with this vibrant ginger recipe.
So, are you curious about what goes into making this delicious condiment? let’s move on to the ingredients section, and i’ll share the simple steps to bring a taste of japan to your kitchen!
Essential Ingredients Guide
Gather round, friends! today we're diving into something super exciting the world of essential ingredients that can take your cooking game to the next level.
Whether you're prepping for a dinner party or just trying to enhance your weeknight meals, knowing your pantry staples can be a game changer.
Let’s break it down!
Premium Core Components
First up, let’s talk about premium core components . think of these as your culinary foundation. from fresh herbs to spices, having the right ones on hand can help you whip up a delicious dish in no time.
Detailed Measurements: You wanna get this right, so remember:
- 1 cup = 240 ml
- ½ cup = 100 g
Quality Indicators: Look for vibrant colors in your produce. Fresh herbs should smell amazing, while spices should be aromatic.
Storage Guidelines: Keep your spices in a cool, dark place. Most have a shelf life of about 1-3 years , but fresh herbs are best used within a week or two.
Freshness Tips: When selecting veggies, go for firm and unblemished options. You’ll thank yourself when your dish bursts with flavor!
Signature Seasoning Blend
Now let’s spice things up! Your signature seasoning blend can be a quick way to elevate any dish.
Essential Spice Combinations: Think garlic powder, paprika, and cumin. You can’t go wrong there.
Herb Selections: Fresh basil and oregano sing together beautifully. And if you’re feeling adventurous, mix in some dill for a unique twist.
Flavor Enhancers: Don’t forget the aromatics ! Onion and ginger are game changers. In fact, when I'm cooking Asian cuisine, I always grab a handful of fresh ginger it brings warmth and sweetness.
Regional Variations: Feel free to switch things up! If you’re more into Mexican food, try cilantro and lime over rosemary and thyme.
Smart Substitutions
Ever run out of an ingredient? Don’t sweat it! Smart substitutions can save your dish.
Common Alternatives: If you’re fresh out of ginger for that beni shoga recipe , grab some ground ginger instead though the flavor won’t be quite the same.
Dietary Modifications: For gluten-free cooks, switch out soy sauce for tamari.
Emergency Replacements: No rice vinegar for your pickling? Use apple cider vinegar! It’ll still give you that fruity tang.
Seasonal Options: In summer, use fresh veggies from the farmer's market. In the winter, switch to hearty root vegetables that pack flavor.
Kitchen Equipment Essentials
Now, let’s get down to the must have tools that every kitchen should have.
Must Have Tools: A sharp knife, a sturdy cutting board, and a good mixing bowl trust me, the basics are where it’s at!
Alternative Equipment: If you don’t have a mandoline slicer? No biggie! Just slice that ginger as thin as you can with a sharp knife.
Preparation Tips: Always prep your ingredients before starting to cook. It keeps you organized and the flow going!
Storage Solutions: Keep your spices in airtight containers. It’ll help them last longer and stay potent.
Now, with all these essential ingredients and tools, you're on a roll! and let’s not forget about the beni shoga .
This japanese pickled ginger is not just a beautiful garnish for sushi; it’s great for flavoring dishes and adds a tangy kick to meals!
Honestly, if you’re ready to flow into the next part let’s talk about how to make that vibrant beni shoga , along with its easy pickling techniques .
Trust me, it’s a journey you won’t want to skip!
Professional Cooking Method for Beni Shoga: Vibrant Japanese Pickled Ginger
Okay, let’s chat about the professional cooking method behind an absolutely essential condiment in Japanese cuisine: beni shoga . I mean, if you haven’t tried this tangy, vibrant pickled ginger yet, are you even living? It’s a gamechanger for sushi garnishes or just to jazz up any dish!
So, let's dive into the nitty gritty, shall we?
Essential Preparation Steps
First things first, let’s talk about mise en place . this fancy french term just means getting everything ready before you start cooking.
Gather your ingredients, like rice vinegar , sugar , and young ginger . trust me, it’ll make your cooking process smoother than a warm knife through butter.
Now, you can’t forget about time management . beni shoga needs at least 24 hours to marinate , so plan ahead.
You could prep it one day for sushi night the next just imagine that zing on your sushi rolls!
Staying organized is also super important. keep everything in one spot and clean as you go. this will save you from a total disaster.
And oh, let’s not skip safety! when you're slicing that ginger, be careful. use a sharp knife and maybe even a mandoline for those paper thin slices .
No one wants a finger in their pickles!
Step-by-step Process
Ready for the step-by-step? Grab your notepad!
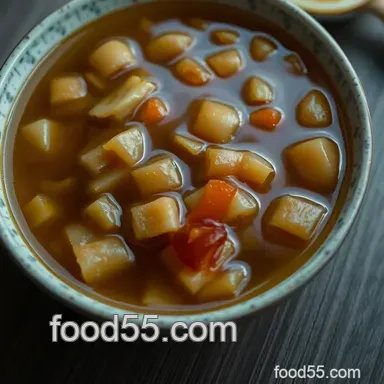
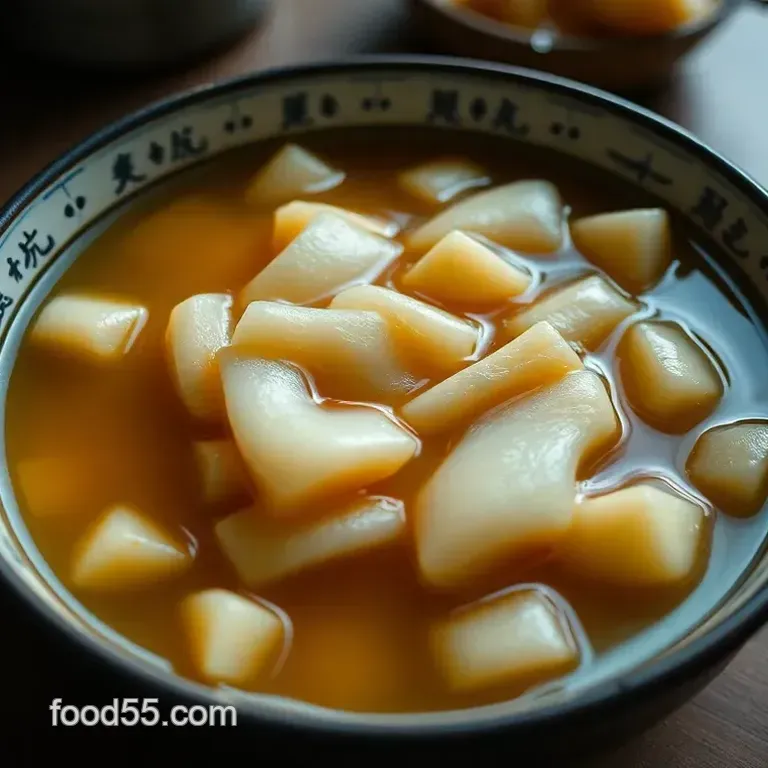
Prepare Your Ginger : Peel your young ginger, then slice it as thin as you can aim for that paper thin texture.
Make the Brine : In a mixing bowl, combine 1 cup rice vinegar , ½ cup sugar , and 2 tablespoons salt . Whisk until everything's dissolved.
Combine Everything : Place the ginger slices in a clean jar and pour that brine over it. Ensure it's submerged; nobody likes dry pickles.
Marinate : Seal the jar and pop it in the fridge. The longer it sits, the better it tastes. At least 24 hours is key!
Serve and Enjoy : Bring out that beautiful pink ginger when you’re ready to serve it. It’s a perfect tangy condiment for sushi or as a side with other dishes.
Expert Techniques
Let’s take it up a notch with some expert techniques . the critical step here is making sure your pickling brine is balanced.
If you prefer it sweeter, adjust that sugar! and don’t shy away from adding a splash of flavors like citrus zest for an aromatic twist.
Temperature control points? well, since you’re working with a cold brine, that’s easy! just keep it chill in the fridge.
Timing is extremely precise: give it that full 24 hours for peak flavor. look for visual cues too once the ginger’s a vibrant pink, you know it’s working its magic.
Success Strategies
Now, what if things go south? here are some success strategies. avoid common mistakes like slicing your ginger too thick seriously, nobody wants a tough pickle! keep an eye on that sugar salt balance too.
Quality assurance? Taste your brine before committing. If it’s not singing to you, don’t hesitate to tweak it. Use your gut!
And let’s not forget make-ahead options. Beni shoga can last for weeks in the fridge! Perfect for those last minute sushi cravings or just wanting something zesty in your meals.
Wrapping It Up
So, to sum it all up, making homemade beni shoga is simple and oh-so-rewarding. your family will rave about it.
Plus, it’s a cool way to incorporate those rice vinegar benefits and the nutritional benefits of ginger into your meals.
Stay tuned for the next section: additional information where we’ll chat more about the versatility of pickled ginger and other fabulous uses in japanese cuisine.
Trust me, your taste buds will thank you!
Pro Tips & Secrets for Making Beni Shoga
Oh my gosh , making beni shoga is such a breeze, and i've got a few personal tips to make your pickling journey even smoother.
First off, always use fresh young ginger . trust me, the flavor and texture are night and day compared to older, tougher ginger.
You want that zingy bite!
One time, i made the mistake of using some older ginger that had been lurking in the back of my fridge.
Not my best moment. it was chewy and not the tangy brightness i was aiming for. stick to young ginger for that delightful crunch.
When you're making your pickling brine , don’t be afraid to tweak those sugar and salt levels. start with half a cup of sugar and then taste it.
If you want it a bit sweeter (who doesn’t love a sweet tangent?), add a smidge more! this is your creation, after all!
Lastly, don’t skip the marination time . i know we live in a world of instant everything, but waiting 24 hours for that flavor to develop is totally worth it.
You'll thank me later!
Perfect Presentation of Your Beni Shoga
Now, let’s talk presentation . you know those instagram worthy posts we all drool over? your beni shoga can totally be one of those moments! once it’s pickled, consider using a lovely glass jar to showcase that bright pink hue.
For a pop of color, pair it with a vibrant sushi platter or as a side on your rice bowls.
You can even sprinkle some sesame seeds on top of your dish to make it look fancy as hell.
And don’t forget your garnish game! a fresh slice of lemon or a sprig of mint can turn your plate into something you’d see at a high end restaurant.
Really, it’s all about those color combinations that make the food jump off the plate.
Storage & make-ahead Tips
Wondering how to keep your homemade beni shoga fresh? storage is key ! once your ginger is marinated, pop it in a clean glass jar with a tight seal and keep it in the fridge.
It should last for about a month, but honestly, it disappears way faster than that in my house!
If you've made a big batch (and who can blame you?), just remember to label it. you could even use some cute washi tape.
It'll keep your kitchen aesthetic , and you'll know exactly when you made it.
When it comes to reheating , there's no cooking involved here since it's a condiment. Just serve it cold straight from the fridge, and it’ll be just as good as the day you made it!
Creative Variations on Beni Shoga
Feeling adventurous? let’s dive into some creative variations ! first, add some citrus zest. i love the brightness of lemon or even yuzu.
It’s like giving your ginger a fun boarding pass to flavor town.
Also, mix it up! Throw in some thinly sliced daikon or other root veggies into your vinegar mix. Kaleidoscope of colors and flavors, people!
For a health conscious twist, you can swap the sugar for honey or agave syrup. The benefits of cooking with ginger are already amazing, and a bit of natural sweetness never hurt anyone.
Complete Nutrition Guide
Now, about the nutrition this beni shoga packs some punch! it’s low in calories (only about 45 per serving!), which makes it a guilt free condiment.
Plus, ginger has some awesome health benefits : it’s great for digestion and can help reduce inflammation. who wouldn’t want that?
When enjoying your pickled ginger, think about the portions. a little goes a long way, so i recommend sticking to a couple of tablespoons per meal, especially if you're pairing it with sushi or rice bowls.
Expert FAQ Solutions
Still got questions about your brand new skill in making beni shoga ? Here’s a quick FAQ to help you out.
- What if my ginger is tough? Save it for cooking use young ginger instead.
- How can I tell if it’s gone bad? If it smells funky or has developed mold, toss it. Always better to be safe!
- Can I make this ahead of time? Absolutely! It gets better over time, so don’t hesitate to make it in advance for a gathering.
Wrapping It Up
There you have it, my friends! beni shoga isn't just a condiment; it's a colorful companion that can jazz up your meals and bring a taste of japanese cuisine to your kitchen.
So grab that young ginger, whip up a batch, and let the vibrant flavors brighten your day.
Don’t forget to share your experiences and variations with friends. Cooking is all about fun, flavor, and, of course, a little adventure. Enjoy your culinary journey!
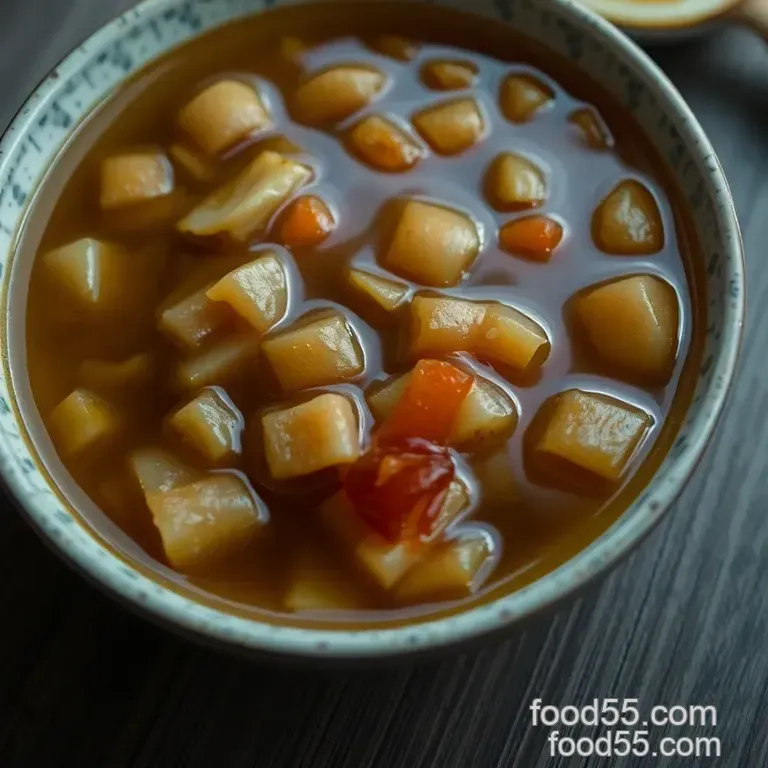
Beni Shoga Vibrant Japanese Pickled Ginger