Cinnamon Rolls: the Ultimate Tender Gooey Danish-Style Sweet Rolls
- The Ultimate Tender & Gooey Cinnamon Rolls Recipe
- The Science of Gooey: Why Our Cinnamon Rolls Melt in Your Mouth
- Gather Your Supplies: Essential Components for Dough, Filling, and Glaze
- Baking Timeline: Creating Your Ultimate Cinnamon Rolls (A Guided Process)
- Troubleshooting Your Bake: Expert Techniques and Pitfalls to Avoid
- Practical Guide: Making Cinnamon Rolls Ahead and Storing Leftovers
- Perfect Pairings for Warm Cinnamon Rolls
- Recipe FAQs
- 📝 Recipe Card
The Ultimate Tender & Gooey Cinnamon Rolls Recipe
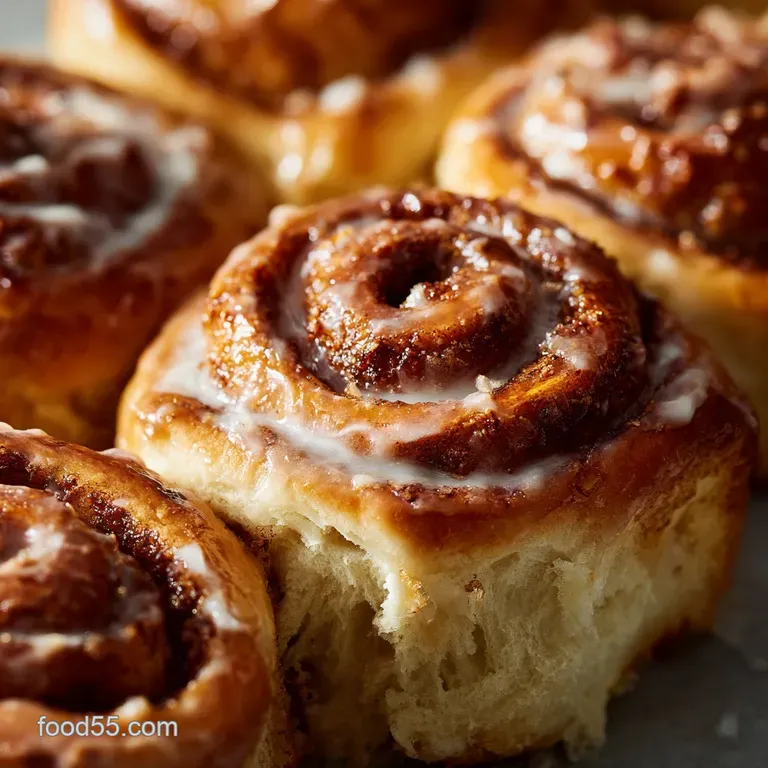
The moment you pull these beauties from the oven, your kitchen transforms into the world’s best bakery. Seriously, the aroma of warm yeast, brown sugar, and rich spice is completely intoxicating.
When they come out, they are sticky, tender, and ridiculously gooey, absolutely nothing like those dry, pale apologies you find packaged at the grocery store. That soft, slightly pull-apart texture is exactly what we are achieving here.
Okay, yes, tackling a yeasted dough sounds like a big Saturday project, but honestly, most of the preparation time is passive waiting. This is affordable comfort food that makes your entire house smell exactly like a hug, and it’s surprisingly straightforward once you know the core tricks.
It’s definitely a showstopper dish that feels luxurious without requiring professional skill.
I've learned all the secrets the hard way (hello, flat, dense rolls of yesteryear!), so forget the guesswork and the wasted flour. Let's dive into the truly foolproof method that delivers these perfect, bakery quality Cinnamon Rolls every single time you bake them.
Trust me, your friends will be begging for this recipe.
The Science of Gooey: Why Our Cinnamon Rolls Melt in Your Mouth
Beyond the Bakery: What Makes These Rolls Special?
The secret to a roll that truly melts is the enriched dough . We are loading this dough up with fat (butter, eggs, milk) right from the start, making it softer and discouraging aggressive gluten formation.
This high fat content ensures the rolls remain tender even after they cool, unlike leaner doughs, which turn tough quickly.
The Magic of Enriched Dough (High Butter Fat Content)
We use a large quantity of butter in this recipe, both in the dough and the filling, and that is non-negotiable for max gooeyness. Using melted butter in the dough keeps the structure light; meanwhile, using softened, spreadable butter in the filling is the absolute key.
It holds the cinnamon sugar mix firmly in place during the roll and slice phase. When it hits the hot oven, that butter melts down and caramelizes the brown sugar, creating that unbelievably sticky layer at the bottom of the pan.
This technique is similar to how we achieve tender results when making [Homemade Dinner Rolls The Ultimate Fluffy Buttery Recipe], proving that fat really is flavor's best friend.
Achieving the Perfect Swirl-to-Filling Ratio
The ratio is everything for the ultimate experience. We roll the dough out aggressively thin (about 12x18 inches), which allows for many perfect, tight swirls without creating a roll that is too huge to handle.
Rolling it tightly and using the dental floss trick ensures that filling is layered perfectly and doesn't squeeze out during the critical second rise.
Mastering the Second Rise (The Secret to Lightness)
Many recipes rush the second rise, but don't do it! The second proof is where the magic happens, allowing the rolls to relax and bulk up before they hit the heat. This prevents that sad, dense crumb texture. You want them to look visibly puffy and almost touching each other when they go into the oven.
Chef’s Note: Never slice the rolls with a dull knife. A knife squishes the dough layers together, which leads to tough rolls and a messy filling explosion. Use unflavored dental floss or a very sharp, thin knife.
Time Commitment and Preparation Overview
This recipe is structured for success, but it does require commitment to the clock, mostly for the two proofing periods. The actual hands-on time is less than an hour, which is completely manageable.
I often do the kneading during a quick show, or while making coffee, then let the yeast do the heavy lifting while I get back to life.
Essential Equipment for Perfect Baking
You absolutely need a kitchen thermometer to check your milk temperature; this is a non-negotiable warning because yeast is temperamental. A stand mixer with a dough hook is a serious lifesaver here, preventing an intense arm workout, though you can definitely knead by hand if you have patience.
Make sure your 9x13 pan is nicely greased!
Gather Your Supplies: Essential Components for Dough, Filling, and Glaze
Detailed Shopping List for the Enriched Dough
Getting your measurements correct is crucial for rich, tender rolls. Always measure your flour by weight if possible, or use the "spoon and level" method to avoid overly dense dough.
| Ingredient | Role | Expert Substitution |
|---|---|---|
| Whole Milk | Hydration, Richness | Use non-dairy milk (oat or cashew) |
| Active Dry Yeast | Leavening | Use Instant Yeast (just mix with dry ingredients) |
| Large Eggs | Structure, Color | Replace with commercial egg replacer/flax egg for vegan |
| Unsalted Butter | Tenderness, Flavor | high-quality, plant based vegan butter sticks |
| All-Purpose Flour | Structure | Bread flour (results in chewier roll) |
The Secret to a Sticky, Caramelized Filling
The richness comes from the brown sugar and spice blend. Make sure your cinnamon is fresh; if it’s been sitting in the back of the cabinet for a year, the rolls will taste dull. We need that vibrant, nutty aroma! We use a ton of cinnamon here because we aren't shy about flavor.
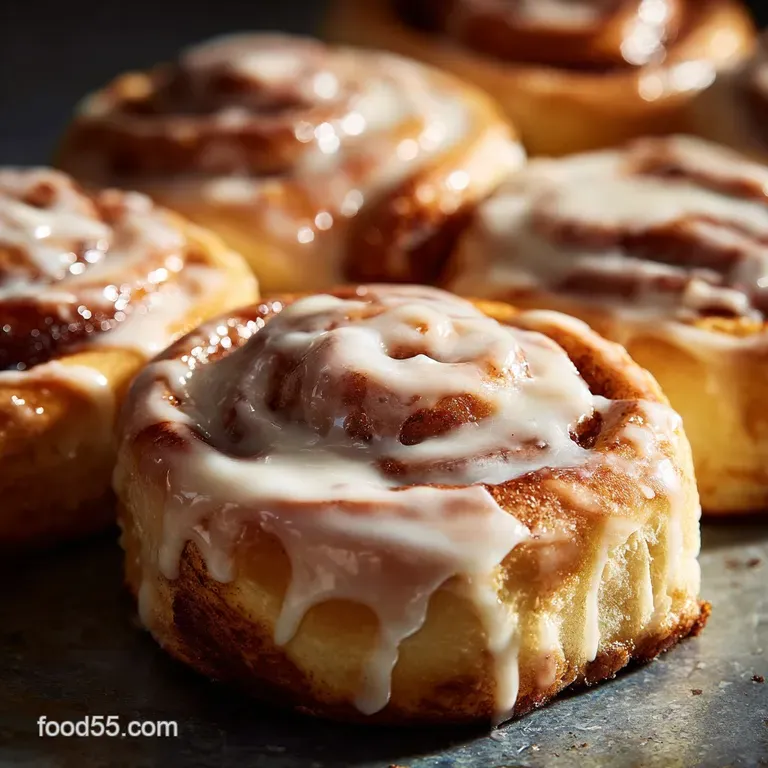
How to Make the Tangy Cream Cheese Glaze
Cream cheese glaze is what separates the decent rolls from the spectacular ones. That tiny bit of tang cuts through the intense sweetness of the filling perfectly. Make sure both your cream cheese and butter are fully softened before mixing them together, otherwise you’ll end up with lumps that ruin the smooth texture.
Expert Substitutions for Dairy and Yeast
If you need a dairy-free approach, substitute the whole milk with full fat oat milk. It adds a lovely richness that cow’s milk offers. If you don't have cream cheese for the glaze, you can just make a standard glaze (powdered sugar and milk), but you will lose that signature tangy note.
Baking Timeline: Creating Your Ultimate Cinnamon Rolls (A Guided Process)
Phase 1: Activating the Yeast and Preparing the Dough
First things first, check your milk temperature; it needs to be warm enough to wake up the yeast but not hot enough to kill it (105-115°F is the sweet spot). Once the yeast is foamy (it should look like a little cloudy patch on top), you know you are good to go.
Then, mix in your wet ingredients and slowly incorporate the flour and salt. Knead the dough until it looks smooth and elastic, which should take about 8 to 10 minutes in a stand mixer.
If your dough is still sticking aggressively to the sides after 8 minutes, add one tablespoon of flour at a time until it cleans the bowl.
Phase 2: Rolling, Filling, and Slicing Techniques
Once the dough has doubled, punch it down gently; you aren’t angry at it, just releasing the gases. Roll it into a large, thin rectangle (12x18 inches is my target). Spread your glorious cinnamon sugar filling evenly across the entire surface, right up to the edges.
Starting from the long edge closest to you, roll that dough up as TIGHTLY as you possibly can. Use the dental floss trick to cut 12 uniform, beautiful rolls.
Phase 3: The Critical Proofing Stage
Place the rolls in the prepared dish, cover them, and find a warm spot for their second rest. This takes about 45 minutes to an hour. Warning: If your kitchen is cold, they will take longer; try the "oven pilot light" trick mentioned in the tips section to speed things up gently.
They need to look visibly puffy and almost touching before they bake.
Phase 4: Baking Temperatures and Visual Cues
Preheat the oven to 375°F (190°C). Baking takes 25– 30 minutes, but you must keep an eye on them. The rolls are done when they are golden brown on top, but the internal center registers about 200°F (93°C).
If they start browning too quickly, loosely tent the pan with foil for the remaining time.
Troubleshooting Your Bake: Expert Techniques and Pitfalls to Avoid
Why Your Dough Isn't Rising (Yeast Check)
If your dough sits there like a lump, the yeast either died from being too hot, or it wasn't activated because the milk was too cold. Always check the temperature. If your yeast never foamed up initially, you need to ditch that batch and start the liquid phase over with fresh yeast.
Preventing Dry Rolls: The Importance of Internal Temperature
Dry rolls are caused by overbaking, period. Do not wait for the rolls to become deep mahogany brown. They should be golden on top and gooey in the center. I used to make this mistake all the time!
I thought 'golden brown' meant dark brown, but no; we are pulling them slightly under done to ensure maximum tenderness.
Achieving the Smoothest Glaze Consistency
Lumpy glaze is the worst. Ensure the cream cheese and butter are thoroughly beaten and smooth before adding the sifted powdered sugar. Sifting is non-negotiable to remove clumps. Adjust the liquid (heavy cream or milk) one teaspoon at a time until it's thick enough to hold its shape but still pourable.
Practical Guide: Making Cinnamon Rolls Ahead and Storing Leftovers
Freezing Rolls Before or After Baking?
You can successfully freeze rolls both before and after baking. The best method for planning ahead is freezing them after the second proof: Slice the rolls, place them in the baking dish, cover tightly with plastic wrap, and freeze.
When you want to bake them, pull them out, let them thaw and complete their final rise for about 3– 4 hours at room temperature, then bake as usual.
Best Practices for Overnight Preparation
If you want warm rolls first thing in the morning, prepare the dough, roll, slice, and place them in the baking dish. Instead of doing the second rise, cover them tightly and put them in the fridge overnight (up to 12– 14 hours).
In the morning, pull the dish out and let the rolls sit at room temperature for 90 minutes to warm up and proof before baking.
Reheating Baked Rolls Without Drying Them Out
Leftover baked rolls can be tightly wrapped and stored at room temperature for up to two days, or in the fridge for four days. To reheat them, the microwave is often too harsh. Instead, wrap individual rolls loosely in foil and reheat in a preheated 300°F (150°C) oven for about 10– 15 minutes until warm and soft again.
Perfect Pairings for Warm Cinnamon Rolls
Time Commitment and Preparation Overview
Cinnamon rolls are heavy and rich, so you want beverage and food pairings that provide a strong contrast or a bright cut. Strong black coffee is the classic pairing, hands down. The bitterness balances the sugar perfectly.
Essential Equipment for Perfect Baking
If you are serving these for brunch, try pairing the sweetness with something sharp and savory, like a simple plate of fresh berries or a bright yogurt parfait. For the truly cinnamon obsessed, you could double down on the flavor profile with a decadent dessert like my [Cinnamon Roll Cheesecake The Ultimate Creamy Swirl Recipe].
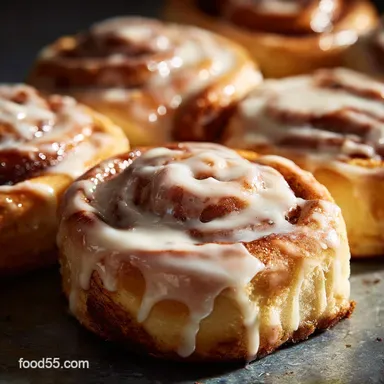
Either way, serve them piping hot with a big slather of that tangy glaze!

Recipe FAQs
Why are my finished cinnamon rolls dry and tough, rather than soft and tender?
The primary culprits are usually overmixing the dough or overbaking. For enriched doughs, knead only until just smooth; excessive kneading activates too much gluten, resulting in a tough texture.
Additionally, use an internal thermometer bake only until the center reads 200 205°F (93 96°C) to ensure they remain moist.
Can I assemble these rolls the night before and bake them fresh in the morning? (Overnight Proofing)
Yes, overnight proofing is the recommended method for ultimate flavor development and convenience. After cutting the rolls, place them snugly in the buttered pan, cover tightly, and refrigerate immediately for 8 12 hours.
In the morning, let them rest at room temperature for 1 to 1.5 hours before baking to reactivate the yeast.
Is there a reliable way to get perfectly themed or decorative rolls (e.g., a "Hello Kitty" design)?
The easiest way to theme the rolls is through the glaze and toppings. For a specific color, add a drop of natural food coloring or fruit puree (like raspberry) to the cream cheese glaze.
Once baked and cooled, you can use edible markers or small cutouts of fondant placed on the glaze for intricate details before serving.
My cream cheese glaze is either too runny or full of lumps. How do I achieve the perfect consistency?
Ensure your cream cheese and butter are fully softened to room temperature before mixing, as cold ingredients will guarantee lumps. If the glaze is too stiff, add milk or cream half a teaspoon at a time until spreadable. If it's too runny, incorporate sifted powdered sugar one tablespoon at a time until thickened.
Why did my cinnamon rolls unroll or expand unevenly while baking?
Unrolling is usually caused by failing to properly pinch the final seam of the dough log before slicing. To ensure neat edges and even expansion, use unscented dental floss instead of a knife to cut the rolls, pulling it tight under the log to create clean slices without squishing the dough layers.
Can I make this dough vegan or dairy-free?
Absolutely; enriched doughs are highly adaptable to dairy substitutions. Substitute regular butter with a high-quality vegan butter stick, and swap the milk for plant based alternatives like oat or soy milk. For the glaze, use vegan cream cheese combined with vegan butter and powdered sugar.
Ultimate Gooey Cinnamon Rolls Recipe
Ingredients:
Instructions:
Nutrition Facts:
| Calories | 220 kcal |
|---|---|
| Protein | 4.0 g |
| Fat | 7.0 g |
| Carbs | 36.0 g |
