The Nofuss Fiesta Ultimate Layered 7Layer Taco Dip
Why This Layered Masterpiece Redefines Party Appetizers
There are party snacks, and then there is the quintessential Layered Taco Dip . It’s more than just a platter of ingredients; it’s an edible centerpiece, a geological marvel of flavour, and the undisputed champion of Appetizer Dips .
When guests spot this vibrant creation spread across the table, you know the party has officially started. This Taco Dip Recipe we are exploring today moves beyond the standard, often disappointing flat dip scenarios.
We are aiming for height, textural contrast, and a flavour payoff in every single scoop. This isn't just about assembly; it's about engineering the perfect bite, ensuring that creamy base, seasoned meat, and crisp toppings coalesce into pure Tex-Mex magic.
Forget the pressure of elaborate main courses; a truly show stopping Party Dip like this one guarantees smiles and immediate gratification for everyone gathered.
The Anatomy of the Perfect Crowd Pleasing Taco Dip
Creating a legendary Taco Dip involves understanding how the different elements interact, both in flavour and structure. Our blueprint involves seven distinct layers, each playing a specific, crucial role in the overall experience.
If you skip a step or rush the process, the final result suffers. Precision in preparation ensures that what you serve isn't just good, but truly memorable.
Setting the Stage: The Ultimate Game Day Centerpiece
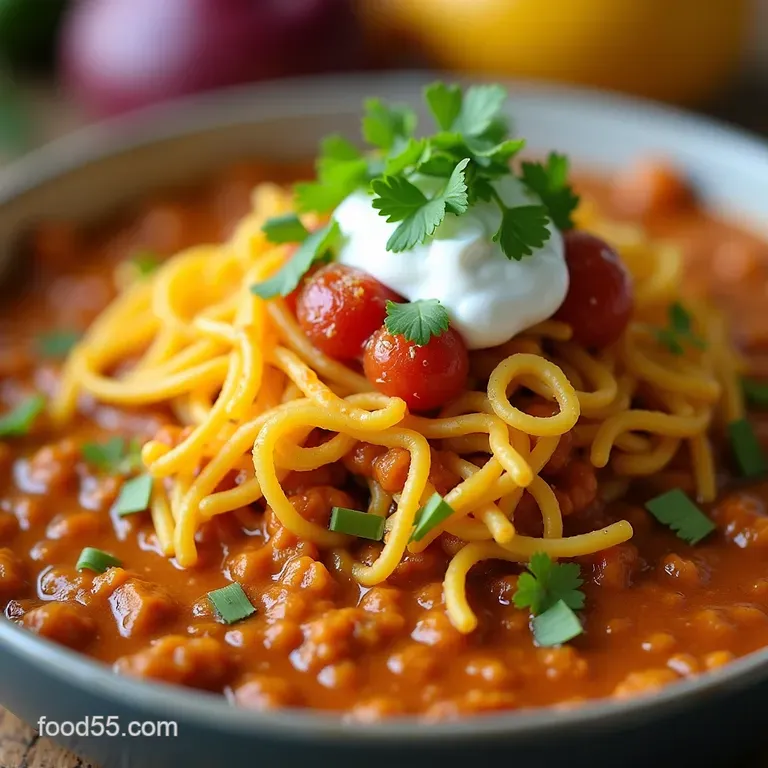
When planning your spread, remember that presentation matters immensely. We are utilizing a standard 9x13 inch dish to provide ample surface area for maximum dipping efficiency. The visual impact of the vibrant colours the pale green of the avocado layer contrasting with the deep red of the tomatoes and the bright white of the sour cream base is what initially draws people in.
This robust structure ensures it holds up beautifully throughout the event, easily serving 10 to 12 happy guests.
Crafting Texture: The Secret to Non-Soggy Layers
The primary enemy of a perfect Layered Taco Dip is moisture migration, leading to a soupy or soggy result. Every ingredient, from the drained refried beans to the patted dry tomatoes, must be handled with moisture management in mind.
On top of that,, the order of operations is dictated by texture. We build from the densest, least perishable layers at the bottom, reserving the freshest, most delicate components like lettuce and guacamole for the very top, ensuring crunch remains paramount until the last chip is dipped.
From Zero to Hero: Quick Setup for Maximum Flavor Impact
Despite its impressive appearance, this Easy Taco Dip is fundamentally simple. Active preparation time clocks in around 25 minutes, with only about 10 minutes spent actively cooking the meat.
This means you can transition from kitchen prep to hosting mode remarkably fast. The beauty lies in the flavour synergy achieved by seasoning components individually before bringing them together, turning simple dairy and canned goods into something spectacular.
Related Recipes Worth Trying
- Easy Cauliflower Fritters Recipe with Zesty Herb Dip — Tired of soggy vegetables These easy Cauliflower Fritters are panfried until golden and packed with Parmesan Perfect for a quick lunch or side dish
- Easy Red White and Blue Fruit Skewers with Tangy Dip — Whip up these vibrant Red White and Blue Fruit Skewers in 20 minutes Paired with a dreamy Cheesecake Yogurt Dip theyre the perfect no bake desserts for any...
- Crock Pot Chicken Taco Chili Tender Shreds Zero Fuss — Make this Slow Cooker Chicken Taco Chiliits the ultimate weeknight comfort that tastes like a proper taco night Perfect for a hearty handsoff meal
Essential Components for Your Seven Layer Creation

To build this masterpiece, we rely on high-quality staples transformed by strategic seasoning. We are assembling seven distinct layers that build upon each other harmoniously, ensuring complexity without complication.
We need a robust, flavourful base, a hearty middle section featuring Taco Dip with Ground Beef (though vegetarian swaps are noted later), and a cool, crisp finish.
The Creamy Foundation: Dairy and Spreads Checklist
The initial layer sets the tone for richness and tang. Start with an 8-ounce block of full fat cream cheese, softened completely to avoid lumps, combined with one cup of full fat sour cream. To this decadent mix, introduce one tablespoon of zesty lime juice for brightness and one full packet of taco seasoning.
Whisking this until it’s perfectly smooth is non-negotiable; this velvety spread acts as the adhesive for the entire structure.
Building Blocks: Seasoning Mix and Ground Meat Requirements
The core savoury element requires one pound of lean ground beef (or turkey). It’s crucial to brown this thoroughly and, perhaps even more critically, drain every trace of excess fat after cooking.
Once drained, incorporate a second packet of taco seasoning according to the package directions, simmering until the mixture is perfectly seasoned and slightly reduced. This ensures a flavourful, non-greasy meat layer that complements the Taco Dip with Cream Cheese base beneath it.
Vibrant Finish: The Crucial Toppings Selection
The upper stratum introduces colour and freshness. This involves one cup of well drained diced tomatoes, a half cup of sliced black olives (rinsed to remove excess salt), and a half cup of sliced green onions.
Above these, we place a generous three cups of finely shredded lettuce Iceberg or Romaine work best for that classic, satisfying crunch. Finally, the crowning glory: one cup of fresh guacamole or diced avocado, added last to maintain its vibrant green hue.
Tool Kit Check: What You Need to Assemble This Dip
While this is not a complicated culinary endeavor, organization speeds things up. You’ll need a large 9x13 inch serving dish to properly accommodate the volume. A sturdy skillet for browning the meat and a couple of large mixing bowls are essential.
An offset spatula is surprisingly helpful for spreading the layers smoothly without dragging up the layers beneath, ensuring those clean visual separations that make this Layered Taco Dip so appealing.
The step-by-step Assembly Guide for Flawless Execution
The magic of this dip lies in the controlled layering process. Rushing this stage can ruin the structural integrity, so take your time to ensure each component is spread evenly and purposefully.
Preparing the Core Elements Before Layering Begins
Before you start stacking, your components must be ready to deploy. This means having your cream cheese base whipped smooth, your beans warmed, and your meat cooked and seasoned. Remember, we are aiming for components that are ready to spread, not simmer, upon contact with the dish.
Cooking Down the 'Taco' Element Perfectly
When preparing the one pound of ground beef, cook it until no pink remains. After draining the fat, stir in the seasoning and a small amount of water, allowing it to bubble gently until the sauce thickens slightly. This process concentrates the spice and ensures the meat isn't watery when it meets the beans.
Let this cool for just a few minutes so it doesn't immediately melt the creamy layer underneath.
Mixing the Dream Base: Achieving Peak Creaminess
In a separate bowl, thoroughly combine the softened cream cheese, sour cream, taco seasoning, and fresh lime juice. Use a whisk or hand mixer if necessary to eliminate every lump. This first layer must be flawlessly smooth, acting as a moisture barrier and the flavour bedrock for the entire Taco Dip .
The Art of Stacking: Layering Sequence Dictates Success
Once the base is spread, gently warm the refried beans (about 16 oz can) with a half teaspoon of cumin and carefully spread them as the second layer. Follow this immediately with the slightly cooled, seasoned ground beef. Over the meat, generously sprinkle the two cups of shredded cheese blend.
Only then do you scatter your tomatoes, olives, and green onions over the cheese.
Chilling Protocol: Allowing Flavors to Mingle and Meld
This is perhaps the most frequently skipped, yet most vital, step for a truly professional Taco Dip Recipe . Cover the dish tightly and refrigerate for a minimum of 30 minutes, though an hour is better.
This mandatory chilling time allows the layers to set firmly, preventing the dip from collapsing into a messy puddle upon the first scoop.
Maximizing Enjoyment: Tips, Tricks, and Variations
Once assembled and chilled, your Layered Taco Dip is ready for its debut, but a few final pointers can elevate the serving experience even further.
Spice Level Adjustments: Personalizing Your Taco Dip Heat
If you enjoy more fire, don't just rely on store-bought seasoning. Introduce finely diced jalapeños (seeds removed for mild heat, kept in for intensity) directly into the cream cheese base, or perhaps mix a dash of chipotle powder into the refried beans.
For a truly fiery experience, you can finely mince a serrano pepper and scatter it over the meat layer.
Dip Delivery System: What Scoops Best?
While sturdy, salty tortilla chips are the traditional partner, consider offering variety. Sturdy baked pita chips stand up well to the density of this dip. For a low-carb alternative, crunchy romaine lettuce cups or sturdy bell pepper slices make excellent delivery vehicles for getting a full scoop of every layer.
Extending Shelf Life: Storing Leftovers Safely
If you are fortunate enough to have leftovers of this incredible Party Dip , cover the dish tightly and keep it refrigerated. It maintains excellent quality for up to three days.
Remember to always keep the delicate lettuce and avocado layers separate or add them fresh when reheating smaller portions, as they degrade fastest.
Creative Twists: Beyond the Traditional Seven Layers
While our seven layer approach is classic, you can always expand. Consider adding a smoky, slightly sweet layer using canned corn kernels mixed with a touch of smoked paprika between the bean and meat layers.
Alternatively, for a richer, tangier finish, some chefs swap the sour cream for Mexican crema or even a layer of softened, whipped queso fresco just under the final lettuce. This versatility ensures your next batch of Taco Dip with Ground Beef can always feel fresh and exciting.

Recipe FAQs
How do I stop my Taco Dip from getting watery, especially the layers with tomatoes?
That’s the bane of a good dip, isn't it? The key is thorough draining. If using canned ingredients like tomatoes or olives, let them sit in a sieve for ages. For the meat, ensure you drain off every last drop of grease after browning.
A well drained dip will hold its beautiful structure, much like a properly laid brick wall!
Can I make this amazing Taco Dip ahead of time, or should I assemble it right before the guests arrive?
You absolutely can make most of it ahead of time, which is a lifesaver when hosting! Assemble all the layers except the fresh ones that means skipping the lettuce and guacamole. Chill it for up to 24 hours to let those flavours mingle, then add the delicate fresh toppings about 30 minutes before serving.
Don't add the lettuce too early, or it'll go a bit limp.
My cream cheese base always turns out lumpy; any tips to get it smooth as silk?
Ah, the classic lump struggle! Make sure your cream cheese is truly softened leave it out on the counter for a good hour before you start, or microwave it for about 15 seconds.
Beat the cream cheese and sour cream together first using an electric mixer (or a very vigorous whisk) until it’s completely homogenous before folding in your seasoning.
What are the best alternatives if I want to skip the ground beef layer for a vegetarian version?
No worries, we can easily make this meat free! A fantastic substitution is to create a hearty black bean layer. Simply mash one can of drained black beans with some sautéed onions, peppers, and extra taco seasoning, perhaps adding a touch of smoked paprika for depth.
It provides great texture and keeps the Tex-Mex vibe going strong.
How long will leftover Taco Dip last in the fridge, and does it freeze well?
Leftovers are usually good for 3 to 4 days in the fridge, provided they are stored tightly covered. However, this dip doesn't freeze particularly well. The dairy layers (cream cheese/sour cream) tend to separate and turn watery or grainy once thawed, which ruins that gorgeous texture we worked so hard to achieve.
Ultimate Layered Taco Dip
Ingredients:
Instructions:
Nutrition Facts:
| Calories | 805 kcal |
|---|---|
| Protein | 9.6 g |
| Fat | 17.5 g |
| Carbs | 33.4 g |
| Fiber | 6.4 g |
| Sodium | 1802 mg |
