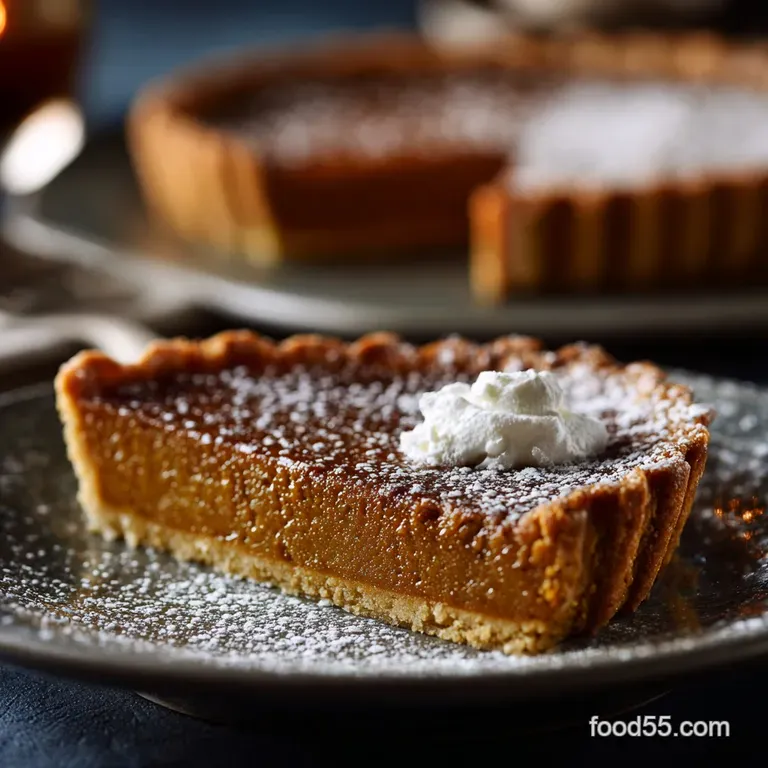
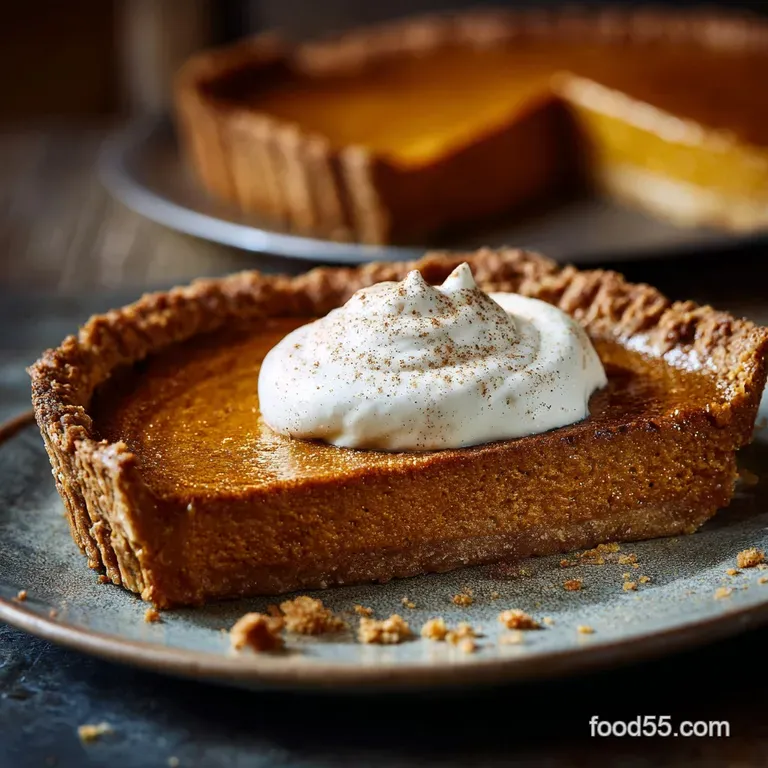
Pumpkin Pie: the Ultimate Silky Deeply Spiced Autumn Treat
- The Ultimate Silky & Deeply Spiced Pumpkin Pie: Overview
- Mastering the Custard: Why This Pumpkin Pie Recipe Works
- Essential Ingredients for the Perfect Pumpkin Pie
- Prepping the All and Butter Flaky Pie Crust (Or Using Store and Bought)
- Step and by-Step: Baking the Ultimate Deeply Spiced Pumpkin Pie
- Troubleshooting and Expert Tips from Our Test Kitchen
- Storing and Freezing Your Pumpkin Pie
- Presentation and Serving Suggestions
- Recipe FAQs
- 📝 Recipe Card
The Ultimate Silky & Deeply Spiced Pumpkin Pie: Overview
You know that moment when the oven door opens and that perfect cloud of autumn spice hits you? That’s what we’re chasing here. That intoxicating aroma of cinnamon, nutmeg, and ginger that just screams "put on a sweater and grab a blanket." But smell isn't enough; we need texture.
We are aiming for a filling that is impossibly silky, firm enough to hold its shape, but melts the second it hits your tongue.
Look, I’ve made those watery, bland pumpkin pies the ones where the filling is suspiciously pale and the crust is soggy. We’re leaving those tragedies behind. This Homemade Pumpkin Pie recipe is my rock, my secret weapon for every major holiday, and it uses canned pumpkin puree, which makes the filling prep ridiculously fast.
Seriously, you can whisk this filling up in about ten minutes flat.
This isn’t just a recipe; it’s a blueprint for the best damn pie you will ever make. It relies on a few sneaky pro and tricks and a heavy hand with the spice jar, ensuring every bite is robust, satisfying, and utterly unforgettable. Ready to conquer your Thanksgiving dessert table? Let’s crack on.
Mastering the Custard: Why This Pumpkin Pie Recipe Works
The goal of the Ultimate Pumpkin Pie Recipe isn't just to put pumpkin in a crust. The goal is perfection. Most folks who struggle with this dessert are missing one of these crucial foundational elements.
Why Most Pumpkin Pies Fall Flat (Watery Filling & Bland Flavor)
The number one culprit for a watery filling is often using the wrong type of milk (like standard whole milk) and failing to properly blind and bake the crust. Whole milk is too thin and contains too much water, leading to a loose, almost soupy texture when combined with pumpkin. Our solution?
We ditch the whole milk for evaporated milk , which is concentrated, creamy, and locks that moisture in tight.
Defining the Perfect Pumpkin Pie Texture: Silky Smooth
The secret to achieving that luscious, non and grainy, Silky Pumpkin Pie texture is the combination of evaporated milk and room and temperature eggs. Evaporated milk provides density and rich dairy flavor without adding excess liquid.
Since it has less water than heavy cream, it ensures the custard sets up firm but still smooth. Oh, and never, ever beat your eggs into a frenzy. Just lightly whisk them until combined; over and beating incorporates too much air, which can cause cracking.
The Secret to Robust Autumn Spice Flavor
Standard recipes skimp on spice. Not here. We double the cinnamon and include a tiny pinch of freshly ground black pepper . I know, I know. It sounds nuts! But that black pepper doesn't make it taste spicy; it amplifies all the other warm spices (ginger, nutmeg, clove) and gives the pie a depth and complexity that will make people ask, "What is that amazing flavor?"
The Importance of Blind and Baking for a Flaky Crust
If you want the Ultimate Fix for a Soggy Bottom Crust, you must blind and bake. Baking the crust first sets the gluten structure and partially evaporates the excess moisture in the pastry. If you skip this, the wet pumpkin pie filling will turn the base of your crust into gummy sadness.
We bake it fully weighted, then remove the weights and let it dry out a bit further.
The Perfect Custard Ratio (Preventing Cracks and Graininess)
Custard is delicate, and the slightest imbalance of liquids to solids causes issues. Too many eggs, and the pie will be tough and crack. Too much liquid, and it won't set. Our ratio, heavy on the concentrated evaporated milk and carefully balanced with just two large eggs, ensures the custard cooks evenly, resulting in that textbook smooth interior.
Essential Ingredients for the Perfect Pumpkin Pie
The American Pumpkin Pie Filling relies on quality ingredients. Don't cheap out on your spices they are the stars here!
Ingredients Checklist:
- 100% Pure Pumpkin Purée (Canned): Make absolutely sure you are not grabbing pumpkin pie filling! That stuff is pre and spiced and sweetened, and it will ruin our meticulously balanced flavor profile.
- Dark Brown Sugar: This adds essential molasses notes and moisture compared to white sugar alone.
- Evaporated Milk: The MVP of the silky filling.
- The Spices: Cinnamon, ginger, nutmeg, cloves, and our secret weapon, black pepper.
Prepping the All and Butter Flaky Pie Crust (Or Using Store and Bought)
While you can totally use a store and bought crust (no judgment!), using a homemade all and butter crust takes this pie from great to legendary. If you’re making your own, the key rule is keep everything freezing cold. For a deep dive into my technique, you might want to check out my tutorial on the Apple Pie: Best Homemade Classic Recipe with Flaky All and Butter Crust , as the pastry method is identical!
Fresh vs. Canned Pumpkin Puree: Which is Better?
Honestly? Canned pumpkin is better for pie. Hear me out! Commercially canned pumpkin (like Libby's) is steam and cooked and strained to a consistent moisture level.
When you roast fresh pumpkin, the moisture content is wildly variable, meaning you could end up with a pie that’s either too wet or too dry, requiring huge adjustments. For reliability and superior texture, stick to canned 100% pure pumpkin purée.
Making Your Own Homemade Spice Blend
I rarely use pre and mixed pumpkin pie spice; I find it dusty and weak. By mixing individual spices, you can adjust the ratios. I love the warmth of ginger and the bite of cloves, so I up those a bit. If you want to use an all and in-one mix, substitute 3 teaspoons for all the individual spices listed. This mix is so good, I even use it for my Pumpkin Snickerdoodles Recipe UltraChewy Highly Spiced Autumn Cookies !
Substitutions for Dairy and Sweeteners
| Ingredient | Substitute | Notes |
|---|---|---|
| Pumpkin Purée | Sweet Potato or Butternut Squash Purée | Ensure they are cooked, mashed, and fully drained of excess moisture. |
| Evaporated Milk | Full and Fat Canned Coconut Milk | Gives a rich texture and a slight tropical note. Great for dairy and free. |
| Brown Sugar | Maple Syrup (use slightly less) | Replace up to half the sugar with high and quality maple syrup for deep flavor. |
| All and Purpose Flour | 1:1 Gluten and Free Blend | Make sure the blend is suitable for pastry (contains xanthan gum). |
Tools and Equipment Checklist
You don't need fancy tools, but having a standard 9 inch pie plate (metal is best for crisp crusts!) and pie weights (or dried beans) for blind baking is non and negotiable.
How to Prevent Crust Shrinkage During Baking
This is where people fail! The crust shrinks because the gluten relaxes in the heat.
Chef's Note: The secret is the "double and chill." After you make the dough disk, chill it for 2 hours. After you roll it out, fit it into the pie dish, flute the edges, and freeze it for another 15 minutes before baking. This shock of cold sets the butter and the fluting, so it locks into place during the bake.
Step and by-Step: Baking the Ultimate Deeply Spiced Pumpkin Pie
We are using a two and temperature baking method. Trust me on this it’s the key to a perfect filling that doesn’t crack.
Phase 1: Preparing and Pre and Baking the Pie Shell
- Prep the Crust: Follow the double and chill method described above. Preheat your oven to a blazing 400°F (200° C) .
- Blind Bake: Line the frozen pie crust with parchment paper, allowing an overhang. Fill completely with pie weights or dried beans. Bake for 15 minutes.
- Bake Naked: Carefully remove the weights and parchment. Poke the base a couple of times with a fork (venting). Return the crust to the oven for 5– 7 minutes until it looks dry and lightly golden. Reduce the oven temperature immediately to 350°F (175° C) .
Phase 2: Making the Silky Pumpkin Custard Filling
- Whisk Dry Spices: In a large bowl, whisk together the brown sugar, granulated sugar, salt, and all the spices (cinnamon, ginger, nutmeg, cloves, black pepper). This prevents those nasty spice clumps that occasionally show up in pie slices.
- Add Pumpkin and Eggs: Add the pumpkin purée and the lightly beaten, room and temperature eggs. Whisk gently until fully incorporated and smooth.
- Add Liquids: Slowly whisk in the evaporated milk and vanilla extract. Do not beat excessively. The mixture should be uniform and a beautiful dark orange color.
Phase 3: Filling, Baking, and Monitoring the Pie
- Fill and Bake (Initial Heat): Carefully pour the Silky Pumpkin Pie Filling into the warm, blind and baked crust. Place the pie in the oven. Bake at 350°F (175° C) for 15 minutes. This high initial heat helps firm up the edges.
- Reduce and Finish: Reduce the oven temperature to 325°F (160° C) . Continue baking for 40– 50 minutes. If the crust edges are browning too fast, loosely tent them with a foil ring.
- The Jiggle Test: Start checking around the 45 minute mark. The pie is done when the edges are set and slightly puffed, but the center 1 2 inches still has a slight, noticeable jiggle (like set Jell-O).
Phase 4: The Crucial Cooling and Setting Process
- Cool: Remove the pie from the oven. The internal temperature will continue to rise for a few minutes (carryover cooking), which is why we pull it out while it still jiggles. Let it cool on a wire rack at room temperature for 2– 3 hours until completely cool. Do not rush this step by placing it in the fridge immediately!
Troubleshooting and Expert Tips from Our Test Kitchen
We’ve all been there the pie looks perfect, then disaster strikes. Here are the most common points of failure.
How to Prevent Cracks in the Pumpkin Filling
Cracks happen for two reasons:
- Overbaking: You cooked it too long, causing the proteins (eggs) to seize up, tighten, and crack as they cool. Fix: Use the jiggle test. Pull it 5 minutes before you think it’s done.
- Sudden Temperature Change: Putting a hot pie directly into a cold fridge. Fix: Let the pie cool completely at room temperature for at least 2 hours before refrigerating.
The Ultimate Fix for a Soggy Bottom Crust
As mentioned, blind baking is mandatory! But if you're still worried, try one extra trick: brush the warm, blind and baked crust with a thin layer of egg white (whisked). Return it to the oven for 1 minute before filling. This creates a waterproof barrier against the filling.
Identifying When Your Pie is Perfectly Done
You should be able to gently tap the edge, and the pie should move as a single, set mass, with only the very center quivering slightly. If the whole pie sloshes, it needs more time. If nothing moves at all, you might be overcooked.
Storing and Freezing Your Pumpkin Pie
Pumpkin pie is a creamy custard, so proper handling is essential for food safety and flavor.
Refrigeration Lifespan (Uncut and Cut)
Once the pie has cooled completely, it must be refrigerated. Store it loosely covered (do not wrap tightly yet, as condensation will ruin the top) in the fridge. It will keep beautifully for 4 to 5 days. For longer storage, slice and store pieces in an airtight container once fully chilled.
Guide to Freezing Baked or Unbaked Pie
- Freezing Baked Pie: Allow the pie to cool completely. Wrap it tightly first in plastic wrap, then in a layer of aluminum foil, ensuring it’s airtight. Freeze for up to 1 month. Thaw overnight in the refrigerator.
- Reheating: Serve chilled, or if you prefer a warm slice, reheat individual slices in a 300°F (150°C) oven for about 10- 15 minutes.
Presentation and Serving Suggestions
The Best Toppings: Whipped Cream vs. Ice Cream
I will fight anyone who uses canned whipped cream on this pie. Homemade is the only way to go.
- Classic: Freshly whipped cream, lightly sweetened with vanilla and a dash of powdered sugar.
- The Upgrade: My absolute favorite is bourbon vanilla bean whipped cream. Add 1 teaspoon of bourbon to your standard whipped cream recipe for a smoky note.
- Alternative: Don't forget the textural contrast! A scoop of homemade vanilla ice cream or a sprinkle of toasted pecans works wonders.
If you’re looking for other stunning autumn desserts that benefit from textural contrast, you might want to try my flaky French Cinnamon Apple Tart Rustic French Apple Pie with Pâtissier Glaze . But for now, enjoy the king of pies!

Recipe FAQs
How do I prevent my pumpkin pie filling from cracking?
Cracking is typically a sign of overbaking; the proteins in the eggs tighten and pull apart once they reach a temperature that is too high. You should remove the pie from the oven when the edges are firmly set, but the center still has a slight, delicate jiggle.
Always let the pie cool gradually at room temperature, never shock it by placing it straight into the refrigerator.
My crust always comes out soggy. How can I guarantee a flaky, crisp bottom?
To prevent a soggy bottom, it is crucial to blind bake your crust completely until the dough looks light golden brown and fully set before adding the filling. Before pouring in the pumpkin mixture, brush the bottom of the baked crust lightly with an egg wash (one beaten egg white) and bake it for 5 minutes to create a waterproof barrier.
Also, ensure your oven temperature is accurate, as baking too low extends the cooking time, allowing the crust to steam.
Can I use fresh pumpkin instead of canned puree for this recipe?
Yes, but you must take great care to process it correctly to prevent a watery filling. Freshly cooked pumpkin often retains excessive moisture, so you must drain it through cheesecloth for several hours after pureeing to ensure it reaches the thick, smooth consistency of canned puree.
If your fresh puree is too thin, it will dilute the filling and prevent proper setting.
How do I know when the pumpkin pie filling is perfectly set?
The pie is done when the edges appear firm and slightly puffed, but the inner 1 2 inches of the center still exhibit a gentle wobble when the pie is nudged. If you insert a sharp, thin knife one inch from the edge, it should come out clean, but a toothpick placed directly in the center should still look moist or have traces of wet filling.
The pie will firm up fully as it cools to room temperature.
How long can I store the pumpkin pie, and does it need to be refrigerated?
Pumpkin pie must be refrigerated because the filling contains eggs and dairy, which are highly perishable. Once the pie has cooled completely to room temperature (about 2 3 hours), cover it loosely with plastic wrap or foil. Stored properly in the refrigerator, it will maintain its quality for up to 4 days.
Can I make this pie completely vegan or dairy-free?
Yes, you can substitute the dairy in the filling with full fat coconut milk (canned, not refrigerated beverage) or a specialized plant based heavy cream alternative. Replacing the eggs requires a bit more technique; substitute each egg with a mixture of cornstarch (about 1/4 cup) combined with liquid, or use commercial egg replacers designed for custard baking.
The recipe notes this is a "Deeply Spiced" pie. Can I adjust the spice level?
Absolutely; the complex spice blend is robust in this recipe, intended for a proper kick, but personal taste varies greatly. If you prefer a milder flavour, reduce the total amount of ground spices by 1/4 to 1/2 teaspoon during the mixing process.
If you want the spices to truly sing, ensure they are freshly ground and highly aromatic before adding them to the filling.
Ultimate Silky Spiced Pumpkin Pie Recipe

Ingredients:
Instructions:
Nutrition Facts:
| Calories | 327 kcal |
|---|---|
| Protein | 8.0 g |
| Fat | 12.0 g |
| Carbs | 48.0 g |
