Nofuss Mexican Unfried Ice Cream Crunch Bombs
- Introducing the Ultimate Guilt-Free Crunch: Mexican Unfried Ice Cream
- Why This 'No-Fry' Version Steals the Show
- Sourcing the Components for Incredible Flavor and Crunch
- Curating Your Unfried Ice Cream Arsenal
- Assembly Line Mastery: Building Your Mexican Unfried Ice Cream Bombs
- The Crucial Freezing Stage for Rock-Solid Perfection
- Elevating Your Dessert: Serving Suggestions and Flavor Twists
- Troubleshooting and Storage Secrets for Longevity
- Frequently Asked Questions
- 📝 Recipe Card
Introducing the Ultimate Guilt Free Crunch: Mexican Unfried Ice Cream
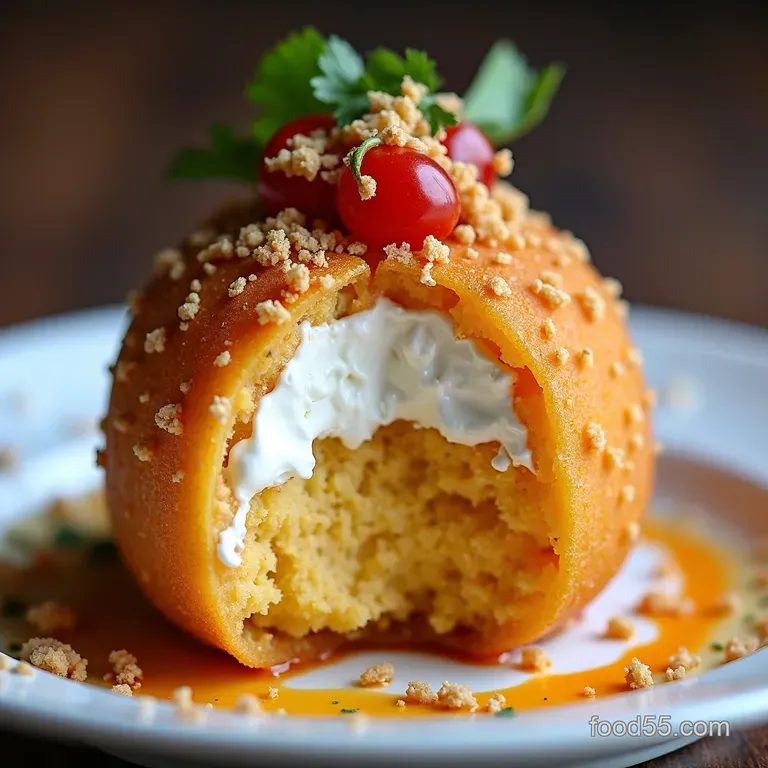
There are few desserts that evoke such instant nostalgia as the traditional deep fried ice cream found at your favourite Mexican restaurant. That perfect moment when a crisp, warm shell cracks open to reveal a blast of icy cold vanilla is pure culinary magic.
But let’s be honest: deep frying at home often means managing sputtering hot oil, and the resulting dessert can feel heavy. Enter the game changer: the Mexican Unfried Ice Cream .
This brilliant adaptation takes the classic flavour profile creamy vanilla hugged by sweet, spiced crunch and delivers it to your table without ever getting near a deep fryer.
It’s lighter, significantly less messy, and surprisingly easy to execute, making it the perfect Easy Ice Cream Dessert for any occasion.
Why This 'No-Fry' Version Steals the Show
We are aiming for the soul of the original while ditching the heavy lifting. This Unfried Ice Cream Recipe provides all the textural fireworks the crunch followed immediately by the chill but achieves it through strategic toasting rather than submersion in oil.
This method allows you to control every element, from the spice level of the coating to the quality of the ice cream base, resulting in a dessert that feels both familiar and uniquely refined. It’s the ideal way to enjoy rich Ice Cream Desserts without the post meal sluggishness.
The Clever Secret Behind Achieving Fried Texture Without Oil
The magic lies in creating a crunchy, flavour packed topping that is prepared separately and adheres to the frozen core. Traditional recipes rely on batter and hot oil to achieve the crunch, but here, we leverage a buttery, spiced corn flake mixture.
By toasting this mixture gently in the oven our Baked Ice Cream Recipe technique we dry out the flakes, deepen the flavour of the cinnamon and nuts, and effectively create a crisp shell that binds beautifully when chilled onto the surface of the ice cream.
The heat is applied only to the coating, ensuring the ice cream remains perfectly frozen beneath.
A Nostalgic Dessert Reimagined for Modern Kitchens
Embracing this Fried Ice Cream alternative means inviting more people to enjoy this beloved treat. If you've ever shied away from deep frying due to safety concerns or a desire for Light Desserts , this version eliminates that barrier entirely.
The process focuses on careful layering and chilling, making it accessible even for beginner bakers. It transforms a potentially messy restaurant experience into a straightforward, fun assembly project in your own kitchen.
Setting the Stage for Your Perfect Frozen Treat
To begin crafting these delightful Mexican Ice Cream bombs, you need to dedicate a bit of time to freezing this is non-negotiable for success. The entire process revolves around maintaining an extremely cold core.
We’ll be working with slightly softened ice cream for mixing and scooping, but the final product must be rock solid before serving. Plan for at least three hours of initial freezing time before you even think about applying the crunchy exterior.
Sourcing the Components for Incredible Flavor and Crunch
The quality of your ingredients directly impacts the final experience of your No Fry Ice Cream . Since the ice cream core is simply enhanced vanilla, the coating has to do the heavy lifting in terms of flavour complexity.
We rely on classic pantry staples, treating them with a little heat to unlock their full aromatic potential. Remember, every element must be perfectly proportioned to ensure maximum crunch adhesion.
Curating Your Unfried Ice Cream Arsenal
Gathering your components thoughtfully will streamline the assembly process dramatically. We’re separating the ingredients into the creamy center and the textural crust, alongside the few tools needed to bring them together seamlessly.
The Creamy Core: Selecting Your Ideal Vanilla Base
Start with four cups of a premium vanilla ice cream. Because we are adding flavour elements to the base, you don’t need an overly complex flavour right out of the tub. The key here is temperature: allow the ice cream to soften just enough that it’s pliable for mixing think the consistency of thick, slightly melted soft serve, not a liquid puddle.
To enhance this base, we incorporate one teaspoon of ground cinnamon and 1/4 cup of granulated sugar directly into the softened ice cream, ensuring the spice flavour is present throughout the cold center. Mix gently until just combined.
Crafting the Signature Cinnamon Sugar Coating Mixture
This topping is where the authentic flavour profile truly shines. You will need two cups of crisp corn flakes, which should be pulverized into coarse breadcrumbs a food processor works wonderfully for this.
To these flakes, we add a warming trio: 1/4 cup of packed light brown sugar, one teaspoon of ground cinnamon, and a crucial pinch of salt to balance the sweetness. Finally, drizzle in four tablespoons of melted unsalted butter.
This butter isn't for frying; it acts as the binding agent that will hold the spiced crumbs firmly to the ice cream when chilled.
Essential Equipment for Effortless Assembly
You’ll need eight sturdy sheets of plastic wrap to help you shape and handle the fragile ice cream balls without melting them with your hands. A sturdy ice cream scoop is essential for creating uniform portions.
For the coating, have a baking sheet lined with parchment paper ready for toasting the crumbs, and two wide, shallow bowls for the assembly process: one for the initial ice cream prep and one large plate or bowl specifically for rolling the finished spheres in the crunchy topping.
Related Recipes Worth Trying
- The Ultimate Smoky Chorizo Breakfast Bowls with Saffron Rice — Ditch the dull fryup for these flavourpacked Smoky Chorizo Breakfast Bowls Featuring saffron rice and creamy avocado this Southwest Breakfast Bowl is...
- The Autumn Ember Creamy Spicy Butternut Squash Pasta Recipe — Ditch the dull This vibrant Spicy Butternut Squash Pasta uses roasted squash and smoked paprika for a luxurious Butternut Squash Sauce with a gentle warming...
- Velvet Pumpkin Spice Dip No Oven Required All the Autumn Flavour — Ditch the crust This Easy Pumpkin Dip delivers all the classic Thanksgiving flavour in a creamy no bake style Perfect Fall Appetizer Dip Find out how simple...
Assembly Line Mastery: Building Your Mexican Unfried Ice Cream Bombs
This phase requires speed and efficiency. Once the base mixture is ready, use your ice cream scoop to portion the mixture into eight even balls. Immediately wrap each ball tightly in a piece of plastic wrap.
The wrap protects the surface from freezer burn and, more importantly, provides you with a handle to rotate the ball without transferring too much heat from your hands during the coating process. Place these wrapped spheres onto your prepared tray and commit them to the deep freeze.
The Crucial Freezing Stage for Rock Solid Perfection
Patience here guarantees success. If the core is not sufficiently frozen, the coating will slide right off, leading to an unfortunately messy situation.
Preparing the Ice Cream Scoops for Coating Success
While the scoops are freezing solid aiming for a minimum of three hours, but overnight is even better you can prepare your crunchy topping. First, pulse your corn flakes until they resemble chunky breadcrumbs.
Then, mix in the brown sugar, the second measure of cinnamon, salt, and the melted butter until every flake particle is lightly coated. Spread this mixture evenly onto your parchment lined baking sheet.
The Double Dipping Technique for Maximum Crunch Adhesion
To achieve a thick, satisfying layer, some cooks prefer a light "wet coat" between the ice cream and the dry crunch. If you notice your frozen balls aren't gripping the dry mix immediately, a quick dip in a small amount of melted chocolate or even a spoonful of the initial cinnamon sugar ice cream mix (if you have extra) can serve as an adhesive layer before rolling in the toasted crumbs.
However, for the purest version, the toasting step is paramount for flavour and binding.
Freezing Protocol: Ensuring Zero Melting Disaster
After the coating is applied, the final set is just as important as the initial freeze. These coated bombs must return to the freezer for at least one final hour. This allows the butter in the coating to re-solidify and cement the crust firmly onto the icy surface, creating a cohesive unit ready for serving.
Perfecting the Cinnamon Crunch Application
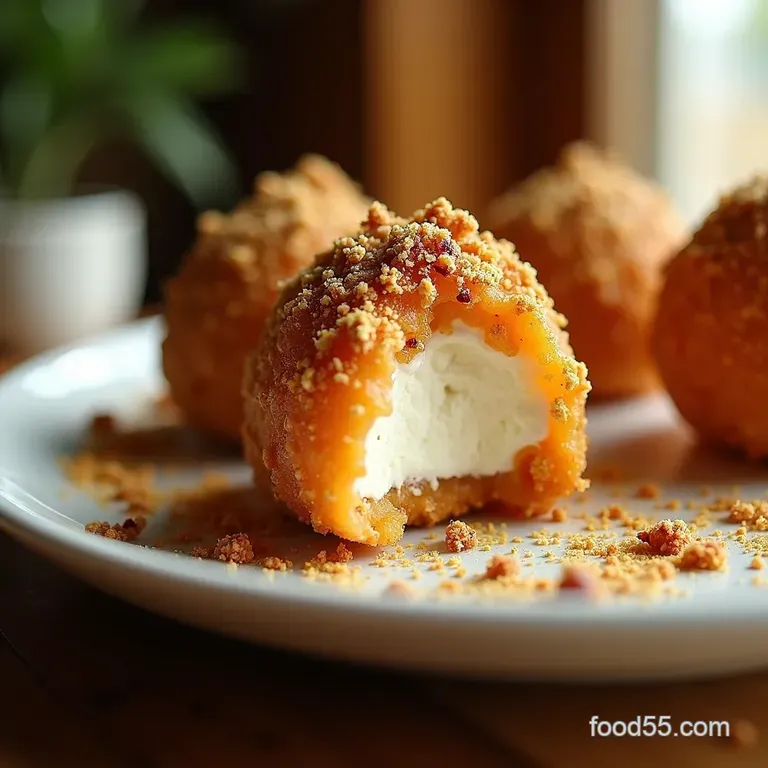
Once the topping is toasted and allowed to cool completely (warm topping melts ice cream instantly!), spread it onto a wide plate. Unwrap your rock solid ice cream balls one at a time. Roll each ball firmly in the crunchy mixture, pressing gently with your hands to ensure full coverage.
Work quickly, keeping the remaining balls safely tucked away in the freezer until you are ready for their turn.
Elevating Your Dessert: Serving Suggestions and Flavor Twists
A beautiful dessert deserves a thoughtful presentation. While the crunch provides the star texture, the accompanying sauces and garnishes round out the Mexican Unfried Ice Cream experience.
Recommended Toppings for a True Fiesta Presentation
The traditional pairing works for a reason: contrast. Serve these chilled delights immediately after removing them from the freezer, drizzled generously with rich chocolate syrup or perhaps a contrasting tang from a slightly warmed berry compote like raspberry or strawberry.
A dollop of lightly sweetened whipped cream or a spoonful of crème fraîche dusted with a final whisper of cinnamon elevates the entire dish to restaurant quality.
Variations: Exploring Spiced Coatings Beyond Cinnamon
If you want to push the envelope on this Unfried Ice Cream Dessert , consider infusing the crunch mixture with other complementary spices. A tiny pinch of cayenne pepper or chipotle powder mixed into the toasted flakes adds a subtle, slow heat that plays wonderfully against the cold vanilla.
Alternatively, for a deeper, richer flavour profile, swap out half the corn flakes for crushed shortbread cookies before toasting.
How Long Can This Mexican Unfried Ice Cream Stay Fresh?
Because we have eliminated the water content introduced by frying batter, these Mexican Unfried Ice Cream treats hold up remarkably well in the freezer, provided they are wrapped tightly. Aim to consume them within two weeks.
If storing longer, ensure they are wrapped first in plastic wrap and then sealed in an airtight freezer bag to prevent any freezer burn from affecting the delicate crunch coating.
Troubleshooting and Storage Secrets for Longevity
Even the best laid plans can sometimes encounter minor hurdles, especially when dealing with frozen components. Knowing how to pivot ensures your Mexican Unfried Ice Cream remains perfect.
Troubleshooting and Storage Secrets for Longevity
The number one concern is always melting. If you find your ice cream balls softening during the coating process, do not panic. Immediately place the half coated ball back onto its tray and return it to the freezer for 10 to 15 minutes.
This brief re-hardening allows the next coating step to adhere properly without compromise. Always use a sharp, thin knife to slice the ice cream ball in half for serving, rather than scooping it, to preserve the integrity of that beautiful, crunchy shell.

Frequently Asked Questions
Why bother making Mexican Unfried Ice Cream when I could just deep fry it?
That's the million dollar question! The main reason is convenience and safety you avoid dealing with dangerously hot oil, which can be a right faff, especially with kids around.
This "unfried" method uses a toasted crumb coating, giving you 90% of the satisfying crunch and flavour without the messy cleanup or the risk of a kitchen catastrophe.
My crunchy coating keeps falling off the ice cream balls. What am I doing wrong?
This usually boils down to temperature, mate. The ice cream balls absolutely must be frozen solid we mean rock solid—before you try to coat them. Make sure you work quickly when rolling them in the toasted crumbs and press the coating on firmly before returning them to the freezer immediately for a final chill.
Can I make these Mexican Unfried Ice Cream balls ahead of time for a party?
Absolutely, this dessert is perfect for prepping in advance! Once the balls are fully coated, they need at least an hour to firm up again, but they can happily stay in the freezer for up to a week.
Just make sure they are wrapped well in cling film or stored in an airtight container so they don't pick up any freezer odours we don't want them tasting of last week's fish pie!
What can I substitute for corn flakes in the crunchy topping?
If you're after a slightly different texture or need a gluten-free option, you have a few crackers up your sleeve! Crushed Rice Chex or toasted oats work brilliantly as substitutes, giving a lovely, sturdy crunch.
You could even try using crushed shortbread biscuits for an extra buttery flavour, though you might want to cut back slightly on the melted butter.
How do I get that authentic, warm flavour in the coating without frying?
The secret lies in toasting the dry ingredients first! By baking the corn flakes, sugar, and spices (especially the cinnamon) for those crucial 5 8 minutes, you deeply toast the spices and melt the brown sugar slightly into the butter.
This quick bake develops a rich, nutty depth that beautifully mimics the flavour you get from briefly frying the crust.
Unfried Ice Cream Bombs

Ingredients:
Instructions:
Nutrition Facts:
| Calories | 963 kcal |
|---|---|
| Protein | 3.7 g |
| Fat | 32.5 g |
| Carbs | 66.8 g |
| Fiber | 15.3 g |
| Sodium | 149 mg |
