The Velvety Nofuss Chocolate Cheesecake a Decadent Fridgeset Classic
- Decoding the Perfect No Bake Chocolate Cheesecake
- Why This Fridge-Set Wonder Wins Over Baked Versions
- Essential Components for Your Rich Chocolate Filling
- Necessary Kitchen Tools for the Simplest Assembly
- Step-by-Step Guide to Assembling Your Dessert Masterpiece
- Mastering the Smooth, Crack-Free Set
- Troubleshooting Your No Bake Chocolate Cheesecake Issues
- Recipe FAQs
- 📝 Recipe Card
Decoding the Perfect No Bake Chocolate Cheesecake
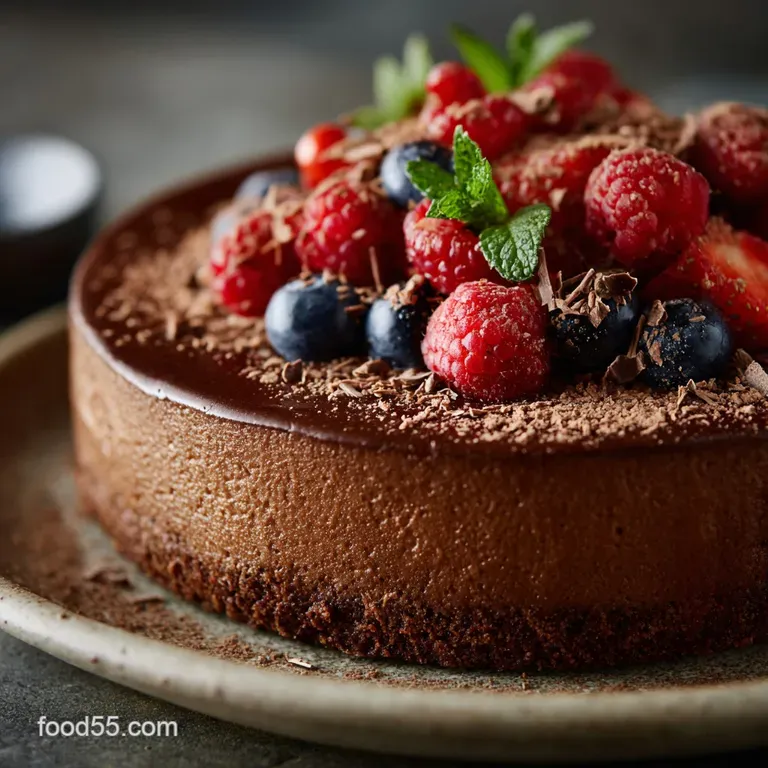
As much as we adore the richness of a traditional baked New York cheesecake, there’s an undeniable luxury in a decadent dessert that requires absolutely zero oven time. This No Bake Chocolate Cheesecake is the ultimate expression of that philosophy.
It delivers an intensely creamy, tangy, and deeply cocoa infused experience, but the preparation is streamlined to mere minutes of active work. Unlike its baked counterparts, which demand meticulous temperature control and nervous vigilance to prevent cracking, this fridge set marvel relies on simple mechanics whipping, melting, and folding to create a dense, yet irresistibly smooth texture that holds its shape beautifully once chilled.
It's truly a champion among Chocolate Desserts No Bake .
Why This Fridge Set Wonder Wins Over Baked Versions
The main attraction of the no bake chocolate cheesecake recipe is its inherent simplicity. It eliminates the risks associated with oven baking, such as over browning, sinking centres, or the dreaded water bath. This is what places it firmly in the category of Easy No Bake Cake Recipes .
If you can operate an electric mixer and melt chocolate, success is practically guaranteed, making it ideal for novice bakers or those seeking a high impact dessert during the heat of summer.
The Secret to Achieving a Stable, Cloud Like Texture
Stability in any no-bake dessert is critical. In this recipe, the structure comes not from starch or eggs, but from the power combination of high fat cream cheese, premium dark chocolate, and thoroughly whipped heavy cream.
We leverage the sheer volume and stiffness of the whipped cream, folding it gently into the velvety chocolate and cream cheese base. This technique encapsulates air, creating a light, cloud like mouthfeel while providing enough structural integrity from the fat to set firmly when cold.
Setting Time vs. Prep Time: Understanding the Effort Balance
The beauty of this dessert lies in its minimal active commitment. You need only 25 minutes of active preparation time to assemble the crust and whisk the filling components together. Once that short burst of work is complete, the passive chilling phase begins.
While the minimum setting time required is 4 hours, patience pays dividends; chilling for 8 hours or, ideally, overnight allows the filling to achieve maximum density and slicing perfection.
Is Gelatin Necessary? Structuring the Filling Without the Fuss
Many no-bake cheesecakes rely heavily on gelatin for structure, but this specific formulation avoids it. Our robust stabilization comes naturally from the quantity of fat specifically, 6 ounces of high-quality dark chocolate (60-70% cocoa solids) and 1 1/2 cups of heavy cream whipped to stiff peaks.
However, if you live in a very warm climate or plan to serve the cheesecake outdoors, a touch of gelatin can be added to the melted chocolate as an extra structural safeguard, though it is not mandatory for a firm result.
The Flavor Profile: Intense Cocoa and Creamy Tang
The flavor balance is sophisticated and rich. By utilizing premium unsweetened cocoa powder in the crust and dark chocolate in the filling, we achieve a deep cocoa intensity that stands up beautifully against the bright, tangy notes of the full fat cream cheese.
The use of pure icing sugar helps to dissolve quickly and maintains the smoothness, ensuring the final bite is decadent without being cloyingly sweet.
Essential Components for Your Rich Chocolate Filling
A flawless filling begins with precise ingredient selection and temperature control. You will need 16 ounces of full fat cream cheese, ensuring it is completely softened to room temperature this prevents lumps and ensures an airy texture when whipped.
The stabilizer, 1 1/2 cups of heavy cream, must be taken directly from the refrigerator and chilled thoroughly before whipping to achieve those stiff, necessary peaks. For the true depth of flavor, 6 ounces of finely chopped dark chocolate (60-70% cocoa) is melted and cooled slightly, providing both structure and intense chocolate flavor.
A cup of sifted icing sugar adds sweetness without grittiness, while vanilla extract and a touch of fine sea salt round out the complex profile.
Related Recipes Worth Trying
- Foolproof NoBake Turtle Lush Chocolate Caramel Pecan Dessert — This decadent NoBake Turtle Lush is the ultimate layered pudding A crunchy crust meets silky cream cheese and chocolate making it one of the Best Cold...
- Ultimate Crispy Potato and Halloumi Bake OnePan — Achieve the crunchiest most glorious Crispy potato and halloumi bake using our UKinspired roasting method This easy onepan halloumi potato recipe is deeply...
- The Foolproof NoBake Pumpkin Fluff Recipe Ready in 15 Mins — This easy Pumpkin Fluff Dessert is the nobake hero of autumn Its light creamy and spiced perfectly Forget the faff this velvety pumpkin cream is ready in 15...
Necessary Kitchen Tools for the Simplest Assembly
Efficiency is key when dealing with no-bake desserts. The core equipment includes a 9 inch springform pan, which is essential for easy release and professional presentation. An electric mixer, whether a stand mixer or a sturdy hand mixer, is non-negotiable for whipping the heavy cream to stiff peaks.
While you can crush the 8 ounces of digestive biscuits by hand, a food processor makes achieving uniform, coarse sand like crumbs instant and effortless. Finally, a rubber spatula is necessary for the crucial, gentle folding stage, ensuring you don't deflate the hard won air from the whipped cream.
Selecting the Best Cocoa Powder for Deep Chocolate Flavor
While the primary chocolate flavor comes from the melted dark chocolate in the filling, we incorporate 1 tablespoon of unsweetened cocoa powder directly into the crust base. Opting for a high-quality Dutch processed cocoa here enhances the overall chocolate complexity and deepens the color of the biscuit base, laying a rich foundation for the creamy filling above.
Crust Confidential: Choosing the Ideal Biscuit Base
This recipe calls for 8 ounces of crushed digestive biscuits (or graham crackers) combined with melted butter and cocoa. This combination offers the perfect balance of firmness and crumbly texture.
Should you wish for an even more intense base, swapping these for sandwich cookies (like Oreos, with the cream filling removed) or even shortbread biscuits works wonderfully, provided the quantity of butter is adjusted slightly to account for the biscuit’s specific fat content.
A well constructed crust is the foundation of the finished no bake chocolate cheesecake pie aesthetic.
Ingredient Swaps and dairy-free Adjustments
This recipe is highly adaptable. For those needing a dairy-free version, substitute the heavy cream with chilled, thick coconut cream (the solid part skimmed from canned full fat coconut milk) and use a high-quality block of vegan cream cheese. Ensure the 6 ounces of chocolate you melt is guaranteed dairy-free.
Alternatively, for speed or convenience, some bakers prefer stabilizing their cheesecake using pre-whipped toppings, and this no bake chocolate cheesecake with cool whip variation can be effective, though it may slightly alter the luxurious density achieved by whipping fresh heavy cream.
Prep Work Checklist: Having Everything Ready Before You Start
Success in no-bake desserts hinges on organization. Before starting Stage 1, ensure the 16 ounces of cream cheese are truly at room temperature. The 1 1/2 cups of heavy cream, conversely, must be kept ice-cold right up until the moment it is whipped.
Melt the 6 ounces of chocolate and set it aside to cool slightly it should be liquid but not hot to prevent it from splitting the cream cheese mixture when combined. Prepping your 9 inch springform pan with a parchment paper circle on the base will also save time later.
step-by-step Guide to Assembling Your Dessert Masterpiece
The assembly of this dessert moves logically in four stages. First, the base is prepared: the crushed biscuits, 1 tablespoon of cocoa, and melted butter are combined and pressed firmly into the lined springform pan, followed by a quick 15-minute chill to solidify the 5 tablespoons of butter.
Next, the chocolate component is prepared by gently melting the finely chopped dark chocolate until smooth and allowing it to cool.
The third stage is the filling. The softened cream cheese is beaten with the 1 cup of icing sugar and vanilla until perfectly smooth. The cooled melted chocolate is then incorporated until the mixture is a uniform, deep chocolate colour. Crucially, in a separate, clean bowl, the heavy cream is whipped to stiff peaks.
The secret to the airy filling is gently folding this whipped cream into the chocolate mixture in three separate additions, using an under and-over motion until no white streaks remain, ensuring maximum air retention. Finally, the filling is smoothed over the chilled crust and refrigerated to set.
Mastering the Smooth, Crack Free Set
Achieving a clean, dense slice requires attention to detail in the final stages of prep and chilling. Since we eliminate the risk of cracking inherent to baked cheesecakes, our focus shifts to achieving a flawless set and a beautiful presentation.
Creating the Firm and Flawless Press-In Chocolate Base
The quality of the base determines how well the final product slices. After mixing the 8 ounces of crushed digestive biscuits with the melted butter and cocoa, press the mixture down tightly and evenly across the base of the springform pan.
Use the bottom of a flat measuring cup or glass to apply consistent, heavy pressure, ensuring the crust is compact and won't crumble when sliced. This short 15-minute chill sets the butter, locking the crust structure in place before the heavy filling is added.
Whipping the Cream Cheese Mixture to Silky Perfection
The goal is to eliminate every last lump of cream cheese before the chocolate is introduced. The combination of room temperature cream cheese, 1 cup of sifted icing sugar, and vanilla extract should be beaten until the mixture is visibly lighter and perfectly silky.
When the slightly cooled melted dark chocolate is poured in, continue beating only until the color is fully uniform, thus avoiding over aerating the cheese mixture prematurely.
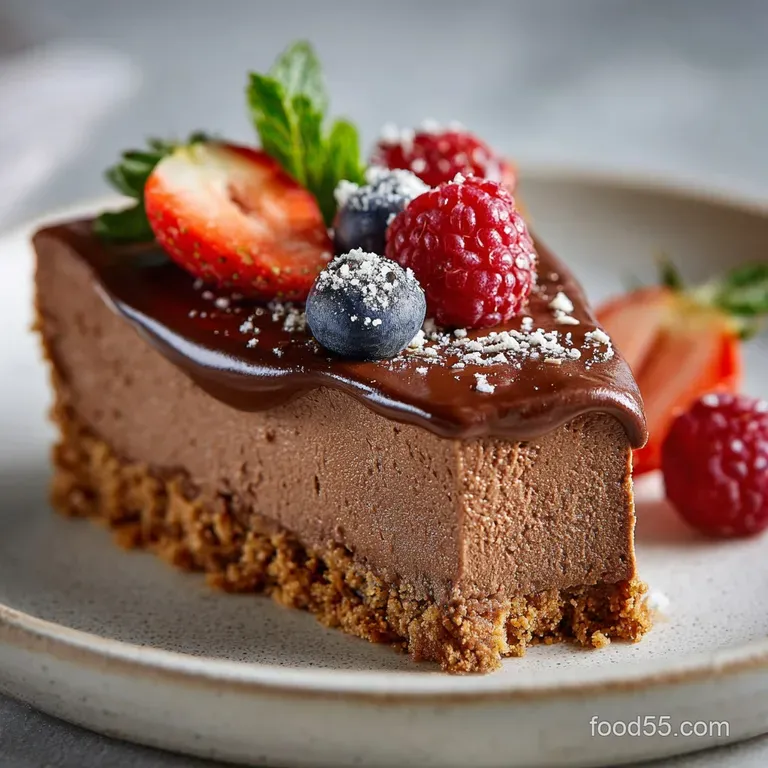
Transferring and Smoothing the Filling for Professional Results
Once the whipped cream has been gently folded in, spoon the entirety of the velvety filling onto the chilled crust. Use an offset spatula to smooth the surface, working from the center outwards.
Do not tap the pan excessively; gentle smoothing is preferred to prevent air bubbles from rising to the surface, which can disrupt the texture. Achieving a level top is essential for a beautiful finish, especially if you plan to present it as sleek no bake chocolate cheesecake bars .
The Critical Chilling Phase: Achieving Maximum Density
The transition from a loose filling to a dense, sliceable cake happens during the chilling phase. Cover the filled pan loosely with cling film to prevent condensation from dripping onto the surface and refrigerate for a minimum of four hours.
For the cleanest, most impressive slices the kind you’d achieve with a perfect no bake chocolate cheesecake pie —aim for an overnight refrigeration of 8 hours or more.
The cold allows the fat in the cream, cheese, and dark chocolate to fully solidify and interlock, resulting in the desired structural density.
Troubleshooting Your No Bake Chocolate Cheesecake Issues
Even the simplest recipes can encounter minor hiccups, particularly when dealing with dairy and temperature fluctuations. The most common issue with this type of dessert relates directly to structural failure a runny filling that refuses to set.
Optimal Storage Times and Freezing Recommendations
A finished no bake cheesecake, when properly covered, will remain fresh and delicious in the refrigerator for 3 to 5 days. If you need a longer term storage solution, this cheesecake freezes surprisingly well.
Once fully set, remove it from the springform pan, wrap it tightly in two layers of plastic wrap, followed by a layer of aluminum foil. It can be kept in the freezer for up to one month. Thaw slowly overnight in the refrigerator to preserve texture.
Serving Temperature and Slicing Techniques for Clean Cuts
Serving temperature is paramount. This dessert should be served cold, straight from the refrigerator. For flawless, professional slices, run a thin, sharp knife under hot water, wipe it dry, and make your first cut. Repeat this process heat the knife, wipe clean before every subsequent slice.
This technique ensures that the dense chocolate filling doesn't stick and drag, allowing you to achieve clean, crisp edges every time.
Why Did My Cheesecake Filling Turn Runny? (Fixes)
If your filling remains soft or runny after sufficient chilling, the issue is almost always insufficient stabilization. This occurs if the heavy cream was not whipped to stiff peaks (it needs to hold its shape), or if the whipped cream was folded too aggressively, knocking out the air that provides the structure.
Another culprit is adding the melted chocolate while it was too hot, which can melt the fat in the cream cheese and compromise the emulsion. While difficult to fix entirely, if the mixture is only slightly soft, putting it back in the freezer for 30– 60 minutes can salvage the structure temporarily.
Scaling the Recipe: Adapting Quantities for Different Pan Sizes
This recipe is designed for a standard 9 inch springform pan, yielding 10 generous slices. However, you can easily adapt the quantity for different presentations. For smaller portions, try no bake chocolate cheesecake cups using ramekins or mini serving glasses, which require less chilling time.
If you wish to create no bake chocolate cheesecake bars in a 9x13 pan, you would likely need to increase the filling ingredients by about 50% to achieve a good depth, though the chilling time would remain similar.
Conversely, using a smaller pan (e.g., 8 inch) would require only slightly less ingredients but demand an extended chilling period to fully set the resulting deep filling.

Recipe FAQs
3 ingredient no bake chocolate cheesecake
For a perfectly smooth filling that sets beautifully, ensure both the cream cheese is at room temperature and the heavy cream is ice-cold before whipping to firm peaks. Gently fold the cooled, melted dark chocolate mixture into the cream cheese base to preserve the volume; this aeration is key to achieving that velvety texture without gelatin.
Once fully set (minimum 4 hours), store the cheesecake tightly covered in the refrigerator for up to 5 days.
Philadelphia chocolate cheesecake no-bake
For a truly velvety finish, ensure your full fat cream cheese is completely at room temperature before mixing; this prevents any lumps and guarantees a perfectly smooth base for the filling.
Critically, whip the heavy cream to firm, stiff peaks this aeration is what provides the elegant structure and cloud like texture for a successful fridge set dessert. Store the finished cheesecake tightly covered in the refrigerator for up to four days.
No bake chocolate cheesecake with condensed milk
While this recipe relies on whipped heavy cream for a light, airy texture, you can achieve a denser, sweeter result by substituting the icing sugar and 1/2 cup (120 mL) of the heavy cream with one 14 oz can of chilled sweetened condensed milk.
Ensure the cream cheese is fully softened and the condensed milk is very cold before incorporating to help stabilize the mixture. The cheesecake must chill for a minimum of four hours, but overnight is recommended to ensure clean, beautiful slices.
No bake chocolate cheesecake with cool whip
For the most stable texture, ensure your cream cheese is fully softened before beating and chill the finished cheesecake for a minimum of 6 hours. If substituting the heavy cream with stabilized whipped topping (such as Cool Whip), use 16 ounces of thawed product and slightly decrease the icing sugar due to added sweetness.
This no-bake delight stores beautifully in the refrigerator for up to five days.
Velvety Nobake Chocolate Cheesecake

Ingredients:
Instructions:
Nutrition Facts:
| Calories | 541 kcal |
|---|---|
| Protein | 3.2 g |
| Fat | 13.4 g |
| Carbs | 40.4 g |
| Fiber | 5.1 g |
| Sodium | 4064 mg |
