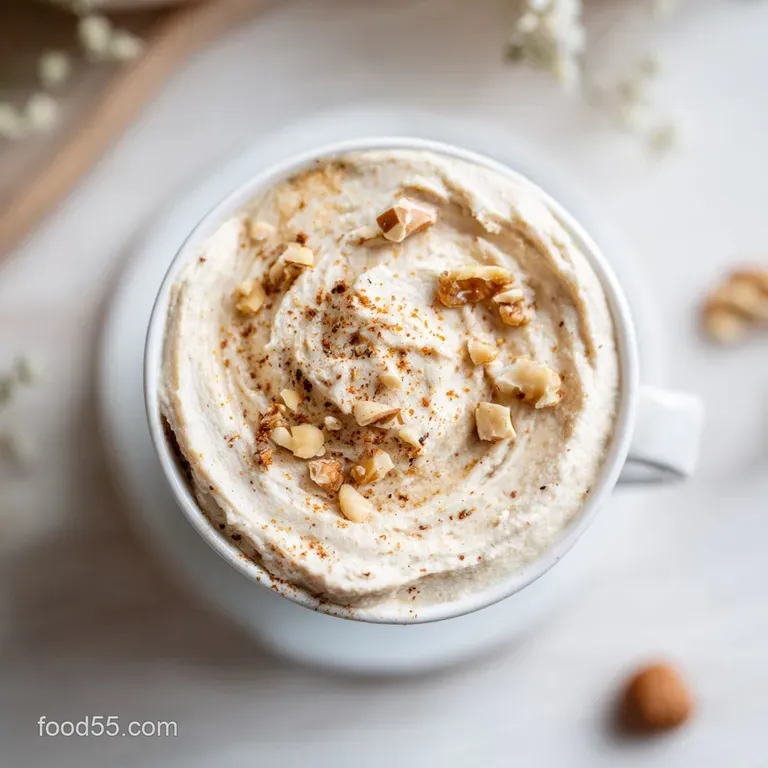
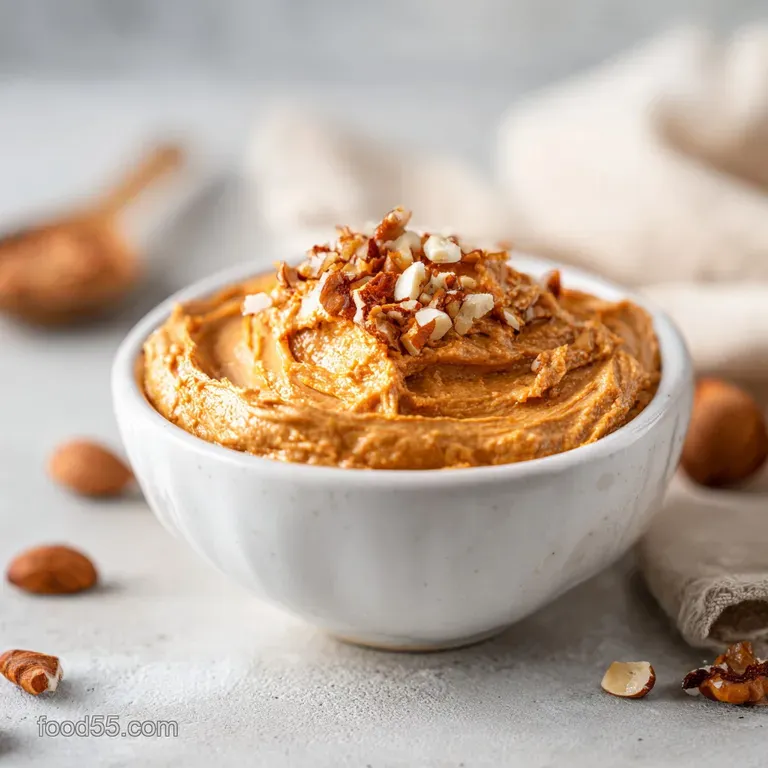
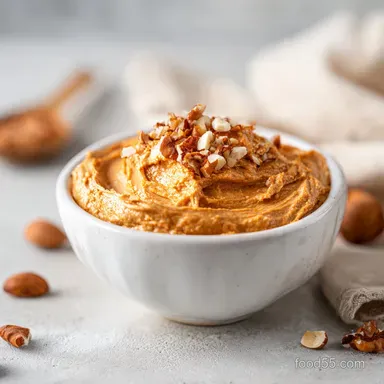
All-Natural Nut Butter: Velvety and Glossy
- Time: Active 5 min, Passive 12 min, Total 17 min
- Flavor/Texture Hook: Velvety, glossy, and deeply toasted
- Perfect for: Holiday brunch boards, healthy school snacks, or seasonal gifts
- Quick Details for Your Occasion Ready Batch
- Sourcing the Finest Local Nuts and Seeds
- The Right Tools for a Silky Finish
- The Simple Path to a Glossy Spread
- Solving the Gritty Paste Plateau
- Customizing Your Spread for Every Season
- Keeping Your Jar Fresh and Sustainable
- Pairing Your Spread for Special Moments
- Recipe FAQs
- 📝 Recipe Card
Quick Details for Your Occasion Ready Batch
Since this is a great option for gifts or party platters, timing is everything. If you're prepping this for a brunch, you can make it a few days early and let the flavors settle. If you're serving it as part of a vibrant cheese board, keep it at room temperature so it stays pourable and silky.
The beauty of this spread is how it holds up. Unlike some emulsions that break, this stays stable because of the natural fats. For a special occasion, I love transferring the finished product into small, reusable glass jars with a piece of twine.
It looks rustic, celebrates the local harvest, and feels far more personal than anything from a supermarket shelf.
| Method | Time | Texture | Best For |
|---|---|---|---|
| Oven Roast | 17 min | Deeply toasted, silky | Maximum flavor, gift batches |
| Raw/No Bake | 10 min | Lighter, more "nutty" | Quick health snacks, raw diets |
| Stovetop | 15 min | Charred edges, rich | Small batches, fast results |
Sourcing the Finest Local Nuts and Seeds
When picking your base, I always suggest looking for raw, organic nuts from a local supplier if possible. The freshness of the oils is what creates that velvety mouthfeel. I've found that mixing a few different types of nuts gives a more complex, vibrant profile than just using one variety.
The Magic of the Warm Roast: Heating the nuts breaks down the cell walls, allowing the natural oils to flow more easily. This means your processor doesn't have to work as hard to reach that liquid state. It's similar to how Homemade Butter relies on temperature to achieve the right consistency.
Component Analysis
| Ingredient | Science Role | Pro Secret |
|---|---|---|
| Raw Nuts | Primary fat source | Roast until mahogany for a deeper flavor |
| Seeds | Texture modifier | Adds a subtle earthiness and extra minerals |
| Coconut Oil | Emulsion stabilizer | Helps prevent oil separation in the jar |
| Maple Syrup | Flavor balancer | Cuts through the richness with a woody sweetness |
The Right Tools for a Silky Finish
You don't need a professional kitchen, but you do need a processor that can handle the heat. The nuts will actually warm up as they are blended, which is a good thing, but it can stress out a cheap motor. If you notice your machine smelling a bit "toasty," give it a break for two minutes.
I prefer a high speed food processor over a blender because the wider base allows the nuts to circulate more evenly. If you use a blender, you'll find yourself scraping the sides way more often, and you might end up with some stubborn lumps of raw nut at the bottom. A sturdy spatula is your best friend here.
The Simple Path to a Glossy Spread
Right then, let's get into the actual making. The key is not to rush the stages. You can't skip from "whole nut" to "liquid" in one go - you have to let the ingredients evolve.
- Preheat your oven to 175°C (350°F). Spread the 500g raw nuts in a single layer on a baking sheet. Note: Don't crowd them, or they'll steam instead of roast.
- Roast for 8–12 minutes, tossing halfway through, until they smell aromatic and turn a rich mahogany color. For the best results, I recommend following a guide on how to roast peanuts to ensure the core is cooked.
- While the nuts are still warm, transfer them to a high speed food processor.
- Pulse in short bursts for 30 60 seconds until they reach a sandy paste consistency.
- Process on high for 3–5 minutes, stopping every minute to scrape down the sides with a spatula.
- Continue processing until the mixture looks like a thick, heavy cream.
- During the final 60 seconds of processing, add the 2g fine sea salt, 15ml melted coconut oil, and 15ml pure maple syrup.
- Blend on high until the mixture becomes a glossy, flowing liquid.
Solving the Gritty Paste Plateau
The most frustrating part of this process is when you hit that "sand" phase and it feels like it'll never become smooth. This usually happens because the nuts have cooled down too much or the processor isn't quite powerful enough to break the last few particles.
Dealing with the Texture Stall
If you're stuck in the gritty phase, don't just keep blending, as you might burn out your motor. Instead, stop and stir in your melted coconut oil a bit earlier than the recipe suggests. The extra fat acts as a lubricant, helping the remaining nut particles slide and collide, which speeds up the smoothing process.
| Problem | Root Cause | Solution |
|---|---|---|
| Gritty texture | Nuts cooled too fast | Add oil earlier or pulse in shorter bursts |
| Oil separation | Not enough emulsifier | Stir in a teaspoon of maple syrup |
| Bitter taste | Over roasted nuts | Sift out burnt pieces before blending |
Common Mistakes Checklist
- ✓ Roast nuts while they are raw, not pre toasted (prevents burning)
- ✓ Process nuts while they are still warm to the touch
- ✓ Scrape the sides every 60 seconds to avoid "dead zones"
- ✓ Use a high speed setting for the final 2 minutes of blending
- ✓ Avoid adding water - it will cause the butter to seize and clump
Customizing Your Spread for Every Season
Once you've got the base down, you can really have some fun with this. In the spring, I love adding a pinch of cinnamon or a drop of vanilla extract to keep it light. For winter, a tiny pinch of nutmeg or cloves makes it feel cozy and festive.
Decision Shortcut If you want a "crunchy" style, pulse in a handful of reserved roasted nuts at the very end. If you want a savory version, skip the maple syrup and add a dash of smoked paprika. If you want a lower fat option, increase the proportion of sunflower seeds relative to the nuts.
Adjusting the Batch Size For a smaller batch (half size), use a smaller processor bowl if you have one. Since there's less mass, the nuts might reach the liquid stage about 20% faster, so keep a close eye on the texture.
For a double or triple batch, I strongly suggest working in stages. Don't overfill your processor, or the nuts will just spin in the middle without actually breaking down. I usually do two separate batches and then stir them together in a large bowl to ensure the salt and syrup are evenly distributed.
| Premium Base | Budget Alternative | Flavor Impact | Savings |
|---|---|---|---|
| Macadamias | Cashews | Less buttery, more creamy | Save $10-15 |
| Pine Nuts | Sunflower Seeds | Earthier, less piney | Save $20+ |
| Almonds | Peanuts | More intense, less subtle | Save $5-8 |
Keeping Your Jar Fresh and Sustainable
To keep your spread tasting fresh and vibrant, store it in a clean glass jar with a tight lid. It'll stay great in the fridge for about 3 months, though it will thicken up significantly when cold. If it gets too hard, just let it sit on the counter for an hour before using.
I don't recommend freezing nut butter, as the oils can sometimes separate and develop an "off" flavor when thawed. However, if you've made a massive amount, you can freeze it in silicone ice cube trays and thaw one cube at a time for your morning toast.
For zero waste, don't throw away the nut skins that fall off during roasting. If you're using almonds, those skins are packed with antioxidants. I often toss them into a compost bin or, if they're clean, I've seen people use them to infuse a savory nut skin tea.
Pairing Your Spread for Special Moments
Because this is an occasion ready dish, presentation is key. Instead of just putting it in a bowl, try swirling it into a shallow plate and topping it with a few whole roasted nuts and a drizzle of extra maple syrup. It looks like something from a high end bistro but takes seconds.
Pair this spread with sliced local pears or crisp apples for a fresh, seasonal contrast. If you're serving it at a dinner party, it's incredible as a base for a savory appetizer - try a dollop on a cucumber slice with a sprinkle of flaky sea salt and a slice of radish.
It's a vibrant way to start a meal that celebrates the natural flavors of the harvest.

Recipe FAQs
Is nut butter actually healthy?
Yes, when made with minimal ingredients. It provides essential healthy fats and protein. This version stays clean by using only nuts, seeds, coconut oil, and maple syrup.
Can you make nut butter from any nuts?
Yes, most oil-rich nuts work perfectly. Almonds, peanuts, and cashews are the most reliable bases. Mixing different varieties often creates a more complex flavor profile.
Can heart patients eat almond butter?
Yes, it is generally heart healthy. Almonds are rich in monounsaturated fats which support cardiovascular wellness. Always verify with a physician for specific medical dietary needs.
Which nut butter is best for acne?
Almond butter is typically the best choice. It contains fewer omega-6 fatty acids than peanuts, which may help lower skin inflammation for some people.
How to get the butter smooth and glossy?
Process on high for 3 5 minutes. Stop every minute to scrape down the sides. If you enjoyed mastering the creamy texture in our cookie dough bites, the same principle of blending fats applies here to create a flowing liquid.
Is it true that roasting nuts destroys their nutrients?
No, this is a common misconception. Roasting at 175°C (350°F) for 8 12 minutes helps release the natural oils, which allows the butter to emulsify without artificial stabilizers.
How to store homemade nut butter?
Transfer to an airtight glass jar and refrigerate. This prevents the natural oils from oxidizing and keeps the spread fresh for up to 3 months.
All Natural Nut Butter
Ingredients:
Instructions:
Nutrition Facts:
| Calories | 280 kcal |
|---|---|
| Protein | 9.6g |
| Fat | 24.1g |
| Carbs | 11.1g |
