Peanut Butter Cookies: the Ultimate Chewy Classic

- Welcome to the Ultimate Chewy Peanut Butter Cookie Recipe
- The Science of Sweetness: Achieving Perfect Texture and Flavor
- Essential Ingredients for Your Classic Peanut Butter Cookie Dough
- Simple Steps to Making Iconic Criss-Cross Cookies
- Troubleshooting and Expert Baker's Tips
- Maximizing Freshness: Storage and Preservation Guide
- Delicious Pairings for Your Finished Bake
- Recipe FAQs
- 📝 Recipe Card
Welcome to the Ultimate Chewy Peanut Butter Cookie Recipe
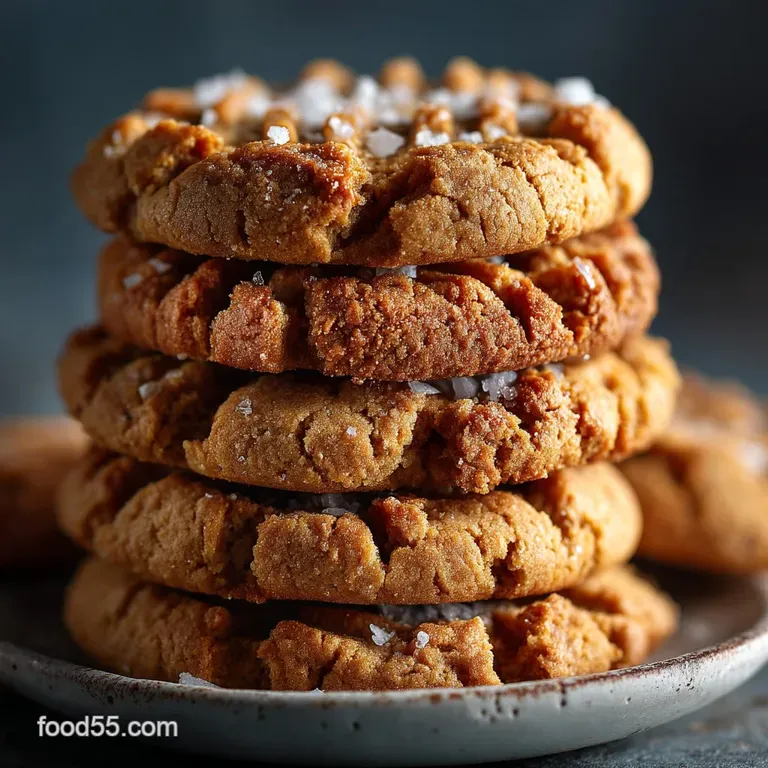
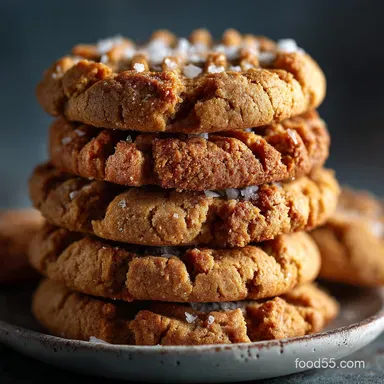
That smell. It hits you right when you open the oven door warm, roasted peanuts mixing with sweet brown sugar. The perfect, slightly crunchy edges give way to a rich, chewy centre. These aren't just cookies; they're nostalgia baked into a round, cross hatched package.
Honestly, when I need a hug in dessert form, this recipe for Peanut Butter Cookies is my emergency button. They are shockingly fast to whip up, you probably already have the ingredients in your pantry, and the resulting chewy texture is simply addictive.
Forget the store-bought stuff; we are making the absolute best Peanut Butter Cookies today. Over the years, I’ve tried every variation, from 3 ingredient experiments to complex bakery styles.
This specific method nails the classic flavor profile while guaranteeing that signature softness. Ready to ditch the flat, crumbly disappointments? Let’s crack on and make these incredible Peanut Butter Cookies !
The Science of Sweetness: Achieving Perfect Texture and Flavor
The Nostalgia Factor: Why This Cookie Matters
Everyone has a memory tied to classic American baking, and for me, the iconic Peanut Butter Cookies are front and center. My grandmother always made them, insisting on the fork criss cross pattern, claiming it was mandatory.
It turns out, that pattern isn't just cute; it serves a crucial purpose: controlling the spread. By pressing the dough down before baking, you ensure a uniform thickness and speed up the baking process in the middle.
The difference between a good Peanut Butter Cookies recipe and a great one often comes down to understanding these simple structural truths.
What Makes These Cookies 'Ultimate'
This recipe is ultimate because it balances flavor and texture using specific fat and sugar ratios. We use a high proportion of peanut butter, obviously, but crucially, we rely on a significant amount of brown sugar.
That brown sugar isn't just sweetening the batch; it's providing essential moisture and a slightly acidic lift, ensuring that signature chewy centre we all crave. These really are the Best Peanut Butter Cookies you can make at home.
Overview of Prep and Bake Time
You can have these delicious treats ready in under an hour, even accounting for the necessary chilling time. We spend about 15 minutes mixing the dough, maybe 30 minutes chilling (don't skip this, ever!), and then 10– 12 minutes per batch in the oven. If you're looking for a quick win compared to something complex like a French Silk Pie: The Ultimate Buttery, Silky Perfection Recipe , these Classic Peanut Butter Cookies are your weeknight solution.
The Role of Dual Sugars (Granulated vs. Brown)
We use both granulated sugar and light brown sugar here, and it’s not interchangeable. Granulated sugar promotes spread and crispness on the edges. Brown sugar, because it contains molasses, adds deep flavor, moisture, and ensures the cookie stays soft and chewy long after it cools.
It's the secret weapon for these soft Peanut Butter Cookies . If you only use granulated sugar, your cookies will spread too thinly and turn rock hard.
Why Creamy Peanut Butter Delivers the Best Chew
Listen, I love chunky peanut butter in a sandwich, but not in this dough. For truly soft and chewy Peanut Butter Cookies , you need the smooth, emulsified fat and solids of creamy peanut butter.
The pieces in chunky varieties can interrupt the gluten structure, leading to a crumbly, dry cookie rather than a tender one. Stick to the creamy stuff for perfect results every time you make Peanut Butter Cookies .
The Importance of Chilling the Dough
I know, I know. Waiting is torture. But chilling the dough for at least 30 minutes is non-negotiable for superior Chewy Peanut Butter Cookies . Chilling solidifies the butter and peanut butter fats.
When these cold fats hit the hot oven, they melt slower, meaning the cookies rise slightly and hold their shape before they spread, giving you that beautiful, thick final product. Warm dough equals flat, greasy discs. You’ve been warned!
Essential Ingredients for Your Classic Peanut Butter Cookie Dough
The beauty of this recipe is its simplicity, relying on standard pantry items. But the quality and state of those ingredients matter immensely. You can't make the Best Peanut Butter Cookies with inferior components.
Selecting the Right Peanut Butter Consistency
CRITICAL NOTE: Use standard, emulsified, shelf stable peanut butter (Jif, Skippy, etc.). Do not use "natural" peanut butter where the oil separates out and pools on top.
Those often have inconsistent amounts of fat and water, leading to unpredictable baking results usually resulting in overly flat Peanut Butter Cookies .
Dairy Notes: Butter vs. Shortening Considerations
We use unsalted butter here because the flavour is incomparable, providing richness and depth. However, if you want a cookie that stays soft and tender for days longer and holds its shape beautifully (like those professional bakery Peanut Butter Cookies ), substitute half the butter with vegetable shortening.
Shortening has a higher melting point, minimizing spread. Always use room temperature butter for proper creaming; cold butter won't incorporate the sugar correctly.
Essential Ingredient Substitutions for Allergies/Diet
It’s always helpful to have alternatives ready. We want everyone to enjoy these magnificent Peanut Butter Cookies , even if they have dietary restrictions.
| Ingredient | Substitute | Note on Usage |
|---|---|---|
| Peanut Butter | Sunflower Seed Butter (SunButter) or Almond Butter | Sunflower seed butter bakes almost identically, though it might turn a greenish hue in certain conditions (it’s harmless!). |
| All-Purpose Flour | 1:1 gluten-free Blend | Ensure the blend contains xanthan gum for structure. |
| Egg | Flax Egg (1 Tbsp flaxseed meal + 3 Tbsp water, rested 5 mins) | May slightly affect chewiness but works perfectly for binding the dough. |
| Unsalted Butter | dairy-free Butter Sticks | Use sticks designed for baking, not tubs. |
Chef’s Note: Want to make easy 3 Ingredient Peanut Butter Cookies ? You can use a formula of 1 cup PB, 1 egg, and 1/2 cup sugar (or honey). However, this classic recipe adds flour and leavening agents for superior texture and stability.
Trust me, the extra ingredients are worth the effort!
Simple Steps to Making Iconic Criss Cross Cookies
This is where the magic happens. Follow these steps exactly for perfect texture and volume.
Creaming the Fats: Achieving the Optimal Lightness
Start with softened butter and the dual sugars (brown and granulated). Cream them in your mixer on medium speed for 3 to 4 minutes. You are looking for a noticeably lighter colour and fluffy texture.
This step incorporates air, which is essential for the structure of your Classic Peanut Butter Cookies . After the butter and sugars are light, add the peanut butter and mix just until smooth.
Forming Uniform Dough Balls
Use a cookie scoop! Seriously, this is my biggest sanity saver. A 1.5 inch scoop ensures every cookie bakes evenly and takes exactly the same amount of time. If you eyeball the size, one cookie might be done while another is still gooey. Roll the scooped dough gently between your palms until smooth.
If you want to integrate a fun element like making Peanut Butter Cookies with Chocolate Chips , stir the chips in right before chilling the dough.
Mastering the Signature Fork Criss Cross Technique
This step is both tradition and engineering. Roll your dough balls and place them on the parchment lined sheet. Now, dip your fork tines into a small bowl of granulated sugar. Press the fork gently onto the top of the dough ball to flatten it slightly.
Lift the fork, turn the cookie 90 degrees, and press again to form the iconic crosshatch. The sugar prevents sticking and adds a lovely crystal sparkle to your finished Peanut Butter Cookies .
Troubleshooting and Expert Baker's Tips
We all make mistakes. I once forgot the baking soda entirely and ended up with hard, brittle disks. Learn from my folly! Making great Peanut Butter Cookies involves avoiding these common pitfalls.
Preventing Spread: The Dough Temperature Rule
If your dough is spreading too much, it’s too warm. Did you skip the 30 minute chill? Did you handle the dough too much? If the kitchen is hot, pop your baking sheets with the shaped dough and criss crosses already done into the fridge for 10 minutes before baking.
Cold dough is the key to thick cookies. This is crucial for successful batches of Chewy Peanut Butter Cookies .
Why Your Criss Crosses Disappear (And How to Fix It)
If your beautiful fork marks vanish while baking, you have too much leavening (baking soda/powder) or too much fat. You might also have over creamed the butter. If you follow my ingredient ratios exactly, the likely culprit is too warm a dough or using natural peanut butter.
If they start to fade in the oven, you can try gently pressing the criss cross again halfway through the bake (around the 5 minute mark), but be careful not to deflate them!
Adjusting Bake Time for a Softer Center
Remember the sensory cues! We are looking for edges that are set and lightly golden , but the center should still look slightly pale and maybe even a little puffy. Pull the Peanut Butter Cookies out at 10– 12 minutes.
They will continue cooking on the hot baking sheet for those crucial 5 minutes, achieving that perfect, fudgy middle. Don't wait until they look completely done in the oven, or they'll be hard rocks once cooled.
This is the difference between dry cookies and truly wonderful Soft Peanut Butter Cookies .
Maximizing Freshness: Storage and Preservation Guide
These treats are best eaten the day they are made, but they store remarkably well too. There’s nothing worse than stale, dry baked goods, so let’s talk preservation for these perfect Classic Peanut Butter Cookies .
Best Practices for Storing Baked Cookies
Once completely cooled (and I mean completely ), store your Peanut Butter Cookies in an airtight container at room temperature. They will stay perfectly soft and chewy for 4 to 5 days.
For extra protection against drying out, pop half a slice of plain sandwich bread into the container; the cookies will absorb the moisture from the bread. Make sure the cookies are fully cooled before sealing, or condensation will ruin the texture.
Freezing Unbaked Dough Balls for Future Use
This is my absolute favorite trick. You can easily make a double batch of the dough and freeze half. Scoop and roll the dough balls, create the criss cross pattern, and place them on a parchment lined tray. Freeze until solid (about 2 hours).
Transfer the solid dough balls to a freezer safe zip-top bag. They keep beautifully for up to 3 months. When the craving hits, bake them straight from frozen, adding 2– 4 minutes to the original bake time for sensational, fresh Peanut Butter Cookies whenever you want them.
Shelf Life of Homemade Peanut Butter Treats
Baked cookies can be frozen, too! Once cooled, wrap them tightly in plastic wrap (in stacks of 4 or 5) and then place them inside an airtight container or freezer bag. They maintain quality for about 2 months.
To reheat, just let them thaw at room temperature, or give them a quick 10 seconds in the microwave to make them warm and fudgy again. That's how you keep your supply of the Best Peanut Butter Cookies constant!
Delicious Pairings for Your Finished Bake
If you've mastered these perfect Peanut Butter Cookies , you need to know how to serve them right.
- Milk is Mandatory: A towering glass of icy cold milk is the only true partner for the intense richness of peanut butter.
- Ice Cream Sandwich: Use two cookies to sandwich a generous scoop of vanilla or salted caramel ice cream. Instant dessert upgrade!
- The Swap: If you are obsessed with that salty sweet contrast, try substituting these for the base of a dessert, similar to how we use shortbread in Fudge stripe cookies: Crisp Shortbread with Glossy Chocolate .
- Chocolate Love: Melt some milk chocolate and drizzle it over the cooled cookies, or try adapting the dough to make Peanut Butter Cookies with Hershey Kisses (press the Kiss gently into the center immediately after baking).
Seriously, go make a batch of these right now. You won't regret having these perfectly chewy, utterly satisfying Peanut Butter Cookies sitting on your counter. Happy baking, friend!

Recipe FAQs
Why did my cookies spread too much or turn out too flat?
Excessive spreading is often caused by warm dough or soft butter, which melts too quickly in the oven. Ensure your butter is truly at cool room temperature (not greasy or melted) and always chill your dough for at least 30 minutes if your kitchen is warm, as this helps solidify the fat.
Why are my finished peanut butter cookies dry or crumbly?
The primary culprit is usually over baking or inaccurate measuring of the flour. Remove the cookies from the oven when the edges are set and lightly golden, but the center still looks slightly soft, as they will continue to set on the hot baking sheet.
Can I use natural or non-stabilized peanut butter for this recipe?
While you can, natural peanut butter (the kind with separated oil) may result in a drier, more crumbly cookie because its fat and moisture content is less consistent than traditional stabilized brands.
If you choose to use it, ensure it is thoroughly stirred and consider reducing the flour by 1-2 tablespoons to maintain moisture.
Is chilling the dough necessary, and how long should I chill it?
Yes, chilling is highly recommended as it solidifies the fats, preventing excessive spreading and ensuring a thicker, chewier cookie. A minimum chill of 30 minutes is ideal, but the dough can be refrigerated for up to 3 days, deepening the flavor profile.
How can I make this recipe gluten-free or vegan?
To make them gluten-free, substitute the all-purpose flour with a 1:1 gluten-free baking blend that includes xanthan gum. For a vegan version, swap the dairy butter for a plant based baking stick and replace the egg with a flax egg (1 tablespoon flaxseed meal mixed with 3 tablespoons water, rested for 5 minutes).
Why do I need to create the fork criss cross pattern?
The iconic crosshatch is both aesthetic and functional. Peanut butter cookie dough is inherently dense, and the pressing action flattens the mound slightly, ensuring the cookie bakes evenly through the center and prevents the edges from burning before the middle is fully cooked.
What is the best way to store the dough or finished cookies?
Store baked cookies in an airtight container at room temperature for up to one week to maintain their chewiness. To freeze the dough, scoop and shape the balls (with the crosshatch pressed in), freeze them solid on a sheet pan, and then transfer them to a freezer bag; bake directly from frozen, adding 2-4 minutes to the bake time.
Chewy Classic Peanut Butter Cookies
Ingredients:
Instructions:
Nutrition Facts:
| Calories | 120 kcal |
|---|---|
| Protein | 3.0 g |
| Fat | 6.0 g |
| Carbs | 14.0 g |
