Chocolate Covered Strawberries: Crisp Shell
- Time: Active 20 minutes, Passive 1 hours, Total 1 hours 20 mins
- Flavor/Texture Hook: A crisp chocolate shatter followed by a burst of tart, juicy fruit.
- Perfect for: Romantic surprises, last minute party platters, or a sophisticated DIY gift.
- Create Exquisite Homemade Chocolate Covered Strawberries
- Why These Flavors Work
- Essential Stats and Prep Times
- Elements for a Flawless Shell
- Tools for a Clean Finish
- Steps for a Smooth Coating
- Fix Common Dipping Failures
- Dietary Swaps for Every Guest
- Keeping the Berries Fresh
- Best Ways to Serve
- Kitchen Myths Debunked
- Recipe FAQs
- 📝 Recipe Card
Create Exquisite Homemade Chocolate Covered Strawberries
The smell of melting semi sweet chocolate always takes me back to my first kitchen disaster. I was trying to impress a date and ended up with a grainy, gray mess because I let a single drop of water hit the bowl.
It was a total nightmare, but it taught me everything I know now about how chocolate behaves when it's being stubborn.
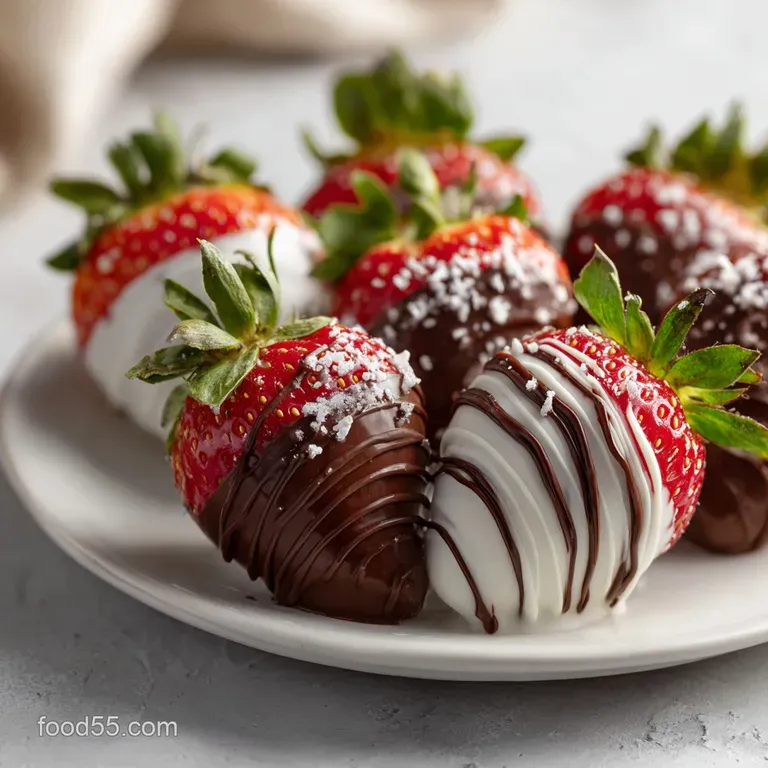
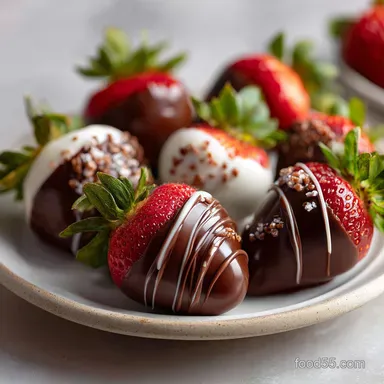
Today, we're skipping the heartbreak and going straight to that satisfying crackle you get from a high end confection. You want a shell that doesn't just slide off the fruit the second you take a bite. It should be a crisp, thin layer that highlights the berry rather than overwhelming it with a thick, waxy coating.
We've all seen those sad, sweating berries in plastic containers at the grocery store, right? Those are usually sitting in a pool of their own juices because they weren't dried properly or were kept in a humid fridge too long.
This recipe fixes all of that, ensuring your Covered Strawberries look like they belong in a boutique window.
Why These Flavors Work
- Surface Tension Mastery: The refined coconut oil reduces the viscosity of the chocolate, allowing it to flow smoothly over the curves of the fruit without clumping.
- Acidic Cleansing: A vinegar soak removes natural waxes and spores from the strawberry skin, which helps the chocolate bond directly to the fruit.
- Thermal Stability: Using bar chocolate instead of chips provides a higher cocoa butter content, which creates a more stable emulsion that resists melting on your fingers.
- Contrast Dynamics: The bitterness of 10 oz semi sweet chocolate cuts through the natural sugars of the long stemmed berries for a balanced profile.
The Physics of the Snap
Fat crystals in the chocolate align into a tight structure when cooled gradually rather than shocked with extreme cold. This specific alignment is what creates that signature shatter and prevents the chocolate from feeling soft or fudge like in your mouth.
| Prep Method | Total Time | Texture Outcome | Best For |
|---|---|---|---|
| Double Boiler | 1 hours 20 mins | Glossy and snappy | Professional gifting |
| Microwave | 45 minutes | Matte and softer | Quick family snacks |
| Cold Shock | 30 minutes | Dull and brittle | Immediate eating |
If you are looking for more ways to use high-quality cocoa, you might enjoy my Foolproof Baileys Chocolate recipe for another decadent treat. It uses a similar melting technique but results in a much creamier, melt in-your mouth center that pairs beautifully with fresh fruit.
Essential Stats and Prep Times
| Ingredient Component | Science Role | Pro Secret |
|---|---|---|
| Semi Sweet Bar | Structural Base | Chop into tiny, uniform shards to ensure even melting without hot spots. |
| Refined Coconut Oil | Emulsifying Agent | Use refined only; virgin oil adds a coconut scent that distracts from the fruit. |
| Long Stemmed Berries | Grip & Esthetics | The stems act as a natural handle, preventing fingerprints on your glossy finish. |
Elements for a Flawless Shell
- 1 lb fresh long stemmed strawberries: Look for bright red color all the way to the top. Why this? Stems make dipping easier and keep your hands clean during the process.
- 10 oz semi sweet chocolate bars: Avoid "baking chips" if possible. Why this? Bars contain fewer stabilizers, leading to a much smoother, velvety melt.
- 1 tsp refined coconut oil: This is our secret for the "snap." Why this? It thins the chocolate just enough for a professional, thin shell coating.
- 4 oz white chocolate: For the decorative drizzle. Why this? High milk solids provide a bright white contrast against the dark base.
- 1 cup cold water: For the cleaning bath.
- 2 tbsp white vinegar: Essential for prep. Why this? It kills mold spores and strips away residue so chocolate actually sticks.
Tools for a Clean Finish
You don't need a professional kitchen, but a few specific items make this much less stressful. A glass bowl that fits snugly over a small saucepan creates the best double boiler. This indirect heat is much safer than the microwave, where chocolate can burn in a heartbeat.
You will also want a roll of parchment paper not wax paper. Parchment has a silicone coating that allows the set chocolate to release perfectly without leaving half the shell behind. A small fork or a bamboo skewer can help with the white chocolate drizzle if you don't have a piping bag.
Steps for a Smooth Coating

- Clean the fruit. Mix 1 cup cold water with 2 tbsp white vinegar and soak the 1 lb strawberries for 5 minutes. Note: This removes any dirt or lingering pesticides that prevent the chocolate from adhering.
- Dry completely. Pat each berry with a paper towel and let them air dry on a rack for at least 30 minutes until the skins feel matte and bone dry.
- Prep the chocolate. Chop the 10 oz semi sweet chocolate into small, uniform pieces using a serrated knife. Note: Small pieces melt faster and more evenly, preventing the bottom from burning.
- Create a double boiler. Simmer two inches of water in a pot, then place your glass bowl on top, ensuring the bottom of the bowl doesn't touch the water.
- Melt the base. Add the chopped chocolate and 1 tsp refined coconut oil to the bowl until the mixture is glossy and liquid.
- Execute the dip. Hold a strawberry by the stem and swirl it through the chocolate, coating it about three quarters of the way up.
- Remove excess. Lift the berry and gently shake it, then swipe the bottom against the edge of the bowl until the heavy dripping stops.
- Set on parchment. Place the berry on a lined sheet pan and repeat with the remaining 1 lb of fruit.
- Drizzle decorations. Melt the 4 oz white chocolate, then use a spoon to flick rapid, horizontal lines across the set dark chocolate until a striped pattern forms.
- Final set. Let the berries sit at room temperature for 30 minutes, then move to the fridge for 15 minutes until the shell is firm to the touch.
Chef Tip: If your chocolate starts to thicken or "sludge" up while dipping, place it back over the steaming water for 30 seconds. Never add water to thin it out, or the whole batch will seize and turn into a grainy rock.
Fix Common Dipping Failures
Why Your Chocolate Seized
If your smooth chocolate suddenly turns into a gritty, clumpy paste, a tiny bit of moisture likely got into the bowl. This is the most common heartbreak in candy making. Even steam from the pot below can cause this if the bowl isn't sized correctly.
Why Your Berries Weep
If you see a puddle of syrup forming under your Chocolate Covered Strawberries, it's usually because of temperature shock. Moving them from a hot kitchen to a freezing fridge causes the fruit to contract and push moisture out through the skin.
| Problem | Root Cause | Solution |
|---|---|---|
| Chocolate sliding off | Berries were still damp | Use a hair dryer on "cool" to ensure total dryness before dipping. |
| Gray/White streaks | Chocolate got too hot | Keep the water at a bare simmer; never let it reach a rolling boil. |
| Thick, clumpy shell | No oil or old chocolate | Add a half teaspoon more coconut oil to thin the consistency. |
Common Mistakes Checklist
- ✓ Skipping the vinegar wash (residue prevents the chocolate from "gripping" the fruit).
- ✓ Dipping cold berries (condensation will form instantly under the chocolate shell).
- ✓ Letting the bowl touch the simmering water (this scorches the chocolate).
- ✓ Using a plastic bowl (plastic retains moisture and smells that can taint the cocoa).
- ✓ Refrigerating for too long (this dulls the shine and causes the berries to "sweat").
Dietary Swaps for Every Guest
Scaling this recipe is fairly straightforward because the ratio is what matters. If you are making a massive batch for a wedding or a large party, remember that 10 oz of chocolate generally covers about 20 to 25 medium berries.
If you double the recipe, you don't need to double the vinegar for the wash one batch of soaking liquid can handle quite a few berries.
For those who want to experiment with different bases, you can easily swap the semi sweet bars for a very dark 70% cocoa bar if you like a more sophisticated, bitter edge. If you prefer a lighter touch, My & Irresistible recipe for white chocolate covered treats offers a great guide on handling the more temperamental nature of white cocoa butter.
| Original Ingredient | Substitute | Why It Works |
|---|---|---|
| Semi Sweet Chocolate | Vegan Dark Chocolate | Most dark chocolate is naturally dairy-free; check labels for a vegan friendly treat. |
| White Chocolate | Melted Peanut Butter | Adds a salty contrast. Note: Will not set as hard as chocolate; keep chilled. |
| Refined Coconut Oil | Cocoa Butter | Provides the same thinning effect with a more authentic chocolate flavor. |
When scaling up to 2x or 3x the amount, I usually work in batches. Melt 10 oz at a time so the chocolate stays at the optimal dipping temperature. If you try to melt 30 oz at once, the bottom will often overheat before the top is even soft.
Keeping the Berries Fresh
Storage Guidelines These are best eaten the day they are made. If you must store them, put them in a single layer in a container lined with paper towels to absorb any moisture. Keep them in a cool, dry place rather than the fridge if your house isn't too warm.
They will stay "snap worthy" for about 8 to 12 hours. If refrigerated, they will last 2 days, but the shell may lose its luster.
Zero Waste Tips If you have leftover melted chocolate, don't throw it out! Pour it onto a piece of parchment, sprinkle some crushed nuts or dried fruit on top, and let it harden into a quick "bark." You can also dip pretzels, dried apricots, or even potato chips into the remaining pool of chocolate.
If you have stems or bruised berries, toss them into a blender for a smoothie later.
Best Ways to Serve
Presentation is everything with this dish. If you are making a Valentines Day Chocolate Covered Strawberries Gift Idea, consider placing each finished berry in a small paper cupcake liner. This prevents them from bumping into each other and keeps the drizzle looking sharp.
It also makes them much easier for guests to grab at a party without getting chocolate on their fingers.
For a true "wow" factor, you can assemble a Chocolate Covered Strawberries Bouquet DIY. Simply slide a long wooden skewer into the bottom of each berry before dipping. Once set, you can tuck the skewers into a vase filled with floral foam and some greenery.
It looks incredible and keeps the berries from touching any surfaces.
The flavor of these berries is enhanced by pairing them with something slightly salty. A side of roasted almonds or even a glass of dry sparkling wine provides a beautiful counterpoint to the sweetness.
Just remember to take them out of the fridge about 15 minutes before serving so the fruit isn't ice cold, which can mask some of its natural floral notes.
If you are feeling adventurous with your pairings, try serving these alongside a hot cup of Cloud Nine Steam Coffee. The heat from the coffee slightly softens the chocolate shell as you eat, creating a really lovely textural experience that feels like a high end cafe treat. It's a simple addition that makes the whole experience feel much more special.
Kitchen Myths Debunked
One of the biggest misconceptions is that you need to "seal" the strawberry by dipping it all the way over the top. In reality, leaving a little bit of red showing at the top allows the berry to "breathe" slightly, which can actually slow down the weeping process.
It also looks much more artisanal than a berry completely encased in a dark lump.
Another myth is that adding butter will make the chocolate shinier. Butter contains water, which is the enemy of a crisp chocolate shell. Butter will make the coating soft and greasy, more like a ganache.
Stick to refined coconut oil or pure cocoa butter for that professional, hard set finish that we're looking for here.
Finally,, people often think you need to freeze the berries before dipping to help the chocolate set faster. This is a recipe for disaster! As the frozen berry thaws under the warm chocolate, it releases moisture and expands, which will cause your beautiful shell to crack and slide right off in a messy heap.
Room temperature fruit is the only way to go.

Recipe FAQs
Can I dip frozen strawberries directly into melted chocolate?
No, never use frozen fruit. Frozen berries release excessive moisture as they thaw, which instantly causes the chocolate coating to streak, bloom, or slide off entirely.
How to properly dry strawberries before dipping them in chocolate?
Gently wash them in a 2:1 water-to-vinegar bath, then air dry completely. Pat each berry thoroughly with a clean paper towel, and allow them to sit on a rack for at least 30 minutes until the skins feel entirely dry to the touch.
How to melt semi sweet chocolate without burning or seizing it?
Melt slowly over indirect heat, stirring frequently. Use a double boiler setup with simmering (not boiling) water, ensuring the bowl never touches the water surface, or use 50% microwave power in 30-second bursts.
Is it true that adding water helps thin out seized chocolate for dipping?
False. Adding any water, even steam, to melted chocolate will cause the cocoa solids to clump immediately, resulting in a grainy, unusable texture. If it seizes, add more fat like coconut oil.
How long can I safely store chocolate covered strawberries?
Eat within 12 hours for optimal texture, maximum 2 days refrigerated. They are best eaten the day they are made; store them in a single layer on paper towels to wick away any condensation.
How do I achieve a thin, professional looking chocolate shell instead of a thick coating?
Incorporate a small amount of refined coconut oil to lower viscosity. The oil allows the chocolate to flow thinner over the fruit and achieve that satisfying, crisp snap when you bite into it, similar to the technique used to stabilize frosting in our Cinnamon Roll Bites recipe.
What is the secret to making the chocolate adhere perfectly to the berry skin?
Thoroughly cleaning and drying the strawberry skin is essential. The vinegar wash removes natural fruit waxes that prevent the chocolate from forming a strong bond; if the skin is not totally dry, the shell will separate upon cooling.
Crispy Chocolate Covered Strawberries
Ingredients:
Instructions:
Nutrition Facts:
| Calories | 89 kcal |
|---|---|
| Protein | 0.9 g |
| Fat | 5.3 g |
| Carbs | 11.3 g |
| Fiber | 1.2 g |
| Sugar | 9.5 g |
| Sodium | 6 mg |
