Red Pepper Jelly the Great British Glaze Perfect Set High Heat

- The Secret Weapon of the Charcuterie Board
- The Essential Ingredients Checklist for Vibrant Red Pepper Jelly
- Mastering the Preserve: Step and by-Step Jelly Making
- Sealing the Deal: Ensuring a Safe and Shelf and Stable Preserve
- Beyond the Board: Creative Uses for Red Pepper Jelly
- Troubleshooting and Glazing Variations
- Recipe FAQs
- 📝 Recipe Card
The Secret Weapon of the Charcuterie Board
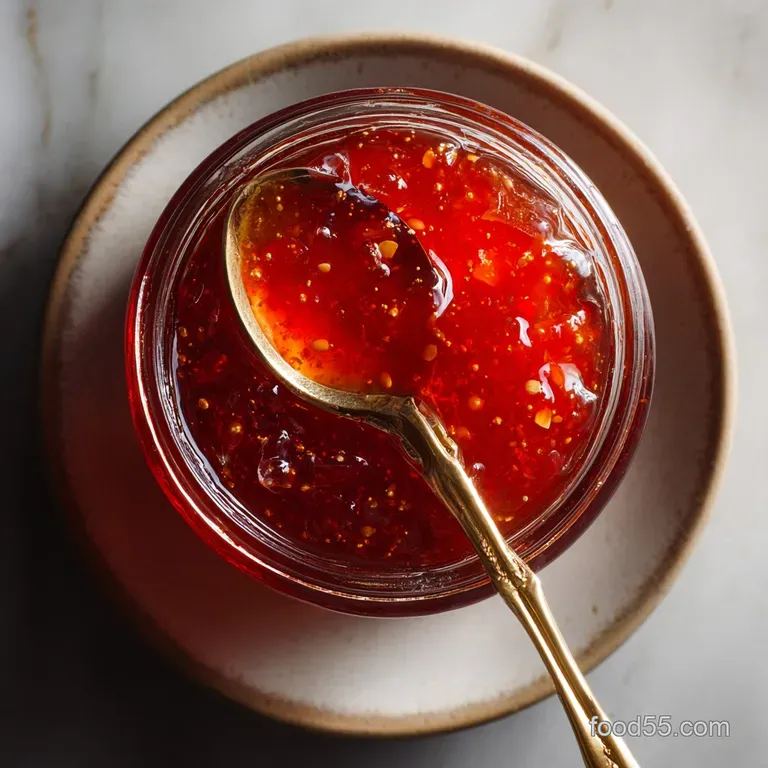
Okay, let’s talk about the condiment hall of fame. You know that jar of shimmering, jewel and toned magic that always disappears first at every holiday party? Yeah, that’s the one. Red Pepper Jelly. It's the perfect foil to a salty cracker.
It’s the sweet and spicy kick that makes boring chicken breast feel like a Michelin and star moment. My goal here isn't just to give you A recipe, but to give you the Best Pepper Jelly Recipe .
One that sets perfectly every single time because honestly, if it doesn't set, what are we even doing?
Why Achieving the Perfect Set Matters
I’ve been there. I boiled and boiled, poured the hot liquid into the jars, and 24 hours later? Liquid gold. Disappointing, right? If it doesn’t set, it’s pepper syrup, and while that’s tasty on pancakes, it’s useless for a proper red pepper jelly cream cheese dip .
We need that glorious wobble, that clean slice that holds its shape. That comes down to understanding the science of sugar, acid, and pectin. This isn't baking where you can eyeball things. This is chemistry. Trust me, we are aiming for firm, beautiful jelly, not sauce.
The Essential Balance of Sweet, Tart, and Cheeky Heat
The flavour profile of good Sweet Red Pepper Jelly Recipe needs a tightrope walk. Too sweet and it's cloying, like a bad dessert. Too much vinegar, and it tastes like salad dressing. We want that slow burn that kicks in right as the initial sweetness fades.
That perfect balance requires enough heat (I usually use Fresnos or jalapeños) to contrast with the massive amount of sugar. That tartness (from the vinegar) is absolutely essential, both chemically to help the pectin set and gastronomically to cut through the richness of a good block of cheese.
A Quick History of Pepper Preserving
Honestly, who decided to combine chili and jam? Bless them. While classic fruit preserves are ancient history, the specific tradition of intensely flavoured, savoury and sweet pepper jellies really took off in the American South, and then thankfully, it jumped across the pond.
It was a pragmatic way to use up a bumper crop of peppers, sure, but mainly it's a much more exciting way to eat grilled cheese. It belongs in the modern pantry as much as mustard does.
The Essential Ingredients Checklist for Vibrant Red Pepper Jelly
Right then. Time to get technical. Before you even start chopping, measure everything meticulously. Get out your measuring cups. I mean it. Jelly making is ruthless about ratios. Do not try to eyeball the sugar. You will regret it.
Choosing Your Heat Level: From Mild Jalapeño to Fiery Habanero
I usually stick to jalapeños for the classic heat level. They offer a nice background hum without requiring a glass of milk immediately afterwards. If you want to kick it up a notch, switch out one of the bell peppers for a deeper red chilli like a Hungarian wax, or use serranos (be careful!).
If you’re feeling truly brave, a sliver of habanero works, but handle those little guys with gloves. Seriously. Don't touch your eyes after chopping habaneros. Ever.
Understanding Pectin: The Preserver's Best Friend
Pectin is the magic glue. We are using liquid pectin here (often sold as Sure Jell in the pouch), which needs a very specific environment lots of sugar and acid and a very short, hard boil to set up. If you forget to add the pectin, you get soup.
If you add it too early, you risk breaking it down before it can do its job. Liquid pectin is added right at the end, after the sugar is dissolved, which makes timing super critical.
Essential Kitchen Tools for over High heat Canning Safety
Look, this involves boiling sugar. Boiling sugar is basically liquid napalm that splatters. Safety first, and the right tools make the process smoother and safer.
- A deep, heavy and bottomed stockpot (for splatter control and even heat distribution).
- A jar lifter (non and negotiable for water bath canning).
- A wide and mouth canning funnel (keeps your jar rims pristine essential for a good seal).
- A reliable timer, set right next to the stove. Don't use your phone and risk dropping it in the boiling lava.
- A long and handled wooden spoon or spatula.
Mastering the Preserve: Step and by-Step Jelly Making
( Note: Refer to the Ingredients and Instructions Outline at the beginning for exact quantities and sequence. )
Related Recipes Worth Trying
- Chicken Cabbage Stir Fry The Quick WokFired Weeknight Hero — Our Chicken Cabbage Stir Fry recipe delivers restaurantquality wok hei flavor in under 45 minutes Learn how to velvet chicken for the perfect texture in...
- Healthy Soup Creamy Vegan Red Lentil Recipe for Weight Loss — This Healthy Soup recipe is an ultracreamy highprotein comfort classic ready in under an hour Its perfect for clean eating and effortless weight loss This...
- PanSeared Tilapia in Tomato Basil Sauce Ready in 25 Minutes — PanSeared Tilapia in Tomato Basil Sauce is your new speedy weeknight tilapia dinner Get flaky panseared fish with bursting tomato basil sauce in 25 minutes
Sealing the Deal: Ensuring a Safe and Shelf and Stable Preserve
This is where we turn a beautiful hot mixture into a long and lasting, shelf and stable product. Attention to detail here is everything if you want a true red pepper jelly canning recipe that lasts.
Preparing the Fruit Base: Pulping and Pureeing Safely
Before the heat even goes on, we need to process the peppers. We need a consistency that’s finely minced, almost like chunky salsa, but not a full liquid puree. Pulse the peppers and chillies in your food processor until they are uniform.
The goal of the processor is to get the flavour out, but keep enough texture so the final jelly has those delightful flecks of pepper that make it look so stunning in the jar.
Achieving the Rolling Boil: The Critical Pectin Activation Phase
This is the moment of truth. You must reach what they call a "hard boil." It means the mixture is bubbling so vigorously that even if you stir it hard, the bubbles don't stop. Once you hit that, ensure your five cups of sugar are fully dissolved, then dump in the liquid pectin quickly. And then...
set the timer for exactly 60 seconds.
This is the point where you literally start counting down the minute. If you boil the mixture for 90 seconds instead of 60 seconds after adding pectin, you risk breaking the pectin’s chains and ending up with a floppy, sad result. Be a clock watcher!
Conducting the Cold Plate Wrinkle Test for a Confident Set
The old and fashioned way, and still the best way, is the Wrinkle Test. Chill a saucer in the freezer while you’re cooking. Right after the 60 seconds is up and you’ve pulled the pot off the heat, drop a teaspoon of the hot jelly onto the chilled plate.
Return it to the freezer for 30 seconds, then push it gently with your finger. If it pushes back and wrinkles slightly, you’re golden. If it just rolls off like water, return the pot to the boil for another 60 seconds and re and test. Don’t jar it until it passes!
Sterilization Protocol for Jars and Lids
We sterilise for two reasons: to kill any lurking bacteria, and to keep the glass hot so it doesn't shatter when the boiling jelly hits it. Keep your jars hot in the canner water or a very low oven until you need them. Cold jars and hot jelly equal disaster.
Once the jelly is finished, wipe the rims clean with a damp, clean cloth (any sugar residue will stop the seal from forming).
The Gentle Water Bath Technique for Long and Term Storage
Once filled (remember that 1/4 inch headspace!), wiped, and sealed fingertip and tight, they go into the water bath. This step seals them hermetically for long and term storage. Bring the water back to a boil, process for 10 minutes, and lift them out gently with the jar lifter.
Place them on a towel or cooling rack and leave them completely undisturbed for 24 hours while the magic happens. Listen for the satisfying pop!
Beyond the Board: Creative Uses for Red Pepper Jelly
Sure, it belongs on a cheese board. That’s a given. But are you truly maximizing its potential? Probably not. We need to go bigger. This jar of homemade glory is too versatile to be relegated to just appetizer duty.
Troubleshooting and Glazing Variations
Glazing a Ham or Turkey: A Holiday Must and Try
Forget the basic honey glaze. Mix a quarter cup of the Red Pepper Jelly with a splash of cider vinegar or orange juice. Brush this liberally over your baked ham or turkey breast during the last 15 minutes of cooking.
The sugar caramelises beautifully, and the heat provides a complex crust that store and bought glazes just can't touch.
The Perfect Pairing: Cheese and Cracker Recommendations
If you’re making the classic block of softened cream cheese topped with the jelly, you’re already winning (it’s the easiest Pepper Jelly Dip ever). But expand your horizons!
| Cheese Type | Cracker Pairing | Notes |
|---|---|---|
| Cream Cheese | Plain Water Biscuit | The classic, ultimate simple pairing. |
| Brie/Camembert | Thin Baguette Slice | The creamy texture loves the sweet bite. |
| Mature Cheddar | Savory Digestive | Salty, sharp cheese needs the sweetness contrast. |
| Goat’s Cheese (Chevre) | Crackers with Herbs | The tang of the goat cheese is amazing with the heat. |
Enhancing Cocktails and Vinaigrettes
Try a dollop (start small, maybe half a teaspoon) in a spicy margarita! It adds a beautiful color and thick sweetness. Or, whisk a teaspoon into your next simple vinaigrette (olive oil, lemon, salt). It emulsifies slightly and adds a wonderful sweetness and viscosity. It’s brilliant.
Why Didn't My Jelly Set? Common Mistakes and Solutions
Usually, the setting failure boils down to three things, and none of them are incurable:
- Too little sugar. (I know sugar seems scary, but don't cheat the sugar! It's necessary for the pectin to activate.)
- Improper boil time. (The 60 seconds wasn't aggressive enough, or you boiled it for too long, breaking the pectin down.) Solution: Reboil for another minute and re and test using the cold plate.
- Old pectin. (Check the date! Pectin doesn't last forever. If it’s expired, it simply won't gel.) Solution: Add a new pouch of pectin and reboil for one minute.
Maximizing Shelf Life: Storage Dos and Don'ts
If your jars sealed correctly (that satisfying pop!), the red pepper jelly is good in the pantry for up to 18 months. Just keep them out of direct sunlight. Once opened, treat it like any jam: fridge it, and use it within 3 4 weeks.
If you skipped the water bath canning step entirely, you must store the jars in the refrigerator immediately, where they will last about 3 months.
Adjusting Acidity and Sweetness Ratios
Don’t mess with the vinegar and to-sugar ratio if you plan to water bath process (it affects safety and the necessary pH). But if you find the final product too sweet for your personal taste, next time, slightly increase the number of chillies you add.
The increase in heat perception will balance the sweetness without compromising the necessary set.

Recipe FAQs
Oh dear, my jelly is still liquid! Why didn't my Red Pepper Jelly set properly?
Setting failure is usually down to the sugar pectin ratio or, more commonly, the boil time. You must hit that exact, rapid 60-second hard rolling boil after adding the liquid pectin, as boiling too long or too short risks breaking the crucial chemical bond needed for a firm set.
That’s a lot of sugar! Can I use less sugar or perhaps a sweetener substitute?
Unfortunately, in traditional preserves like this, the sugar is structurally necessary to interact with the pectin to form the gel, not just for taste. Reducing the sugar quantity will almost certainly result in a beautiful but frustratingly runny pepper syrup instead of a proper Red Pepper Jelly.
Once I've canned this, how long will it keep in the cupboard?
If processed correctly in a boiling water bath and the lids have achieved a proper vacuum seal (the satisfying 'pop'), the jars will be shelf stable for up to 18 months in a cool, dark place. Once you crack open a jar, though, pop it in the fridge and finish it within 3 to 4 weeks, please!
I want to dial the heat up (or down). How can I adjust the chilli level safely?
The heat resides largely in the chilli seeds and white membranes, so for a fiery punch, include them during mincing. For a milder, gentler glaze, remove all seeds and membrane entirely, or substitute the chillies for one additional red bell pepper and a mere pinch of dried flakes.
What’s the most authentic, brilliant way to serve this fiery Red Pepper Jelly?
The definitive serving is as the 'Cheeseboard Champion': spooned generously over a wedge of mature cheddar, Stilton, or creamy Brie, served simply with water biscuits. It also makes for an absolutely magnificent, glossy glaze when brushed over a roasting Sunday ham or chicken wings in the last 15 minutes of cooking.
Fiery Red Pepper Jelly Recipe
Ingredients:
Instructions:
Nutrition Facts:
| Calories | 68 kcal |
|---|---|
| Fat | 0 g |
| Fiber | 0.2 g |
