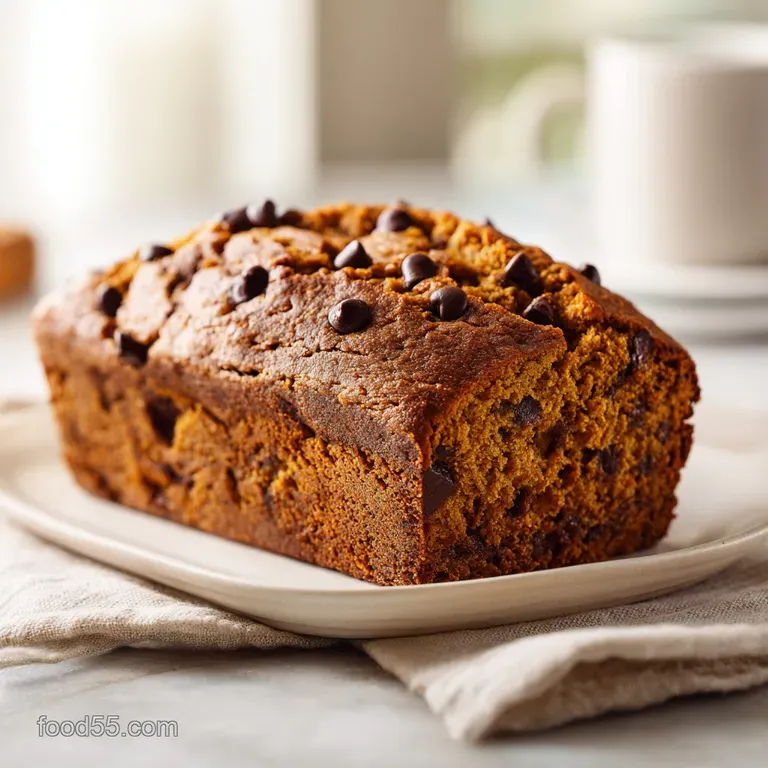
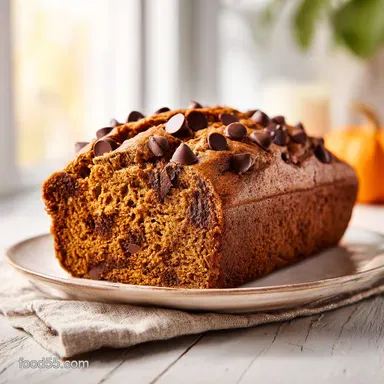
Pumpkin Chocolate Chip Bread: Moist and Spiced
- Time: Active 10 minutes, Passive 60 minutes, Total 70 minutes
- Flavor/Texture Hook: Spiced velvety crumb with molten chocolate pockets
- Perfect for: Cozy weekend mornings or a giftable holiday treat
- Making the Most Tender Pumpkin Chocolate Chip Bread Ever
- Understanding the Secret to a Moist Spiced Loaf
- Component Analysis for Your Homemade Bread
- Essential Details for Your Perfect Loaf
- Simple Kitchen Tools for Baking Success
- A Step by Step Guide to Baking Your Loaf
- Fixing Issues for a Perfectly Level Loaf
- Scaling the Recipe for Any Crowd
- Creative Ways to Customize Your Spiced Loaf
- Debunking Common Pumpkin Baking Myths
- Keeping Your Pumpkin Bread Moist and Fresh
- Delicious Ways to Enjoy Your Warm Slices
- Recipe FAQs
- 📝 Recipe Card
Making the Most Tender Pumpkin Chocolate Chip Bread Ever
There is a specific moment when you’re baking this bread where the kitchen transforms. It happens around the 40 minute mark. The spicy aroma of cinnamon and cloves starts to mingle with the earthy scent of roasting pumpkin, and suddenly your home feels ten degrees warmer.
I remember the first time I made this for a neighborhood potluck; I was so worried about it being dry that I almost over hydrated the batter. But when I pulled that first loaf out and saw the chocolate chips glistening against the deep orange crumb, I knew it was something special.
We often think of quick breads as just "muffins in a loaf pan," but this version is different. It’s got a density that feels substantial without being heavy, and a sweetness that doesn't mask the warm spices. It is the kind of recipe you keep on a stained index card because everyone who tries it asks for a copy.
We aren't looking for a light, airy sponge cake here. We want a rich, tender slice that can stand up to a thick swipe of salted butter or a cup of dark coffee.
What I love most is the simplicity of the process. You don't need a heavy stand mixer or any fancy gadgets. Just a couple of bowls, a sturdy whisk, and about ten minutes of hands on effort. It’s the ultimate low stress bake for when you want a high reward treat.
Whether you’re a seasoned baker or someone who only uses their oven to store sweaters, you can nail this. The secret lies in the emulsion of the wet ingredients and the gentle hand used when folding in the flour.
Understanding the Secret to a Moist Spiced Loaf
Before we get our hands messy, let's talk about why this specific method works so well. It isn't just luck; it's a bit of kitchen logic that makes every bite consistent.
- Hydration Balance: Using a full 15 oz of pumpkin puree provides intense moisture that doesn't evaporate as quickly as milk or water would during the 60 minutes of baking.
- Oil vs. Butter: Neutral oil stays liquid at room temperature, which means your bread feels soft even when it’s cold, whereas butter based breads can feel firm or dry after a day.
- Sugar Saturation: Whisking the sugars vigorously with the eggs and oil for a full minute helps dissolve the granules, creating that desirable shiny, slightly crackled top.
- Gentle Integration: Folding the dry ingredients by hand prevents the over development of gluten, ensuring the crumb remains tender rather than bread like and chewy.
| Method | Time | Texture | Best For |
|---|---|---|---|
| Oven Baked | 60 minutes | Even crumb, golden top | Traditional slices, gifting |
| Stovetop Steam | 75 minutes | Ultra moist, pudding like | Keeping the kitchen cool |
| Air Fryer | 45 minutes | Crispy exterior, soft core | Smaller batches or mini loaves |
The choice between methods really depends on what you're after. While the oven is my go to for that classic "loaf" look with a beautiful crust, a stovetop steam method (placing the pan in a covered pot with an inch of water) creates a texture almost like a steamed pudding. It’s incredibly velvety but lacks that slight outer crunch that makes the edges of a loaf so coveted. If you’ve ever tried making my Mastro's butter cake recipe, you know how important that balance of moisture and crust can be for a truly memorable dessert.
Component Analysis for Your Homemade Bread
Choosing the right components is the difference between a "good" bread and a "where has this been all my life" bread. Let's look at the heavy hitters in this lineup.
| Ingredient | Science Role | Pro Secret |
|---|---|---|
| Pumpkin Puree | Structural moisture | Use 100% pure pumpkin, not pie filling which has added water and sugar. |
| Neutral Oil | Fat suspension | Avocado or grapeseed oil provides a cleaner flavor than vegetable oil. |
| Baking Soda | Leavening agent | Ensure it's fresh; it reacts with the acidic pumpkin to create lift. |
| Brown Sugar | Hygroscopic sweetener | Pack it tightly; the molasses adds a deep caramel note and extra soft texture. |
The interaction between the pumpkin and the baking soda is particularly interesting. Since pumpkin is slightly acidic, it triggers the baking soda immediately upon contact. This is why you want to get your loaf into the oven relatively quickly once the wet and dry ingredients meet.
If the batter sits on the counter for too long, you lose those precious carbon dioxide bubbles, and the bread won't rise quite as high.
Essential Details for Your Perfect Loaf
For this Pumpkin Chocolate Chip Bread, you'll want to have everything measured out before you start. It makes the process much more rhythmic and prevents you from realizing halfway through that you're out of spices.
- 15 oz pumpkin puree: Why this? Provides the base flavor and essential moisture for the entire loaf. (Substitute: Roasted and mashed butternut squash)
- 2 large eggs: Why this? They act as the "glue" that binds the fats and starches together. (Substitute: 1/2 cup unsweetened applesauce)
- 1/2 cup neutral oil: Why this? Keeps the crumb exceptionally soft even after several days in the fridge. (Substitute: Melted coconut oil)
- 1 cup brown sugar: Why this? Adds moisture and a hint of toffee like flavor to the bread. (Substitute: Coconut sugar)
- 1/2 cup granulated sugar: Why this? Helps create a slightly crisp, sweet exterior crust on the loaf. (Substitute: Cane sugar)
- 1 tablespoon vanilla extract: Why this? Rounds out the spices and brings a floral sweetness to the mix. (Substitute: Almond extract)
- 1 3/4 cups all purpose flour: Why this? The structural foundation that holds all those chocolate chips in place. (Substitute: 1:1 gluten-free flour blend)
- 1 teaspoon baking soda: Why this? The primary lift that keeps the dense pumpkin batter from being a brick. (Substitute: 3 tsp baking powder)
- 1/2 teaspoon fine sea salt: Why this? Sharpens the flavor of the chocolate and balances the sugar. (Substitute: Kosher salt)
- 2 teaspoons pumpkin pie spice: Why this? A warm blend of cinnamon, ginger, nutmeg, and cloves for classic flavor. (Substitute: Cinnamon + a pinch of ground cloves)
- 1 cup semi sweet chocolate chips: Why this? high-quality chips hold their shape while providing pockets of molten chocolate. (Substitute: Dark chocolate chunks)
When selecting your chocolate, I usually opt for semi sweet. It has enough bitterness to contrast with the sweet pumpkin but still melts into a velvety texture. If you're a fan of different textures, you might recall how the walnuts in my chocolate chip walnut cookies add a specific crunch; you could certainly add 1/2 cup of toasted pecans here for a similar effect.
Simple Kitchen Tools for Baking Success
You don't need a lot of gear to make a world class loaf, but having the right basics makes the job easier and more enjoyable.
- 9x5 inch loaf pan: This is the standard size. If you use a smaller 8x4 pan, you'll have extra batter don't overfill it, or it will spill over and create a smoky mess in your oven.
- Parchment paper: I like to create a "sling" by cutting a strip that fits the width of the pan and hangs over the long sides. It makes lifting the hot bread out a breeze.
- Large mixing bowl: Give yourself plenty of room to whisk vigorously without splashing pumpkin all over your shirt.
- Fine mesh sieve: Sifting the flour and spices directly over the wet ingredients ensures there are no clumps of baking soda, which can taste bitter if not distributed properly.
- Silicone spatula: Perfect for folding the batter and scraping every last bit of chocolatey goodness into the pan.
- Whisk: A balloon whisk is best for incorporating air into the eggs and sugars during that first minute of mixing.
A step-by-step Guide to Baking Your Loaf

The process is straightforward, but pay attention to the sensory cues. Your eyes and nose are often better indicators of success than a timer.
- Prep the oven: Preheat your oven to 325°F (165°C). Grease a 9x5 inch loaf pan and line it with a parchment paper sling for easy removal. Note: A lower temperature prevents the edges from burning before the center is cooked.
- Mix the wet base: In a large mixing bowl, whisk together the pumpkin puree, eggs, oil, brown sugar, granulated sugar, and vanilla extract. Whisk vigorously for approximately 60 seconds until the mixture is glossy and the sugars begin to dissolve.
- Sift the dry: Sift the all purpose flour, baking soda, salt, and pumpkin pie spice directly over the wet pumpkin mixture. The aroma of the spices hitting the wet pumpkin should be immediate and warm.
- Fold carefully: Using a silicone spatula, begin to fold the ingredients together. Move the spatula in a "J" motion, scraping the bottom and flipping the batter over itself.
- Add the chips: When only a few streaks of flour remain, add the semi sweet chocolate chips.
- Finalize the batter: Continue folding just until no dry flour is visible. Avoid overmixing to maintain a tender crumb; the batter should look thick and slightly lumpy, not smooth like pancake batter.
- Fill the pan: Transfer the batter into the prepared loaf pan, smoothing the top with your spatula.
- Bake the loaf: Bake for 60 minutes. The kitchen will smell like a spice market after 30 minutes.
- Check for doneness: Insert a skewer into the center; it should come out clean or with a few moist crumbs (but no wet batter). The top should feel springy and look deeply golden.
- Cool down: Let the bread rest in the pan for 10 minutes before using the parchment sling to lift it onto a wire rack to cool completely.
Chef's Tip: If you want those "bakery style" tops, sprinkle a few extra chocolate chips on top of the batter right before sliding it into the oven. It makes the final loaf look much more professional!
Fixing Issues for a Perfectly Level Loaf
Even the best bakers run into trouble sometimes. The most common issue with pumpkin bread is a sunken middle or a gummy texture, but these are usually easy to fix once you know what's happening.
Preventing the Sunken Middle
If your bread rises beautifully and then collapses as it cools, it's usually because it was underbaked. The edges set first, but the center needs that full hour to build enough structure to support its own weight. Always use a skewer to check the very center.
Avoiding a Gummy Crumb
A gummy or "rubbery" texture is almost always caused by overmixing. When you stir flour too much, you develop gluten. Gluten is great for chewy sourdough, but it's the enemy of a tender quick bread. Stop stirring the second you don't see any more white flour.
Preventing Soggy Bottoms
If the bottom of your loaf feels wet or dense, it might be sitting in the pan for too long after baking. The steam from the cooling bread gets trapped between the pan and the crust. Get it out onto a wire rack after 10 minutes to let the air circulate.
| Problem | Root Cause | Solution |
|---|---|---|
| Cracked Top | Oven temperature too high | Check oven with a thermometer; use 325°F (165°C). |
| Chips Sinking | Batter too thin or chips too heavy | Toss chips in 1 tsp of flour before adding to the batter. |
| Dry Texture | Too much flour or overbaked | Use a kitchen scale for flour (210g) and check at 55 mins. |
Common Mistakes Checklist
- ✓ Using "Pumpkin Pie Filling" instead of "Pumpkin Puree" (filling has too much liquid).
- ✓ Scooping flour directly with the measuring cup (this packs it down, leading to dry bread).
- ✓ Forgetting to preheat the oven (the initial burst of heat is vital for the rise).
- ✓ Opening the oven door too often (this drops the temp and can cause the loaf to sink).
- ✓ Using expired baking soda (if it's older than 6 months, it might be dead).
Scaling the Recipe for Any Crowd
Whether you are baking for a big family breakfast or just a quiet treat for yourself, this recipe is quite flexible.
How to scale down (1/2 loaf): To make a mini loaf, cut everything in half. Since the recipe calls for 2 eggs, beat one egg in a small bowl and use exactly half of it. Use a small 5x3 inch mini loaf pan and start checking for doneness around 35-40 minutes.
The internal temperature should still reach about 200°F (93°C) for the best structure.
How to scale up (Double batch): Doubling this recipe is great for gifting. You can bake two 9x5 loaves at the same time. However, don't just double the salt and spices blindly; I recommend using 1.5x the salt and spices first, then tasting a tiny bit of the batter to see if it needs the full double amount.
Make sure your oven has enough room for air to circulate between the pans, or the sides might stay pale.
Creative Ways to Customize Your Spiced Loaf
Once you've mastered the classic version, it's fun to play with the flavors. Pumpkin is a fantastic canvas for all sorts of additions.
The "Double Chocolate" Twist
If you want something truly decadent, replace 1/4 cup of the flour with high-quality Dutch processed cocoa powder. This creates a deep, dark batter that makes the chocolate chips pop. It's almost like a brownie but with the moisture and spice of pumpkin bread.
Making it gluten-free
This recipe adapts surprisingly well to gluten-free life. Use a high-quality 1:1 gluten-free flour blend that contains xanthan gum (like King Arthur Measure for Measure). The pumpkin puree provides so much moisture that you won't get that "gritty" texture often found in gluten-free bakes.
Adding Crunch and Texture
While I love the smoothness of this bread, adding 1/2 cup of chopped walnuts or toasted pumpkin seeds (pepitas) to the top adds a wonderful textural contrast. If you're looking for more ways to use walnuts in baking, you should see how they transform my chewy chocolate chip cookies; it's a very similar flavor profile!
Debunking Common Pumpkin Baking Myths
There’s a lot of advice out there that isn't always accurate. Let's clear up a few things so you can bake with confidence.
Myth: You must blot the pumpkin puree with paper towels. While some recipes for pumpkin cookies require blotting to prevent spreading, this bread actually thrives on that moisture. Blotting it will result in a denser, drier loaf that loses that signature velvety mouthfeel.
Myth: Sifting the flour isn't necessary. In some recipes, you can get away with just whisking the dry ingredients. But with quick breads, clumps of baking soda or cinnamon are common. Sifting ensures that every single bite has the same level of spice and rise.
It only takes thirty seconds and is worth the effort.
Myth: The bread is better the moment it comes out of the oven. I know it’s tempting to slice it immediately, but pumpkin bread actually improves as it sits. The spices meld together and the moisture redistributes.
If you can wait until it’s completely cool or even until the next day the flavor will be much deeper.
Keeping Your Pumpkin Bread Moist and Fresh
If you have leftovers (a rare occurrence in my house!), you want to keep them just as good as they were on day one.
- Room Temperature
- Wrap the cooled loaf tightly in plastic wrap or store in an airtight container for up to 3 days.
- Fridge
- You can store it in the fridge for up to a week. I actually prefer it cold sometimes, as the chocolate chips get a nice little snap to them.
- Freezer
- This bread freezes beautifully. Wrap individual slices in parchment paper, then put them in a freezer bag. They’ll stay fresh for up to 3 months. Just pop a slice in the toaster or microwave for 20 seconds when the craving hits.
Zero Waste Tips: If you find the ends of the loaf getting a bit stale, don't toss them! You can cut them into cubes and toast them in a pan with a little butter and sugar to make "pumpkin bread croutons" for a bowl of yogurt or vanilla ice cream.
Alternatively, stale pumpkin bread makes the most incredible French toast you’ve ever had. Just dip it in a quick egg and milk wash and fry it up.
Delicious Ways to Enjoy Your Warm Slices
While a plain slice is perfection, there are a few ways to turn this into a real event.
My personal favorite is to serve a thick, warm slice with a dollop of whipped salted honey butter. The salt cuts through the sweetness of the chocolate, and the honey echoes the earthy notes of the pumpkin.
If you're serving this for a brunch, a side of Greek yogurt with a drizzle of maple syrup provides a nice tangy balance to the rich bread.
For a true "coffee shop" experience at home, try lightly toasting a slice in a pan with a tiny bit of butter until the edges are golden and the chocolate chips start to melt again. It brings back that "just out of the oven" aroma and makes the house smell incredible all over again.
No matter how you serve it, this Pumpkin Chocolate Chip Bread is all about bringing people together over something simple, sweet, and deeply comforting.

Recipe FAQs
Is it true I must use pumpkin pie filling for extra flavor?
No, this is a common misconception. You must use pumpkin puree because pumpkin pie filling contains added sweeteners and liquids that will ruin the structure of your loaf.
How to measure flour correctly to avoid a dry loaf?
Spoon the flour into your measuring cup and level it off with a knife. Scooping directly with the cup packs the flour down, leading to an excess of flour and a dry, crumbly texture.
How to ensure the bread rises properly?
Verify your baking soda is fresh and preheat the oven to 325°F before you begin. If your leavening agent is older than six months, the bread will not rise, and the initial blast of heat is required for the proper structure.
How to prevent the loaf from sinking in the middle?
Avoid opening the oven door during the 60-minute bake time. Frequent temperature drops cause the delicate structure to collapse, a mistake you can avoid by monitoring the rise through the glass only.
How to mix the batter for the most tender crumb?
Fold the dry ingredients into the wet ones using a silicone spatula until just combined. If you enjoyed learning to control the batter texture here, apply that same gentle folding technique to our family favorite cookies to keep them soft.
Is it necessary to use a parchment paper sling?
How to tell when the bread is perfectly baked?
Insert a skewer into the center of the loaf; it is done when it comes out clean. Because ovens vary, rely on this physical test rather than just the 60-minute timer to ensure the middle is fully set.
Moist Pumpkin Chocolate Chip Bread
Ingredients:
Instructions:
Nutrition Facts:
| Calories | 336 kcal |
|---|---|
| Protein | 3.7 g |
| Fat | 14.1 g |
| Carbs | 49.9 g |
| Fiber | 3.3 g |
| Sugar | 34.2 g |
| Sodium | 204 mg |
