The Decadent Nobake Turtle Lush a Proper Crowdpleaser
- Introducing the Ultimate No-Bake Turtle Lush Experience
- Prep Ahead: Timing the Perfect Chill
- Sourcing Your Decadent Turtle Lush Components
- Constructing the Four Pillars of Turtle Lush Perfection
- Troubleshooting Common No-Bake Mishaps
- Customizing Your Classic Turtle Lush Recipe
- Presentation and Longevity Strategies
- Recipe FAQs
- 📝 Recipe Card
Introducing the Ultimate No-Bake Turtle Lush Experience
Okay, let’s talk about a dessert that solves all my "I need serious chocolate and caramel but it’s too hot to turn on the oven" problems. It's the Turtle Lush. You’ve probably seen some version of this layered masterpiece, maybe called Chocolate Lasagna, but trust me, this specific ratio and these sturdy layers are the one .
It's everything you love about those gooey, rich turtle candies (pecans, caramel, chocolate, the whole decadent crew), but structured into the most ridiculously satisfying, perfectly creamy, no-bake square you will ever put in your mouth.
Forget those weak, runny layered dessert salads we suffered through in the 90s. This is structured chaos. This is pure, chilled decadence, and it’s a non-negotiable addition to your next potluck lineup.
Prep Ahead: Timing the Perfect Chill
This Turtle Lush isn't a 30-minute dessert. Let's get that straight right now. If you rush the chill, you get soup. Nobody wants chocolate soup.
This dessert needs a serious time out in the fridge, ideally overnight. Why? Because we are layering cream, pudding, and more cream on top of a buttery crust. If the layers aren't stable, the pressure of the subsequent spreading will push everything down, turning your beautiful, defined stripes into an ugly, muddy swirl.
Think of the chilling time as the structural engineer of your Turtle Lush. Patience is not just a virtue here; it's a requirement for success.
The Magic Behind the Multi Layered Structure
The success of a great layered dessert is that every component plays a specific role.
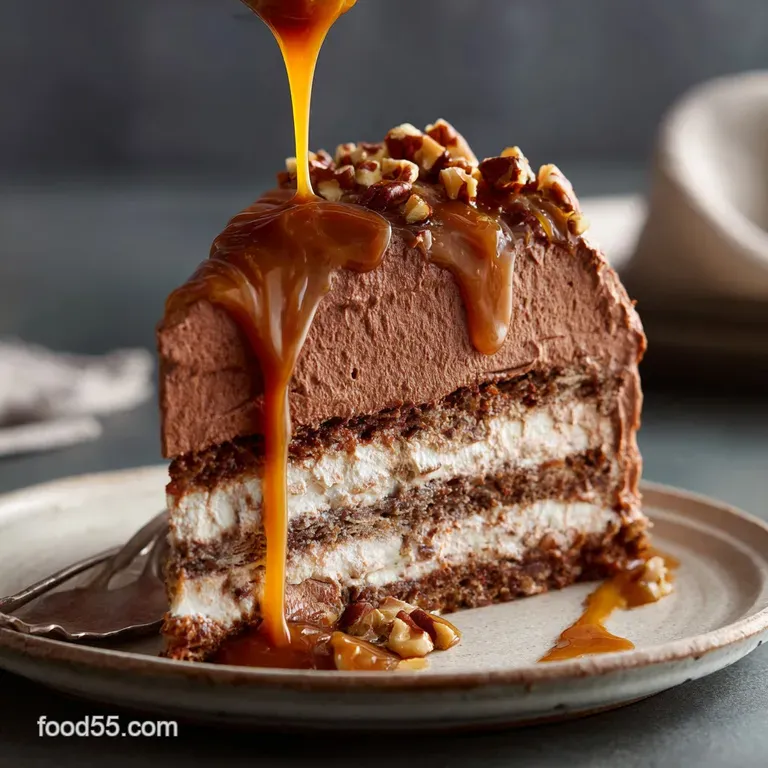
The base is a sturdy, slightly salty pecan shortbread crust. That's your stable foundation it resists sogginess. Then comes the "lush" layer. It’s a mix of beaten cream cheese and whipped topping that is tangy, sweet, and incredibly smooth. Next up is the thick, set chocolate instant pudding.
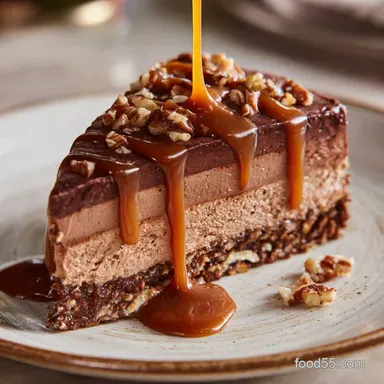
This is your core density. And finally? The light, airy whipped topping, laced with thick ribbons of salted caramel and crunchy pecans. The way those textures combine (crunchy base, silky cream, firm pudding) is what makes this turtle lush recipe incredible.
Why This Dessert Deserves the 'Crowd Pleaser' Title
Ever brought a dessert to a potluck that everyone just... ignored? Yeah, me too. This is the opposite of that experience.
People love the turtle flavor profile. People love creamy, chilled desserts that cut easily. When you slice into this, and your guests see those clean, defined layers? It’s a moment.
Plus, because it’s built in a big 9x13 pan, it travels like a champ and serves at least 12 hungry people easily. It looks sophisticated, but you know the truth: it was almost zero effort aside from waiting for the freezer door to stay shut.
Essential Equipment Checklist for Success
You don't need specialty tools, but a few key items make life way easier:
- A sturdy 9x13 pan (glass or metal is fine).
- An electric mixer. Seriously, don’t try to beat the cold cream cheese by hand. Your arm will fall off, and the texture will be lumpy.
- An offset spatula. Absolute game changer for spreading soft layers without tearing the one below.
- Plenty of fridge space. Clear a shelf now.
Understanding the Required Setting Time
Let's be specific about the clock. Four hours is the absolute bare minimum, mostly for the chocolate instant pudding to set completely hard.
But here is my favorite strategy: after I bake and cool the crust (Stage I), I build the cream cheese layer (Stage II) and the pudding layer (Stage III) the night before . Then I cover it tightly and let it chill for 8 to 12 hours.
I do the final whipped topping, caramel, and pecans (Stage IV) the next morning, just an hour or two before serving. This guarantees everything is rock solid and slices beautifully. Patience truly makes the difference here. Don't rush it.
Sourcing Your Decadent Turtle Lush Components
Choosing the Right Cookie Crust Base (gluten-free Options Included)
I use a quick shortbread crust here because it holds up better than those flimsy graham crackers. It’s also much less prone to absorbing moisture from the layers above and turning soggy over time. The pecans baked into the crust give it a fantastic depth of flavor and crunch.
If you need a gluten-free option, substitute the all-purpose flour for a GF blend, or use gluten-free vanilla sandwich cookies crushed up with melted butter. Whatever base you choose, the key is to press it firmly . Use the bottom of a measuring cup to compress it tight before baking.
Creamy Layers: Whipped Topping vs. Freshly Whipped Cream
Okay, the great debate: store-bought frozen whipped topping (like Cool Whip) versus fresh cream.
Look, I’m a scratch baker usually, but for a lush dessert destined for a potluck table? I stick to the frozen whipped topping. Why? Stability. It’s formulated to hold its structure much longer than fresh cream, especially if your kitchen gets warm.
If you insist on fresh cream, you must stabilize it with powdered sugar and maybe a bit of cream of tartar, or it will eventually weep all over your pudding layer. For this recipe, I say, embrace the convenience of the frozen stuff.
The Salty Sweet Secret: Selecting the Best Caramel
Don't skimp on the caramel sauce. Seriously. If you use that thin, syrupy stuff designed for ice cream cones, it will run everywhere and completely soak the top whipped cream layer.
You need a thick, quality salted caramel sauce. If you want to make your own from scratch, fantastic. If you buy it, look for one labeled "thick dessert topping" or "ice cream sundae topping." And make sure it’s salted! That little salty bite cuts the overpowering sweetness of the chocolate perfectly.
Decoding the Instant Pudding Mix Requirement
I know I already said this, but it bears repeating: You absolutely must use the Instant chocolate pudding mix. Not cook and-serve.
If you accidentally grab the cook and-serve, your layers will never, ever set up correctly, and you'll end up with a gloppy, warm mess when mixed with the cold milk. Read the box carefully before you check out! Also, ensure you use milk that is icy cold straight from the fridge.
The colder the milk, the faster and firmer the pudding sets.
Related Recipes Worth Trying
- The Ultimate NoBake Turtle Lush Chocolate Caramel Pecan Delight — This decadent NoBake Turtle Lush is a proper showstopper pudding Five layers of creamy caramel chocolate and salty pecans The perfect easy potluck dessert...
- Foolproof NoBake Turtle Lush Chocolate Caramel Pecan Dessert — This decadent NoBake Turtle Lush is the ultimate layered pudding A crunchy crust meets silky cream cheese and chocolate making it one of the Best Cold...
- Ultimate NoBake Pineapple Lush Dessert The 20Minute Creamy Tropical Treat — This easy layered NoBake Pineapple Lush Dessert is a kitchen hero Buttery biscuit crust meets cloudlike creamy pineapple dessert filling A refreshing...
Constructing the Four Pillars of Turtle Lush Perfection

Right then, let’s crack on with the construction. Think of building this as painting, not sculpting. We need smooth, even strokes, applying minimal pressure to the layers below.
- The Foundation: Ensure your baked pecan crust is 100% cooled. If it's warm, it will instantly melt the cream cheese layer you put on next.
- The Creamy Buffer: Gently beat the softened cream cheese, then fold in the whipped topping. Spread this over the crust. Chill it for 15 minutes. This step creates a vital cold barrier that prevents the pudding from soaking the shortbread.
- The Chocolate Core: Whisk the instant pudding quickly with cold milk until it thickens (about two minutes). Immediately spread it gently over the chilled cream cheese layer.
- The Long Wait: Cover and chill for 4– 6 hours (or overnight).
- The Grand Finale: Top with the remaining whipped topping, drizzle heavily with the thick caramel and chocolate syrup, and sprinkle those toasted pecans everywhere. Done.
Troubleshooting Common No-Bake Mishaps
Foundation First: Pressing the Crust for Clean Slices
The most frustrating thing is when you try to slice a square and the crust shatters, leaving you with a pile of crumbs, cream, and embarrassment.
To prevent crust shattering, after you press the mixture into the pan, make sure the edges are especially compact. I actually use the blunt edge of a small spoon to really force the crust mixture firmly against the sides of the pan. When you slice it later, that compacted edge holds its shape better.
Mastering the Instant Pudding Layer Ratio
Many people run into trouble here because they think the pudding mix is too thin after the initial whisking and they try to add more mix or wait too long.
Stick precisely to the 3 cups of cold milk for the two boxes of mix. Instant pudding is designed to go from watery to thick incredibly fast. If you live somewhere very humid, reduce the milk by maybe a tablespoon that small reduction can be the insurance you need against a soft set.
The Final Drizzle: Achieving Bakery Quality Ganache Topping
We aren't just dumping caramel and chocolate on top; we are drizzling artistically.
I use two easy methods: either a small spoon flicking back and forth across the pan, or I put the sauce into a small Ziploc bag, snip a tiny corner off, and pipe delicate lines. Do the chocolate drizzle first, let it set for a minute, then do the caramel.
The contrast of the dark chocolate against the golden caramel looks fantastic.
Dealing with a Runny Pudding or Soft Layers
Okay, disaster strikes. You went for a slice after only two hours, and the pudding is soft and gooey, or the layers are sliding off the crust. What now?
CRITICAL WARNING: If your Turtle Lush is runny, DO NOT try to slice or serve it. Immediately put it back, uncovered, into the coldest part of your fridge (usually the bottom shelf). Let it sit another two hours minimum.
If it still hasn't set after 6 hours, you unfortunately likely used the wrong kind of pudding mix (the cook and-serve kind) or milk that wasn't cold enough, and the structure is compromised beyond rescue. Sorry. Learn and move on!
Customizing Your Classic Turtle Lush Recipe
Once you master the classic turtle lush dessert, you might feel adventurous. That's great! The beauty of this recipe is that the structural integrity remains the constant, but the flavors are totally changeable. Here are a few swaps I’ve tried that worked brilliantly:
| Component | Classic Ingredient | Customization Idea |
|---|---|---|
| Nut/Crunch | Pecans | Toasted almonds, chopped pretzels (for salty crunch), or crushed Heath bar pieces. |
| Pudding | Chocolate | Instant Cheesecake, French Vanilla, or even instant Banana for a surprising twist. |
| Crust | Shortbread/Pecan | Oreo crumbs (skip the brown sugar) or vanilla wafers with melted butter. |
Making It Allergy Friendly: Nut-Free and dairy-free Adjustments
Need to skip the nuts? Use plain vanilla wafer crumbs for the crust instead of the pecan shortbread. It’s just as sturdy.
For dairy-free, you will need to swap out almost everything. Use a dairy-free cream cheese alternative, mix it with a coconut based whipped topping, and use non-dairy milk (like oat or soy) with the instant pudding. Just double check that your instant pudding brand is dairy-free, as some contain trace milk powder.
Flavor Twists: Coffee, Mint, and Coconut Variations
I love adding a little caffeine kick, especially when chocolate is involved. Try mixing 1 teaspoon of instant espresso powder into the cold milk before whisking the chocolate pudding it really deepens the chocolate flavor.
For a fresh mint version, add ½ teaspoon of peppermint extract to the cream cheese layer (it pairs so well with chocolate). For a coconut twist, skip the pecans in the crust, mix coconut extract into the cream cheese, and sprinkle plenty of toasted coconut flakes on top of the caramel.
Presentation and Longevity Strategies
Expert Tips for Cutting Picture Perfect Squares
To get those bakery quality squares with clean edges, you must use a hot knife.
This is tedious, but it is the secret. Dip a long, sharp knife (like a chef’s knife) into a tall glass of very hot water. Wipe the blade dry with a paper towel between every single cut. The heat melts the chocolate and cream layers just enough to let the blade glide through, preventing drag and smudging.
It’s annoying, but it works every time, making those layers stand out beautifully.
Optimal Storage: Freezing vs. Refrigerating Leftovers
This is primarily a refrigerated dessert. It will happily keep for 3 to 4 days covered tightly with plastic wrap in the fridge.
But can you freeze it? Yes, you can! If you have lots of leftovers, slice the whole pan while it’s cold and firm. Then, wrap individual squares tightly in plastic wrap and foil. Thaw them overnight in the fridge when you get a craving.
Be warned, though, the whipped topping texture can get slightly spongy and lose some height after freezing and thawing, but the flavor is still absolutely fantastic.

Recipe FAQs
Can I make this proper Turtle Lush a day or two ahead of time for a party?
Yes, absolutely! This layered dessert is best when chilled overnight, but it keeps beautifully, covered tightly in the fridge, for up to 3 days; just remember to save the final pecan garnish and extra caramel drizzle until just before serving to maintain the perfect crunch.
My chocolate layer ran into the cream cheese layer! What went wrong, and how do I avoid that muddy mess next time?
Blimey! That usually means the cream cheese layer wasn't chilled long enough or your pudding wasn't fully set before spreading; ensure the cream cheese layer gets its crucial initial 20-minute chill to stabilize, and always spread the pudding gently from the centre outwards.
I don't fancy pecans is there a good nutty alternative, or can I make the crust nut-free?
No bother, walnuts or almonds are a brilliant swap and will provide similar texture in the crust; alternatively, for a totally nut-free version, use crushed digestive biscuits or plain graham crackers mixed with the melted butter and sugar.
I only have cook and-serve pudding mix in the cupboard will that do the trick instead of instant?
Sadly, no, you must use the instant variety, as the cook and-serve pudding won't set up quickly or firmly enough to properly support the upper layers, which would result in a very disappointing, sloppy slice.
This is rather decadent! Is there a way to make the Turtle Lush a bit lighter on the waistline?
If you fancy a lighter slice, you can certainly use sugar-free instant pudding mix and reduced fat cream cheese; however, be aware that these swaps may slightly affect the luxurious texture, so don't skimp on the high-quality caramel sauce for flavour.
Is it okay if I slice and freeze the leftovers, or will the texture go horribly wrong?
You can freeze individual slices tightly wrapped for up to two months, but be warned: the whipped topping and cream cheese may weep slightly upon thawing, so wrap them like a parcel and thaw slowly in the fridge overnight to mitigate the issue.
Nobake Turtle Lush Layered Dessert
Ingredients:
Instructions:
Nutrition Facts:
| Calories | 2045 kcal |
|---|---|
| Protein | 9.7 g |
| Fat | 29.0 g |
| Carbs | 52.6 g |
| Fiber | 3.4 g |
| Sodium | 339 mg |
