Ornament Cookie with Vanilla Glaze Recipe
- Time: Active 35 minutes, Passive 40 minutes, Total 1 hours 15 mins
- Flavor/Texture Hook: Shatter crisp edges with a velvety, vanilla bean finish
- Perfect for: Holiday gifting, edible tree decor, or festive tea parties
- Creating Your Ornament Cookie with Vanilla Glaze
- Memories Baked Into Every Bite
- The Science Behind the Snap
- Fast Versus Classic Method Comparison
- The Elements of Perfect Dough
- Essential Tools for Precision Baking
- Mixing and Baking Step By Step
- Solving Common Baking Mishaps
- Creative Flavor and Diet Swaps
- Storage and Keeping Cookies Fresh
- Finishing Your Festive Holiday Display
- Recipe FAQs
- 📝 Recipe Card
Creating Your Ornament Cookie with Vanilla Glaze
The first time I tried to hang cookies on a tree, the kitchen smelled like burnt sugar and disappointment. I had used a standard grocery store dough that looked fine on the tray, but the second the heat hit it, my stars turned into blobs and my bells looked like melting snowmen.
I stood there, flour on my nose, watching my "ornaments" slide right off their hooks. It was a mess, but it taught me that edible decor requires a specific kind of structural integrity. Indulge in the heartwarming tradition of our favorite ornament cookie recipe, complete with a dreamy vanilla glaze.
The air in my kitchen right now is thick with the scent of high-quality butter and that floral, almost cherry like punch of almond extract. This isn't just a cookie; it's a tiny canvas. We’ve all been there, squinting at a recipe that promises "no spread" only to end up with a giant sheet pan-sized cookie.
I’ve spent years tweaking the ratios of cornstarch to flour to ensure these stay exactly how you cut them. You want that satisfying "snap" when you bite into the edge, followed by the soft, melt in-your mouth feel of the glaze.
We are going for a finish that looks like polished porcelain but tastes like a nostalgic bakery. This recipe uses a cold start method for the eggs and slightly cool butter to keep the dough from getting too greasy during the rolling process.
Trust me, once you see that first batch come out of the oven with edges so sharp they look laser cut, you'll never go back to the refrigerated tubes. Let's get into the mechanics of why this particular dough is such a reliable partner for your holiday decorating.
Memories Baked Into Every Bite
The Story Behind Our Favorite Ornament Cookie with Vanilla Glaze actually starts with my grandmother's old copper cutters. She used to say that a cookie meant to hang on a tree had to be "sturdy as a board but soft as a cloud." It sounded like a riddle back then, but now I realize she was talking about the delicate balance of gluten development and fat saturation.
When you pull these out of the oven, the aroma is toasted and sweet, a signal that the Maillard reaction has done its job on the base.
Every year, I find myself returning to this specific method because it creates a shared experience. There’s something meditative about the whisk hitting the side of the bowl as you prep the glaze, watching it turn from a thick paste into a glossy, pourable silk.
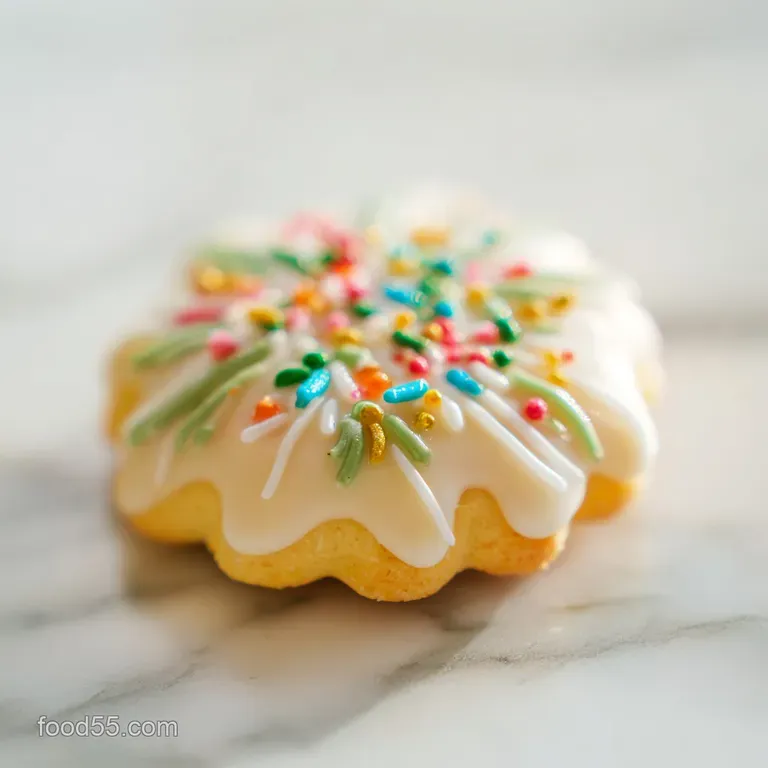
The Behind Our Favorite Ornament Cookie with Vanilla Glaze is really about that moment when you see the vanilla bean flecks suspended in the white icing. It looks like falling snow trapped in sugar.
The FeelGood Story Behind Our Favorite Ornament Cookie with Vanilla Glaze is rooted in the fact that these cookies actually taste better the next day. As the glaze sets, it creates a moisture barrier that keeps the cookie underneath perfectly tender while the exterior develops a delicate shatter.
I’ve shared this with neighbors and friends, and the reaction is always the same: they can’t believe something that looks this "stiff" for decorating can actually be so velvety to eat.
The Science Behind the Snap
Starch Interference: The addition of 2 tbsp (16g) of cornstarch breaks up the gluten strands in the all purpose flour, creating a tender crumb that snaps rather than crumbles.
Crystalline Stability: Using granulated white sugar instead of brown sugar minimizes moisture absorption from the air, which prevents the cookies from becoming soft and limp while hanging on the tree.
Protein Binding: A cold egg provides immediate structure and emulsification, acting as the "glue" that prevents the fat from separating and causing the dough to spread during the first 3 minutes of baking.
Gloss Mechanics: The light corn syrup in the glaze acts as an interference agent, preventing the sugar from recrystallizing into a dull, grainy finish as it dries.
Fast Versus Classic Method Comparison
| Method Type | Chill Time | Texture Result | Best Use Case |
|---|---|---|---|
| Classic Chill | 45 minutes | Maximum edge retention and very crisp | Intricate, thin ornaments |
| Fast No Chill | 0 minutes | Slightly softer, more "puffy" appearance | Round cookies or chunky shapes |
| Flash Freeze | 10 minutes | Densest crumb with zero spread | Heavy decorations/piping |
If you are looking for a reliable base for other projects, my Simply Irresistible Shortbread recipe uses a similar high fat ratio that works beautifully for simple shapes. The key difference here is the baking powder, which gives our ornament cookies just enough lift to feel light without losing their silhouette.
The Elements of Perfect Dough
Selecting your ingredients for this Ornament Cookie with Vanilla Glaze is more about temperature than brand. You want that butter to be "pliant" but not greasy if you poke it, your finger should leave a dent, but the butter shouldn't shine.
- 1 cup (227g) salted butter: Must be slightly cool to the touch. Why this? Prevents the dough from becoming overly soft and oily during the rolling process.
- 1 cup (200g) granulated white sugar: Provides the essential structure. Why this? Keeps the cookie pale and crisp compared to moisture heavy brown sugar.
- 1 large egg: Keep this cold until the moment you crack it. Why this? Helps stabilize the dough temperature and provides necessary protein for lift.
- 1.5 tsp (7.5ml) pure vanilla extract: The aromatic backbone. Why this? Adds that classic nostalgic scent that fills the house during baking.
- 0.5 tsp (2.5ml) almond extract: The secret weapon for professional flavor. Why this? Enhances the sweetness of the vanilla and adds a "bakery style" complexity.
- 3 cups (375g) all purpose flour: The primary structural component. Why this? Provides enough protein for the cookies to hold a hole for hanging.
- 2 tbsp (16g) cornstarch: Softens the bite. Why this? Creates a "short" texture that shatters beautifully when bitten.
- 0.75 tsp (3g) baking powder: Just a hint of leavening. Why this? Lightens the dough so it isn't as dense as a brick.
| Component | Science Role | Pro Secret |
|---|---|---|
| Salted Butter | Fat & Flavor | Use high fat European style for a richer, more velvety mouthfeel. |
| Cornstarch | Gluten Inhibitor | Sift it with the flour to ensure no chalky clumps remain in the dough. |
| Corn Syrup | Surface Tension | This is what gives the glaze its "mirror" shine and prevents cracking. |
| Vanilla Bean Paste | Visual & Aroma | The tiny seeds signal to the eater that this is a premium, homemade treat. |
While you have the flour out, you might find that you've got the baking bug. If you're in a rush and can't wait for the oven to preheat for a second batch, this No Bake Cookie recipe is a lifesaver for filling up the dessert table while these ornaments are drying.
Essential Tools for Precision Baking

You don't need a professional kitchen, but a few specific items make the Story Behind Our Favorite Ornament Cookie with Vanilla Glaze much easier to tell. A rolling pin with thickness rings is a total game changer here. I usually set mine to 6mm (about 1/4 inch).
This ensures every single cookie in the batch bakes at the exact same rate. If one is 3mm and the other is 8mm, you'll end up with a mix of burnt edges and raw centers.
I also swear by parchment paper or silicone mats (like a Silpat). Never grease your cookie sheets for this recipe! Adding extra fat to the bottom of the cookie is a one way ticket to Spread Ville. You want the dough to "grip" the surface slightly so it stays put.
Also, grab a plastic straw it's the easiest way to punch perfect holes for the ribbon before the cookies go into the oven.
Mixing and Baking step-by-step
Preparing the Base Dough
- Cream the butter. Beat the 1 cup (227g) salted butter and 1 cup (200g) granulated sugar until the mixture looks pale and fluffy. Note: Don't over airate, or the cookies will puff too much in the oven.
- Add the wet ingredients. Incorporate the cold egg, vanilla extract, and almond extract. Smell the floral almond notes as they hit the creamed fat.
- Sift the dry goods. Mix the 3 cups (375g) flour, 2 tbsp (16g) cornstarch, and 0.75 tsp (3g) baking powder together. Note: Sifting ensures the cornstarch is evenly distributed for a uniform snap.
- Combine slowly. Add the dry mix to the butter mixture on low speed until the dough begins to clump and pull away from the bowl.
- Roll it out. Place the dough between two sheets of parchment paper and roll to 6mm thickness. Note: Rolling between paper prevents you from adding too much extra flour, which toughens the cookie.
- Cut the shapes. Use your favorite ornament cutters to stamp the dough. Press firmly to ensure clean, sharp edges.
- Punch the holes. Use a straw to create a hole at the top of each shape. Ensure the hole is at least 5mm from the edge so it doesn't break.
- Bake the batch. Place in a preheated oven at 180°C (350°F) for 8 minutes until the edges are just barely beginning to turn gold.
- Cool completely. Let them sit on the tray for 5 minutes, then move to a wire rack. Listen for the faint "tink" of the cookies firming up as they cool.
Creating the Professional Glaze
- Whisk the sugar. Mix the 2 cups (240g) powdered sugar with 4 tbsp (60ml) whole milk and 1 tbsp (15ml) corn syrup.
- Add the aromatics. Stir in the 1 tsp (5ml) vanilla bean paste until the glaze is velvety and thick.
- Dip and set. Carefully dip the cooled cookies into the glaze or pipe it on. Let them sit for at least 4 hours until the surface is hard to the touch.
Solving Common Baking Mishaps
Even with a reliable recipe, the Behind Our Favorite Ornament Cookie with Vanilla Glaze can sometimes go sideways if the kitchen is too warm or the oven calibration is off. I once made a batch in a humid July kitchen, and they were so soft I could barely move them to the tray.
The fix was a quick 10 minute stint in the freezer before baking.
Why Your Cookies Spread
If your ornaments look more like puddles, your butter was likely too warm during the creaming stage. When butter gets too soft, it loses its ability to hold air bubbles, causing the structure to collapse as soon as it meets the heat.
Another culprit is "over creaming" if you whip the butter and sugar for 5 minutes like a cake, you're incorporating too much air.
| Problem | Root Cause | Solution |
|---|---|---|
| Edges are blurry | Dough was too warm | Freeze cut shapes for 10 minutes before sliding into the oven. |
| Glaze is translucent | Too much milk | Add sifted powdered sugar 1 tablespoon at a time until it coats a spoon. |
| Cookie is tough | Over worked dough | Mix only until the flour disappears; stop the mixer immediately. |
Common Mistakes Checklist
- ✓ Using "spreadable" butter from a tub (it contains too much oil and water).
- ✓ Skipping the cornstarch (you'll lose that signature shatter crisp texture).
- ✓ Rolling the dough too thin (anything under 4mm will likely break when you try to hang it).
- ✓ Decorating while the cookie is still slightly warm (the glaze will melt and run off).
- ✓ Forgetting to sift the powdered sugar (lumps in glaze are nearly impossible to whisk out later).
Creative Flavor and Diet Swaps
If you want to move away from the classic profile, this recipe is incredibly sturdy and accepts modifications well. For a "Spiced Ornament," add 1 tsp of cinnamon and a pinch of cloves to the dry ingredients. The kitchen will smell like a winter market while they bake.
| Original Ingredient | Substitute | Why It Works |
|---|---|---|
| Whole Milk (4 tbsp) | Heavy Cream | Creates a much thicker, more opaque glaze with a richer mouthfeel. |
| Almond Extract | Lemon Extract | Changes the profile to a bright, citrusy "Shortbread" style. |
| Corn Syrup | Agave Nectar | Provides the shine but adds a slight caramel undertone to the finish. |
If you want X, do Y
- If you want a matte finish: Omit the corn syrup from the glaze recipe.
- If you want a "Stained Glass" look: Fill the center cut outs with crushed hard candies before baking.
- If you want extra sparkle: Sprinkle coarse sanding sugar over the glaze while it is still "wet" (the first 2 minutes after dipping).
Storage and Keeping Cookies Fresh
These cookies are remarkably hardy. You can store the unglazed cookies in an airtight container at room temperature for up to 7 days. If you've already glazed them, wait until they are completely rock hard (usually overnight) before stacking them with parchment paper in between.
For the freezer, these are a dream. You can freeze the raw dough discs for up to 3 months. Just thaw in the fridge overnight before rolling. If you want to freeze baked cookies, do so before glazing.
Once they are glazed, the moisture in the freezer can sometimes make the sugar "bloom" or get sticky when they thaw.
Zero Waste Tip: Don't throw away the "scraps" after cutting your shapes! Gather them up, roll them into small balls, and press them flat with a glass dipped in sugar. These "taster cookies" are perfect for snacking on while you wait for the beautiful ornaments to dry.
You can also crush any broken cookies and use them as a crust for a cheesecake or a topping for vanilla ice cream.
Finishing Your Festive Holiday Display
The final step in the Story Behind Our Favorite Ornament Cookie with Vanilla Glaze is the presentation. If you are hanging these on a tree, use a thin silk ribbon rather than standard ornament hooks. The ribbon distributes the weight more evenly and won't cut through the cookie.
For a professional look, I like to use a "double dip" method. Dip the cookie once, let it dry for an hour, and then dip the bottom half again at an angle. It creates a beautiful tiered effect that looks like it came from a high end patisserie.
When the light hits that vanilla glaze, the corn syrup reflects the glow of the tree lights, making your kitchen feel like the most magical place on earth. Right then, let's get baking your house is about to smell incredible!

Recipe FAQs
How to turn a cookie into an ornament?
Punch a hole before baking. Use a clean, plastic straw to punch a hole near the top edge of your cut dough shapes while they are still raw. Ensure the hole is sturdy and at least 5mm from the edge so it doesn't break during baking or hanging.
What is the secret to making ornament cookies not spread?
Use cold ingredients and roll the dough thinly. Keep your butter and egg cold, and roll the dough evenly to 6mm thickness between two sheets of parchment paper. This dough relies on low moisture and precise chilling to maintain sharp edges; mastering this technique is similar to controlling texture in our Classic Chewy Chocolate Chip Cookies recipe.
How long do these cookies need to dry before hanging on a tree?
Allow a minimum of four hours for complete setting. The vanilla glaze needs time for the sugar structure to stabilize and fully harden on the surface. Trying to hang them too soon will result in the glaze sticking to the ribbon or cracking off completely.
Is it true that you must use royal icing for structural cookies?
No, this is a common misconception. This recipe uses a stabilized high gloss vanilla glaze, which achieves an almost porcelain like hardness through the inclusion of corn syrup, making it perfectly suitable for decorative hanging.
How can I make Christmas ornaments out of cookies that taste good?
Incorporate extracts like almond into the dough and glaze. Using a small amount of almond extract alongside vanilla elevates the flavor profile beyond standard sugar cookies, giving them a distinct, "bakery quality" taste that complements the crisp texture.
My cookie holes keep closing up while baking, what should I do?
Flash freeze the cut shapes for 10 minutes before baking. The immediate cold shock helps lock the structure in place so the dough doesn't puff up and seal the straw hole prematurely. This precise temperature management is a key skill you’ll also use when perfecting the texture in a Classic Peanut Butter recipe.
Can I substitute the corn syrup in the glaze for another sweetener?
Yes, agave nectar works as a direct substitute. Agave provides a similar viscous consistency necessary to achieve the mirror like shine by inhibiting rapid sugar crystallization. However, it may impart a very slight earthy sweetness compared to pure corn syrup.
Ornament Cookie Vanilla Glaze Recipe
Ingredients:
Instructions:
Nutrition Facts:
| Calories | 205 kcal |
|---|---|
| Protein | 2.0 g |
| Fat | 8.0 g |
| Carbs | 31.6 g |
| Fiber | 0.4 g |
| Sugar | 18.9 g |
| Sodium | 78 mg |
