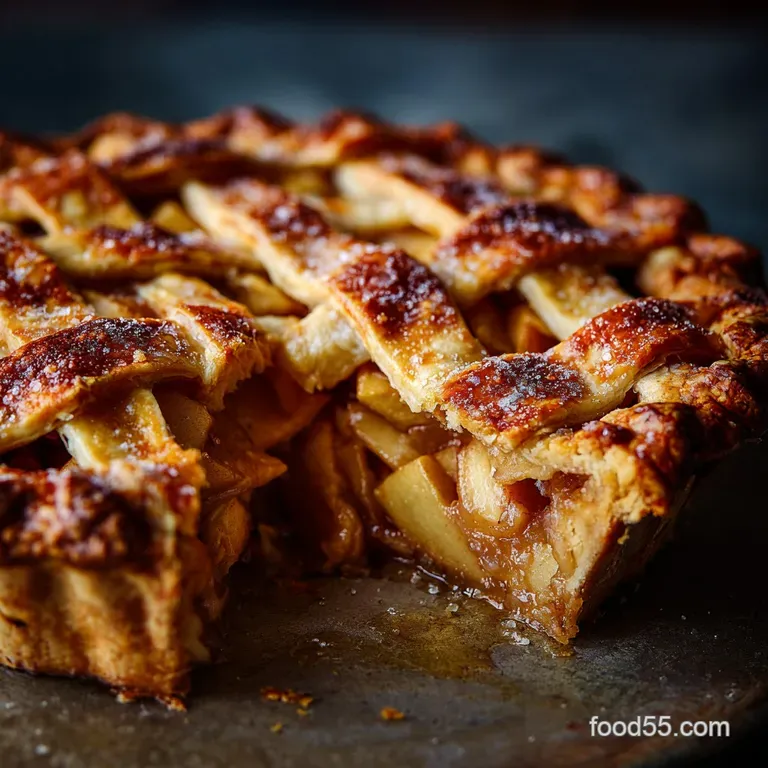
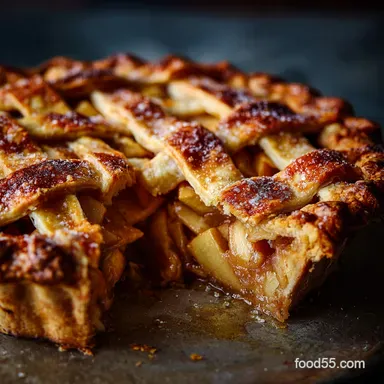
The Proper Apple Pie: Flaky All-Butter Crust and Warming Spiced Filling

Conquering the Dreaded Soggy Bottom
Right, let’s get straight to it. If you’ve ever served up a gorgeous homemade apple pie only to have the bottom crust turn into a grey, gooey sadness when you slice it, you are not alone. I’ve been there.
My first attempts at classic apple pie recipe baking were disasters in structural integrity.
The soggy bottom isn't a mysterious curse; it’s just physics. When apples bake, they release an insane amount of water, which pools at the bottom of the crust before the pastry has a chance to fully cook and crisp up. Simple as that.
We are defeating physics today.
My secret weapon has two parts: aggressively cold, pure butter pastry (which melts slowly and creates steam layers) and a mandatory pre and maceration step for the filling. We pull the liquid out of the apples before the pie goes in the oven, thicken it separately into a syrupy base, and then pour it back in.
Boom. Moisture crisis averted. This tiny extra step the Apple Pie Filling Recipe secret is what separates a good pie from a legendary one.
Why This Is Your New Signature Apple Pie
I call this "The Proper Apple Pie" because it combines the best of all worlds: the intense, comforting spice profile of an old and school recipe, the professional structural integrity to stand up when sliced, and that unmistakable flavour of all and butter crust.
This isn't just an Apple Pie Recipe Easy to follow; it’s reliable.
We’re not using any funky shortcuts, but we are using techniques that minimize your frustration and maximize the crunch. There’s something deeply satisfying about that perfect first bite: the delicate crunch of sugar on the crust, the flaky lift of the pastry layers, and the warming, slightly tangy apples inside.
The Secrets to an All and Butter Flaky Pastry
Forget vegetable shortening. Seriously. While shortening technically gives you flakiness because of its high melting point, you lose 90% of the flavor. Pie should taste like butter. Our goal is controlled flakiness, meaning we need huge, cold chunks of butter that stay intact throughout the mixing process.
The steam they release when they finally melt in the oven is what pushes the pastry layers apart.
- Keep the flour in the freezer for 30 minutes before mixing.
- Use ice water, and I mean ice water (maybe one cube floating in the cup).
- Stop mixing the second the dough comes together. Overmixing is the death of flakiness.
Chef’s Method for Moisture and Free Filling
This is the non and negotiable step that gets you a non and soggy pie bottom. When you slice your apples and toss them with sugar and lemon juice, the sugar acts like a magnet, drawing water out of the fruit cells.
If you skip this, all that liquid ends up steaming your bottom crust. Instead, we let the apples rest for about 30 minutes. Then we drain that watery, sugary runoff and boil it down until it’s thick and concentrated.
We return that golden syrup to the apples, mix in the thickener, and then fill the pie. You have flavor concentration, and zero excess liquid.
The Quintessential Pairing: Serving Your Apple Pie
Look, I’m a traditionalist. While ice cream is fine, nothing beats a hot slice of Homemade Apple Pie With Slice served with warm vanilla custard (crème anglaise). The contrast between the rich, eggy warmth of the custard and the spiced tartness of the filling is heavenly.
If you want to get truly traditional (and slightly controversial), try serving it with a thin wedge of sharp, mature Cheddar cheese. Don’t knock it until you try it!
Sourcing and Preparing Your Pie Elements
Choosing the Best Apples for Baking: Structure vs. Sweetness
You cannot use one type of apple and expect a best homemade apple pie result. Soft apples (like McIntosh or Gala) break down into mush. Super crisp apples (like Fuji) stay too firm. You need a blend.
I always recommend a 50/50 split:
| Apple Type | Role in the Pie | Key Feature |
|---|---|---|
| Granny Smith | Structure & Tartness | Holds shape, provides necessary tang |
| Honeycrisp/Fuji | Sweetness & Firmness | Excellent flavour, resists mushiness |
Slice them thin (about 1/8 inch). If they are too thick, they won’t soften enough during the baking time.
Elevating the Flavor: Spice Blend Breakdown
Cinnamon is great, obviously. But the difference between a nice pie and a great pie lies in the nutmeg. You absolutely must use freshly grated nutmeg here. It smells intensely aromatic, and the flavor is brighter and warmer than the pre and ground stuff sitting in your spice cupboard since 2017.
I add a tiny pinch of allspice too, just to deepen the complexity. This is the heart of the Apple Pie Filling flavour.
Required Kitchen Tools for Effortless Pastry
You don't need much, but a few things make life easier:
- A sturdy rolling pin: I prefer wood, it gives me better feel.
- A food processor: The fastest way to cut the cold butter into the flour without warming it up with your hands. If you don't have one, use a pastry blender or two knives, working quickly.
- A deep and dish 9 inch pie plate: Glass or ceramic distributes heat beautifully, which is critical for that bottom crust.
Related Recipes Worth Trying
- Apple Crisp Mini Cheesecakes: Easy, Individual Fall Dessert Recipe — Apple Crisp Mini Cheesecakes combine creamy filling with a buttery crumble topping. These easy apple crisp mini cheesecakes are the ideal fall dessert...
- Cranberry Apple Cider Detox Drink Spiced Winter Tonic Recipe — This Cranberry Apple Cider Detox Drink is the natural detox drinks homemade solution you need Enjoy this easy spiced winter tonic recipe perfect for a...
- French Cinnamon Apple Tart Rustic French Apple Pie with Pâtissier Glaze — The French Cinnamon Apple Tart is the ultimate rustic dessert built on a buttery pâte sablée Master this classic French Apple Tart Recipe with our guide to...
Master Steps: From Dough to Golden Lattice
We’re starting with the dough because it needs a two and hour nap in the fridge. That chilling time is non and negotiable; it helps the gluten relax and the butter firm up.
Crafting the All and Butter Crust: The Cold Fat Method
When combining the flour and the very cold, cubed butter, whether you use a food processor (pulse just 8 10 times!) or a blender, you are aiming for a mix that looks like coarse cornmeal speckled with distinct, pea and sized chunks of butter. Those chunks are your flakiness insurance.
When adding the ice water, drizzle it slowly. You might not need all of it. Stop mixing the second the dough just comes together when pinched. It should look shaggy and dry. If you keep mixing until it's smooth, you've overworked the gluten, and your crust will be tough. Tough crusts are the worst.
Prepping the Filling: The Crucial Sugar Rest
After you’ve sliced your apples and mixed them with the sugars and lemon juice (the maceration step), set a timer for 30 minutes. Let them sit. You will be amazed how much liquid pools at the bottom of the bowl.
Drain that liquid, reduce it on the stove until syrupy, cool it slightly, and then mix it back in with your spices and your thickener (flour or cornstarch). This gives you the thick, beautiful sliceable filling everyone wants.
Sealing and Venting: Ensuring a Perfect Top Crust
Once the filling is in the cold bottom crust, lay your top crust or lattice over it. Use a bit of water or egg wash to moisten the edges of the bottom crust, then press the two layers together and crimp firmly. A good seal prevents the filling from bubbling out and hardening into gluey caramel on your dish.
If you are using a full top crust, you must cut 4 5 generous vents. Steam needs an exit strategy! If it can’t get out, it will lift and warp your top crust, and sometimes it will just make the whole thing explode slightly. Been there, trust me.
Achieving the Ideal Golden and Brown Finish
The initial over high heat blast (425°F/220°C) is key. We start hot for 15 minutes to rapidly set the butter layers and ensure the bottom crust starts baking before the liquid filling heats up.
Then, we drop the temperature to 375°F (190°C) for the slow, thorough cook.
If your edges start browning too quickly (they often do), pull the pie out and gently tent the rim with foil. Don't worry about being precious; just wrap the edges. You want the top to be a deep, rich amber, not just pale yellow. Remember to bake until the filling is visibly bubbling thickly through the vents.
That bubbling means the thickener is doing its job!
Expert Advice and Troubleshooting Your Apple Pie
If you follow the "cold, colder, coldest" rule for the pastry and the maceration rule for the apples, most things will go smoothly. But we all run into problems:
Problem: The Crust Edges Burn
- Fix: Wrap the edges with foil after the first 15 minutes of over high heat baking. Foil is your best friend.
Problem: The Filling is Watery
- Fix: Did you drain and reduce the liquid? If not, you skipped the most critical step. If you did, next time use cornstarch instead of flour as your thickener; it works slightly better in high and moisture environments.
Problem: The Pie Slices Fall Apart
WARNING: You must let the pie cool for at least three hours, preferably four, at room temperature. The filling is not fully set until it is completely cool. If you cut it while warm (tempting, I know), the starches and sugars haven't stabilized, and it will be soup. Patience is paramount here.
Extending the Life of Your Homemade Dessert
How to Freeze and Reheat Apple Pie Safely
You can absolutely freeze apple pie! You have two options: freezing baked or unbaked.
- Unbaked Pie: Assemble the entire pie, but skip the egg wash. Wrap it tightly (two layers of plastic wrap, one layer of foil). Freeze for up to 3 months. When ready to bake, brush with egg wash and bake directly from frozen, adding about 20- 30 minutes to the baking time.
- Baked Pie: Cool the pie completely. Wrap tightly and freeze. To reheat, thaw overnight in the fridge, then bake at 350°F (175°C) for about 20 minutes until warmed through and the crust crisps up again.
Adjusting Sweetness and Thickness (Variations)
If you have super sweet apples, you might want to adjust the sugar content down slightly. Conversely, if you rely solely on Granny Smith, you might need an extra tablespoon of brown sugar. Taste your sliced, raw apples and adjust before you mix in the thickener.
| Component | Standard Recipe Ratio | Variation Tip |
|---|---|---|
| Sweetener | 3/4 cup total (mixed) | Reduce by 1/4 cup if using only sweet apples. |
| Thickener | 3 Tbsp Flour | Swap for 2 Tbsp Cornstarch for a clearer, firmer set. |
| Flavor Profile | Cinnamon/Nutmeg | Add 1/2 tsp ginger or cardamom for an autumnal twist. |
Nutrition Snapshot and Serving Suggestions
This is a treat. It’s a spectacular, buttery, celebratory classic. Don't worry too much about the macros. However, a standard slice (1/8th of a 9 inch pie) usually clocks in around 450 to 500 calories, mainly from the all and butter crust and the sugar in the apple pie recipe filling homemade .
Serve it warm, perhaps with a scoop of high and quality vanilla ice cream (I prefer the intense kind that uses egg yolks) or, if you're feeling ambitious, a homemade caramel sauce drizzled right over the top. Honestly, though? A simple fork and a good strong cup of tea is often all you need.

Recipe FAQs
Why has my pastry got a soggy bottom, and how can I stop it?
Soggy bottoms are often caused by excess apple liquid weeping into the pastry; this recipe avoids it by draining the macerated apples and reducing the juices before mixing them back in, ensuring a thick, set filling. For extra insurance, always bake the pie on a preheated baking sheet to rapidly set the bottom crust.
Which apples are best for this proper Apple Pie?
You’ll get the best results by using a mix of apples: tart, firm varieties like Granny Smith maintain their shape, while sweeter, crisp apples such as Honeycrisp or Gala add wonderful complexity and flavour.
Is it really necessary to chill the pastry for two hours? I’m rather impatient!
Yes, chilling is non-negotiable for a truly flaky crust; the aggressive cold keeps the butter solid, which then turns to steam during baking, creating the distinct layers we all seek in a proper all-butter pie.
I want to make this Apple Pie ahead of time; how should I store leftovers?
Baked apple pie can be stored tightly covered at room temperature for up to two days, though if you plan to keep it longer, refrigerate it; always reheat individual slices gently in the oven to restore that lovely flaky texture.
My crust is browning too quickly in the oven! What’s the trick to saving it?
If the crust edges are darkening faster than the centre, simply create a shield using strips of aluminium foil and gently tent the rim of the pie to slow down the browning process while the filling finishes cooking.
Proper Apple Pie Flaky Crust
Ingredients:
Instructions:
Nutrition Facts:
| Calories | 420 kcal |
|---|---|
| Protein | 4.0 g |
| Fat | 18.0 g |
| Carbs | 63.0 g |
