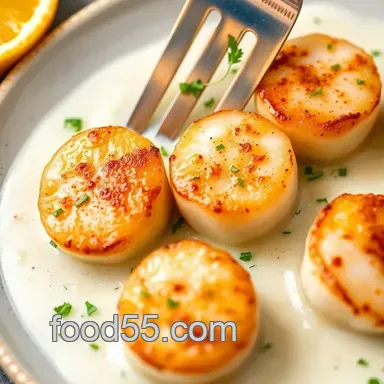
Sear Scallops with Citrus Herb Foam Delight
Look into Into Coastal Luxury: Sear Scallops with Citrus Herb Foam Delight
Ever had a moment when a meal completely turned your day around? picture this: it’s a friday night, the week has been long, and i’m standing in my kitchen contemplating takeout.
Suddenly, an image pops in my head of a gourmet scallop dish i once had at this fancy seaside restaurant.
Yes, those perfectly pan-seared scallops glistening under a zesty citrus foam so luscious! at that moment, i thought, “why not bring that dining experience home?” thus, my quest for the perfect sear scallops with citrus herb foam delight began, and honestly, it was more fun than i imagined!
This recipe is not just another addition to my collection of seafood recipes ; it's like a ticket to a fancy restaurant without the dress code.
The dish combines the delicate sweetness of scallops with the zesty citrus flavors that dance on your taste buds. so, if you’re looking to whisk someone off their feet or just feel like splurging on a weeknight, this dish checks all the boxes for an elegant dinner at home.
A Little History Goes a Long Way
The humble scallop has traveled through time. these little nuggets of ocean magic are staples in coastal cuisine across the globe.
Originating from the shores of europe, they’ve won hearts (and stomachs!) everywhere. fast forward to today, they’ve made their way to our plates with a modern twist.
Whether it’s fancy dinner parties or intimate date nights, scallops are definitely in the limelight.
Let’s talk about the logistics! this recipe sits comfortably on the medium difficulty scale. while it might seem intimidating to master the art of searing scallops , it’s all about practicing the right scallop cooking techniques .
You plan for about 55 minutes total , with 15 minutes of active prep and just 10 minutes of cooking time.
Your wallet will love you, too this dish yields four servings for under $30, making it a fantastic option for special occasion meals.
Why This Recipe Rocks
First off, scallops are packed with protein and low in calories, making them a healthy seafood dish option. besides being delicious, they are also rich in omega-3 fatty acids, great for your heart (and who doesn’t love that?).
And let’s not forget how versatile this dish is; it’s perfect for a fancy dinner party or just a casual meal that makes you feel like royalty.
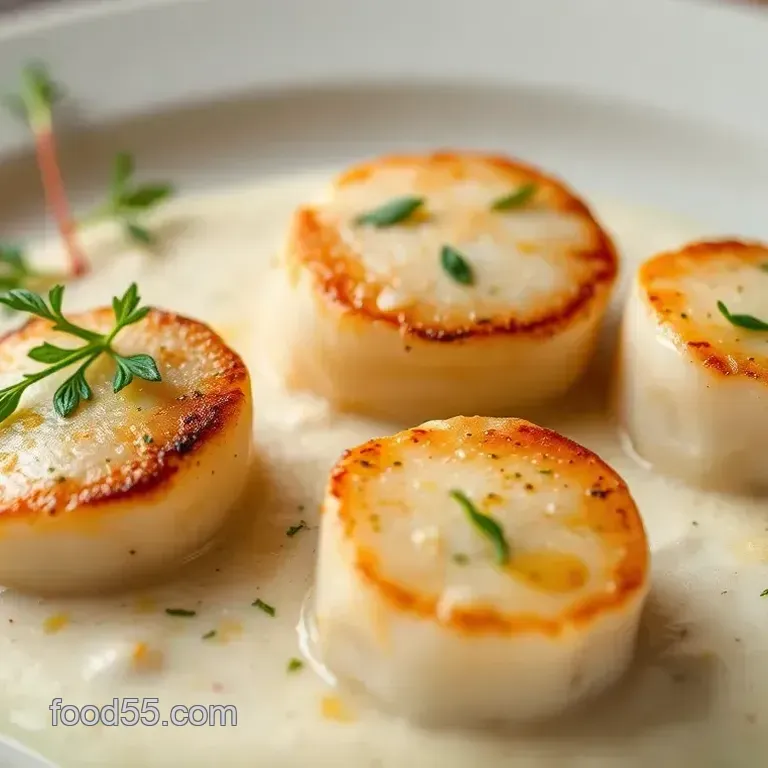
A notable feature of the citrus herb foam is not just its vibrant taste, but a fun twist in texture that leaves guests wondering how you pulled it off.
The foam elevates the dish to another level perfect for displaying your gourmet plating ideas . plus, who doesn’t like a bit of whimsy at the table?
While many seafood recipes take hours to perfect, this one is a quick gourmet recipe that takes your dining experience up a notch.
Think about it! you’re serving a showstopper that tastes like fine dining, yet it’s easy to whip up. talk about a win-win!
A Flavor Party Awaits
In this recipe, you’ll learn valuable seafood cooking tips that will not only make the scallops shine but give you confidence in the kitchen.
We’ll dive deep into proper searing techniques to achieve that dream crust. and just wait until that citrus foam dances on your scallops it’ll be like a party on your plate!
So, whether you’re planning a cozy date night or hoping to impress your friends during your next dinner party, this dish is the way to go! Let’s move on to the ingredients list and start gathering what you need for your culinary adventure!
Essential Ingredients Guide
Cooking can feel a little overwhelming, right? trust me, we’ve all been there. but having a solid essential ingredients guide can make all the difference in the kitchen.
Today, we're diving into what you really need to create those gourmet scallop dishes and other fantastic seafood recipes . so, let’s break it down simply.
Premium Core Components
First up, let’s talk about essential ingredients. The key to a mouthwatering dish starts with the right ingredients.
Detailed measurements : for instance, if you’re making my favorite sear scallops with citrus herb foam delight , you'll need 1 pound (450g) of sea scallops .
It's critical to measure them correctly in both us and metric. it just makes cooking so much smoother!
Quality Indicators : Always seek out the best! Fresh scallops should smell like the ocean - nothing fishy here. Check their texture, too; they should be firm and not too slimy.
Storage Guidelines : Scallops should be kept in the fridge for just a day or two. Freezing can extend their shelf life, but they lose that fresh ocean vibe.
Freshness Tips : Look for glossy and translucent scallops. If they appear dry, it might be time to walk away!
Signature Seasoning Blend
Now, let’s elevate those scallops. Nothing says fine dining like a killer seasoning blend.
Essential Spice Combinations : For this dish, a sprinkle of salt and freshly ground black pepper can do wonders. Trust me, simple yet effective!
Herb Selections : I love using fresh thyme and chervil in my herb infused sauces . They bring that coastal aroma to life.
Flavor Enhancers : Don’t overlook aromatics like garlic or shallots; they can really amp up your dish.
Regional Variations : Depending on where you're from, feel free to play with flavors. Cajun spices can give your seafood an unexpected kick!
Smart Substitutions
Sometimes, life throws us curveballs - and that’s where smart substitutions come in handy.
Common Alternatives : Maybe you can’t find scallops? Shrimp might be your best pal! They sear nicely and keep that sweet flavor.
Dietary Modifications : Are you dairy-free? Olive oil will replace butter without missing a beat, especially when sizzling scallops in a nonstick skillet .
Emergency Replacements : No citrus juice? A splash of white wine can add an acidic kick to your foam.
Seasonal Options : Citrus fruits shine in the winter, but in summer, why not try some fresh berries to brighten up your dish?
Kitchen Equipment Essentials
Now, let’s round off those essential ingredients with must have tools.
Must have tools : a good non-stick skillet or cast iron pan is your best friend for searing those scallops. and if you have an immersion blender, it’s a game changer for aerating that foam.
Alternative Equipment Options : If you don't fancy fancy tools, a regular whisk works just fine for making your foam!
Preparation Tips : Don’t forget to have your scallops patted dry before they hit the pan. This helps them sear properly without being steamed.
Storage Solutions : Keep all your herbs wrapped in damp paper towels in the fridge to keep them fresh longer!
Now that we've covered the essentials, you’re all set to impress your guests with that easy scallop recipe , especially the show stopping sear scallops with citrus herb foam delight .
You can whip up something truly special for a cozy dinner or a celebratory meal.
Stay tuned for the step-by-step instructions coming right up, and let’s get to cooking!
Look into into the World of Professional Cooking
Cooking is like a dance one that requires preparation, timing, and a sprinkle of creativity. when you're trying to impress someone with a special meal, learning some professional cooking methods becomes essential.
Let’s chat about one of my all-time favorites: sear scallops with citrus herb foam delight . i mean, can you say “fancy”? this recipe is the epitome of fine dining at home!
Essential Preparation Steps
Mise en place is the fancy name for having all your ingredients prepped and organized. before you even think about heating your pan, take a moment.
Chop your herbs, squeeze those citrus fruits, and lay out everything you need. it makes cooking a breeze and helps you avoid that frantic last minute dash for the salt!
Now, let’s talk time management . i can't stress enough how crucial it is to plan. keep your eye on the clock.
For instance, while your citrus herb foam is chilling (about 30 minutes ), it’s the perfect time to prep your scallops.
That way, when it’s go-time, everything is flowing smoothly.
Being organized is key. put your tools within reach. if you’re working with a nonstick skillet , that’s your best friend for scallops.
And don’t forget about safety! there’s nothing worse than a hot oil splatter. wear an apron and be cautious around that sizzling pan.
Step-by-step Process: Searing Scallops Like a Pro
Alright, let's break it down. Here’s how you master this dish in a few clear steps:
Prepare the foam : combine 1 cup of vegetable stock, ½ cup of orange juice, ¼ cup of lemon juice, and the zests in a small saucepan.
Bring this to a simmer and reduce by half. remove from heat and whisk in 2 tablespoons of butter and your herbs .
Allow to cool in the fridge.
Sear your Scallops :
- Heat 2 tablespoons of olive oil and 2 tablespoons of butter in a non-stick skillet over high heat.
- Season 1 pound of dry sea scallops with salt and pepper.
- Sear the scallops for about 2- 3 minutes on one side until they turn golden brown. There’s nothing like that golden crust!
- Flip them and cook for another 1- 2 minutes , making sure they stay translucent in the center (aim for an internal temperature of 125° F ). Pro tip: a meat thermometer works wonders here!
Whip Up the Foam : Once you've chilled that citrus goodness, use a whisk or immersion blender to aerate it until frothy. Just look for that light, airy texture.
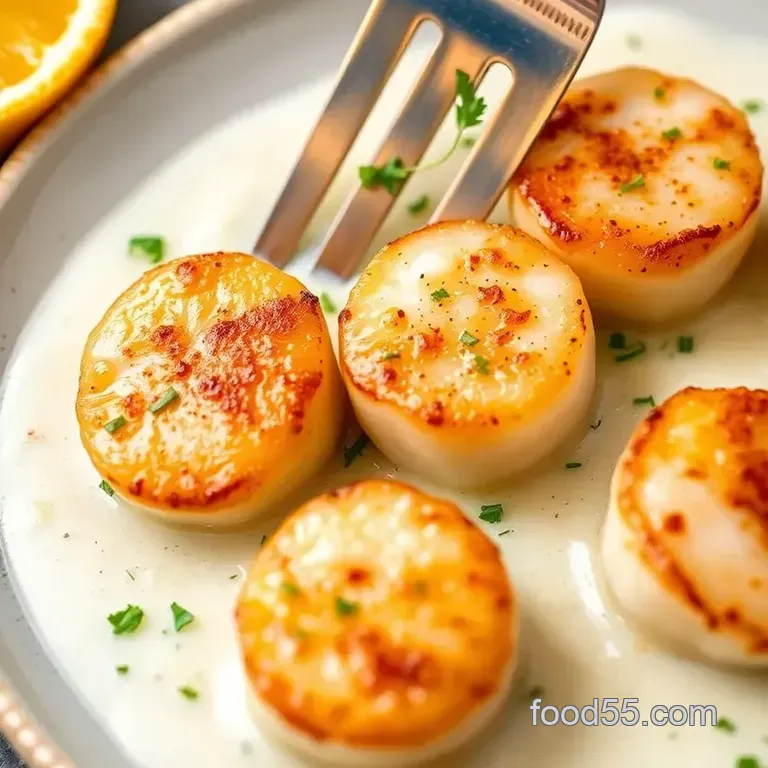
Plate It : Place 2-3 scallops on each plate, spoon that zesty citrus herb foam over the top, and maybe add a few herbs for a pop of color.
Expert Techniques for Perfect Dish
Cooking scallops might seem daunting, but with practice, you’ll nail those searing techniques . make sure your scallops are dry before they hit the hot pan.
Moisture is the enemy of a great sear. oh, and if you’ve ever had “rubbery” scallops, the key is not to overcook them!
Quality checkpoints are essential. after cooking, let the scallops rest for a minute. this lets the juices redistribute and keeps them tender.
And if the foam seems less stable than you hoped? no worries! just a gentle whisk can bring it back to life.
Success Strategies: Avoid Common Pitfalls
Now, let’s talk about some common mistakes you can dodge. first off, don’t overcrowd the pan. give those scallops space to breathe.
You might even need to work in batches. also, don’t skip on seasoning! the scallops need it.
To ensure quality, always taste your foam before serving. make adjustments if needed. if you want to make this dish ahead of time, you can prepare the foam in advance and chill it.
Just give it a quick whisk before serving for that fresh kick.
Final Thoughts on Your Culinary Adventure
This recipe for sear scallops with citrus herb foam delight is not just about impressing friends with a gourmet scallop dish.
It's an invitation to explore elegant dinner recipes , enhance your seafood cooking techniques , and truly savor the moment.
The zesty punch of citrus paired with perfectly cooked scallops makes this a dish to remember.
So, roll up those sleeves and get cooking! Trust me, the looks of awe on your guests' faces will make every minute spent in the kitchen totally worth it.
And hey, if you feel inspired and want to dive even deeper into the world of cooking, there's plenty more to come! catch me in the next section where i'll share additional information for creating unforgettable meals.
Let's keep this culinary journey alive!
Mastering the Art of Sear Scallops with Citrus Herb Foam Delight
Oh my gosh, if you’re looking to elevate your cooking game, sear scallops with citrus herb foam delight is your golden ticket! this gourmet scallop dish is not only a feast for the taste buds but also such a stunning presentation that it could star in a fancy restaurant.
It’s perfect for those special occasion meals, or even just a cozy dinner to treat yourself! so let’s jump into some of my best tips and secrets that’ll help you nail this recipe every single time!
Pro Tips & Secrets
First off, let’s talk pan-seared scallops . getting that perfect sear is honestly an art form. make sure your scallops are room temp before hitting the pan this helps them cook evenly.
Also, don’t skip the patting them dry step; it’s key to achieving that glorious golden crust without steaming. and here’s a little insider tip: if you’re feeling fancy, add a splash of white wine at the end when flipping them for that extra hit of flavor!
When it comes to your citrus herb foam , keep it simple! use fresh herbs like thyme and chervil for the best flavor trust me, it makes a difference.
And for a little time saving are, make the foam ahead of time! just chill it while you whip up the scallops, and you're all set.
Perfect Presentation
Next up, presentation! food should hit the eyes first, right? for your final plating, consider the color combinations . place your beautifully seared scallops on a plate and contrast them with that bright foam.
A sprinkle of additional chopped herbs on top adds freshness that looks gorgeous. if you’re feeling artsy, try drizzling the foam in circular patterns around the scallops so sophisticated, you know?
Storage & make-ahead
Now, if you’re making this for a gathering, you might wonder what to do with leftovers. if you’ve got any (which, let’s be honest, is unlikely because they’re that good), store the scallops in an airtight container for about 1-2 days in the fridge.
The foam can also be refrigerated, but be prepared to re-whisk it back to a frothy state before serving. just warm up the scallops on low heat and they should be fine don’t overdo it, or they’ll turn into rubber.
Nobody wants that!
Creative Variations
Want to jazz it up a little? you can totally get creative! swap out the citrus if you’re feeling adventurous grapefruit adds a nice twist.
Also, if you're cooking for someone with dietary restrictions, feel free to adapt! shrimp could be a delicious alternative if scallops aren’t an option.
You can even toss in some seasonal ingredients, like fresh basil in the summer or a hint of maple syrup in the fall.
Complete Nutrition Guide
And hey, let’s not forget the nutritional value of scallops! these little gems pack a punch! packed with protein, low in calories, and oh-so-healthy when prepared right.
Each serving of this dish will bring you around 320 calories and lots of good nutrients. adjust your portion sizes based on your own health goals, and you’re golden!
With all these tips, you'll be ready to whip up sear scallops with citrus herb foam delight like a pro.
The blend of zesty citrus flavors and tender scallops is going to impress even the pickiest eaters. so, what are you waiting for? gather your ingredients and get cooking! you’ve got this! enjoy every moment, from prep to that first delicious bite.
Happy cooking, friends!
Frequently Asked Questions
What are some tips for perfectly searing scallops in the "Sear Scallops with Citrus Herb Foam Delight" recipe?
To achieve perfectly seared scallops, start with dry scallops at room temperature to avoid steaming. Ensure your pan is hot before adding the scallops to develop a nice golden crust. Don't overcrowd the pan; cook in batches if necessary, and let them rest briefly after cooking to retain juiciness.
Can I make the citrus herb foam in advance for the "Sear Scallops with Citrus Herb Foam Delight"?
Yes, you can prepare the citrus herb foam in advance. After creating the foam, cool it completely and store it in the refrigerator. Just before serving, aerate it again with a whisk or immersion blender for the best texture.
What can I serve with "Sear Scallops with Citrus Herb Foam Delight" for a complete meal?
This dish pairs wonderfully with light sides such as a fresh arugula salad or lightly sautéed vegetables like asparagus. You can also serve it with a crisp, dry white wine to enhance the flavors of the scallops and foam.
How long can I store leftover "Sear Scallops with Citrus Herb Foam Delight"?
Leftover scallops should be stored in an airtight container in the refrigerator and consumed within 1-2 days for the best taste and texture. The citrus herb foam can also be refrigerated for up to 3 days; however, you may need to re-aerate it before serving.
Are there any healthy variations I can make for the "Sear Scallops with Citrus Herb Foam Delight"?
For a healthier twist, consider using less butter in both the scallops and foam. You can also opt for a lighter citrus foam with more vegetable stock and a dash of olive oil, and experiment with seasonal herbs for flavor without extra calories.
What is the nutritional value of "Sear Scallops with Citrus Herb Foam Delight"?
This dish is roughly estimated at 320 calories per serving, with 22g of protein and 20g of fat, making it a nutritious option, especially for seafood lovers. It provides a good dose of omega-3 fatty acids, vitamins, and minerals, depending on the specific ingredients used.
Sear Scallops With Citrus Herb Foam Delight