Southern Smothered Chicken: Savory and Tender
- Time: Active 15 minutes, Passive 35 minutes, Total 50 minutes
- Flavor/Texture Hook: Shatter crisp skin meets silky, onion laced gravy
- Perfect for: Sunday family gatherings or cozy weeknight comfort
- Authentic Southern Smothered Chicken Recipe
- Essential Recipe Specs
- Selecting Your Ingredients
- Tools for Success
- Mastering the Method
- Common Pitfalls Avoided
- Simple Dietary Swaps
- Adjusting Serving Sizes
- Kitchen Myths Debunked
- Storing Your Leftovers
- Perfect Serving Suggestions
- Very High in Sodium (Critical 🚨)
- Recipe FAQs
- 📝 Recipe Card
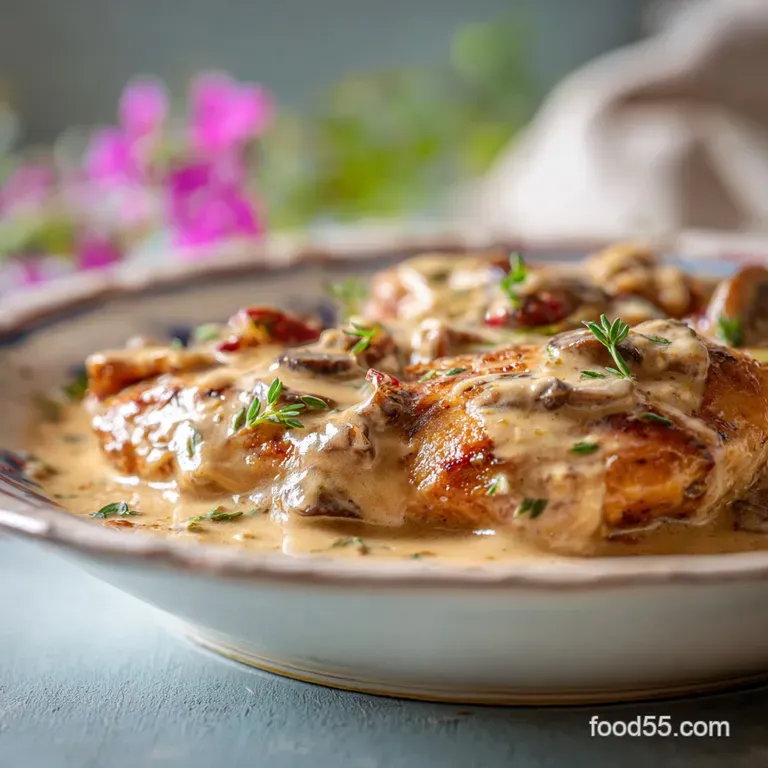
Authentic Southern Smothered Chicken Recipe
The first time I stood over a cast iron skillet watching the fat rendered from chicken skin, I finally understood what "soul" meant in cooking. You can hear it first that rhythmic sizzle as the flour dusted thighs hit the shimmering oil.
Then comes the aroma, a heady mix of smoked paprika and sharp garlic that fills every corner of the house. It’s the kind of smell that brings people running to the kitchen before the plates are even set.
This dish isn't just about eating; it’s about a shared cultural exchange that has been passed down through generations of Southern kitchens.
Smothered chicken is a cornerstone of the Sunday dinner tradition, a meal designed to bring people together after a long week. It has roots in resourcefulness, taking humbler cuts like bone in thighs and transforming them through a slow, bubbling braise in a rich gravy.
When you make this, you’re participating in a ritual of patience and care. It’s about more than just sustenance; it’s about creating a velvety, savory hug in a pan that makes everyone at the table feel seen and nourished.
We aren't looking for a quick sear and a watery sauce here. We are building layers of flavor, starting with a mahogany colored crust on the chicken and ending with a gravy so glossy and thick it demands a bed of fluffy rice.
Whether you grew up eating this or you're trying it for the first time, the result is always the same: pure, unadulterated comfort that lingers long after the last bite is gone. Let's get that skillet hot.
Essential Recipe Specs
Before we start dredging, let’s look at the numbers. Precision helps keep the peace in the kitchen, and knowing exactly when your chicken is ready to be "smothered" makes all the difference.
This southern smothered chicken recipe relies on the balance between the initial over high heat sear and the subsequent gentle simmer.
Starch Suspension: The reserved seasoned flour acts as a thickener, binding the fats from the butter and chicken drippings into a stable, glossy emulsion.
Collagen Breakdown: Simmering bone in thighs for 25 minutes allows the connective tissue to melt, resulting in meat that is incredibly tender without becoming mushy.
The Fond Factor: Scraping the brown bits (fond) after sautéing onions releases concentrated umami into the chicken stock, creating a deeper flavor profile.
Aromatic Infusion: Fresh thyme and Worcestershire sauce add top notes of earthiness and acidity that cut through the richness of the heavy gravy.
| Thickness | Internal Temp | Rest Time | Visual Cue |
|---|---|---|---|
| 1 inch (thigh) | 165°F | 5 minutes | Juices run clear when poked |
| 1.5 inch (breast) | 160°F | 8 minutes | Opaque white throughout |
| Drumstick | 170°F | 5 minutes | Meat pulls away from bone |
The magic of this southern style smothered chicken lies in the transition of textures. We start with a dry, seasoned exterior that creates a barrier, then we introduce moisture to soften everything into a cohesive, savory bite. If you’ve ever tried my Homemade Popeyes Chicken, you know how important that initial crunch is, even when we're going to "smother" it later.
Selecting Your Ingredients
This component analysis shows how each piece of the puzzle contributes to the final velvety finish. We aren't just tossing things in a pan; we are selecting elements that work together to create a harmony of salt, fat, and heat.
| Ingredient | Science Role | Pro Secret |
|---|---|---|
| Chicken Thighs | Fat & Gelatin | Use skin on for better fat rendering and a richer gravy base. |
| All Purpose Flour | Starch Binder | Toasting the flour in the drippings removes the raw taste and adds nuttiness. |
| Yellow Onion | Sugar & Moisture | Slicing them thin ensures they melt into the gravy rather than staying chunky. |
| Chicken Stock | Liquid Base | Using a high-quality stock provides the body and salt necessary for the sauce. |
- - 3 lbs bone in, skin on chicken thighs
- Why this? Thighs stay juicy during the braise and provide essential gelatin for the sauce.
- - 1 cup all purpose flour
- Why this? Creates the crust and thickens the gravy perfectly.
- - 1 tbsp smoked paprika
- Adds a deep, woodsy color and subtle heat.
- - 1 tbsp garlic powder
- Provides a consistent savory base that penetrates the meat.
- - 1 tsp onion powder
- Complements the fresh onions for a multi layered flavor.
- - 1 tsp cayenne pepper
- Gives that classic soul food smothered chicken kick.
- - 2 tsp kosher salt
- Essential for drawing out moisture and seasoning the flour.
- - 1 tsp cracked black pepper
- Provides a sharp, floral heat.
- - 1/4 cup neutral oil
- High smoke point for that perfect mahogany sear.
- - 1 large yellow onion
- Thinly sliced to create a sweet, caramelized base.
- - 1 green bell pepper
- Diced for a traditional "holy trinity" aromatic profile.
- - 3 cloves garlic
- Minced fresh for a pungent, aromatic punch.
- - 2 tbsp unsalted butter
- Adds a velvety richness to the roux.
- - 3 cups chicken stock
- The liquid gold that turns into gravy.
- - 1 tbsp Worcestershire sauce
- The secret weapon for deep umami and acidity.
- - 2 sprigs fresh thyme
- Adds a bright, herbal finish to the simmering pot.
Tools for Success
You don't need a high tech kitchen to master this southern smothered chicken recipe, but a few heavy hitters will make your life much easier. The goal is even heat distribution and enough surface area to avoid crowding the chicken during the sear.
A 12 inch cast iron skillet is my absolute favorite for this. It holds heat like a champion, which means when you drop that cold chicken in, the temperature doesn't plummet. This is how you get that mahogany skin rather than a soggy, grey exterior.
If you don't have cast iron, a heavy bottomed stainless steel pan or a Dutch oven will work too. Just make sure it’s deep enough to hold the chicken and the three cups of stock without overflowing.
You'll also want a sturdy set of tongs for flipping the chicken and a flat edged wooden spoon. That wooden spoon is vital for "deglazing" the process of scraping up all those delicious brown bits from the bottom of the pan after you sauté the onions. Those bits are where the concentrated flavor lives.
Finally, a wire whisk will ensure your gravy stays silky and free of those pesky flour lumps.
Mastering the Method
Now we get to the heart of it. Follow these steps closely, and pay attention to what you see and hear in the pan.
Chicken Preparation Tips
In a shallow bowl, whisk together the flour, smoked paprika, garlic powder, onion powder, cayenne, salt, and black pepper. Pat chicken pieces completely dry with paper towels. Note: Dry skin is the only way to get a proper sear; moisture is the enemy of browning.
Dredge each chicken piece in the seasoned flour mixture, shaking off any excess. Reserve the remaining flour for the gravy later. Don't throw that flour away it's seasoned gold!
The Mahogany Sear
Heat the neutral oil in your skillet over medium high heat until it shimmers and wisps of smoke appear. Place chicken skin side down in the pan. Sear for 5-7 minutes until the skin is mahogany brown and releases easily from the pan.
Remove chicken and set it aside on a plate; it won't be cooked through yet, and that's exactly what we want.
The Smother Base
Reduce the heat to medium. Add the butter to the skillet drippings. Sauté the sliced onions and bell peppers for 6-8 minutes until they are softened, golden, and translucent. Use your wooden spoon to scrape the bottom of the pan constantly.
Stir in the minced garlic and 3 tablespoons of that reserved seasoned flour. Cook for 2-3 minutes until the flour smells nutty and the mixture turns a toasted tan color. This step is crucial for removing the "raw" flour taste.
Finishing the Gravy
Slowly whisk in the chicken stock and Worcestershire sauce. Add the liquid in a thin stream, whisking constantly until the mixture is smooth and begins to bubble. This prevents lumps from forming.
Add the thyme sprigs and return the chicken (and any juices from the plate) to the pan. Cover with a lid and simmer for 20-25 minutes until the chicken is tender and the gravy is thick enough to coat a spoon. If you’re craving more comfort, this is the perfect time to prep a side like my Instant Pot Chicken Soup for another day.
Common Pitfalls Avoided
Even the most seasoned home cooks run into trouble sometimes. The most common issue with a smothered chicken recipe is the texture of the gravy or the doneness of the meat.
Why is my gravy lumpy?
Lumps usually happen when the liquid is added too fast to the flour and fat (the roux). If you dump all three cups of stock in at once, the flour will clump together. To fix this, always add the first half cup of liquid very slowly, stirring it into a thick paste before adding the rest.
If it's already lumpy, you can try to whisk it vigorously or, in a pinch, pour the gravy through a fine mesh strainer and return it to the pan.
What if the gravy is too thick?
As the chicken simmers, the flour continues to hydrate and thicken the sauce. If you find the gravy has turned into a paste, simply whisk in an extra splash of chicken stock or water, one tablespoon at a time, until it reaches that velvety consistency you're looking for.
Remember, it will thicken even more as it cools on the plate!
| Problem | Root Cause | Solution |
|---|---|---|
| Tough Chicken | Not simmered long enough | Cover and simmer for 5-10 extra minutes until tender. |
| Bland Gravy | Under seasoned flour or stock | Add a dash more Worcestershire or a pinch of salt at the end. |
| Greasy Sauce | Too much residual oil | Skim excess fat off the top with a spoon before serving. |
Common Mistakes Checklist - ✓ Forgetting to pat the chicken dry (this leads to steaming, not searing). - ✓ Crowding the pan during browning (work in batches if your skillet is small). - ✓ Skipping the "flour cooking" stage (raw flour makes the gravy taste like paste).
- ✓ Using a lid that doesn't fit tightly (you'll lose too much moisture and the chicken won't tenderize).
Simple Dietary Swaps
This best smothered chicken recipe is incredibly versatile. Whether you need to avoid gluten or want to use different cuts of meat, there’s a way to make it work without losing that signature soul food feel.
How do I make this gluten-free?
You can easily swap the all purpose flour for a high-quality gluten-free 1:1 baking blend. Be aware that gluten-free flour sometimes browns faster and thickens differently, so keep a close eye on the roux stage.
Alternatively, you can use cornstarch for the thickening part, but you’ll lose that traditional "fried" crust on the chicken.
Can I use chicken breasts?
You can make a homemade smothered chicken breast version, but you have to be careful with the timing. Breasts dry out much faster than thighs. I recommend searing them just until golden, then only simmering them in the gravy for 10-12 minutes.
Check the internal temperature early once it hits 160°F, pull them off the heat and let them rest.
| Original Ingredient | Substitute | Why It Works |
|---|---|---|
| Chicken Thighs | Chicken Drumsticks | Similar fat content and gelatin. Note: May need 5 extra minutes of simmering. |
| Chicken Stock | Vegetable Stock | Provides the necessary liquid. Note: Flavor will be less "meaty" and more herbaceous. |
| All Purpose Flour | Rice Flour | Great for gluten-free crusts. Note: Provides a lighter, crispier texture but less "body" in gravy. |
If you find yourself with extra chicken and aren't in the mood for gravy, you could always pivot and try a Crispy Chicken Parmesan instead. It’s a different vibe, but just as satisfying.
Adjusting Serving Sizes
Scaling this recipe is fairly straightforward, but there are a few "cook's secrets" to keeping the flavors balanced when you're feeding a crowd or just yourself.
Scaling Down (Feeding 1 or 2): Use a smaller skillet (8 or 10 inch). You can easily halve the ingredients, but keep the seasoning amounts slightly higher (about 60% of the original) to ensure the flavor isn't lost.
Since there is less volume in the pan, the gravy may thicken faster, so watch your heat levels closely and be ready to add a splash of water.
Scaling Up (Feeding a Crowd): If you're doubling this for a big family dinner, do not crowd the pan during the searing phase. Work in two or three batches to ensure every piece gets that mahogany crust.
When it comes to the gravy, you may not need to double the salt and spices exactly; start with 1.5 times the amount and taste as you go. Liquids should be doubled, but you might find you need 10% less stock as the larger volume of meat will release more juices.
- - Fast Method
- Use boneless, skinless thighs. They cook in half the time (10-12 min simmer) but you lose the depth of the rendered skin fat.
- - Classic Method
- Use bone in, skin on thighs. It takes 50 minutes total but gives you the most velvety, rich results.
- - Oven Method
- After making the gravy on the stove, transfer everything to a baking dish and bake at 375°F for 30 minutes for a hands off finish.
Kitchen Myths Debunked
There are a lot of old wives' tales floating around Southern kitchens, and while some are based in truth, others are just distractions from the goal of a great meal.
One big myth is that searing meat "seals in the juices." Science tells us this isn't true; moisture is actually lost during browning. However, we sear the chicken for the Maillard reaction that complex chemical process that creates hundreds of flavor compounds and that beautiful mahogany color.
We aren't sealing anything; we are building a foundation of flavor that the gravy will eventually pick up.
Another myth is that you must use a heavy cream or milk to get a "creamy" gravy. In a traditional southern smothered chicken recipe, the "creaminess" actually comes from the emulsion of fat (butter and chicken drippings) and starch (flour), combined with the gelatin released from the chicken bones.
If you do it right, the gravy will be velvety and rich without a single drop of dairy besides the butter.
Storing Your Leftovers
Smothered chicken is one of those rare dishes that actually tastes better the next day. As it sits, the spices in the gravy continue to meld, and the chicken absorbs even more of that savory goodness.
Storage: Store leftovers in an airtight container in the fridge for up to 4 days. When reheating, the gravy will likely have thickened into a jelly like consistency due to the natural gelatin. Don't worry!
Simply heat it in a saucepan over medium low heat with a tablespoon of water or stock to loosen it back up.
Freezing: This dish freezes beautifully. Place the chicken and gravy in a freezer safe container or a heavy duty zip top bag. It will stay fresh for up to 3 months. To serve, thaw it overnight in the fridge and reheat gently on the stovetop.
Avoid the microwave if possible, as it can make the chicken rubbery.
Zero Waste Tip: Don't toss the bones! If you have leftovers, strip the meat for a sandwich or a salad, and put the bones in a pot with some water, celery, and carrots. Simmer them for an hour to create a quick, fortified stock for your next soup or stew.
Even the thyme stems can be thrown into a stock pot for extra earthy flavor.
Perfect Serving Suggestions
To truly enjoy this southern smothered chicken recipe, you need the right companions on the plate. In the South, this is almost always served over a mountain of white rice or creamy mashed potatoes. The goal is to have something that can act as a sponge for every last drop of that mahogany gravy.
For a balanced meal, I love serving this with some garlicky sautéed green beans or a mess of slow cooked collard greens with smoked turkey. The acidity and slight bitterness of the greens cut through the heavy, savory richness of the chicken.
If you want to go full comfort mode, a side of honey buttered cornbread is non negotiable. There is nothing better than using a piece of warm cornbread to swipe the last bit of gravy off your plate.
Ultimately, this dish is about the joy of a shared meal. It’s about the clinking of forks against plates and the quiet that falls over a room when the food is just that good.
It connects us to the cooks who came before us and the ones who will come after, all of us looking for that same feeling of home in a cast iron skillet. Now, grab your apron and get to browning your kitchen is about to smell like heaven.

Very High in Sodium (Critical 🚨)
1140 mg 1140 mg of sodium per serving (50% 50% of daily value)
The American Heart Association recommends no more than 2,300mg of sodium per day for most adults, with an ideal limit of 1,500mg.
Tips to Reduce Sodium in Your Chicken Dish
-
Choose Low-Sodium Chicken Stock-30%
Opt for low-sodium or no-salt added chicken stock. This is the largest contributor of sodium in your recipe and a simple swap can make a big difference.
-
Significantly Reduce Added Salt-25%
Cut the 2 teaspoons of kosher salt to 1/2 teaspoon. You can always add a pinch of salt at the table if needed.
-
Use Unsalted Butter-10%
Switch to unsalted butter instead of salted. This will help control the overall sodium content without impacting flavor.
-
Amplify Herbs and Spices
Don't be afraid to increase the amounts of smoked paprika, garlic powder, onion powder, and cayenne pepper. These add flavor without sodium.
-
Use Low-Sodium Worcestershire Sauce-20%
Look for a low-sodium version of Worcestershire sauce. Regular versions can be quite high in sodium due to anchovies and fermented ingredients.
Recipe FAQs
What's the secret to the best smothered chicken?
The secret is building a deep flavor base with the fond. After searing the chicken to a mahogany brown, you must scrape up all those caramelized bits from the skillet when sautéing your onions and bell peppers, as this provides the foundation for the entire gravy.
How to make southern style chicken?
Dredge your chicken in seasoned flour, sear it in a cast iron skillet, and simmer it in a rich onion and bell pepper gravy. This classic method ensures the skin stays flavorful and the meat becomes incredibly tender during the final braise.
What kind of cheese does Texas Roadhouse use on their smothered chicken?
No, this recipe does not include cheese. The authentic preparation relies on a savory roux based gravy rather than dairy toppings to achieve its signature rich texture.
How long to smother chicken?
Simmer the chicken for 20-25 minutes. This specific timeframe allows the meat to reach perfect tenderness while giving the gravy time to thicken into a velvety, coating consistency.
Is it true I should bake the chicken after searing to finish it?
No, this is a common misconception. You do not need to move the pan to an oven, as simmering on the stovetop is the most effective way to thicken the gravy and cook the meat simultaneously.
How to store leftovers properly?
Place your leftovers in an airtight container and refrigerate for up to four days. If you enjoyed mastering the flour thickening technique here, you might appreciate how we use similar principles for a more complex traditional sauce to elevate your future meals.
Why is my gravy too thick after storing it in the fridge?
The gravy thickens into a jelly like consistency because of natural gelatin. Simply reheat it in a saucepan over medium low heat and stir in a tablespoon of stock or water to restore its original smooth texture.
Southern Smothered Chicken
Ingredients:
Instructions:
Nutrition Facts:
| Calories | 712 kcal |
|---|---|
| Protein | 44g |
| Fat | 46g |
| Carbs | 26g |
| Fiber | 2g |
| Sugar | 3g |
| Sodium | 1140mg |
