Sparkly Red Velvet Cookies: Chewy and Rich
- Time: Active 45 minutes, Passive 10 minutes, Total 55 minutes
- Flavor/Texture Hook: Chewy center with a shatter crisp sugar exterior
- Perfect for: Holiday gift boxes or a cozy weekend treat
- Why Most Recipes Fail with Sparkly Red Velvet Cookies
- Essential Recipe Specifications and Metrics
- Why This Specific Method Works
- Selecting Your Elements for Vibrant Results
- Tools for Professional Cookie Crafting
- Mastering the Sparkly Red Velvet Cookies Process
- Troubleshooting Your Red Velvet Baking Mistakes
- Scaling the Recipe for Any Occasion
- Debunking Common Red Velvet Myths
- Storage Guidelines and Zero Waste Tips
- Presentation and Gifting Advice
- Recipe FAQs
- 📝 Recipe Card
Why Most Recipes Fail with Sparkly Red Velvet Cookies
If you've ever pulled a tray of cookies out of the oven only to find they look more like a sad, muddy brown than a vibrant ruby, you know the frustration. I remember my first attempt years ago, I thought I could just add red food coloring to a standard chocolate chip cookie recipe.
The result was a weirdly grey purple lump that tasted okay but looked absolutely unappetizing. The secret isn't just dumping a bottle of dye into the bowl, it's about the chemistry between the cocoa and the acid.
Most people skip the vinegar and buttermilk, thinking they're just for cakes, but that's where the magic happens. Without that specific acidity, the red color doesn't pop against the dark cocoa, and you lose that signature "velvet" tang that sets these apart from a basic chocolate cookie.
We want these to be showstoppers, something that glows on the plate and makes everyone ask for the recipe.
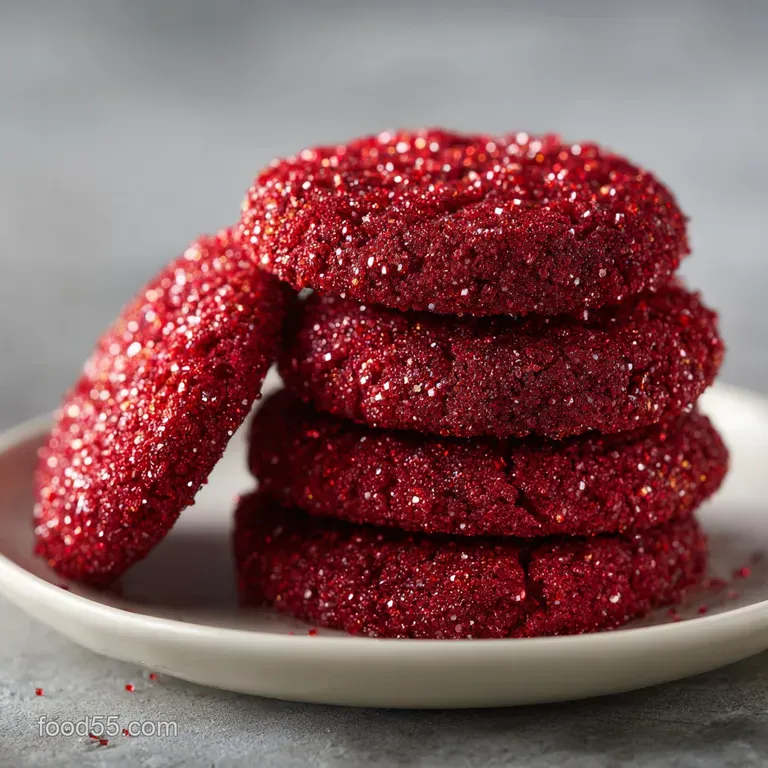
These sparkly red velvet cookies are designed to be thick, soft, and strikingly red. We’re going to layer the sweetness with a double sugar coating, first in granulated sugar to create a barrier, and then in sanding sugar to give it that "just fallen in snow" sparkle.
It’s a textural experience that starts with a crunch and ends with a fudgy, melt in-your mouth center.
Essential Recipe Specifications and Metrics
Before we get our hands messy, let's look at what we're actually building here. This recipe is precision engineered for a specific yield and texture. We aren't just making "some" cookies, we are making 24 perfectly sized portions that balance fat and flour for that ideal chewy bite.
| Metric | Target Value | Significance |
|---|---|---|
| Yield | 24 Cookies | Perfect for sharing or gifting |
| Oven Temp | 350°F (175°C) | Ensures even rise without burning |
| Dough Ball Weight | ~35-40g | Consistent baking across the tray |
| Total Time | 55 minutes | Includes 45 mins prep and 10 mins bake |
The Logic of the Chill: Chilling the dough for exactly 30 minutes isn't a suggestion, it's a structural requirement. Cold fats expand slower in the oven, meaning your cookies won't spread into thin pancakes but will instead stay thick and soft.
If you skip this, the sanding sugar will likely sink into the dough rather than sitting on top like a crown of jewels.
Why This Specific Method Works
Understanding why these ingredients behave the way they do is the difference between a lucky batch and a consistent one. It’s all about controlling moisture and the reaction of the leaveners.
- Acidic Activation: The combination of buttermilk and vinegar reacts instantly with the baking soda to create tiny carbon dioxide bubbles, giving the cookie a lighter, "velvety" crumb rather than a dense, fudgy one.
- Sugar Layering: Rolling in granulated sugar first absorbs excess moisture on the dough's surface, which allows the larger sanding sugar crystals to stay dry and sparkly during the bake.
- Fat Stabilization: Using softened butter (not melted) creates a stable emulsion with the sugars during the 2-3 minute creaming process, trapping air that helps the cookie stand tall.
- Pigment Protection: The cocoa powder acts as a base that deepens the red gel, preventing it from looking neon and giving it that sophisticated, deep crimson hue.
Quick Prep Decision Guide
| Goal | Preparation Tweak | Outcome |
|---|---|---|
| Extra Thick | Freeze dough balls for 15 mins before baking | Minimal spread, very fudgy center |
| Crispy Edges | Use only granulated sugar for the coating | A harder, caramelized exterior |
| Ultra Sparkle | Use large crystal sanding sugar only | High intensity glitter effect |
When you are looking for that perfect texture, remember that the environment in your kitchen matters. If it's a humid day, your flour might hold more moisture, so the dough might feel tackier than usual. Don't panic, just trust the 30 minute chill time to firm everything up before you start rolling.
Selecting Your Elements for Vibrant Results
The ingredients in this recipe aren't interchangeable if you want that specific red velvet profile. Each component serves a purpose, from the structural protein in the flour to the specific type of sugar used for the coating.
Ingredient Deep Dive
| Ingredient | Science Role | Pro Secret |
|---|---|---|
| All Purpose Flour | Provides the gluten skeleton | Weigh it (315g) to avoid dry, crumbly cookies |
| Unsweetened Cocoa | Adds depth and "mahogany" base | Use natural cocoa, not Dutch processed, for better color |
| Red Gel Coloring | Concentrated pigment | Gel is superior to liquid as it won't thin the dough |
The Full Ingredient List
- 315g All Purpose Flour: Why this? Provides enough structure to hold the heavy white chocolate chips. (Sub: 1:1 gluten-free baking blend)
- 15g Unsweetened Cocoa Powder: Why this? Just enough for flavor without turning the dough brown. (Sub: Carob powder)
- 1 tsp Baking Soda: Why this? Reacts with vinegar for the perfect rise. (Sub: 3 tsp baking powder)
- 0.5 tsp Salt: Why this? Cuts through the sugar to highlight the cocoa. (Sub: Sea salt flakes)
- 170g Unsalted Butter, softened: Why this? high-quality butter adds a rich, creamy mouthfeel. (Sub: Vegan butter sticks)
- 150g Light Brown Sugar, packed: Why this? Adds moisture and a hint of molasses chewiness. (Sub: Dark brown sugar)
- 100g Granulated Sugar: Why this? Helps create those crisp, sparkly edges. (Sub: Coconut sugar)
- 1 large Egg, room temperature: Why this? Binds the dough without curdling the butter. (Sub: Flax egg)
- 1 tbsp Buttermilk: Why this? The essential "velvet" tang and acid catalyst. (Sub: Whole milk + 1/4 tsp lemon juice)
- 0.5 tsp Distilled White Vinegar: Why this? Brightens the red dye and activates the soda. (Sub: Apple cider vinegar)
- 2 tsp Vanilla Extract: Why this? Rounds out the flavor profile. (Sub: Vanilla bean paste)
- 2 tsp Red Gel Food Coloring: Why this? Gives that intense, bakery style crimson color. (Sub: 1 tbsp beet powder)
- 170g White Chocolate Chips: Why this? Provides creamy contrast to the cocoa dough. (Sub: Milk chocolate chips)
- 50g Granulated Sugar: For the base coating.
- 50g Red or Clear Sanding Sugar: For the final "sparkle" layer.
I once tried to make these with liquid food coloring because that's all I had. Big mistake. I had to add so much liquid to get the red I wanted that the dough turned into a sticky soup. If you really want that vibrant punch, stick to the gel. If you're looking for more inspiration for festive treats, you might enjoy reading about my Red Velvet Cupcakes recipe which uses a very similar chemical balance but in a much lighter, airy format.
Tools for Professional Cookie Crafting
You don't need a high tech lab, but having the right gear makes the process of creating sparkly red velvet cookies much smoother.
- Stand Mixer: Using a KitchenAid or similar mixer ensures the butter and sugar are perfectly aerated. Hand mixers work too, but you’ll need some extra elbow grease.
- Digital Scale: Baking is chemistry. Measuring your 315g of flour by weight instead of volume prevents the "too much flour" trap that leads to dry cookies.
- Cookie Scoop: A 2 tablespoon scoop ensures all 24 cookies are the same size, so they all finish baking at the exact same 10 minute mark.
- Parchment Paper: Don't just grease the pan. Parchment allows the sugar coating to set without sticking to the metal.
- Wire Cooling Rack: Crucial for letting air circulate under the cookies so they don't get soggy bottoms while cooling.
Chef's Tip: Freeze your white chocolate chips for 10 minutes before folding them into the warm dough. This prevents them from melting slightly and streaking the vibrant red dough with white smears.
Mastering the Sparkly Red Velvet Cookies Process
Right then, let's crack on with the actual baking. This is where the sensory fun begins. You'll see the dough transform from a pale butter color to a deep, royal red that smells faintly of chocolate and vanilla.
- Whisk dry ingredients. Combine the 315g flour, 15g cocoa, baking soda, and salt in a bowl. Note: Whisking breaks up cocoa lumps so you don't get brown spots.
- Cream butter and sugars. Beat the 170g butter with both the brown and granulated sugars for 2-3 minutes until light, fluffy, and pale.
- Incorporate wet ingredients. Add the egg, buttermilk, vinegar, vanilla, and red gel. Beat until the color is a uniform, vivid crimson.
- Mix in dry base. Slowly add the flour mixture to the wet until just combined with no white streaks visible.
- Fold in chips. Gently stir in the 170g white chocolate chips using a spatula.
- Chill the dough. Cover and refrigerate for 30 minutes until the dough feels firm and less tacky.
- Preheat and prep. Set the oven to 350°F (175°C) and line your sheets.
- Roll and coat. Scoop 2 tablespoon portions, roll into balls, then roll in granulated sugar, followed by the sanding sugar until completely encrusted in sparkle.
- Bake the cookies. Place 2 inches apart and bake for 10 minutes until the edges are set but centers look slightly soft.
- Cool and set. Let them rest on the pan for 5 minutes until they firm up enough to move, then transfer to a rack.
The smell in your kitchen during that 10 minute bake is going to be incredible. It’s that warm, comforting cocoa aroma mixed with the sweet scent of caramelizing sugar. When you pull them out, they might look a little underdone in the middle, but trust the process.
They’ll carry over cook on the hot tray, leaving the center perfectly soft while the sugar crusted edges provide that satisfying snap.
Troubleshooting Your Red Velvet Baking Mistakes
Even the best of us hit a snag sometimes. If your cookies aren't looking quite like the pictures, it's usually a small mechanical error that's easily fixed for the next batch.
Why Your Red Velvet Spreads Too Much
This is the most common heartache. If your cookies turn into one giant sheet on the pan, it’s almost always a temperature issue. Either the butter was too warm when you started, or you skipped that crucial 30 minute chill.
| Problem | Root Cause | Solution |
|---|---|---|
| Flat Cookies | Butter was too soft or melted | Chill dough for an extra 20 mins before baking |
| Dull Color | Used Dutch processed cocoa | Use natural cocoa powder to maintain acidity/color |
| No Sparkle | Sugar dissolved into dough | Roll in granulated sugar before the sanding sugar |
Why the Texture is Cakey
If your cookie feels more like a muffin top, you might have over measured the flour or over mixed the dough after adding the dry ingredients. Over mixing develops gluten, which leads to a tough, bread like texture rather than a tender, velvety one.
Pro Baker's Checklist for Success
- ✓ Always use room temperature eggs to prevent the butter from seizing
- ✓ Scrape the sides of the bowl frequently to ensure the red gel is fully distributed
- ✓ Use a silicone mat or parchment to prevent the sugar from burning on the bottom
- ✓ Don't over bake! They should still look slightly "wet" in the center cracks when pulled
- ✓ Ensure your baking soda is fresh by dropping a pinch in vinegar (it should fizz violently)
If you find yourself struggling with delicate textures, you might want to practice with something like a Madeleine Cookies recipe. They require a different kind of finesse with butter and air, which is great training for any home baker looking to master the art of the perfect crumb.
Scaling the Recipe for Any Occasion
Whether you're baking for a small dinner party or a massive school bake sale, adjusting this recipe is straightforward as long as you keep the ratios in check.
Scaling Down (12 Cookies) Cut all ingredients in half. Since the recipe calls for one egg, whisk the egg in a small bowl and use exactly half of it (about 25g). Use a smaller mixing bowl to ensure the beaters can properly cream the smaller amount of butter.
Reduce bake time by about 1-2 minutes as smaller batches sometimes heat up faster in the oven.
- Spices/Leaveners
- Only increase baking soda and salt by 1.5x for a 2x batch to avoid a metallic aftertaste.
- Liquids
- Reduce the total buttermilk/vinegar by about 10% to keep the dough from becoming too soft.
- Mixing
- Work in batches if your mixer is smaller than 5 quarts. Overcrowding the bowl leads to uneven color distribution.
For big holiday batches, I usually roll all the balls first, keep them on a tray in the fridge, and only do the sugar coating and baking right before I'm ready to serve. This keeps the sparkle fresh and the texture optimal.
Debunking Common Red Velvet Myths
There is so much misinformation about red velvet out there! Let's clear the air so you can bake with confidence.
Myth 1: Red velvet is just chocolate cake with dye. False! A true red velvet, like these sparkly red velvet cookies, relies on the reaction between cocoa, vinegar, and buttermilk. It has a distinct tangy flavor profile that a standard chocolate cookie lacks.
The cocoa is a background note, not the lead actor.
Myth 2: You can use beet juice for the same result. While you can use it, the color will never be as vibrant. Beet juice often turns brown or earthy during the over high heat baking process.
Gel coloring is designed to stay stable at 350°F (175°C), ensuring that "wow" factor when you open the oven door.
Myth 3: Chilling the dough is optional. I promise you, it’s not. In this recipe, the 30 minute chill is what allows the flour to fully hydrate and the butter to firm up. Without it, the white chocolate chips will sink and the cookies will spread too thin to be chewy.
Storage Guidelines and Zero Waste Tips
Once you've baked a batch of these beauties, you'll want to keep them at their peak. Because of the sugar coating, they are slightly more sensitive to moisture than your average chocolate chip cookie.
- Countertop
- Store in an airtight container for up to 4 days. Place a piece of parchment paper between layers to keep the sanding sugar from sticking to the cookie above it.
- Freezer
- These freeze beautifully! Freeze the baked cookies for up to 3 months. To reheat, just let them sit at room temperature for an hour.
- Dough Freezing
- You can freeze the unbaked, uncoated dough balls for up to 2 months. When ready to bake, roll them in the sugars while still frozen and add 2 minutes to the baking time.
Zero Waste Kitchen Tips If you have leftover buttermilk, don't toss it! You can freeze it in ice cube trays for your next batch of cookies or use it to make a quick ranch dressing. Any leftover sanding sugar can be saved in a small jar for decorating future bakes.
If you happen to have a few cookies that get a bit too crunchy or stale, crumble them up! They make an incredible topping for vanilla bean ice cream or can be used as a "soil" layer in a festive dessert parfait.
Presentation and Gifting Advice
The beauty of sparkly red velvet cookies is that they are their own decoration. However, if you're taking these to a party or giving them as a gift, a few small touches go a long way.
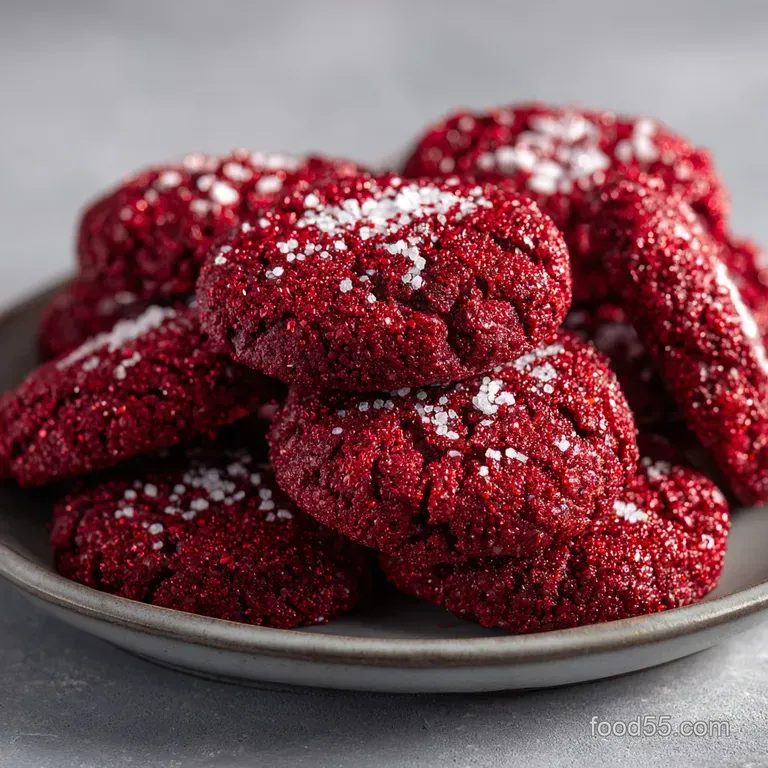
- The Contrast Plate: Serve these on a white or marble platter. The deep red against a bright white background makes the colors pop.
- Gift Tins: Use clear cellophane bags or glass jars to show off the sparkle. Tie it with a simple white ribbon to mimic the white chocolate chips inside.
- Milk Pairing: Honestly, nothing beats a cold glass of milk with these. The creaminess of the milk highlights the "velvet" texture of the cookie perfectly.
- The "Shatter" Test: When serving, I love to break one in half to show off the contrast between the sparkly exterior and the soft, dark red interior. It’s an instant conversation starter.
These cookies aren't just a dessert, they're a way to bring people together. There's something about the vibrant color and the festive sparkle that feels special, like you've put in way more effort than the 55 minutes it actually took.
Whether you're making them for a holiday exchange or just a Tuesday afternoon treat, they are guaranteed to disappear off the plate faster than you can say "sparkle." Enjoy the process, smell the cocoa, and most importantly, enjoy that first chewy, sugar crusted bite!

Recipe FAQs
What are common Red Velvet Cookie mistakes?
Overmixing the dough or skipping the chill time. Mixing past the point where the dry ingredients disappear leads to tough cookies, while omitting the 30-minute refrigeration causes them to spread too thin in the oven.
Are these the same as Snoop Dogg cookies?
No, this is a common misconception. These cookies are a classic red velvet recipe featuring white chocolate chips and a signature dual sugar coating, rather than the specific celebrity branded version.
What is the secret ingredient in red velvet cake?
A small amount of acidic cocoa powder combined with buttermilk and vinegar. This combination creates the signature subtle tang and ensures a velvety, tender crumb. If you enjoyed learning how these chemical reactions create texture, see how the same principle works in our classic chocolate chip walnut cookies.
Why add vinegar to red velvet cookies?
Vinegar reacts with the baking soda to help the cookies rise. It also balances the richness of the cocoa powder and butter, which is essential for achieving that authentic red velvet flavor profile.
How to keep the sanding sugar from melting?
Roll the dough balls immediately before placing them in the oven. Storing them coated in sugar for too long before baking causes the moisture in the dough to dissolve the crystals, ruining the sparkle.
How to ensure the cookies stay soft?
Remove them from the oven while the centers still look slightly underbaked. They will finish setting on the hot baking sheet during the 5-minute cooling period, preventing the edges from becoming crunchy.
How to store leftovers?
Place them in an airtight container at room temperature for up to 4 days. Layer them with parchment paper to prevent the sparkling sugar coating from sticking to the cookie sitting on top.
Sparkly Red Velvet Cookies
Ingredients:
Instructions:
Nutrition Facts:
| Calories | 198 kcal |
|---|---|
| Protein | 1.8 g |
| Fat | 8.1 g |
| Carbs | 28.7 g |
| Fiber | 0.5 g |
| Sugar | 18.7 g |
| Sodium | 98 mg |
