Baby Back Ribs: Irresistibly Tender (The Low Slow Showstopper Recipe)
- The Sunday Lunch Showstopper: Achieving Perfect Baby Back Ribs
- Culinary Science: Mastering Texture and Flavour Infusion
- Shopping List and Ingredient Deep Dive
- The Low & Slow Method: Step-by-Step Perfection
- Expert Tips and Avoiding Common Rib Mistakes
- Making Ahead and Storage Guide
- Perfect Pairings: What to Serve Alongside Your Ribs
- Recipe FAQs
- 📝 Recipe Card
The Sunday Lunch Showstopper: Achieving Perfect Baby Back Ribs
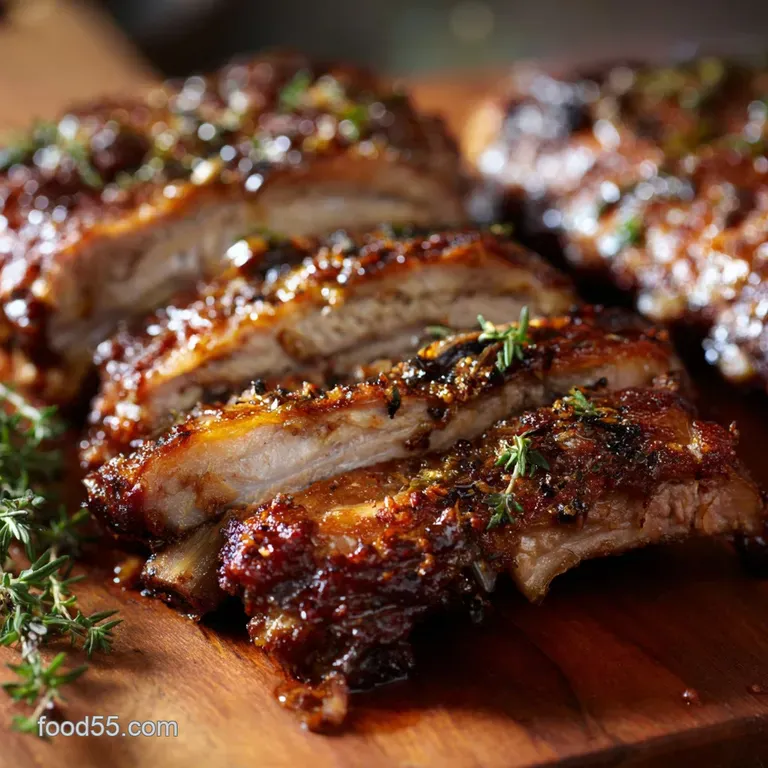
Stop what you are doing right now and imagine this aroma: Deep, smoky paprika hits the air, followed by sticky sweet caramelising brown sugar. When you poke the rack, the meat doesn't just pull away; it literally collapses into a delicious, juicy pile.
We aren't aiming for "good" ribs today; we are aiming for Irresistibly Tender Baby Back Ribs that make people forget their manners.
I know what you're thinking: Ribs are a massive pain, only achievable on an expensive smoker or requiring hours of complicated mopping. Nope. This method my tried and true, incredibly simple Low and Slow Baby Back Ribs technique uses your basic home oven for 95% of the heavy lifting.
It's passive cooking at its best. Get the prep done the night before, then spend your Sunday relaxing while the oven does the magic.
I wasted years trying fast and hot methods that resulted in tough, chewy messes. Seriously, I once chipped a tooth. Don't be like past-me. This recipe guarantees that fall off-the-bone tenderness every single time. Let's dive into the foolproof process for the Best Rib Recipe you'll ever need.
Culinary Science: Mastering Texture and Flavour Infusion
The Magic of the Low & Slow Method
Why the obsession with "low and slow"? The secret is collagen. Rib meat is tough because of collagen, a connective tissue that melts when held between 140°F and 180°F (60°C and 82°C) for several hours. Our 275°F (135°C) oven temperature holds the meat perfectly in this sweet spot.
This extended cooking time allows the collagen to convert into gelatin, which is that luscious, mouth coating moisture that makes the ribs taste so incredibly rich. You can't rush this stage.
Overview of the 3 Stage Rib Process
Think of this as a strategic mission broken into three crucial phases. First, we have the Dry Rub Infusion , where the salt and sugar penetrate the muscle fibers overnight, seasoning the meat from the inside out.
Next comes the Steam Bath , where tightly wrapped ribs cook gently, building that beautiful, tender texture. Finally, we blast them with high heat to achieve that sticky, caramelised Glazed Crust . Each stage is vital for the finished product.
Why This Recipe Guarantees Fall Off-The-Bone Tenderness
The combination of the dry rub (which draws out moisture and allows flavour in) and the tight foil wrap (which traps all the moisture) creates a self basting environment. Essentially, we are slow braising the ribs in their own juices and the rendered fat, resulting in that classic, delicious "pull" of the meat.
If you want truly Irresistibly Tender Baby Back Ribs , you absolutely must nail the foil wrapping.
The Essential Role of Dry Rub Chemistry
A good rub isn't just about flavour; it's also about texture and cure. The high concentration of salt and sugar in the mix acts as a curing agent. The sugar also plays a huge role in the final flavour profile.
The brown sugar melts during the slow cook, mingling with the rendered fat, forming a fantastic, sticky layer that eventually caramelises under the broiler. This is where the depth of flavour comes from.
Steam Bath Secrets: Preventing Dryness in the Oven
This is the non-negotiable step for Baby Back Ribs in Oven . Wrapping the racks tightly in heavy duty foil ensures zero moisture loss. The ribs are basically poaching in their own aromatic steam, which prevents the surface from drying out.
If you see liquid spilling out, your foil package is broken, and you need to rewrap it immediately.
The Maillard Reaction: Achieving the Perfect Glazed Crust
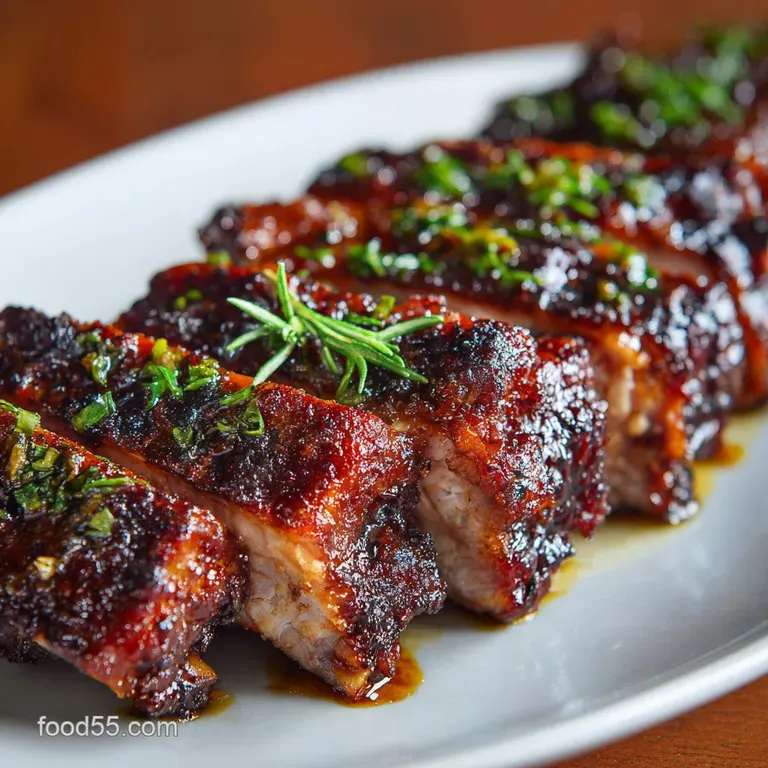
We wait until the last 15 minutes to add the sticky sauce because that sugar needs to hit high heat fast. The Maillard Reaction is the fancy word for the caramelisation of sugars and proteins under the broiler or on the grill.
This is when the sauce bubbles, darkens, and forms that signature, slightly charred, sticky crust we all crave. You are looking for sticky, not burnt so keep an eagle eye on them during this short phase.
Shopping List and Ingredient Deep Dive
Choosing the Best Racks of Baby Back Ribs
When you're at the butcher, look for racks with good marbling but not an excessive, thick layer of fat. Baby Back Ribs are cut from high on the hog, near the loin, making them leaner and faster to cook than spare ribs (which are also amazing, but a different recipe entirely).
Try to choose racks that are uniform in thickness so they cook evenly.
Crafting the Aromatic Dry Rub Base
Our signature rub is built on a foundation of brown sugar, smoked paprika, and salt. The depth of the spices matters here. The brown sugar provides necessary sweetness for the caramelisation and balances the heat from the cayenne pepper.
Tip: Make a massive batch of this rub and keep it stored in an airtight container. It’s perfect on pork shoulder, too.
Glaze vs. Sauce: Which to Use and When
For this Best Rib Recipe , we are using a glaze , not just a sauce. A glaze is thick, sticky, and high in sugar, designed to caramelise quickly. We only apply the glaze at the very end.
Applying a thin, vinegary sauce earlier works better if you’re smoking, but for the oven method, stick to the thick glaze at the end to maximize the delicious crust.
Essential Substitutions for Dry Rub Spices
Don’t panic if you’re missing a specific spice. I hate making an extra trip just for one teaspoon of something. I’ve been there, friend. Here are some quick swaps:
| Ingredient Needed | Viable Substitution | Why It Works |
|---|---|---|
| Dark Brown Sugar | Light Brown Sugar + 1 tsp Molasses | Maintains the sticky moisture content and deep flavour. |
| Smoked Paprika | Standard Paprika + A tiny dash of Liquid Smoke | Gives you that essential smoky flavour profile. |
| Apple Cider Vinegar (Glaze) | White Wine Vinegar or Lemon Juice | Provides the necessary tanginess to cut the richness. |
| Onion/Garlic Powder | Finely crushed granules or skipped entirely | Adds depth, but the rub still functions without it. |
The Low & Slow Method: step-by-step Perfection
Preparation Stage: Removing the Silverskin Membrane
This step is the most critical part of prepping Homemade Rib Dinner Ideas . Flip the rack over so the bone side is up; you’ll see a shiny, thin, silvery membrane stretched across the bones. Grab a sharp paring knife and slide it under the membrane on one end.
Once you've loosened a bit, grab that edge firmly with a paper towel it provides crucial grip and slowly peel the entire sheet off. If you skip this, your ribs will be tough and chewy, guaranteed.
Rubbing and Resting: The Crucial Overnight Infusion
Mix your dry rub thoroughly in a bowl. Now, here is a chef’s note I live by: Use mustard as a binder. It’s optional, but a thin coat of yellow mustard ensures the rub sticks beautifully and aids the flavour penetration, dissolving completely during cooking.
Apply the mustard, then press the dry rub liberally onto both sides. Wrap them tight tighter than a drum and let them chill overnight, or for at least 8 hours.
The Oven Steam Bath Technique (Low & Slow Cook)
Preheat your oven to 275°F (135°C). Lay out your heavy duty foil in a cross shape, place the rubbed ribs meat side up, and seal that package tight, folding the edges over repeatedly to ensure zero leaks. That wrapper must create an airtight seal; we are trapping the steam inside!
Bake these beautiful packages for 3 hours and 15 minutes. Don't peek. Trust the process.
Chef’s Note: After 3 hours, the meat should have retracted significantly from the bone ends. When you lift the rack, it should bend easily, but not completely fall apart. We still want it sturdy enough for the final glazing step.
The Final over High heat Glazing Finish (Grill or Oven)
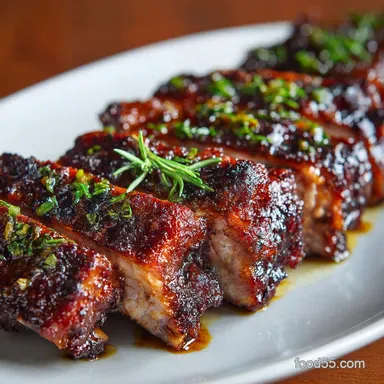
While the racks rest slightly after baking, make your glaze. Combine all the glaze ingredients and simmer them until they are slightly reduced and sticky. Now, get your broiler running high or your grill heated to medium high for the ultimate Baby Back Ribs on the Grill finish.
Remove the ribs carefully from the foil (discarding the liquid), brush them generously with the glaze, and hit them with the high heat. Turn and re-glaze every two minutes for about 10– 15 minutes until the glaze is thick, bubbly, and caramelized.
Expert Tips and Avoiding Common Rib Mistakes
How to Know When the Ribs Are Truly Done (The Bend Test)
Forget the internal temperature test; the bend test is king for barbecue. Pick up one end of a rack with tongs. If the meat cracks and easily breaks right in the middle, they are done and ready to glaze. If they are stiff and don't bend, they need another 15– 30 minutes in the steam bath.
If they totally disintegrate, you went a little too long, but hey, it will still taste amazing.
Dealing with Uneven Cooking Racks
If one rack is much thicker than the other, wrap them separately and check the thicker one 30 minutes later. If you only have one large, thick rack, consider cutting it in half before the steam bath stage.
That ensures that every piece of your Baby Back Ribs gets equal heat.
Rest Time: Why It’s Non-Negotiable After Glazing
Yes, you just cooked them for four hours, but you must rest them! After the over high heat glazing stage, the internal juices are raging hot and rushing to the surface. Allowing the ribs to rest, loosely tented with foil for 10– 15 minutes, permits those juices to redistribute throughout the meat.
This guarantees maximum tenderness and juiciness.
Making Ahead and Storage Guide
Reheating Baby Back Ribs Without Drying Them Out
The best way to reheat is to wrap the leftover ribs tightly in foil with a tablespoon or two of remaining sauce or a splash of water, then bake them low and slow again. Put them in the oven at 300°F (150°C) for 20– 25 minutes. Trying to microwave them is a crime, seriously.
Freezing Cooked Baby Back Ribs for Long Term Storage
But does it freeze well? You bet! Once fully cooled, wrap individual portions of ribs (or half racks) tightly in cling film, then again in heavy duty foil, excluding as much air as possible. They will keep perfectly in the freezer for up to 3 months.
Thaw them overnight in the fridge before reheating using the method above. Cooked ribs keep well in the fridge for 3 4 days.
Perfect Pairings: What to Serve Alongside Your Ribs
Classic Sides That Cut the Richness
You need sides that offer crunch, acid, and coolness to perfectly contrast the sticky, sweet richness of these ribs. Skip the heavy, starchy stuff. I always make a big bowl of my bright, herby The Best Summer Pasta Salad with Baby Greens Feta . The vinegar and fresh herbs are a beautiful counterpoint to the glaze.
If you want something heartier, you can never go wrong with fantastic crispy potatoes. My new favourite? A pile of Fried Baby Potatoes with Garlic Brown Butter UltraCrispy Side — it is salty, crunchy perfection. And for some necessary Southern flair? You must serve a side of My Crispy Fried Green Tomatoes Recipe Comeback Sauce . That creamy sauce and tart acidity against the sweet ribs? Absolutely unforgettable.

Recipe FAQs
Why are my ribs tough or chewy, even after cooking for the recommended time?
Tough ribs usually indicate a lack of sufficient connective tissue breakdown, meaning they needed more time at the low temperature. Ensure your oven temperature is accurate and that the ribs maintain an internal temperature around 200°F (93°C) for several hours to properly render the collagen.
If you wrapped them tightly during the steaming phase, try adding a tiny splash of liquid, like apple cider vinegar or broth, to create steam and prevent drying out.
Do I really need to remove the membrane (silver skin) from the back of the ribs?
Yes, absolutely. The silver skin is a tough, impenetrable membrane that, if left on, prevents the rub from seasoning the meat and results in a chewy, unpleasant texture when cooked.
To remove it easily, slide a butter knife under a corner of the membrane, grip it with a paper towel for traction, and pull it cleanly away from the bone.
How do I know when the ribs are perfectly done and "fall off-the-bone" tender?
The best indicator is the bend test: pick up the slab in the middle with tongs; if it bends easily and the meat cracks on the surface, they are ready. Alternatively, if a toothpick or probe slides in between the bones with almost no resistance, the ribs are perfectly tender and ready for the final glaze.
Can I use this "low and slow" method on spare ribs instead of baby back ribs?
Yes, the low and slow method works exceptionally well for spare ribs, but they typically require 1 to 2 hours longer cooking time due to their higher fat content and thicker size. Monitor the temperature and tenderness closely, ensuring they cook until they reach the same internal temperature and texture as baby backs.
The dry rub and glaze ratios remain the same.
I don’t have a gas grill. Can I finish the ribs under the broiler?
The broiler (grill) is an excellent alternative for finishing the ribs and caramelizing the glaze, provided you watch them closely. Set the oven rack about six to eight inches away from the broiler element and only keep the ribs under for 2 to 4 minutes per side, turning frequently to avoid burning.
Glaze them immediately before putting them under the heat.
What is the best way to store leftover ribs, and can I freeze them?
Cool any leftover ribs quickly and store them wrapped tightly in foil or in an airtight container in the refrigerator for up to 3 days. For freezing, slice the ribs and store them in a freezer bag with as much air removed as possible; they will keep well for up to three months.
To reheat, thaw them overnight and gently warm them in a 300°F (150°C) oven covered with foil to prevent drying.
Tender Low And Slow Baby Back Ribs
Ingredients:
Instructions:
Nutrition Facts:
| Calories | 600 calories |
|---|---|
| Fat | 35 g |
| Fiber | 2 g |
