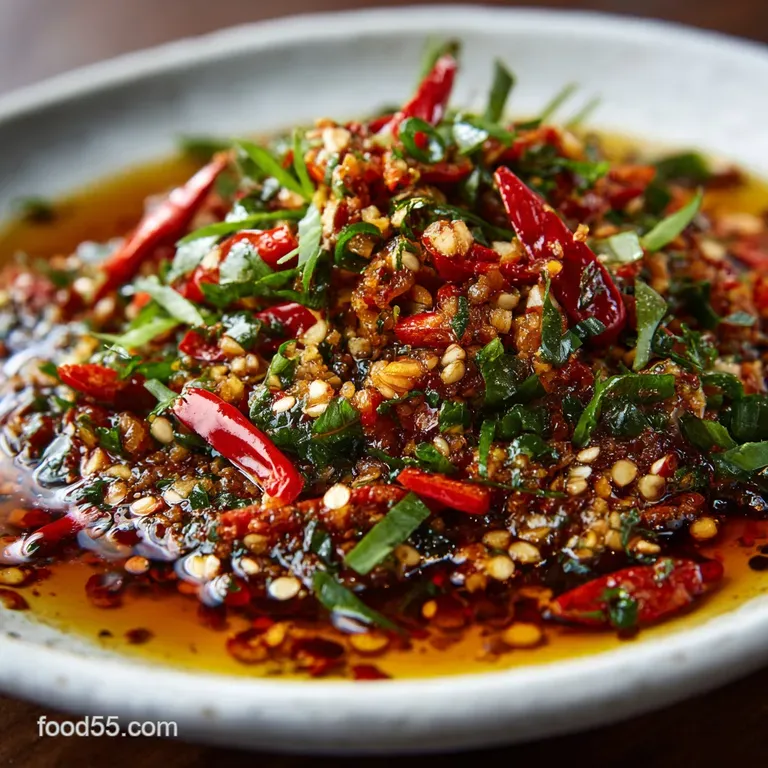
Garlic Chili Sauce: the Ultimate Crispy Crunch

- Mastering the Ultimate Crispy Chili Crunch Condiment
- Essential Ingredients for the Best Garlic Chili Sauce Base
- Step-by-Step Guide: Infusing Your Homemade Chili Oil
- Troubleshooting and Advanced Techniques from the Kitchen
- Extending the Life of Your Homemade Condiment
- Unleashing the Umami: Inspired Ways to Serve Crispy Garlic Oil
- Recipe FAQs
- 📝 Recipe Card
Mastering the Ultimate Crispy Chili Crunch Condiment
I need you to stop whatever you are doing and inhale deeply. If you could smell my kitchen right now, you would know exactly why we are making this sauce. It smells like happiness, frankly that perfect intoxicating mix of slow fried, sweet garlic and vibrant, earthy chilies.
This isn't just a recipe; it's the formula for the ultimate, homemade, crispy Garlic Chili Sauce .
The jarred versions you find at the grocery store? They’re fine, sure, but they are flat, lack texture, and usually taste only of heat, not complex flavor. This homemade version is completely different because we control the aromatics.
It’s cheap to make, keeps for months, and transforms dull weeknight dinners faster than takeout.
We are aiming for maximum crunch, intense color, and a serious umami punch. Trust me, once you make your own batch of this fiery, flavor packed condiment, you’ll be handing out jars like some kind of savory, spice wielding Oprah. Ready to upgrade your spice cabinet forever?
Let’s crack on and master this Garlic Chili Sauce recipe.
Why This Recipe Works: The Magic of Temperature Control
The secret to a superior chili oil the kind that makes you want to eat it with a spoon is two-fold: the cold start and the three stage oil bloom. When we start the garlic and shallots in cold oil, it prevents them from burning on the outside before the moisture has a chance to escape.
They slowly fry and dehydrate, giving us those stunningly golden, addictive little crispy bits that make this Garlic Chili Sauce so incredible.
The second trick is managing the hot oil temperature before pouring it over the chili flakes. If the oil is too hot, it scorches the chilies instantly, resulting in a dark, bitter, and sad sauce. If it's too cool, the spices won’t bloom or release their essential oils, leaving you with dull flavors.
We pour the oil in three distinct stages hot, warm, and cool to maximize color, flavor, and depth without compromising the delicate spice structure.
The History of Asian Chili Oils and Umami
Chili oil, in its various forms, has been an indispensable part of Asian cuisine for centuries. It's an ingredient, a condiment, and a finishing oil all rolled into one beautiful, fiery package.
Whether you look at the vibrant, savory Laoganma from China, the spicy Vietnamese variety, or the more aromatic, nuanced Japanese versions, they all share that essential goal: delivering pure, potent flavor alongside heat.
This specific style of Garlic Chili Sauce leans heavily into the crunchy texture we all crave. It balances that traditional heat with tons of savoury depth provided by slow cooked aromatics and a little mushroom powder (my secret ingredient).
It’s an ode to the classic, but souped up for the modern pantry.
What Defines the Perfect Crispy Garlic Chili Oil?
Perfection, to me, means crunch that lasts, color that dazzles, and complexity that satisfies the umami craving. The best Garlic Chili Sauce is visually arresting a deep, rich red, not brownish orange and thick enough that the solids don’t all sink to the bottom immediately.
Crucially, the texture must hold up. If your garlic bits go soggy after a week, you fried them too quickly. We need those aromatics to be dried out almost completely before they hit the chili mix.
The interplay of sweet fried garlic, salty soy, and hot chili oil is what takes this condiment from "good" to "absolute necessity."
Is Homemade Garlic Chili Sauce Worth the Effort?
Yes. A thousand times yes. Think about it: the ingredient list for the best store-bought brands is usually long and includes stabilizers and preservatives. When you make this homemade Garlic Chili Sauce , you control the quality of the oil, the freshness of the garlic, and the specific spice blend.
Plus, the aroma that fills your house while you are making it? It’s therapy. It genuinely takes less than 45 minutes of active cooking time. If you’re serious about your cooking, moving beyond store-bought jars of Asian Chili Garlic Sauce is the next logical step.
The flavour improvement is so massive you'll wonder why you waited so long.
Essential Ingredients for the Best Garlic Chili Sauce Base
Sourcing the right ingredients is 50% of this battle. We aren't just dumping a bunch of stuff into hot oil; every choice serves a purpose, from the shade of red to the final tingling spice.
| Ingredient | Role in Recipe | Substitution/Alternative |
|---|---|---|
| Neutral Oil | Carrier, high smoke point | Avocado oil or peanut oil (if no allergy). Do not use olive oil. |
| Fresh Garlic | Crispiness and aromatic base | If absolutely necessary, use dried minced garlic (but skip the cold start). |
| Gochugaru Powder | Color and mild, fruity heat | Standard paprika (for color) + a little cayenne (for heat). |
| Soy Sauce/Tamari | Final Umami punch | Fish sauce (start with half the amount) or coconut aminos. |
| Sichuan Peppercorns | The characteristic ‘Mala’ tingle | Skip entirely if unavailable, or add a pinch of five spice powder. |
Choosing the Right Chili Flake Blend for Color and Heat
This is where people usually mess up their homemade Garlic Chili Sauce . They grab the standard crushed red pepper flakes from the back of the pantry and call it a day.
Those flakes are great for pizza, but they contain too many seeds and burn easily when heated in oil, resulting in a dark, muddy color.
The Golden Ratio: I insist on blending two types of chili. Use standard crushed red pepper flakes for the heat (you know, the kind you shake onto your pizza). Then, pair that with Korean Gochugaru chili powder.
Gochugaru is finely milled, vibrant, and has a fruity, smokier flavor with milder heat. The Gochugaru gives us that glorious, deep, rusty red color without making the oil unbearably hot. It’s non-negotiable for beautiful crispy Garlic Chili Sauce .
Selecting the Neutral Oil Base: Temperature and Smoke Point
You need a high-quality, high smoke point oil. Canola oil, sunflower oil, or grapeseed oil are perfect because they are truly neutral, meaning they won’t add any unwanted flavor and they can handle the heat. I use canola because it’s economical and readily available.
Crucial Warning: Don't use extra virgin olive oil! Its low smoke point and strong flavor will compete with the aromatics and break down under the high heat required for the oil blooms.
You need an oil that lets the gorgeous flavor of your fresh aromatics and the spice blend shine through in this powerful Asian Chili Garlic Sauce.
Enhancing Depth with Aromatic Spices and Powders
We aren't just seasoning the oil with salt and sugar we are building layers of umami. I always drop a few star anise pods and thin slices of fresh ginger into the oil after the garlic is strained out.
This imparts a subtle, warming, background note that makes the sauce taste complex, not just spicy.
For the pure, unadulterated savory punch, I stir in a little mushroom powder (or MSG, if you're not afraid of it) into the dry chili mix. This boost of umami is the final secret ingredient that takes this from a spicy oil to the best Garlic Chili Sauce you’ve ever tasted. You will use the same technique to intensify the flavor when making dishes like Chinese eggplant with garlic sauce: Get Silky, Restaurant Quality Texture .
step-by-step Guide: Infusing Your Homemade Chili Oil
You need to pay attention now. This is where patience is key, and an instant read thermometer will be your best friend.
Preparing the Garlic and Aromatics for Frying
First, sterilize your storage jars. Seriously, do it. We are making a shelf stable condiment, and we need a clean start. Now, finely mince your cup of fresh garlic and half cup of shallots. You want them small and uniform, but not a paste.
Uneven chopping leads to uneven crisping, and that means some bits will burn while others remain chewy.
In your medium saucepan, pour in the two cups of neutral oil. Now and this is critical for the best crispy Garlic Chili Sauce —add the minced garlic and shallots while the oil is still stone cold. Place the pan over medium low heat.
This low and slow process is the entire key to achieving those spectacular crispy, golden flecks.
Chef’s Note: If you hear aggressive sizzling early on, your heat is too high! Keep the temperature between 120°C (250°F) and 130°C (265°F). Stir gently but constantly for 15– 20 minutes until the bits turn a pale, light golden brown.
They should smell sweet and nutty. Immediately strain the solids out and set them aside. They will darken slightly off the heat.
The Critical Temperature for Oil Infusion and Blooming Spices
While the reserved crispy bits cool, combine your dry spice mix both chili powders, sugar, salt, and mushroom powder in a large, heatproof bowl. Now, let’s go back to the oil, which should still be quite warm.
Add your star anise and ginger slices, heating gently for five minutes, then remove them and discard.
Now, we execute the triple bloom technique:
- First Pour (300°F / 150° C): Bring the remaining oil up to 300°F. Turn off the heat. Immediately pour about one-third of the oil over the dry spice mix. It should bubble dramatically and release a gorgeous, spicy aroma. This first shock extracts the robust flavor compounds. Stir well.
- Second Pour (230°F / 110° C): Wait 5 minutes for the oil to cool naturally to about 230°F. Pour the second third of the oil over the mixture. This gentler heat is perfect for extracting the deep red color from the Gochugaru, resulting in a beautiful, rich red color for our homemade Garlic Chili Sauce .
- Final Pour (Room Temperature): Wait another 10 minutes. By now, the oil should be around 175°F (80°C). Pour in the remaining oil. Stir thoroughly, ensuring every flake is submerged.
Cooling, Resting, and Jaring the Finished Chili Oil
We are almost there! Once the oil mixture has cooled down to warm (about 30 minutes), stir in the reserved crispy garlic, the crispy shallots, and the tablespoon of soy sauce. The soy sauce is what really elevates the final flavor of this Asian Chili Garlic Sauce.
Let the entire mixture rest at room temperature for at least an hour. Ideally, leave it overnight on the counter (covered!) to let the flavors fully marry. This is crucial for developing the depth of this truly superior Garlic Chili Sauce .
Once completely cool, transfer it into your sterilised glass jars, ensuring the solids are entirely submerged in the oil.
Troubleshooting and Advanced Techniques from the Kitchen
I've burned enough garlic in my time to share the hard won wisdom. Making this vibrant, homemade Garlic Chili Sauce is simple, but requires attention.
Avoiding Burnt Garlic: The Biggest Mistake
Burning the garlic is the number one reason homemade chili oil fails. Burnt garlic tastes acrid, bitter, and will ruin the entire batch. How do you fix it? You don't. You have to scrap it and start over.
The fix is prevention: Use the low and slow cold start method, and constantly stir. Watch the color, not the clock. As soon as the garlic pieces turn a light straw color, pull them out. They will continue to cook in the residual heat.
If you wait until they look perfectly golden in the pan, they will be burnt by the time they hit the cooling bowl. Seriously, pull them early.
Adjusting the Pungency for Sensitive Palates
I get it; not everyone wants to breathe fire after every bite. The beauty of this Garlic Chili Sauce recipe is that you can control the heat. If you want less heat, reduce the amount of crushed red pepper flakes by half, and increase the amount of milder Gochugaru powder.
For those who want extreme heat, you can substitute the standard flakes with ground chilis like chile de árbol or even a pinch of ghost pepper powder. Just remember to handle those with gloves!
Extending the Life of Your Homemade Condiment
You’ve created this glorious jar of spicy gold; you need to keep it pristine. This crispy Garlic Chili Sauce keeps surprisingly well, but only if you follow the right steps.
Proper Sealing Techniques for Long Term Storage
Because this recipe contains fresh aromatics (garlic and shallots), there is a small risk of bacterial growth, particularly if stored improperly. Always ensure the solids are completely submerged in the oil. Oil is an anaerobic environment, and keeping the garlic covered helps preserve it.
Store the sealed jar in the refrigerator. It will solidify, which is completely normal due to the oil base. This Garlic Chili Sauce will last beautifully in the fridge for up to three months.
To use it, simply scoop out a spoonful and let it sit at room temperature for a few minutes to soften, or warm it gently in the microwave (if you need a whole lot for a recipe).
Unleashing the Umami: Inspired Ways to Serve Crispy Garlic Oil
So, you have a gorgeous jar of vibrant, deeply flavoured Garlic Chili Sauce . Now what? This stuff genuinely goes on everything. Seriously. Everything.
Elevating Simple Rice, Noodles, and Eggs
This is where the magic happens. Drizzle a spoonful of this concentrated Asian Chili Garlic Sauce over a perfectly fried egg and some plain rice breakfast is instantly transformed. Mix it into a simple soy-sauce based dipping liquid for your potstickers or dumplings.
I always mix a big spoonful into cold sesame noodles for lunch, or use it as a finishing touch when I make Honey Walnut Shrimp: The Ultimate Recipe for Crispy Batter Creamy Sauce (it adds a phenomenal counterpoint to the sweetness). You can even use the crispy bits as a delicious textural topping for savory baked dishes, like a pan of Baked Shrimp and Broccoli Foil Packs 30 Minute Lemon Garlic Dinner . Honestly, I think the most common use for my homemade Garlic Chili Sauce is simply eating it straight out of the jar. It's truly irresistible.

Recipe FAQs
How can I ensure the garlic stays truly crispy and doesn't burn?
The key to crispiness is low, slow frying and careful timing. Start the garlic in cold oil and keep the heat medium low; remove the garlic just before it achieves the desired golden colour, as residual heat will continue cooking it once drained.
Furthermore, ensure the garlic is finely minced and patted completely dry before frying to prevent steaming.
My chili oil tastes bitter. What went wrong?
Bitterness is usually caused by overheating the chili flakes or spices, which burn easily when dry. The oil must be hot enough to sizzle but not smoking (ideally around 325°F or 160°C) when poured over the chili blend.
If you are toasting dry ingredients, keep the heat extremely low and monitor them constantly to prevent scorching.
What is the best way to store the finished chili oil, and how long does it last?
Store the finished chili oil in a sterilized, airtight glass jar at room temperature, away from direct sunlight, where it will last for up to 3 to 4 weeks. While refrigeration will extend the shelf life, be aware that the oil will solidify slightly, but this is normal and it will return to liquid form once warmed up.
Is there a risk of botulism when preserving garlic in oil?
Yes, this is a crucial safety concern, as garlic submerged in oil creates an anaerobic environment where botulism spores can thrive. To mitigate this risk, ensure all ingredients are thoroughly heated during the preparation process to kill spores.
For absolute long term safety, store the oil in the refrigerator or freeze it, though the former is usually sufficient if consumed within a month.
Can I adjust the spice level without sacrificing the overall flavour profile?
Absolutely. The spice level is primarily determined by the type of chilies used; try swapping intense Sichuan chilies for mild Korean chili flakes (Gochugaru) for a milder heat but deeper colour.
You can also significantly lower the heat by removing the majority of the seeds from the dried chilies before processing them for the blend.
My oil seems murky or cloudy after a few days. Is it spoiled?
Cloudiness is usually a result of temperature change, particularly if the oil was recently refrigerated or stored in a cool place, as the fat begins to solidify. If there is no foul odour, mold, or visible discoloration, the oil is likely safe and simply needs to be warmed slightly to regain clarity.
Ensure the oil was strained properly to remove fine sediment which can also contribute to murkiness.
Can I use fresh chilies instead of dried ones for this recipe?
While possible, using fresh chilies will result in a very different product, more akin to a cooked chili paste than a crispy oil. Fresh chilies contain water, which requires frying for a long time to remove moisture, risking burning the other ingredients and dramatically changing the oil’s texture.
For the crispy crunch texture, dried chilies are essential.
Ultimate Crispy Garlic Chili Sauce
Ingredients:
Instructions:
Nutrition Facts:
| Calories | 190 calories |
|---|---|
| Fat | 20 g |
| Fiber | 0.5 g |
